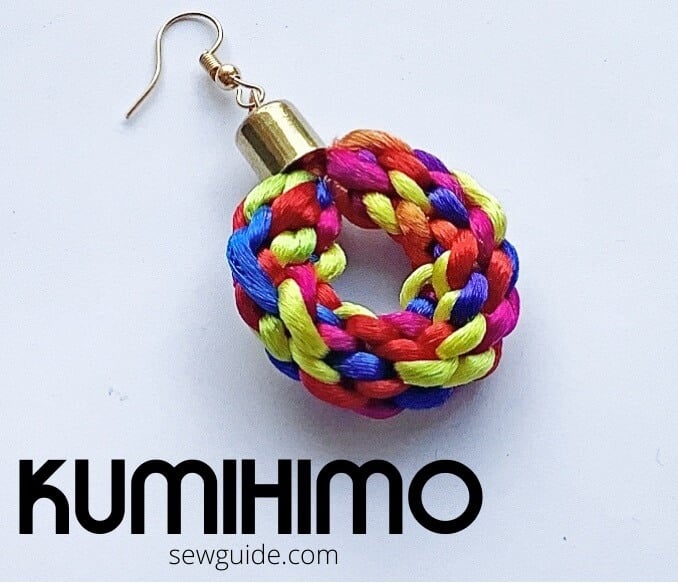
Kumihimo (組紐) is the Japanese craft of making plaited cords /braids. If you look up the word ‘Kumihimo’ in dictionary, it says ‘braided cord’. I have read elsewhere that it means “gathering of threads”. It is the ancient japanese art of gathering different threads to make beautiful interlaced round cords/flat braids.
Kumihimo – History
Braids have been discovered in excavations in Asia 1000s of years before Christ. The Nara Period ( Nara Jidai) of ancient Japan (710-794 CE) is said to be the beginning of kumihimo. Kumihimo was used by Samurais of Japan to decorate their armor or to hold it together. They also used it to decorate their horses’ armor, and on their swords.
Down the centuries, kumihimo braids have adorned the clothes of the royalty and the rich in Eastern Asian countries like Korea, Japan and China. By the 1800s, Kumihimo braids were made by machines because of the increased demand. Rich and poor, everyone used kumihimo in their everyday living.
Uses of Kumihimo
The technique is used in Asian countries to make braids used as ties on haori jackets, as obijime a decorative braided rope tied over an obi belt with a Kimono. Kumihimo is so important in Japan that there are schools that soley teach this craft of braid making. It is a part of Japanese cultural heritage.

Kumihimo is widely used to make jewelry, belts, straps, and pet leads and also as laces that can be attached along necklines, sleeve hems etc. Kumihimo ropes make great-looking sturdy bag handles. Beads are interwoven with the threads creating beautiful braids suitable for making bracelets, and necklaces.
Tools and supplies used to make the kumihimo braids?
Kumihimo braids look complicated but the basic ones are quite easy to make. You just need the cord/thread/yarn, the foam kumihimo discs and a stand to keep the kumihimo disc steady or a comprehensive kumihimo loom/stand. And depending on what you are making with the braid, you will also need buttons, beads, clasps, buckles, etc.
Japanese Kumihimo silk fiber is the traditional kumihimo fiber. You can use any cord or thread for this – Rayon cords, embroidery floss, crochet cord, knitting yarn are all obvious choices. Strips of fabrics can also be used.
If you dig deep into this technique there are several specialized tools. even ones which work like weaving looms.
- Marudai is a basic kumihimo round stand used in kumihimo to make simple as well as complex and inticate braids.
- Ayatakedai is a flat wooden stand made of bamboo which makes flat braids.
- Takadai is a specialized loom meant for making kumihimo braids. Threads or yarns are placed around these tools to make desired patterns.
If you need to weave beads, you will also need a beading needle.
The organized threads on the tools are kept taut by using specialized weighted bobbins called Tama. The Tama/ weighted bobbins keeps the threads under consistent tension
The Kumihimo stand is an optional necessity when using the kumihimo discs but is very convenient if you regularly make these braids. You have your hands free for one, and also you get to have the correct amount of tension and tightness with the help of this.
The width of the kumihimo depends on the tool you are using (whether it is just the disc or a takadai loom), number of threads you are using, and the thickness of the threads you are using. The length of the braid is usually the length of the thread plus about 25% extra.
How to make a basic Kumihimo cord
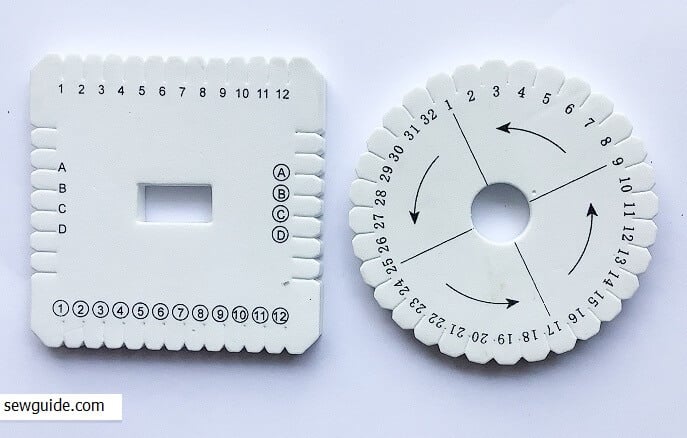
With the help of the Kumihimo foam discs you can easily make cords, ropes and braids. The simplest braiding technique involves looping four threads through each other, creating slanted stripes in alternating colors.
The foam discs used will have a hole in the center – the kumihimo braid is created through this center hole.
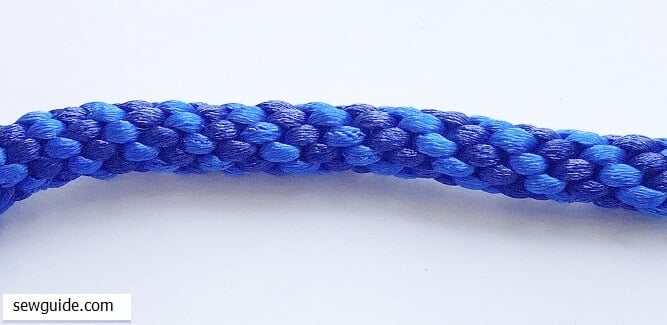
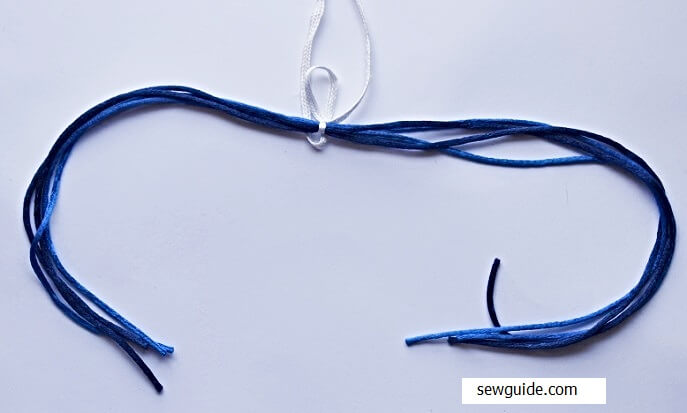
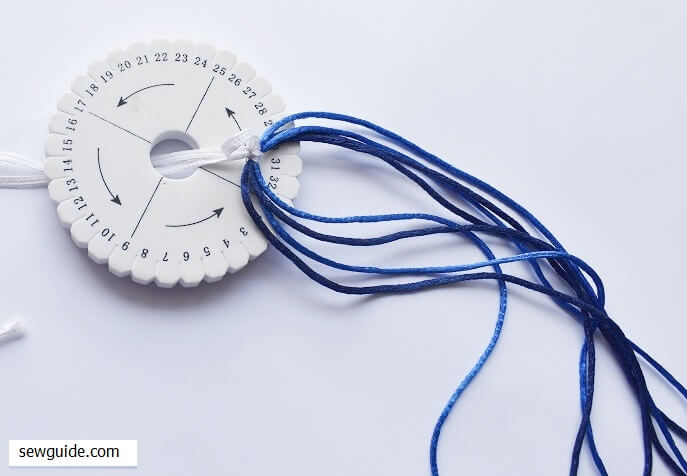
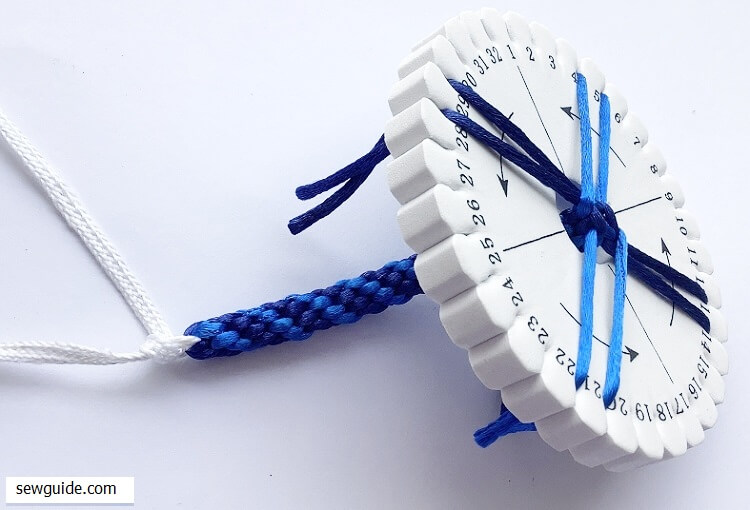
I am using 4 threads here – in 2 colors ; 2 threads in a dark blue and 2 threads in light blue. It has resulted in this cord. You can decide on the length of the final cord you need. Double this and add an extra 25 % to this- This is length you should cut each of the 4 cords.
Step 1. Keep the 4 cords infront of you and using a seperate thread tie them together with an overhand knot in the middle.
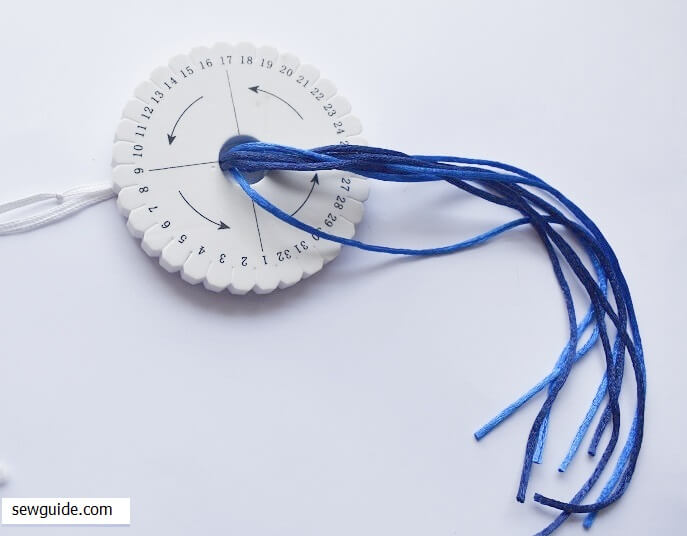
Step 2. Take the middle thread through the hole in your disc.
Take it to the back and keep it there
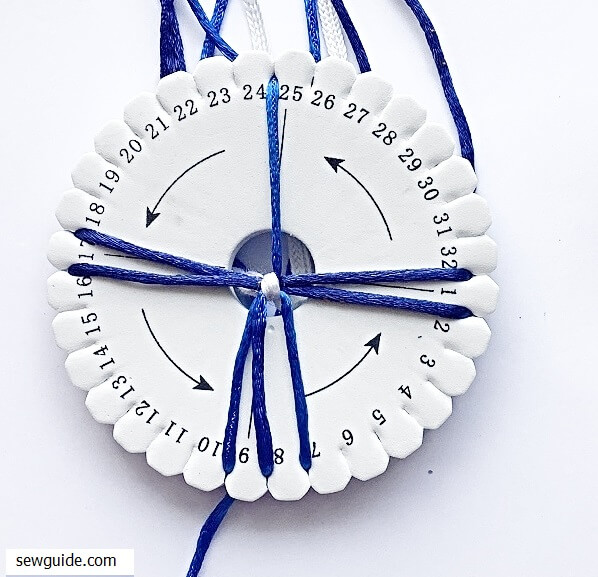
Step 3. Separate the thread in 4 sections as in the picture below.

Insert the thread inside the slots.
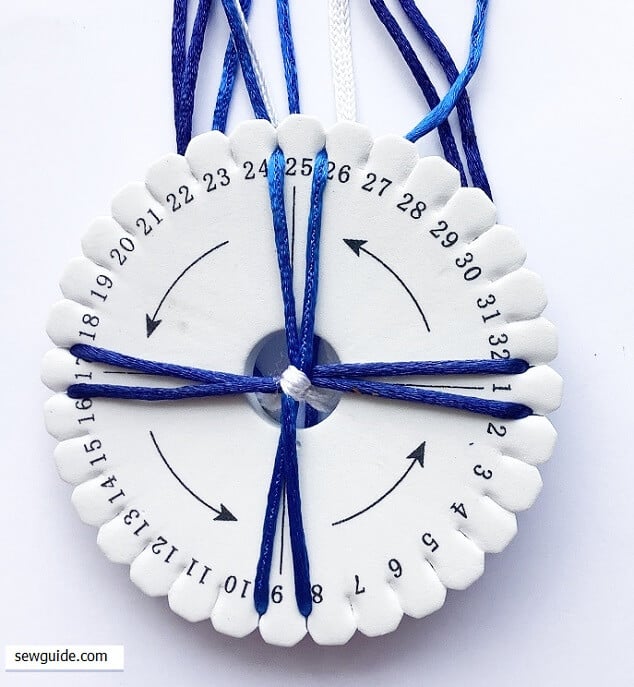
Step 4. Now the thread has to be moved through different slots in a rhythmic manner, resulting in the cord..
First move works like this – the thread which is in the slot between 25 and 26 (the right thread in the top position) is moved to the slot between 7 and 8 (the right position in the bottom edge)
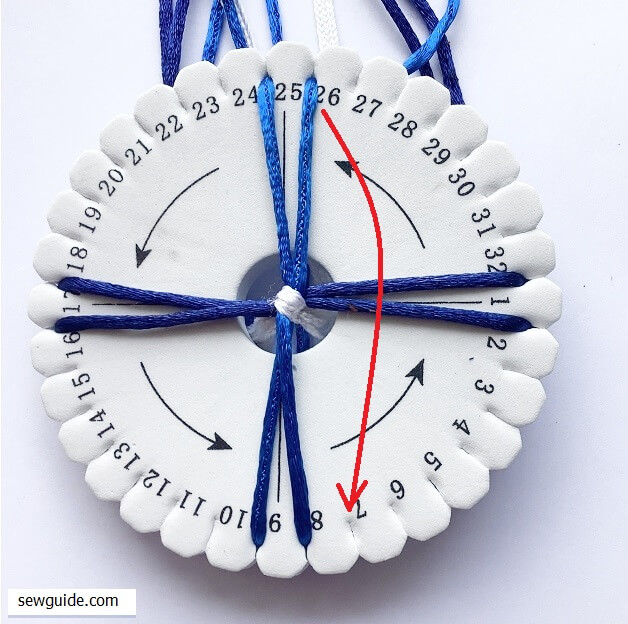
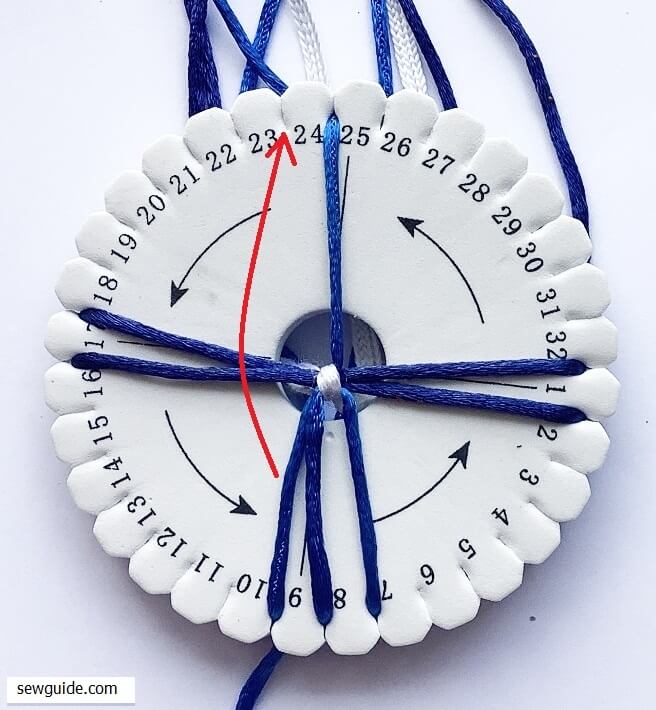
This is how it will look after it is moved.
Step 5. Now move the thread in the slot between 9 and 10 (thread on the left side at the bottom) is moved to the slot between 23 and 24 (top left position).
This is how it will look.
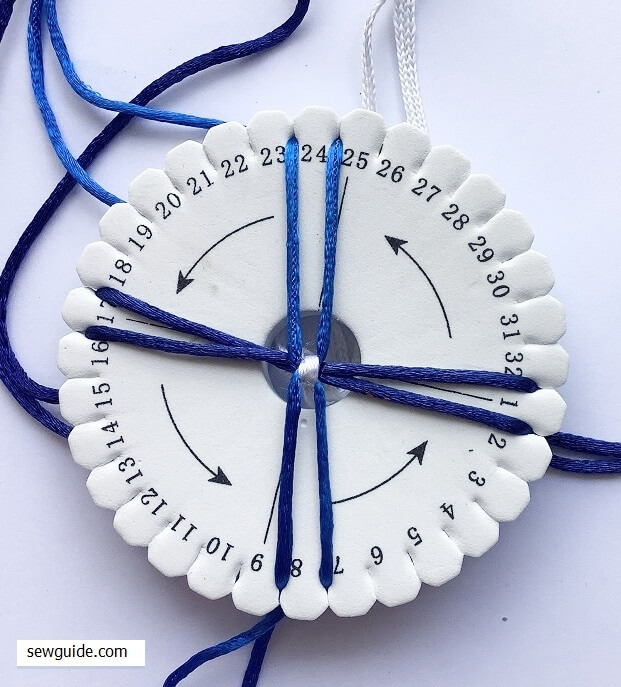
Step 6. Move the disc following the arrow so that the slots 16 and 17 are on top.

Repeat the same steps that you did earlier in the same order, moving the thread to the bottom and repacing it with thread to the top.
When you do this again and again a cord is formed in the back.
Options of ending the braid : The end can be secured by tying with twine and then it can be inserted into a cap. You can use a thread to make a larks end knot at the end point. You can leave the end threads as a tassel. Hemstitching is also done with hand sewing needles and thread. To finish a wide braid in a straight line you can cut the braid a little longer than the final braid you want and then sew across with a sewing machine stitch. Cut off the extra and apply a fray check. You can cover the ends with a piece of fabric to truly envelop the ends.
This video shows how to make a 8-cord kumihimo braid.
Books to read if you want to learn more about making kumihimo braids :
Braids: 250 Patterns from Japan, Peru, and Beyond by Rodrick Owen ;
Maru-dai braids, by Aiko Sakai and Makiko Tada ;
All other Kumihimo braiding Books by Makiko Tada;
Website with more technical details about kumihimo can be seen here and here.
Related posts : You can replicate the kumihimo disc at home with cardboard – checkout this tutorial to make a cardboard loom to make a similar cord.; How to make a 3 strand braid; How to make a 4 strand braid; How to make a 5 strand braid; How to make a 7 strand braid