Maintaining a thick mane is not for lazy bums, which is why I have not much hair on my head. The girl at the salon told me “you have such baby fine hair’, ‘the number of hair on your head is less” etc – all euphemisms for “You don’t have much hair”. Celebrating this tragedy, I have decided to make some hair accessories.
Making these easy recycled hair accessories is just the right sewing project for those who like recycling things – turn out new accessories from whatever is around the house, in less time than it would take you to make 100 strokes on your hair to try to revitalize them- just keep hair neat and tidy and no one will be the wiser. A ponytail, as my daughter kindly told me, is the best remedy for hair loss and bad hair days.
So here are the hair accessories
Easy DIY Hair accessories
1. Make a hair tie with elastic

Every one who sews has some elastic scraps in their house. Remnants left from making easy skirts, pajama pants etc . You are even luckier if you have those colored and pretty elastic pieces – in different colors. The satin finish fold over elastic you use on lingerie is the best.
But I have to do with the 1/2 inch wide really ordinary looking elastic.
You can simply join the short edges of the elastic and make your hair tie. What is the big deal, you may ask? But with this method, you can join the elastic without the seams showing out.

Cut out the elastic about 8 inches long.

Keep the short edges together and stitch with a 1/2 inch seam allowance.
Trim one of the seam allowance to 1/4 inch. Leave the other 1/2 inch seam allowance as it is. See the picture above.

Now turn the longer (1/2 inch) seam allowance over the 1/4 inch seam allowance. Hold it there.

Stitch in place. Now everything is neat- no seam allowance projecting out.
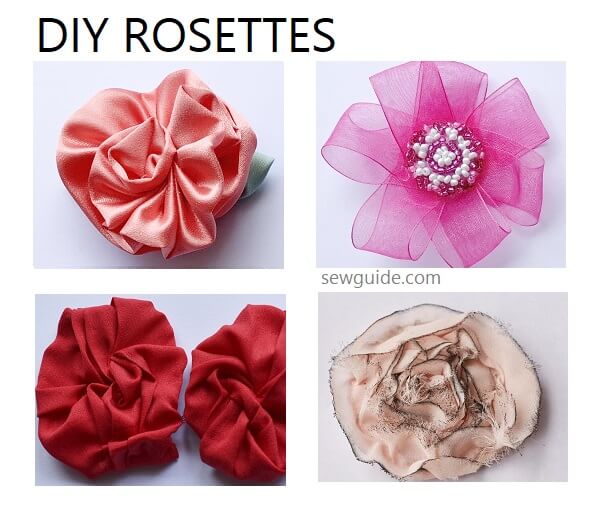
You can decorate your elastic hair tie with a fabric flower. See tutorials to make felt flowers like the one in the picture, or 4 ways to make felt roses. Or nice little rosettes.
If you would rather make your own scrunchies covered with fabric from scratch here is the tutorial to make them: 10 ways to make scrunchies.
2. Stretchy hairband from old clothes

We all have old t-shirts which we cannot throw away; they don’t fit anymore but their prints look too good to be in the dumpster. Or those cute pajama pants in knit fabrics which we hold on for sentimental reasons. Whatever it is, You need stretchy fabric.
I have a lot of these old clothes – I obviously have a problem throwing away old clothes – which is a boon for my work, but a curse for my family. Or a reason for them to curse me.
Take one of them.

Cut out 20 inch long and 5-inch wide fabric piece from it.

Keep the fabric right sides together and join the short edges. Use a tight zigzag stitch for stretch fabric.

It will look like this.

Now fold the top layer to the inside – this is folded so that it would not get in the way when you stitch the other layers together.

Keep on folding to the center till the top layers is one slim fold. Do not pin or anything.

Now bring the bottom layer together – they are to be stitched together.

Start stitching the fabric. As you stitch, ensure that you are not stitching the folded fabric inside.

Move the fabric outside as you continue stitching the whole thing – you will have to pull out the folded fabric from inside as you stitch – stop short of 2 inches from where you started.

It will look like this – remember to leave 2 inches or so unstitched – you have to bring the whole thing out through this hole.
Now Bring out the right side of the hairband through the hole.
It is almost ready. You still have a little sewing to do – closing the hole. Use hand sewing stitches to close the hole.
After I have made this, my daughter says she can’t wear puppies on her hair – fine, I have other pajamas in waiting.
3. Cover an old barrette with pearls
Take the plain old barrette – even the ones with paint chipping away would do. And some pearls.

Glue.
You can do simple.

Or like this beautiful monstrosity which my daughter says is all the rage now.

4 Cover an old metal hairband with fabric
This method revitalizes those ‘seen-better-days’ hairbands in plastic and metal with pretty fabric. You can use simple fabric and then perk it up with rhinestones sequins etc.
Take a fabric piece which is 4 times the width of the hairband plus a 1/4 inch ease . Length should be a little extra plus the length of the hairband.

Keep the fabric folded by the middle right side in.

Stitch through fabric distance from the fold should be the width of the hairband plus 2/8 inch.

Do not cut the extra seam allowance – this will form a padding for your hairband.

Use a thick needle and thread to bring this tube right side out. Insert the headband inside the tube you have made. Cut off the extra and hand stitch the ends.

5. Perk up simple hairbands and hair ties with bows
So lonely.

Not so lonely now, with a super cute and easy to make little bow.

Take a fabric piece – 7 inches by 3 inches. Any fabric would do – crepe, velvet, silk etc would look awesome as a bow.

Keep it before you rightside up.

Fold as in the pictures above and below, bringing the short ends to the middle.

Pin in place; Stitch along the top and bottom – the red lines in the picture.

Turn the thing, right side out, through the middle hole. You will get a rectangular piece.

Gather along the middle and tie with a thread and glue a small piece of ribbon around the thread to conceal the thread. Stitch to your hair tie for an instant transformation.

If you want to make fabric hairbands yourself check out this post with many hairband tutorials. Decorate your own plain hair clips, tic tac clips and barrettes.
Related posts :How to make headband with cute ears; Make a pretty headband to keep hair in check
25 Different types of hair accessories; Make fabric bows ; Make Christmas bows, Make big bows ; How to tie a sash bow; Make ribbon bows.
More recycling posts : Make bags from old jeans ; Make a beanie hat from old sweaters
Have you ever made your own heat transfers i.e. a face of an animal etc etc? And if not any suggestions other than drawing free hand?
Hi Lavina
Are you asking me methods to transfer designs on to fabric – maybe this post on transfering embroidery designs to fabric would help you.
Hi…after being depressed I woke up to real treat that being your website. Beautifully done and thank but one question. I bought a computerized Brother machine and works fine with one exception. When stitching two ends of thick elastic the foot will not “grab” on to the elastic. There is an option of sewing on thick fabric wherein if you press a small button it will elevate the foot also I do not have a walking foot. Would it work if you used heavy Pellon to give the feed dog a head start and waala! it should continue to sew. Any thoughts? Have to be diligent in setting aside time to learn zippers and various functions of my machine
Hi
You can use a teflon foot (the white plastic foot)- this will prevent the slipping. Check this post to see a picture of the foot. Start sewing very slowly by moving the hand wheel towards you. As you say, Sewing with something firm like interfacing is also good to try.Best wishes and thanks for the nice words.
One very simple addition to your informative list: The sleeve (shoulder) section of a T-shirt. I often remove the sleeves from T-shirts, retaining the seam on the shoulder (or not, but it’s a little different without it). A short sleeve shirt is fine but a longer sleeve would likely best be cut shorter. For a first fitting, slide the sleeve over the head so the shoulder edge is along the forehead and hairline side. Depending on the circumference of the sleeve, if it fits over the head the remainder of the sleeve may be left wandering, be rolled back on itself to form a headband, have a seam run along the arm end so the band forms a hat, and so on. I have very very long and (even at my age) quite thick hair but a sleeve forms a very nice and reliable hold-back when called for . . . .
That is a good one, OneBirdieMa. Thanks for writing this.
Fabulous