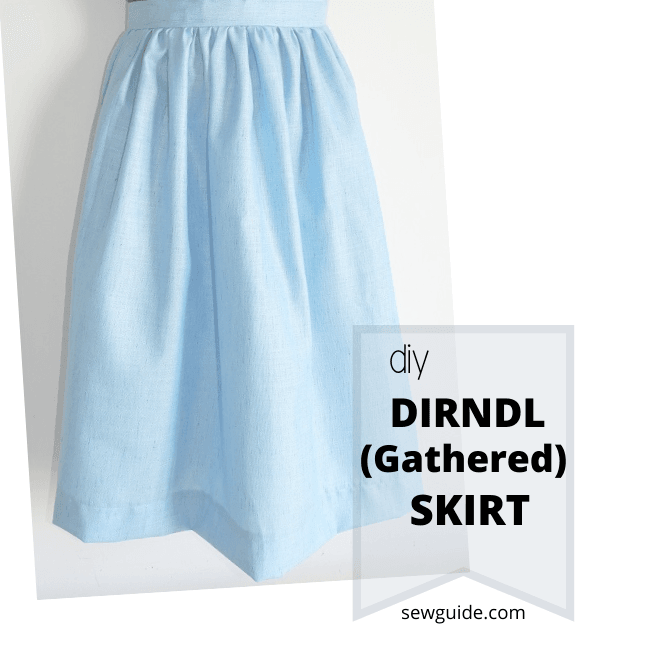
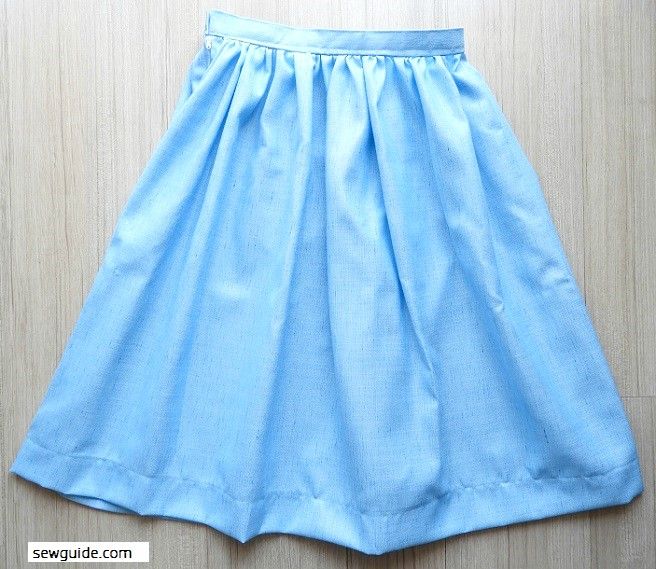
Dirndl Skirt is your typical all-feminine gathered waist skirt – what comes to mind when you think of a skirt – the one with a tight waistband and some soft gathers of fabric around it forming the body of the skirt. It is just a rectangular fabric piece gathered into a waistband and is one of the simple skirts you can ever make. Here is a tutorial to make one yourself.
A Dirndl skirt is originally the traditional folk wear of the Alps region – a part of the dirndl dress which also includes a dirndl blouse and an apron. This full skirt is still relevant as a modern skirt when made with a suitable fabric ( and I guess with a suitable thin waisted figure) and worn with a flair (very important).
In the Alps tradition, the dirndl skirt will have a knot at the waistband tied with ribbons, in different positions (Ref 1). The position of the knot will indicate the marital status of the wearer. A single girl will wear the knot on the front left side, A married woman will have the knot placed on the right side of the waistband and a widow will have the knot at the back of the waistband. You do not have to do all that- all those are the ways of the past. Just choose a pretty fabric and make away. One for you, many for others or many for you and one for another or many for you and none for others. Whatever.
How to make the Dirndl skirt
Step 2 – Cut fabric pieces for the skirt
Get that suitable fabric – velvet, cotton, chiffon, silk, what have you.
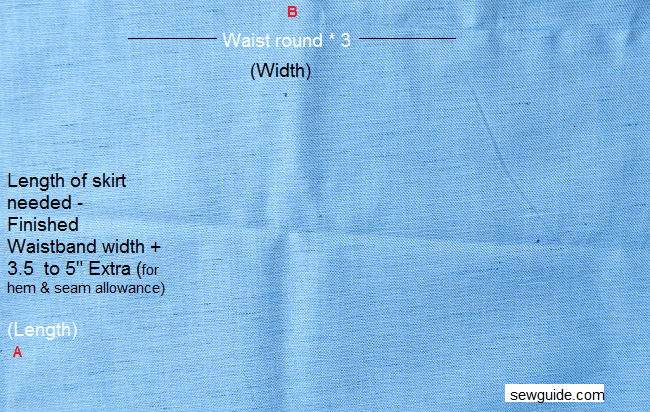
A = This is the length of the fabric you should cut for the skirt body. First decide on the waistband width you want. Measure the length you finally want for the skirt. Minus the waistband width from the length you want. Now Add 3.5 inches (to 5 inches for a wide hem) to this. (for seam allowance and hem)
B = This is the width of the fabric you have to cut for the skirt body. Measure around your waist – Multiply this by 3. If your waist round is 30 inch multiply this by 3. You get 90 inches. This is 2.5 Yards or 2.30 meters.
C = This is the waistband width; For waistband width take this as 2 1/5 inch – this is for a 1 inch wide waistband ( take more if you want a wider band – double the length of the width you want and add 1 inch extra as seam allowance)
D = For waistband length Take your waist round and add 1 3/4 inches
You will need a zipper and matching thread to make the skirt, other than these fabric pieces.
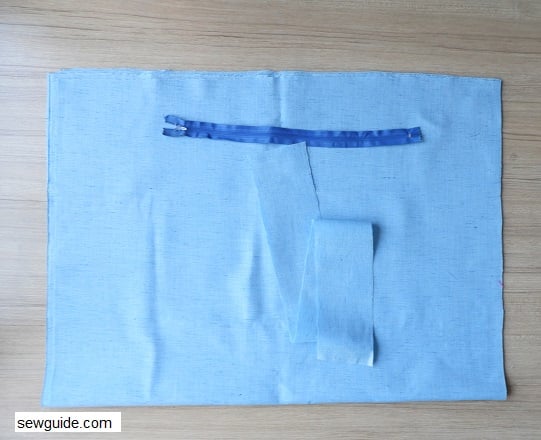
Step 2 – Sew zipper
Fold the fabric by half length wise, right sides together.
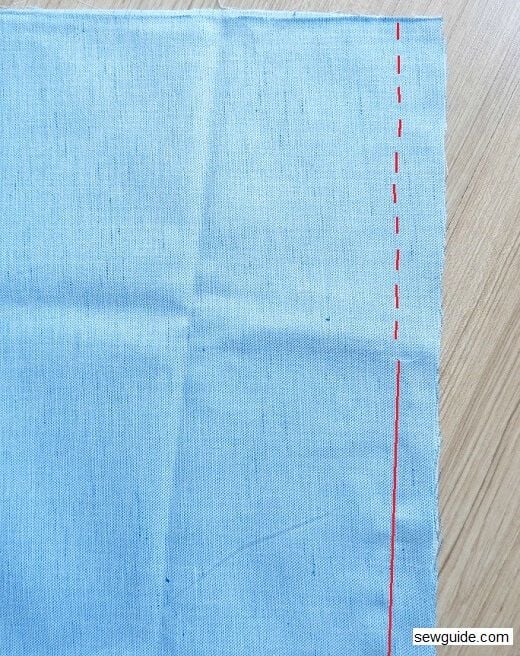
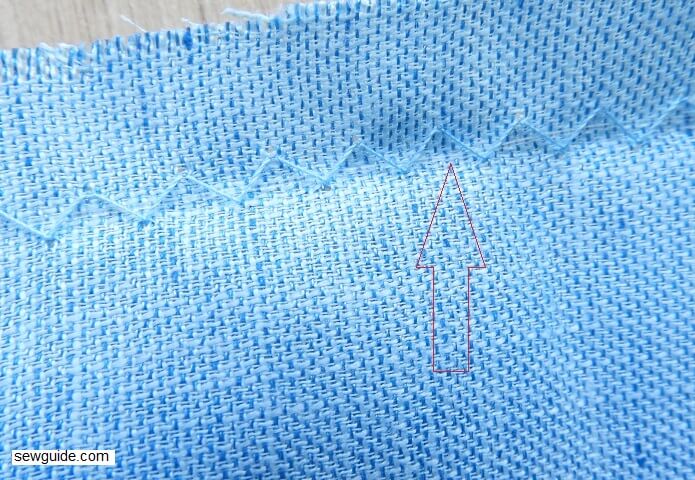
Join the fabric edges lengthwise to make your skirt tube. When you join the seam join the top edge about 7″ with a basting stitch – this is for adding a zipper. Finish the fabric edges (I haven’t, but you should : ) )
Basting stitch is the longest stitch in your sewing machine
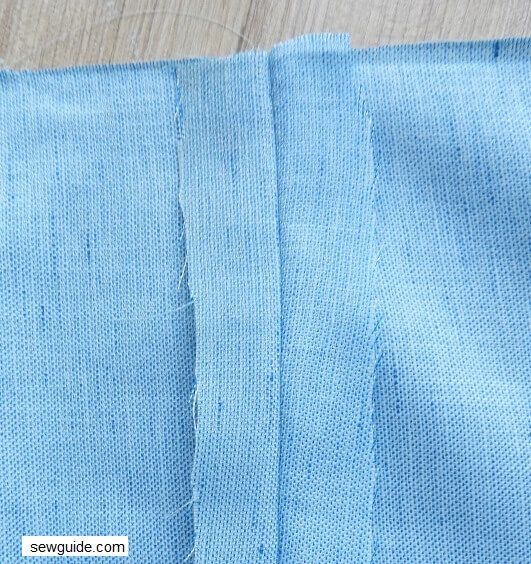
Open the seam allowance and press it open.
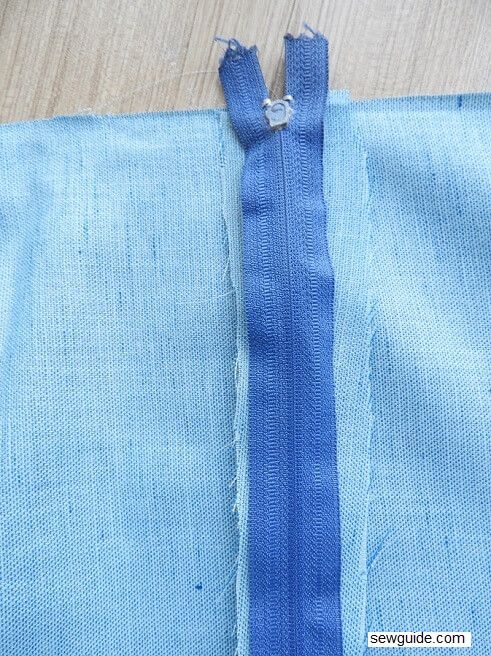
Keep your zipper face down on the seam allowance
Pin it there so that the zipper teeth is on top of the seam.
Now change your presser feet to a zipper feet.
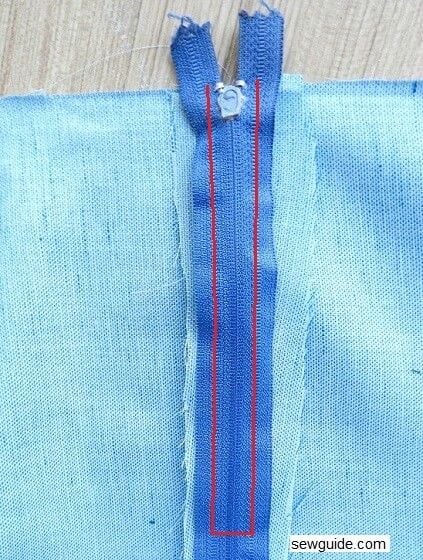
Sew the zipper there – the red line is the stitching line.
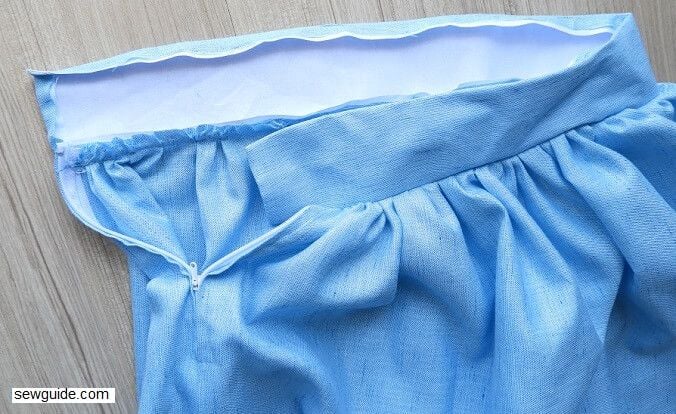
Now turn your skirt tube right side out.
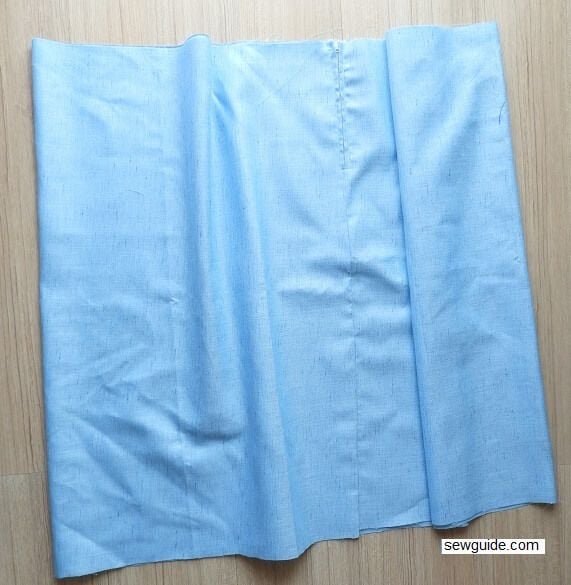
Open the seam over the zipper teeth – where you made the basting stitches. It will be quite easy to remove them with a seam ripper.
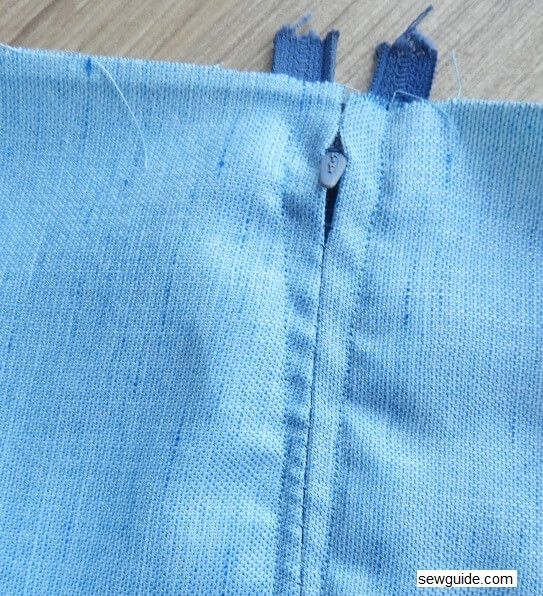
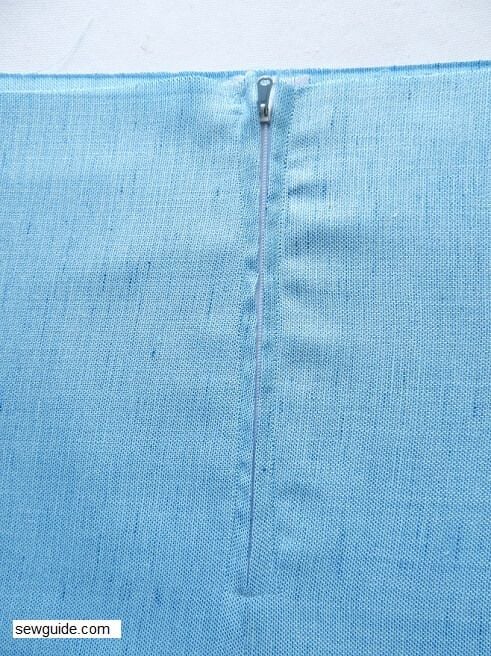
Open the zipper
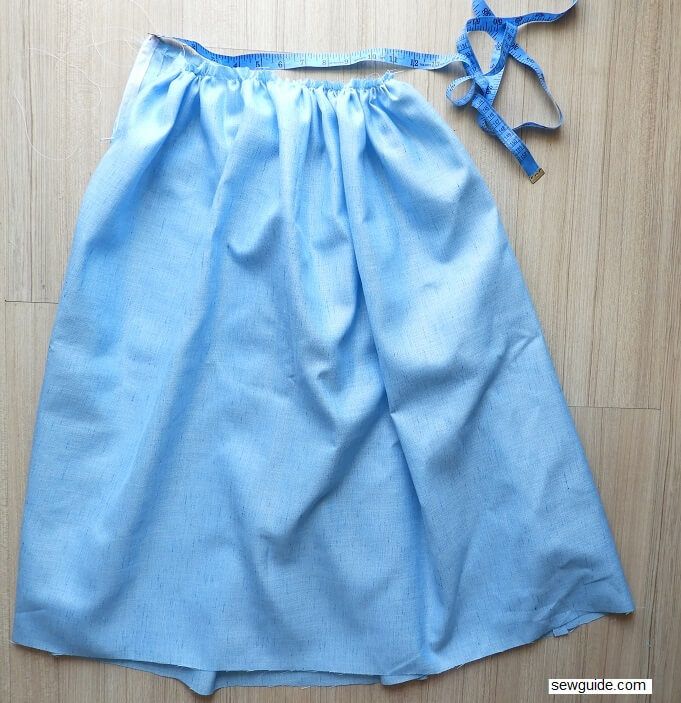
Step 3 – Gather the skirt
Make gathering stitches along the top edge of the skirt.
Using a thick cord or plastic fishing line and a wide zig zag stitch over it made over the top edge of your skirt tube, gather the top edge – this edge when gathered should match your waist round + 1/4 inch.
Related post : How to gather fabric ; How to use a gathering foot
Measure with the measuring tape to be sure.
Make a straight stitch to stay stitch the gathers. Ensure that the gathers are even allover as you stitch.
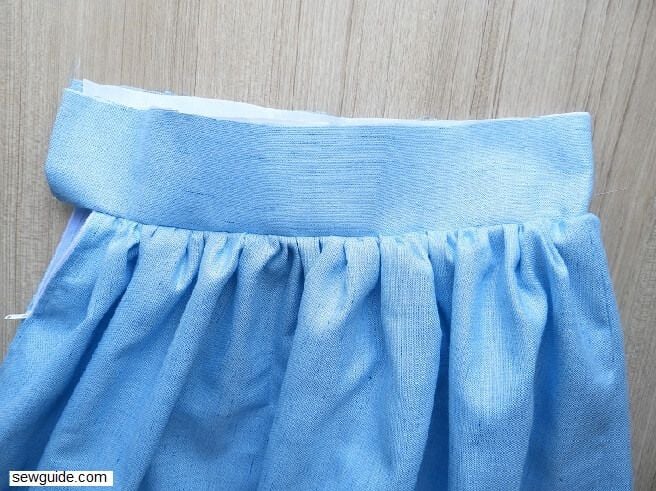
Now start making your waistband.
Step 4 – Sew waistband
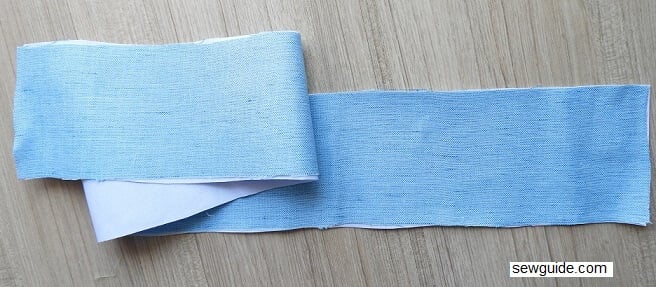
Take your waistband fabric. Interface if you want a nice and stiff waistband. It is better if you interface only on the main area of the waistband and not on the seam allowance. I just interfaced the whole fabric.
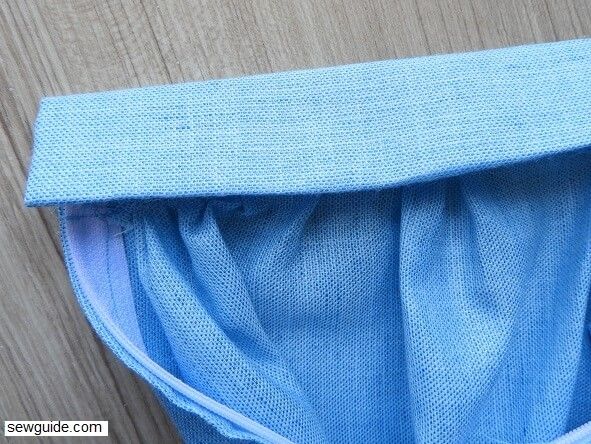
Now press 1/4 inch of the waistband short edge to the inside
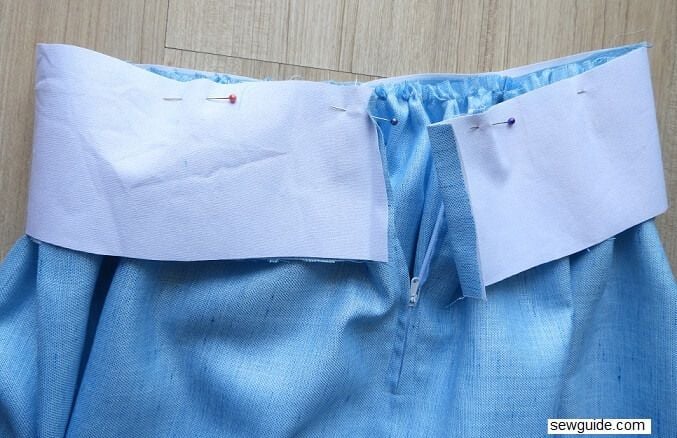
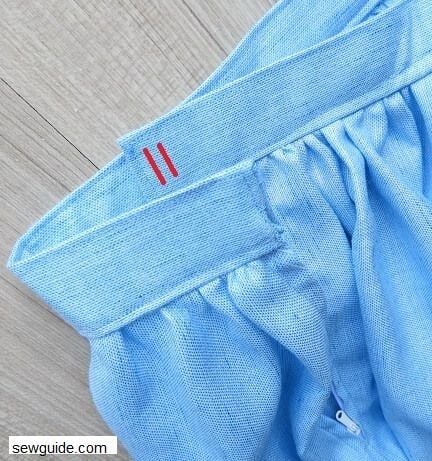
Keep the waistband fabric over the skirt. Pin as in the picture below. On the right side there is a 1 inch projecting out.
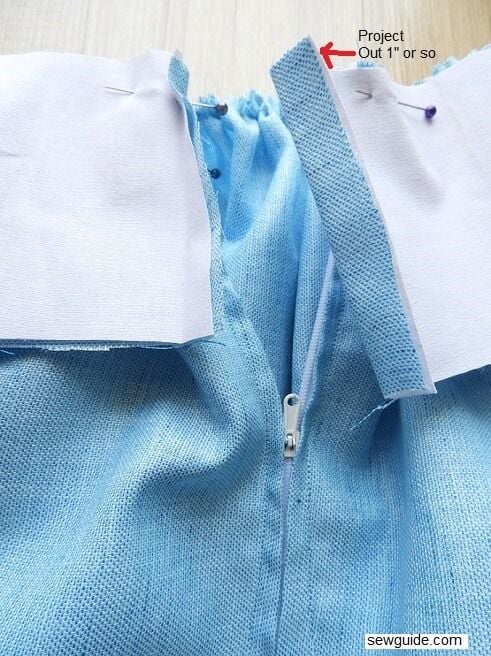
This is for the attaching the hook bar later. Pin the whole thing. And then start stitching.
When the stitching is done bring it up.
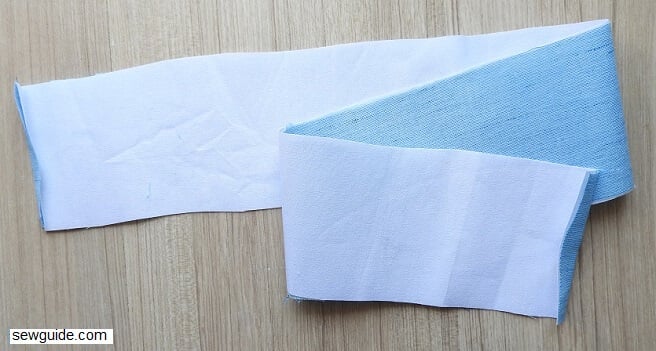
Now fold 1/4 inch of the waistband from the top edge down and press in place.
Fold the whole waistband by the Middle so that it aligns over the gathered edge. You can either hand stitch the waistband in place. I would prefer to do handstitching because it is neater. Because if you just stitch from the back the line will not be so even on the front
( an alternative is to add 1/4 inch extra to the waistband width(when you cut) and then stitch in the ditch from the front).
Step 5 – Add fasteners
Attach the hook and metal bar. Check out this post on sewing hooks and eye
Hem the skirt – just turn under twice and stitch a wide hem (as you much as you have left for the hem).
Related posts : How to sew skirts ; Make a skirt from old jeans ; How to sew an easy elastic waist skirt; How to sew a reversible skirt ; How to sew wrap around skirt; How to sew pencil skirt; 18 different types of skirts and their names ; Sew a Basic straight skirt.
Ref 1 on knots on dirndl skirts – ilikegermany.com
Good and perfect explanation with picture and I really thank you bcz for me it was important to know about this dirndl skirt
Very clear instructions and i look forward to sewing this skirt. May i know how long the zip should be. Thank you
Thank you .
Thanks a lot . This was well expressed. I currently have a project of this nature at hand and this illustration has help me to understand it better.
What does ‘Minus the waistband width from the length you want’ mean? It’s not a complete sentence and doesn’t make any sense.
: ) True, I wrote as I thought. I meant “From the length you want, minus the waistband width”.
I think you mean “subtract the waistband width” 🙂
Also – what are your seam allowances for this?
very good and easy to understand information. love to receive more. sewing is my passion. thank you.