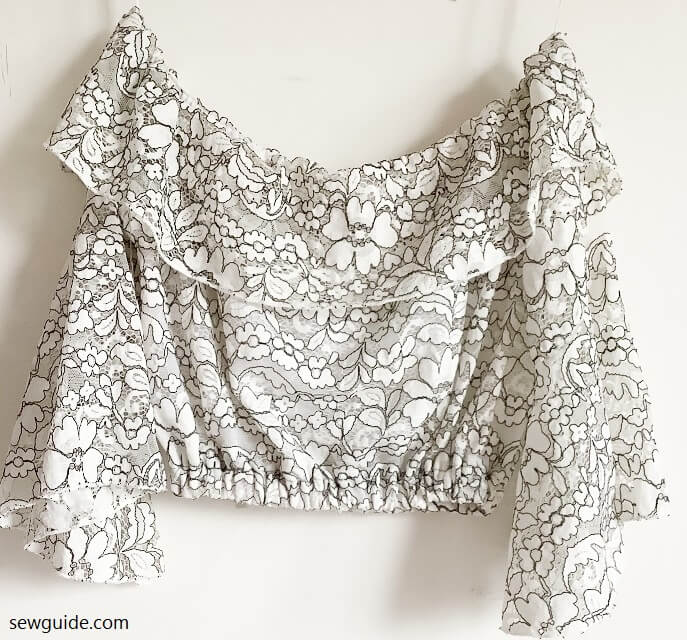
A crop top is a self-explanatory name for a top that is cropped just at the waist or even above it. It is also called a half top or a midriff top. The usual length of a crop top can range from 12 inches to 15 inches.
All the different types of the top can be crop top so long as it is short in length and somewhat fitting.
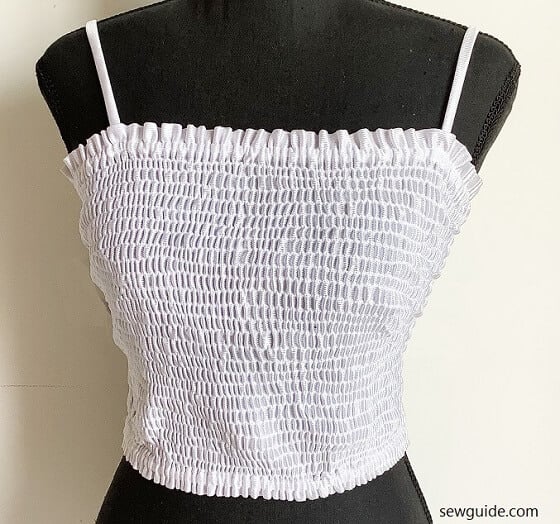
A Shirred bandeau crop top – find the tutorial to sew a shirred tube top here.
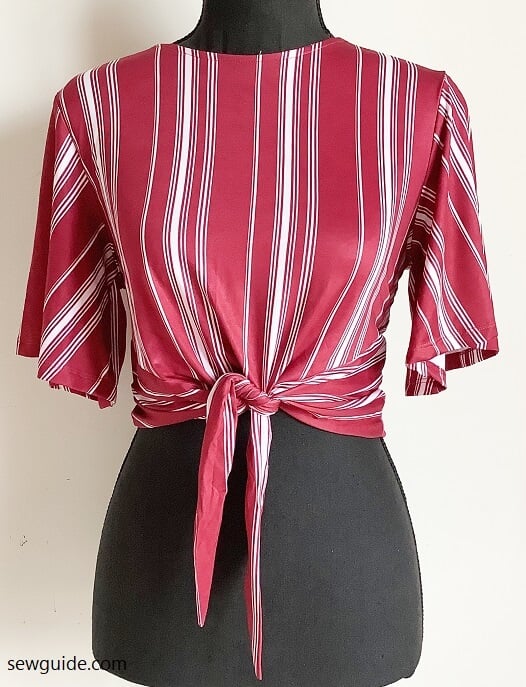
A front tie crop top.
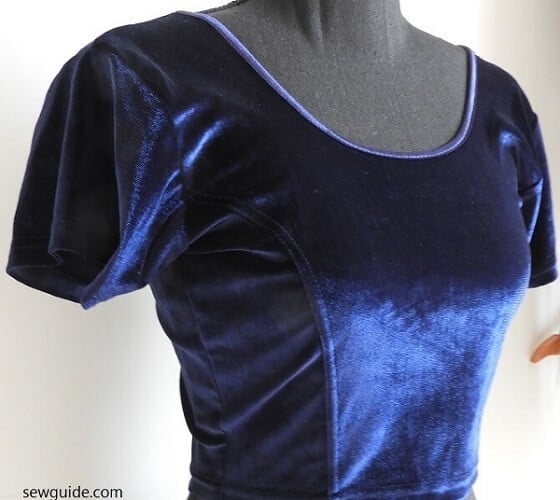
A princess-cut form fitting crop top.
Cut off tshirt crop top.

There are many ways to sew a crop top yourself.
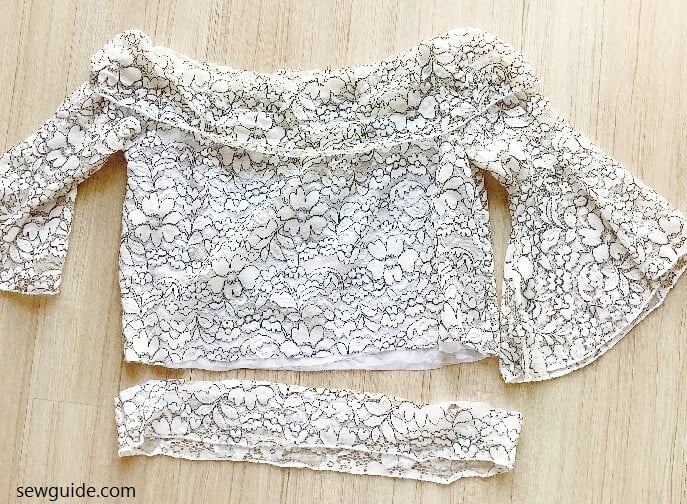
An easy way is to convert your existing long top to a cropped length. You can simply cut off the top at the length you want and sew a new hem or add an elastic band at the hem for a more fitted style. It is easy to do that – here is how to. This is an easy way to make a loose top fitting.
Cut off the excess from your top. Remember to leave extra for making the casing – this depends on the width of your elastic tape and then add 1/2 inch seam allowance.
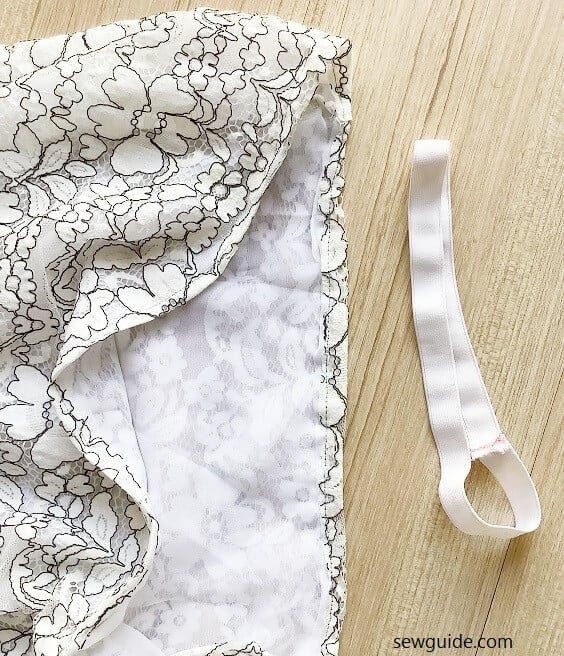
Measure around your waist. Minus some 2 inches from this. Ensure that the elastic you cut in this measure will go through your head as you put the top on.
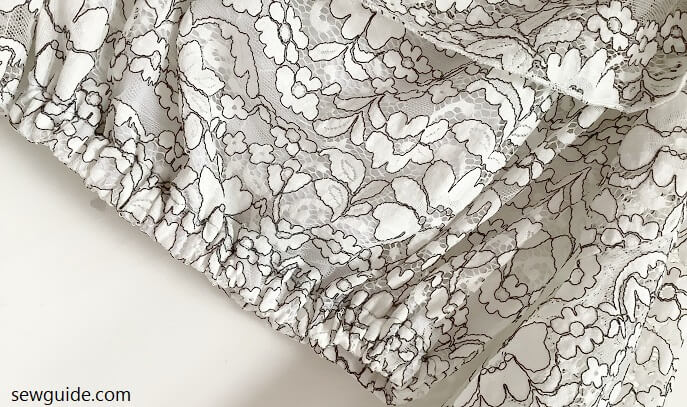
You can make the casing first and then insert the elastic or make a circle out of the elastic by joining the ends and then later sew-as-you-go into the fabric.
The regular way of sewing a cropped top from scratch is as described below: Alternatively, If you want a cropped top with a lining, you can check out this tutorial for sewing a bodice with lining.
Crop top sewing pattern
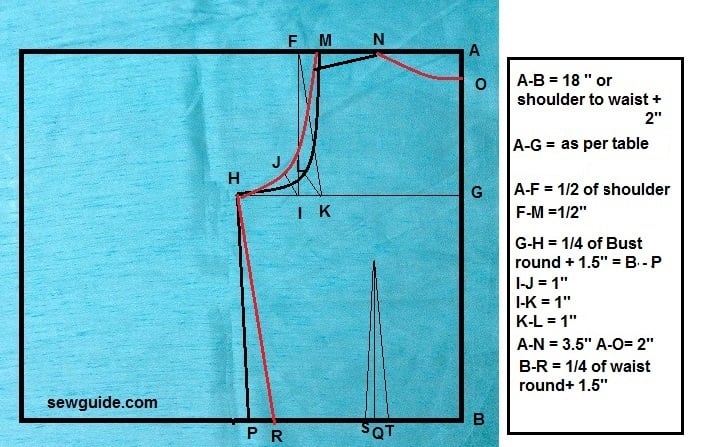
Both the front and back bodice pattern is marked here. The back pattern is outlined in red color.
The detailed measurements are as follows.
The total length of the top – measure from the shoulder tip to where it should end. Add 2″
A-D = 2″ This is the back neck depth.
A-E =3.5″ This is the neck width and is marked only for the back neck as the front neck is marked on the facing piece.
A-F = 1/2 of measure from shoulder tip to the other shoulder tip ; As this is a sleeveless top a little to the inside will look good, so take 1/2 inch to the inside from F.
G-H = 1/4 of Bust round + 1.5″ = B-P This is the marking for the side for front bodice. ( The extra 1.5 inches may be reduced to 1 inch if you want a fitting top).
For the back bodice this is marked 1/4 of waist round + 1.5″ from B ( The extra 1.5 inches may be reduced to 1 inch if you want a fitting top).
To mark the armhole measure checkout the table below:
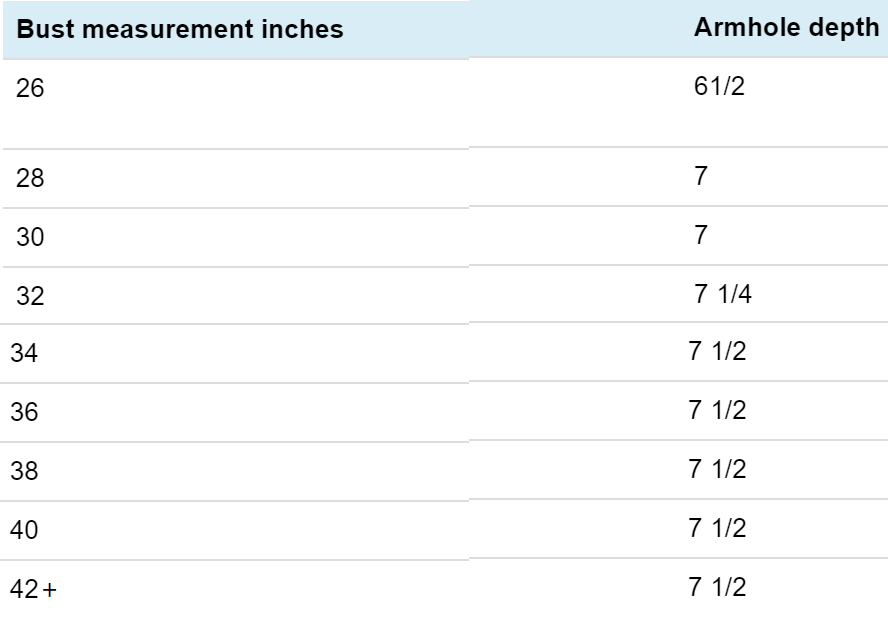
Mark this measure from A down to G
Mark down I from F ( straight down)
Mark 1″ diagonally to J ; I-J = 1″
Mark 1″ inside from I to K; I-K = 1″
Mark L 1″ diagonally from K ; K-L = 1″
Mark the H-J-M as the back armhole line and Mark H-L-M as the front armhole line
Mark the shoulder slope 1/2 inch down from M for the back and front bodice.
To mark the darts
Calculate the measure of bust round – waist round
Take this as Z
if Z is less than 4 inches mark the dart width( S-T) as 1″ ( 1/2″ on either side of the middle dart line S-Q & Q-T)
if Z is more than 4 inches mark the dart width as 2″ ( 1″ on either side of the middle dart line)
if Z is less than 6 inches mark the dart width as 3″ ( 1 1/2″ on either side of the middle dart line)
Measure between your bust apex points . This is the measure between the two darts.To mark this measure on the pattern, divide this by two and mark from B-Q. The darts should be ending 1/2 inch down from the bust apex point. Checkout the post on dart placements and tips for sewing darts
Make paper patterns – cut out back and front patterns separately and mark on folded fabric.
How to sew a crop top
Step 1. Cut out the pattern for the front and back bodice, 2 strips of bias tape for binding the armscye, and two bias strip pieces for binding the back necklines.
If you plan to use a lining, cut the lining piece. I am using the lining as underlining; the lining pieces will be treated as the main bodice pieces.
The darts and the seams and neckline bindings and armscye bindings will be done together ( it will be treated as the outer fabric).
This is the front bodice.
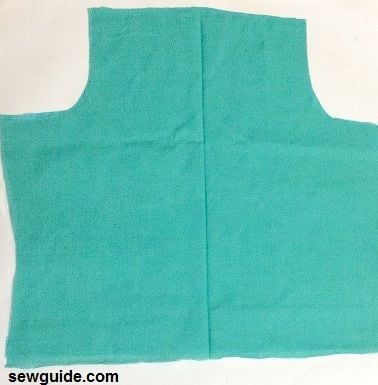
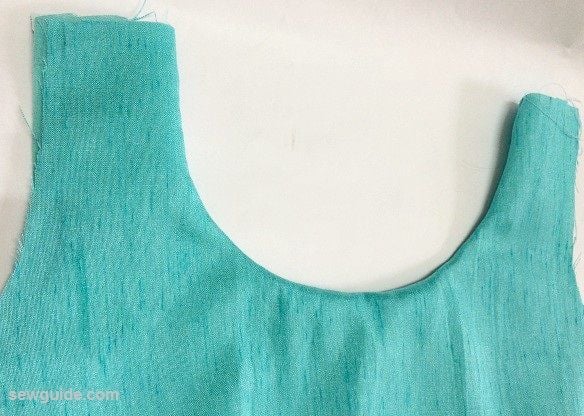
And this is the back bodice with the neck cut.
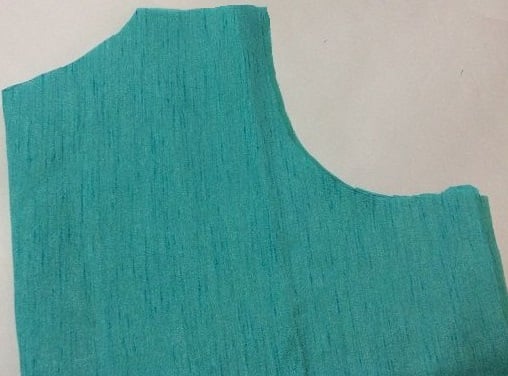
Step 2. Make facing for the front neckline.
You can make any type of neckline for the front. Checkout the 60 different types of necklines you can stitch.
Follow along with what I have made.
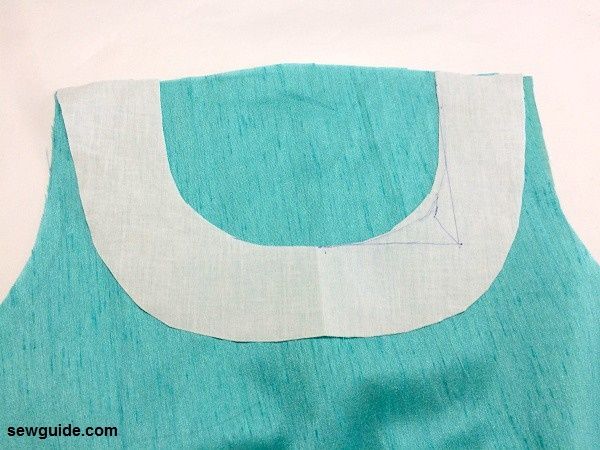
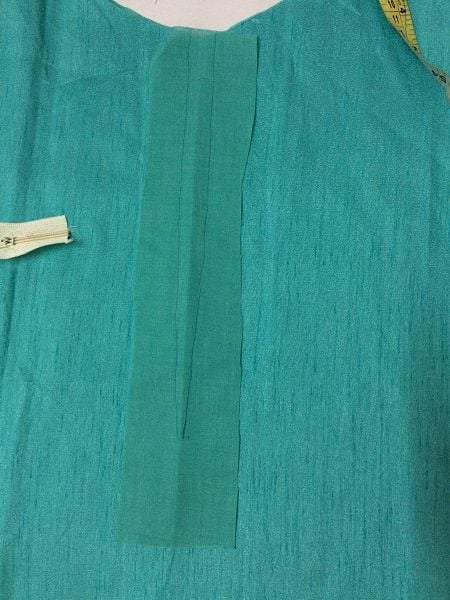
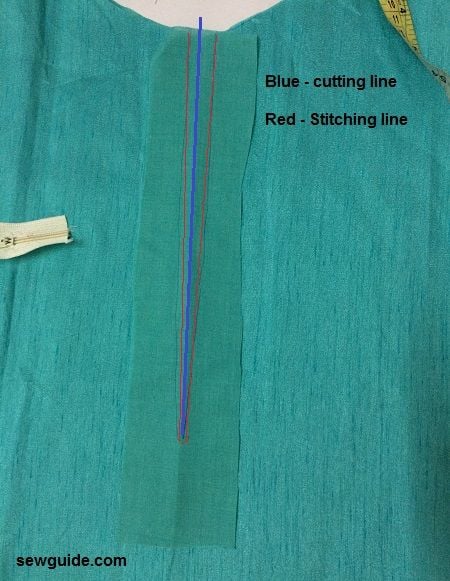
To make the facing cut out a piece of fabric 12″ wide and 12 ” length; fold this by the center and mark as per the following pattern.
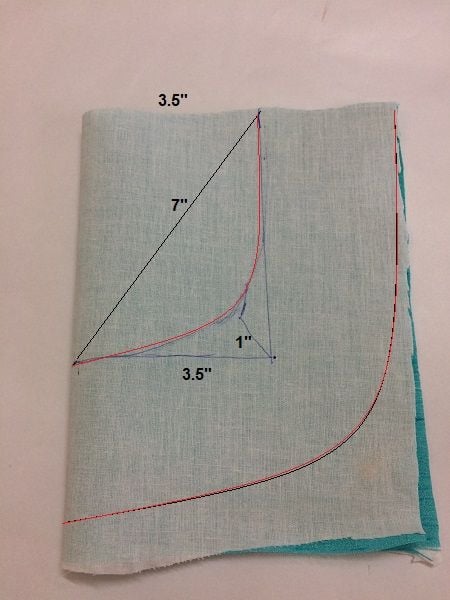
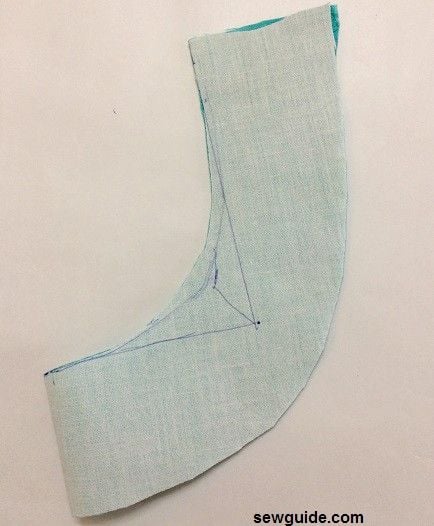
Cut out the center ( inside the marking ) and beyond the line 3 inches (around the red line in the above picture) and you will get a facing piece like this one.
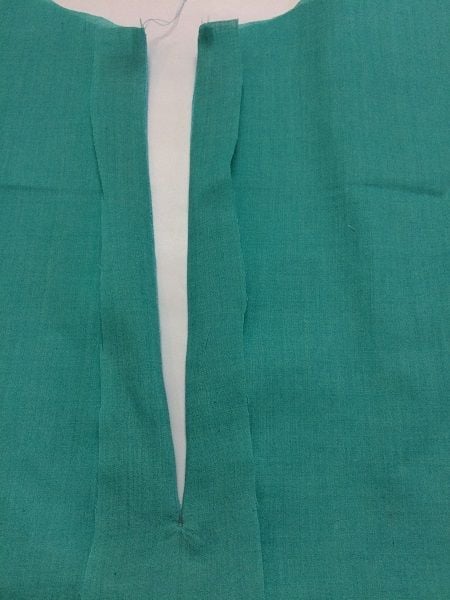
Keep it face down on the bodice; align the center carefully; pin it in place.
Stitch the neckline of the facing and the bodice carefully with a very small seam allowance ( 1/4 inch) ; Clip all along the seam allowance. Understitch the facing piece and the seam allowance together from the back of the bodice.
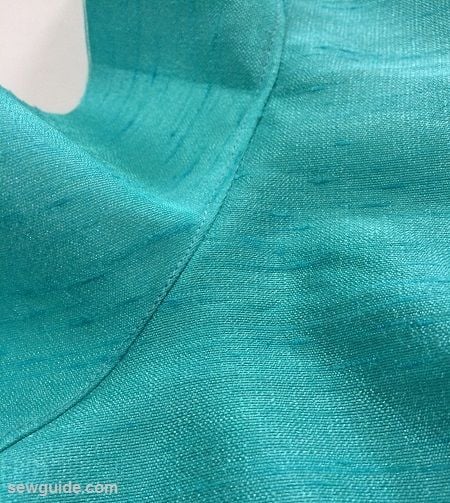
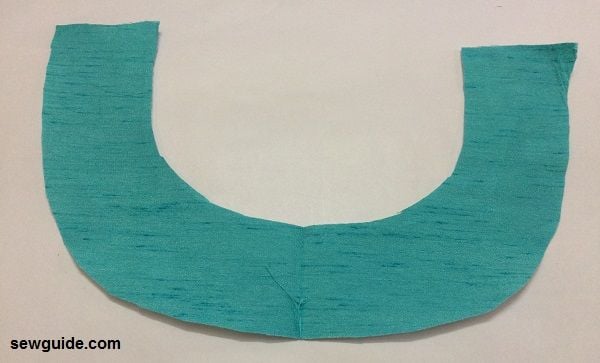
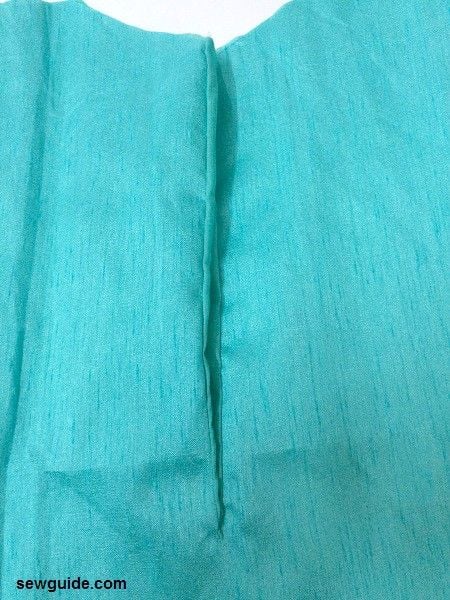
The neckline will look like this when the facing is turned to the other side.
Step 3 Attach zipper to the back with a lapped method.
You can insert an invisible zipper as well. Checkout the invisible zipper sewing tutorial here.
Take a piece of fabric 2.5 inches wide and a length 2 inches more than the zipper length. Finish the long edges with a zig-zag stitch or a serged finish.
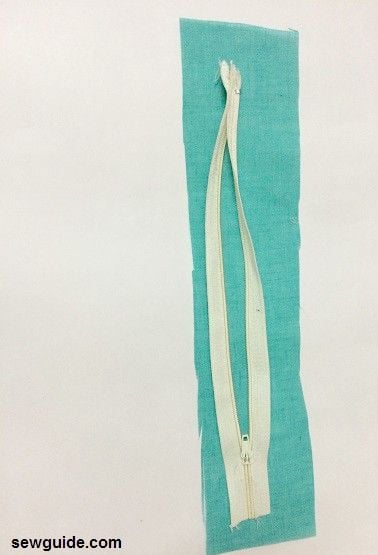
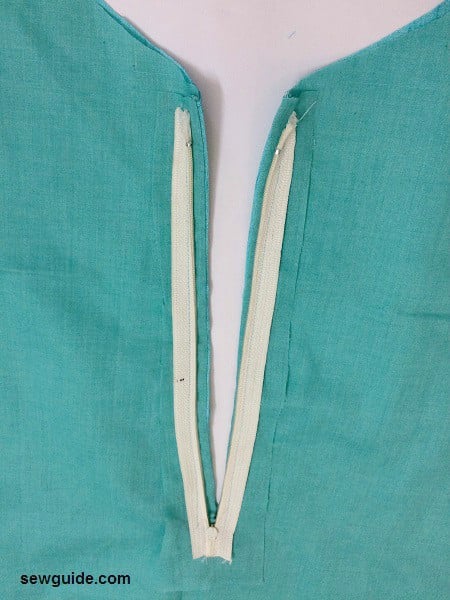
Mark the center line on the fabric piece. Draw a line 1/4 inch to either side of the center line, tapering towards the endpoint at the bottom. Keep it on the center line of the back bodice. Pin in place. For more details on this zipper application checkout the zipper tutorial here
Stitch along the two lines as in the picture below; cut through the middle line to the end. ( cut to the very end, making sure that you are not cutting the stitching lines)
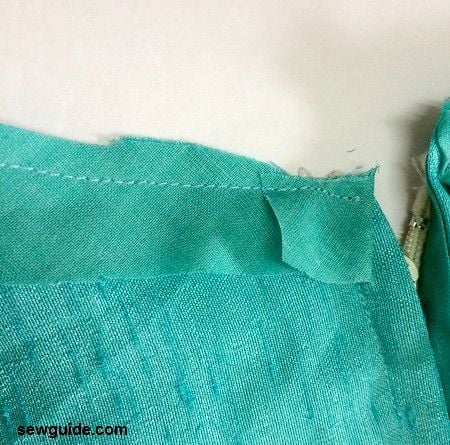
Turn the piece to the back of the bodice. I have not finished the fabric strip here – don’t be lazy like me. Do finish the edges. After a wash or two you will regret that your did not take the time to do it. I know from experience.
Keep the zipper face down on the back on top of the fabric piece. One side zipper teeth is kept close to the edge and the other side zipper teeth is kept 1/4 inch inside. Pin in place and stitch in place.
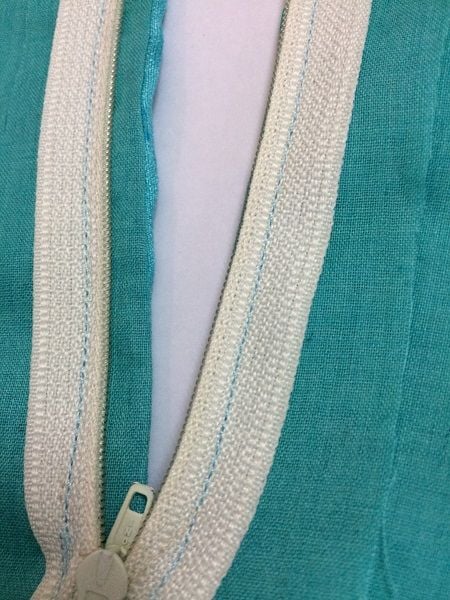
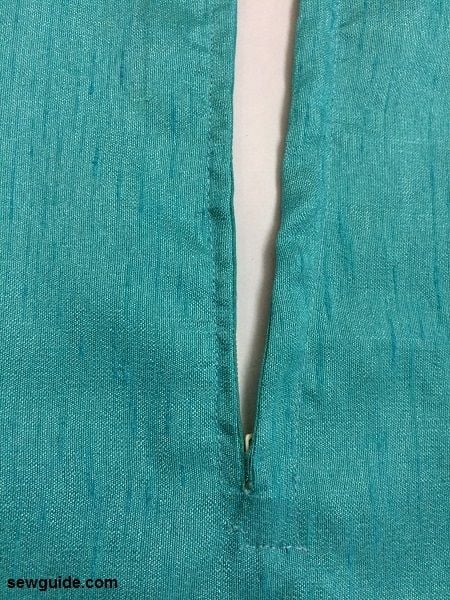
Stitch the end with a crosswise stitch to secure the end as well; You will get a nice lapped look.
Step 4
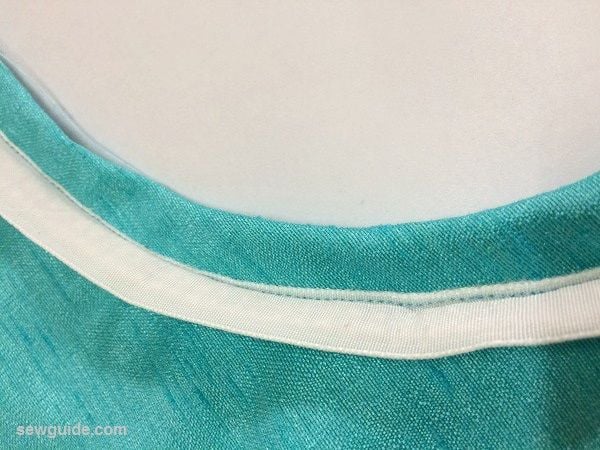
Bind the top edges of the back necklines with bias strips. Remember to fold the short edges inside. Keep it on top of the neckline and stitch the edges together. Turn the binding to the back and stitch in place.
Step 5
Make darts for the front bodice
Step 6
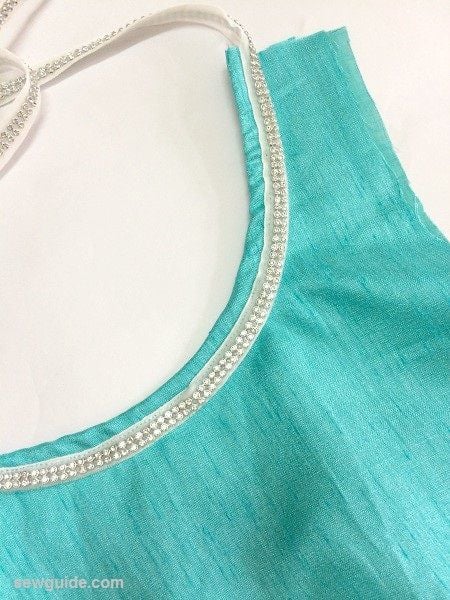
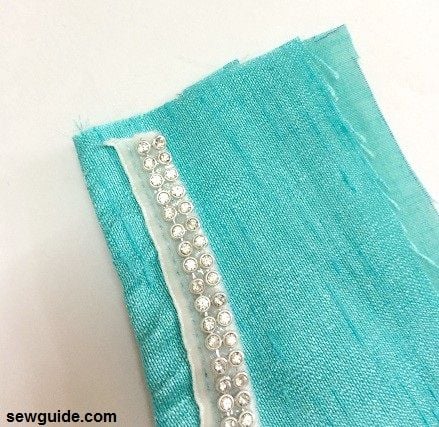
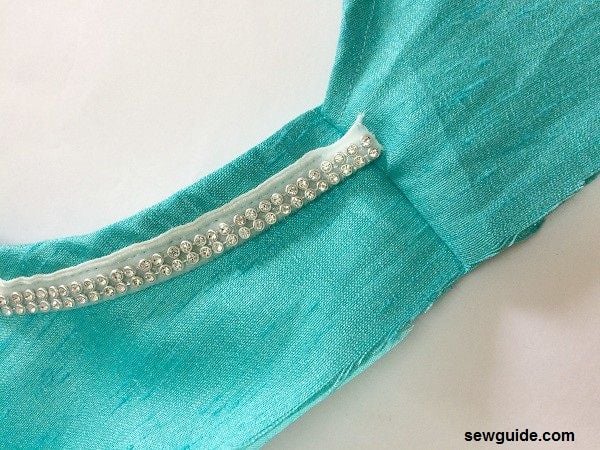
Attach trim. I am stitching a rhinestone trim to the neckline. Checkout the pictures for details. I kept it face down and stitched one edge. I turned it right and then top-stitched the other edge to the bodice.
You will have to cut off some or stop the trim 1/2 inch near the shoulder seam. Otherwise, you may not be able to stitch the seam together.
Step 7 Join the shoulder seam.
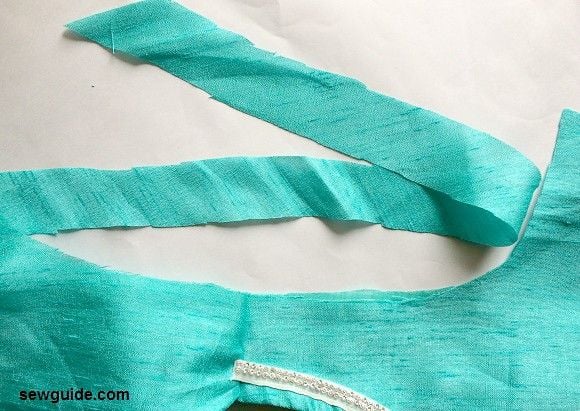
Step 8 Bind the armscye with a bias strip.
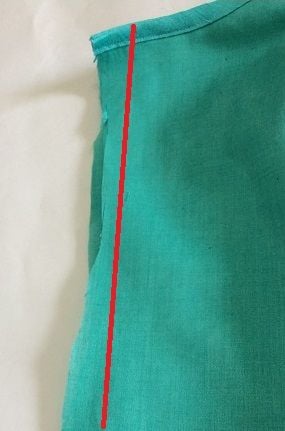
Step 9 Join the side seams together.
Step 10
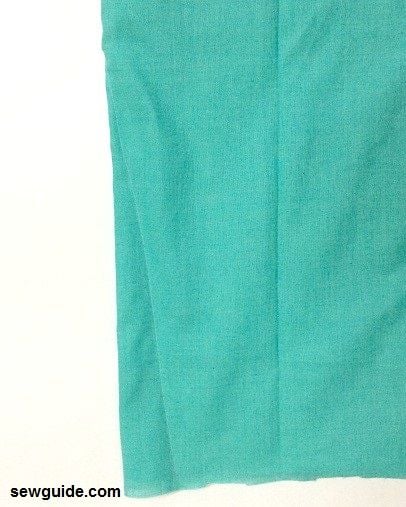
Hem the bottom edge. If the length is more, you can cut off a little from the bottom edge. Turn under 1/4 inch and then turn the rest of the extra edge and stitch in place. You can hand stitch or machine stitch the hem.

So explanatory, I wish u can have a application on play store for me to download
Thank you very much, this was useful.
Although, I tried it with a yard of fabric.
This is my favourite site for sewing,Good job!
This is one of the most clear sewing tutorials I’ve found! The photos reinforce the directions making it even easier to understand. The tips given are helpful in sewing many other styles of blouses with facings. Thank you!
Thank you Tara
Hello can you help me how to stitch crop top drafting and cutting and also how much material needed for the same
Thank you