
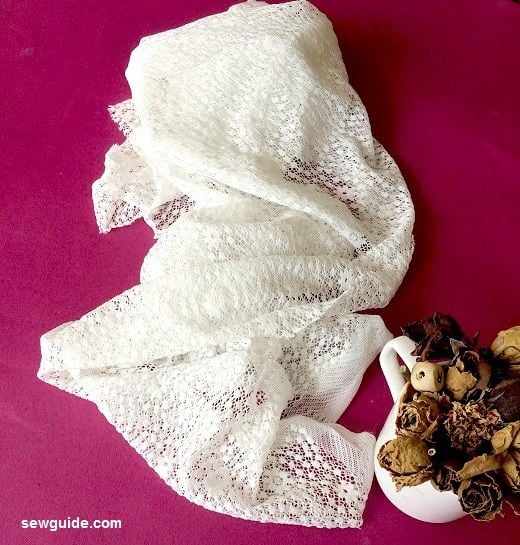
A Vest is a sleeveless jacket. For a girl, a vest is something she wears on top of her bodice and adds to the beauty of her dress—a lace vest – all the more so.
For layering, a vest is the best and hides your worst ( pun unintended).
I love lace and try to incorporate lace in someway I can on my clothes and accessories. Checkout this post on different ways to add lace to your wardrobe. Sewing lace is slightly more challenging than other fabric – because it is a sheer, delicate & open weave fabric ; Checkout tips on how to sew lace if you want some solutions to lace sewing problems.
Sewing Pattern for the lace vest
Step 1
Get your lace fabric . It took 1/2 meter of a 60 inch fabric to make this vest. I suppose if the width is lesser you could make it in 1 meter.
Checkout this post on the different types of lace fabrics you can make this pattern with.
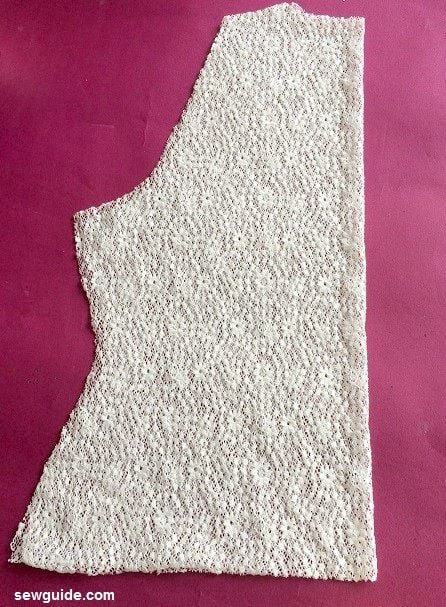
Step 2
Make the pattern for the lace vest

A-B = 18″ – This is the length of the vest. You can increase or decrease this
A-C = 3″ ; This is the neck width
A-I = 1″ ; This is the neck depth
A-L = 8″ or you can calculate 1/4 of your bust round – 1/2 inch
L-K = 1/4 of Bust round + 1.5″
M-N = 1/4 of waist round + 1.5″ ( A-M should be length from shoulder to waist)
B-G = 1/4 of hip round + 1.5″
G-H = 1″. This is to ensure that the vest do not overhang from the sides.
C-D = 2″ This is the shoulder strap.
D-E= 3/4″ This is the shoulder slope.
A-F = 1/2 of shoulder. Mark down straight from F to the Armhole line. Mark this as R. Make a diagonal mark to S with 1″ measure. Draw curved armhole line KSE.
R-S = 1″
Cut out the back pattern as below.
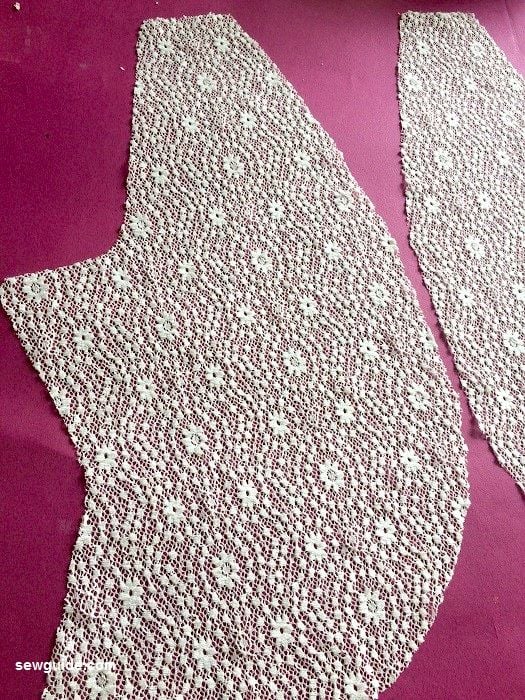
Step 3
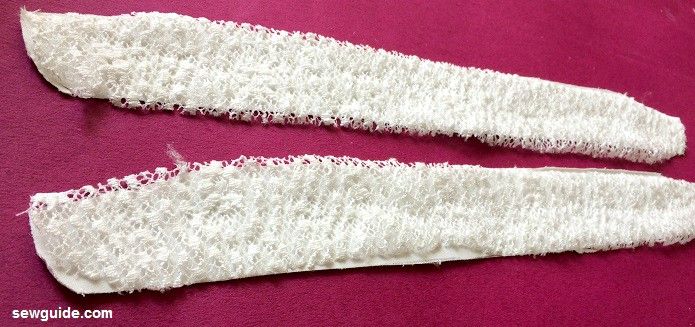
Make the front pattern.
Keep the back pattern on another folded fabric. Keep it 1/4 inch inside from the edge. This way, your front pattern can be marked 1/4 inch bigger. Mark the side seams, armhole and shoulder, and hem. Cut it out.
Keep aside the back piece. We will deal with the front pieces only now. Some changes in the neckline and armhole have to be made for the front pattern.
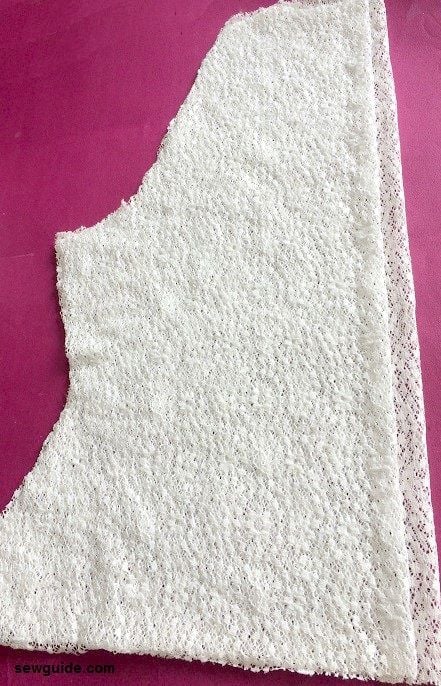
 Front armhole – Mark T 3/4 inch from R of the back pattern. This is so that the front armhole is curved slightly inside ;R – T = 3/4″
Mark U diagonally from T ; T -U = 1″
Join the armhole in a slight curve.
The bottom edge is marked inside 3 inches from B . Make a curved edge and join smoothly to the neck width at C. Add a 1/4 inch edge outside of this line. This is your cutting line.
Cut it out. You will get two pieces of front flaps.

Step 4
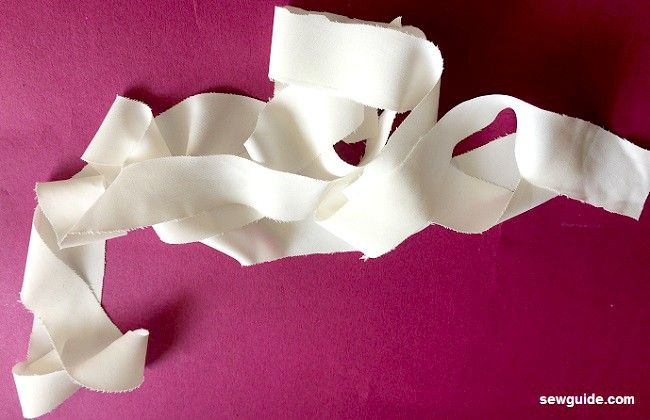
Cut a piece of bias binding strip. Do use a cotton bias strip. I used a polyester cloth to cut the bias strips because it matched my lace, but because of that, the hem started curling as soon as the binding was done. On hindsight, I should have interfaced. You sew and learn.
You sew and learn.
You need lots to bind the front lapels and back hem, and armholes. Check out this post on making bias bainding strips and on how to do bias binding.
Step 5
Keep the bias strip right side down on the front lapel, which is kept right side up. Basically, you are bias-binding the lapel edge. Sew the bias strip with a 1/4-inch seam allowance along the edge.
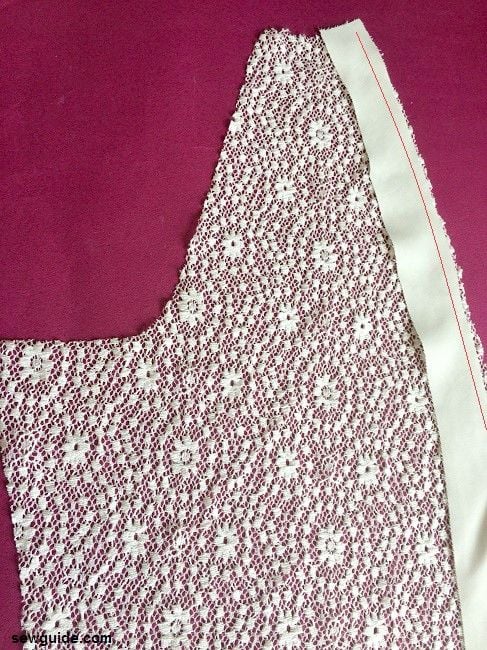
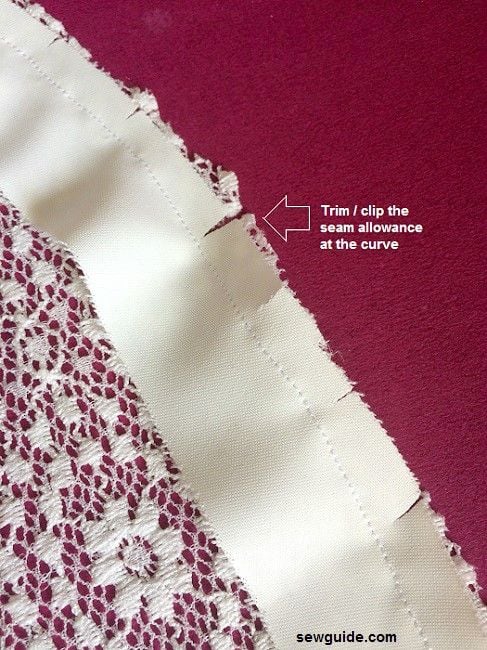
Trim closely to the stitching line. You may also want to clip the seam allowance near the curves so that the curves will lie nicely.
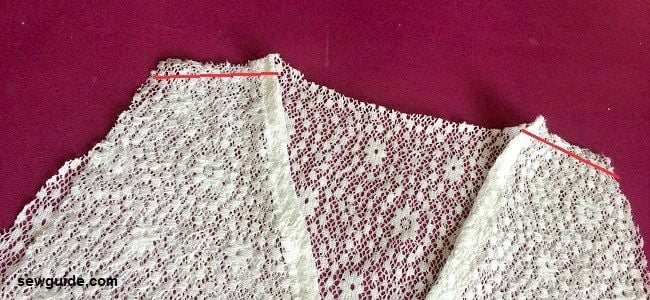
Take the bias strip to the back. Fold under. Pin in place. Stitch the bias band in place.

Step 6
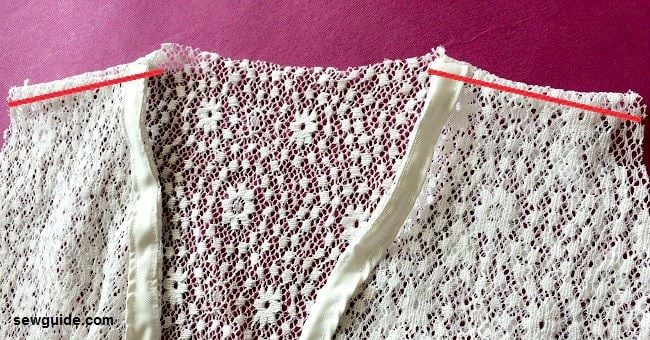
Stitch the shoulder seams.
I did a french seam. To make the seam keep the front panels on top of the back piece, wrong sides inside (Opposite of right sides together, which is how you stitch a regular seam). Stitch the shoulder seams like this. Trim closely to the stitching line.
Check out this post on French seams for more detail.
Flip the seam and then stitch again, enclosing the seam allowance inside.
Step 7
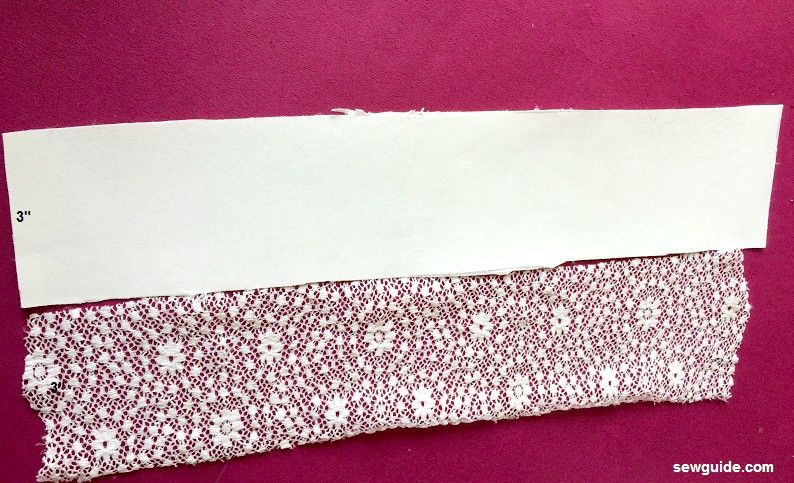
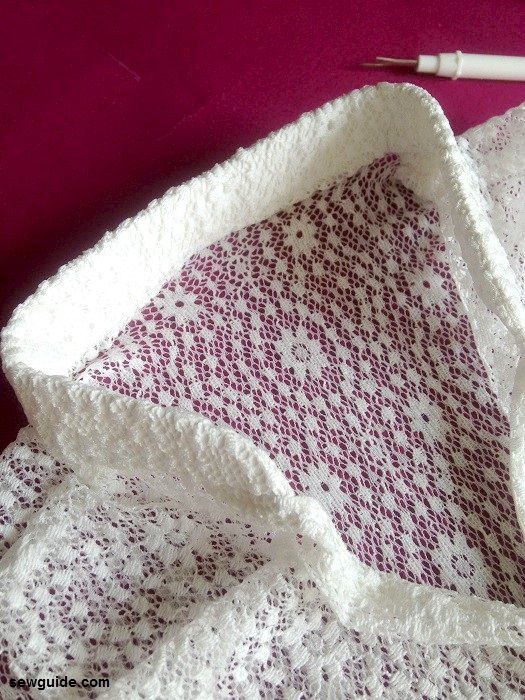
Cut out the collar pieces.
Dimensions
- Length = back neckline length + 4″ + 1″
- Width = 3″
I have cut a lace piece as well as a lining piece that is interfaced. This will be folded by the center lengthwise and then again by the center crosswise to mark the pattern below.
Cut out the collar pieces as per the pattern.
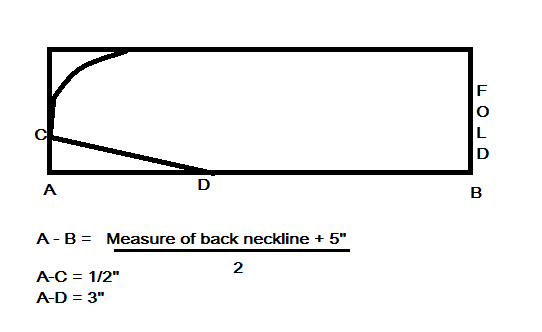
The final collar piece will be 1.5 inch wide.
Keep them right sides together and stitch along the top side with a small stitch length and 1/2 inch seam allowance. After stitching, trim the seam allowance close to the stitching line.

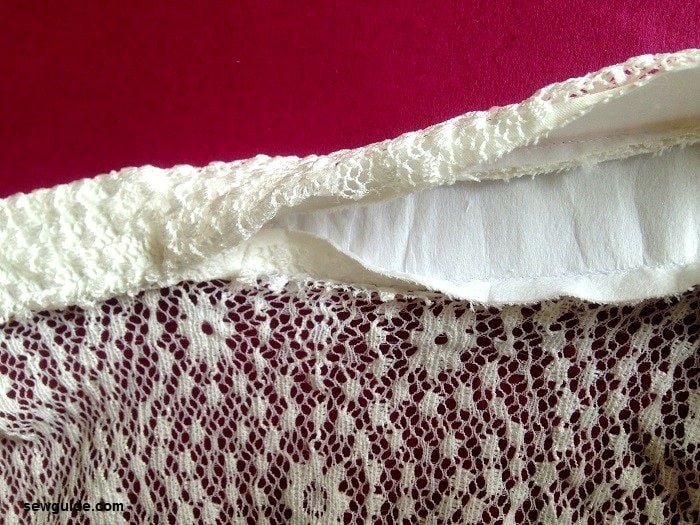
Turn the collar right side out.

Step 8
Stitch the collar to the vest
Keep the collar right sides together to the vest. Pin in place, aligning the center of the collar and the back neckline center. Stitch in place.
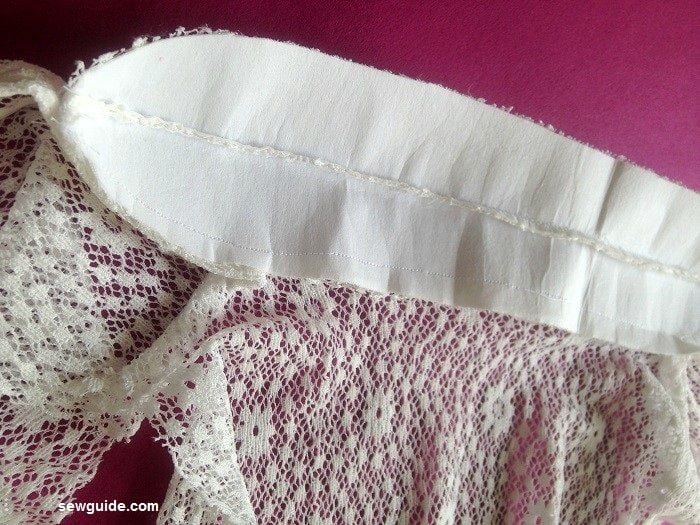
Now the underside collar is top stitched, enclosing the seam allowance inside.
Step 9
Sew the hem of the back piece.
Step 10
Bind the armholes the same way you did the front lapels.
Step 11
Sew the side seams. I did French seams here too. Because the seam allowances will be visible through the open weave in lace, unless it is lined, the french seam works best here too.
Related posts : How to sew a vest; What is a vest; How to sew jeans vest


Amazing. Your website is extensive, well explained and marvelously illustrated. Soooo much info. You’re a one-person encyclopedia of sewing! Thank you for sharing your knowledge.
That is too much praise and not so deserved – and you are really kind to say all that, thanks