Warning : Eye popping bling overload ahead
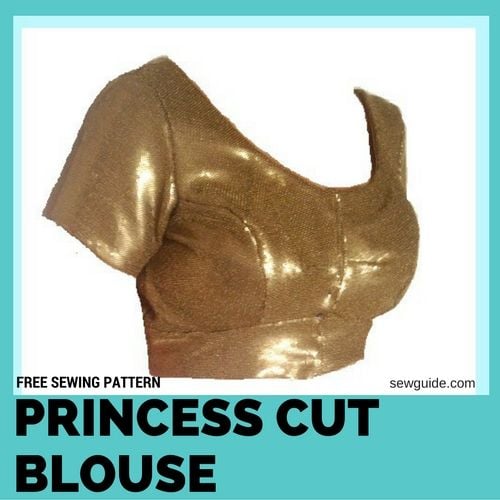
I love bling and when I saw this sequenced fabric in beaten gold I decided ‘this is it’ for a sari I have with the same colour in the border. The colour looks a little bit more flashier in the photos . But bling is bling, so no excuses.
A simple sari blouse is good but I donot much fancy the pointy look it gives where I have curves. A curvy princess line is more like it. So on to a princess line sari blouse pattern. I suggest a simple cotton scrap piece of about 1 meters for your first princess line blouse.
You will have to make a simple blouse pattern as follows and then adapt it to a princess line. Very simple. Stitch a beautiful blouse in the princess line style by drafting the pattern with princess seams that will follow your shapely curves to perfection.
Take the following measurements ( Check this post for tips on taking body measurements)
- Length . I took measurement from shoulder tip to waist
- Front Bust measure ( from front armpit to the other over the highest point of bust)
- Back measurement ( From back armpit to the other armpit)
- Shoulder to shoulder
- Sleeve length
- Sleeve round
- Armhole measurement. All around the armscye.
- Back neckline depth
- Front neckline depth
- Waist round ( Where the blouse will end )
- Measurement Between the bust apex ( highest point of bust)
- Distance from shoulder to bust apex.
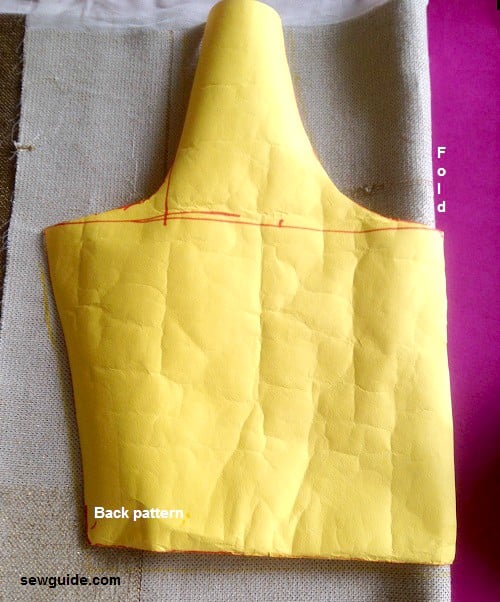
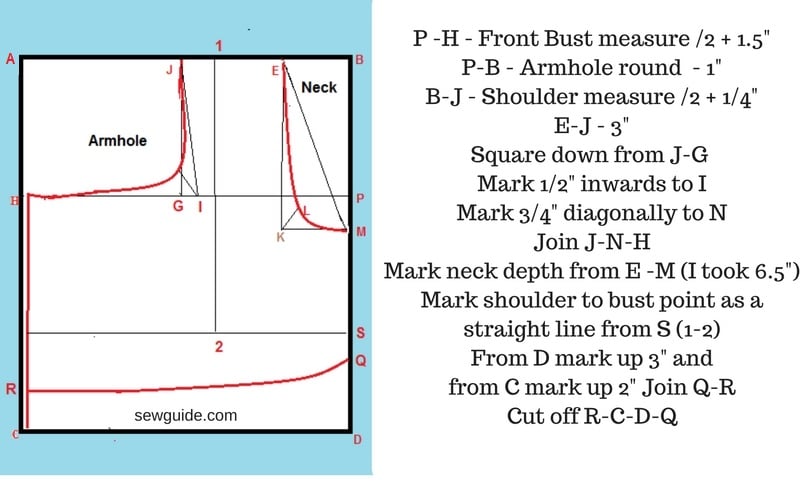
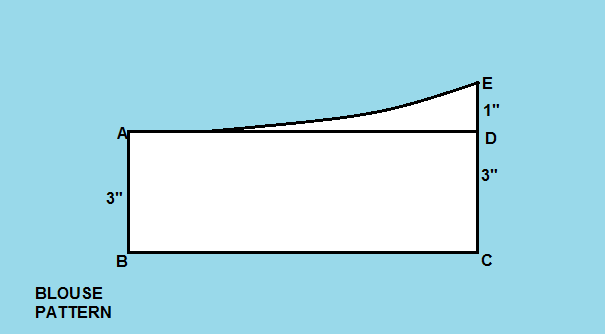
Make the Back bodice Pattern
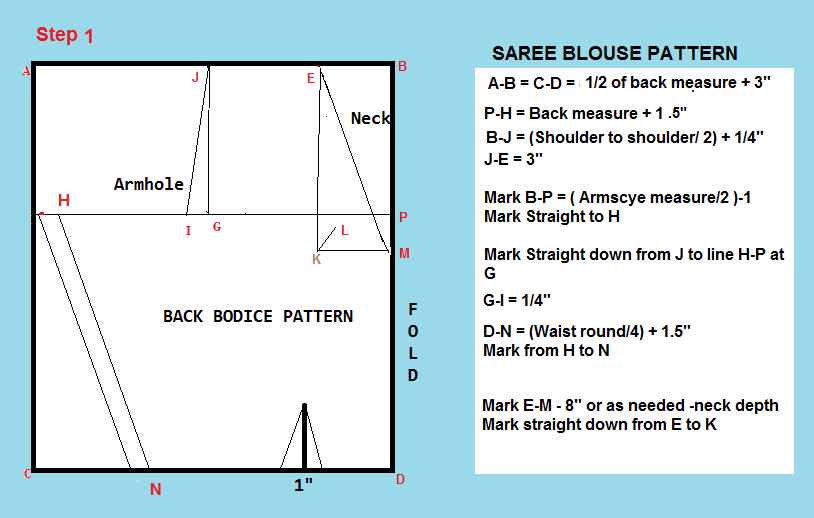
B- D – Length needed for the blouse + 1″ for seam allowances
P-H =Back measure + 1.5″ – This is the bust line.
B-F = (Shoulder to shoulder/ 2) + 1/4″
J-E = 3″ – this is the shoulder strap
Mark B-P = ( Armscye round measure/2 ) – 1″
Mark Straight to H
Mark Straight down from F to line H-P at G.
Mark I a little outside of G
G-I = 1/4″
D-N = (Waist round/4) + 1.5″
Join H to N
- Mark the neck depth for back and front and armhole.
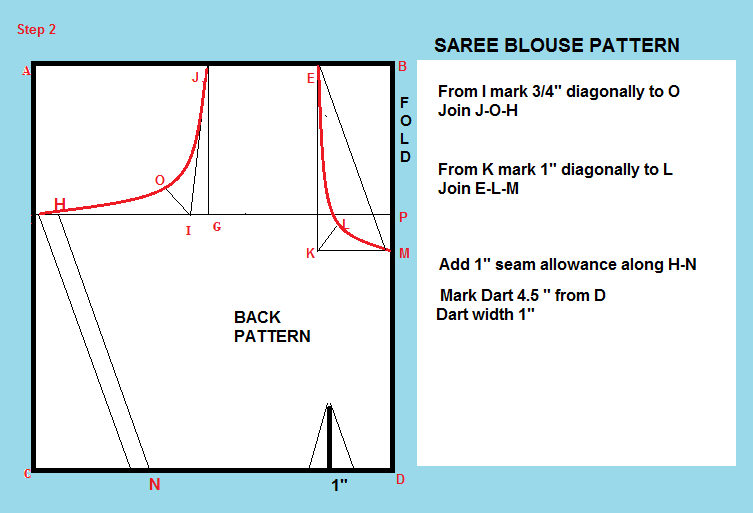
From I mark 3/4″ diagonally to O
Join J-O-H
Mark E-M – 8″ or as needed – this is the back neck depth
Mark straight down from E to K
From K mark 1″ diagonally up to L
Join E-L-M in a soft curve
Mark the DART – Mark a dart 4.5 inches from the fold . The dart length is 4 inches. If the blouse is long increase dart length till 6 inches. Width of the dart is to be 1″ . ie 1/2″ wide on either side of the mark
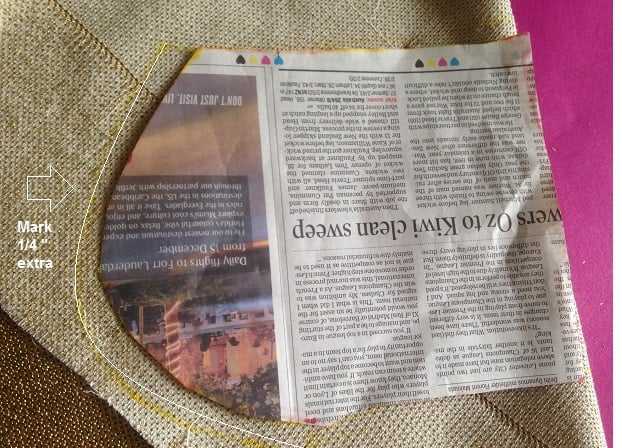
Keep the pattern of back bodice on the folded fabric .I traced outside . Cut off most of the traced lines because those tiny lines add up inches to your pattern.The crumbled paper is from an old craft project my daughter did. I am not particular about what I use when drafting patterns – even newspaper are not left alone.
Step 2
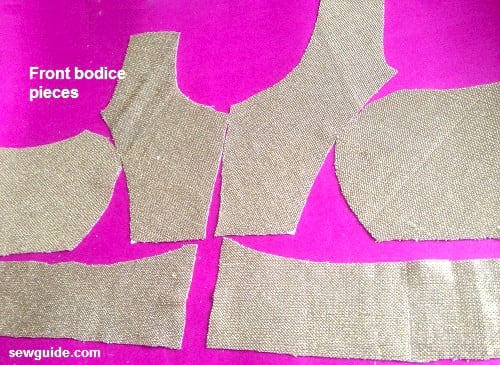
Front bodice pattern
Make the measurements like neck width, shoulder on the front bodice piece as on the back pattern. Then continue as the picture.Please note that waist measurement is not taken for the front pattern piece.
Cut off the piece where yoke should be joined from R- Q. You donot need the piece. We will be cutting and stitching a separate yoke piece here.
After you have marked the pattern on fabric, Cut through the center fold M-Q. This will divide the front pattern into two pieces.
Mark the darts as follows on the front pattern pieces.
Mark A – C – measure from shoulder to bust apex + 1/2 inch
Mark A-B – Distance between bust apex / 2 – 1/2 inch
Dart L-N = 1″
M-O = Dart as per difference between bust round and waist round
Dart B – 1″
For E dart the width is calculated
Calculate bust round – waist round = Z
If z is less than 4 inch make dart width 1″
If z is more than 4 inch make dart width 2″
If z is more than 6 inch make dart width 3″
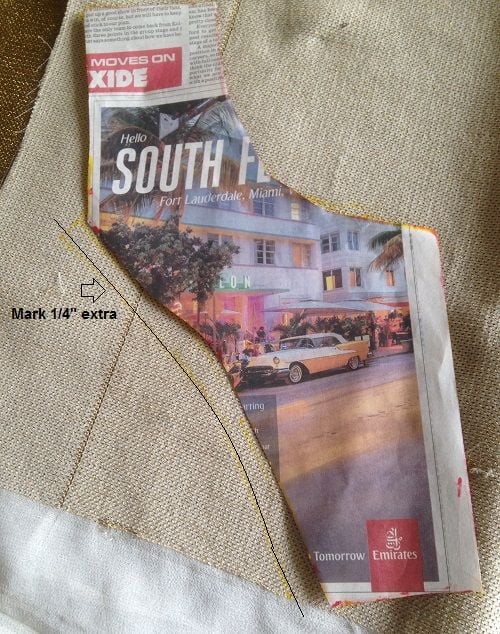
You will have to cut the area inside the darts at E & B out . Cut through L-A-M & N-A-O which makes the front bodice half again divided into half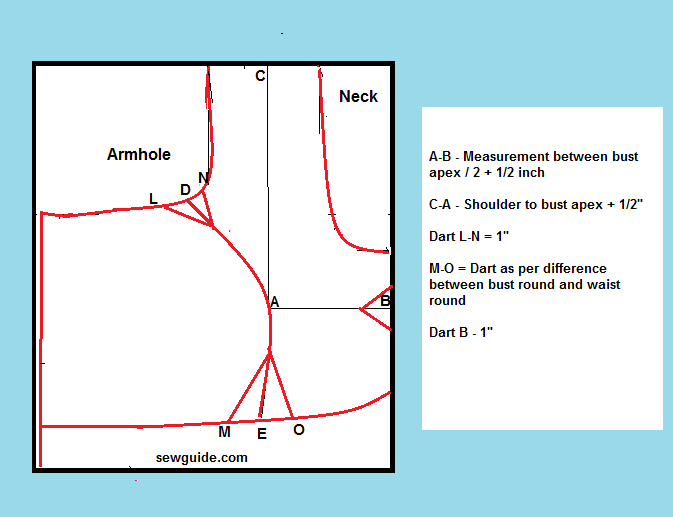
When cutting the fabric for the front bodice upper portion, donot forget to mark the seam allowance of 1/4 inch along the princess line we have just cut.You will add 1/4 inch seam allowance to the L-A-M & N-A-O sides. you can keep the paper pattern on the fabric and mark this extra
Also keep the pattern on a fabric which is folded right sides together. This way you will get two mirror image pattern pieces for the left and right sides.Do this for all the front bodice pieces including the yoke pieces.
Make the yoke pattern
B-C will the same as R-Q at the front bodice pattern

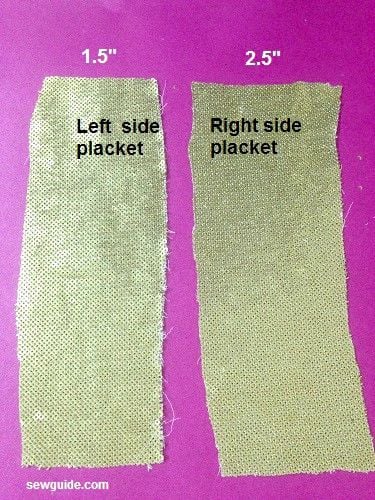
Cut out the 2 placket pieces
The length of the placket pieces should be the length of the front bodice + 1″. Width of one placket piece should be 1.5 inches and the other should be 2.5 inches
Cut out the sleeves
Made a sleeve pattern following the instructions here.
How to sew the princess line blouse
Keep the patterns pieces ready . Cut out lining the same way as the main fabric if you are using lining for the blouse. I have used Voile cloth for lining the blouse as it is the thinnest I could get my hands on.
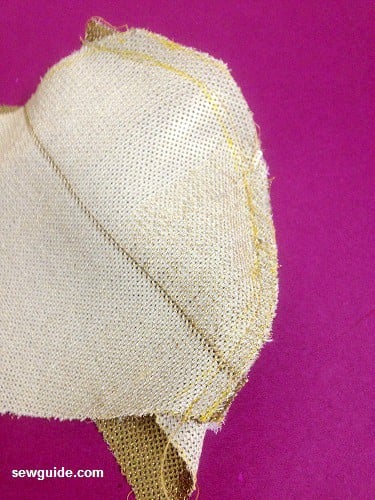
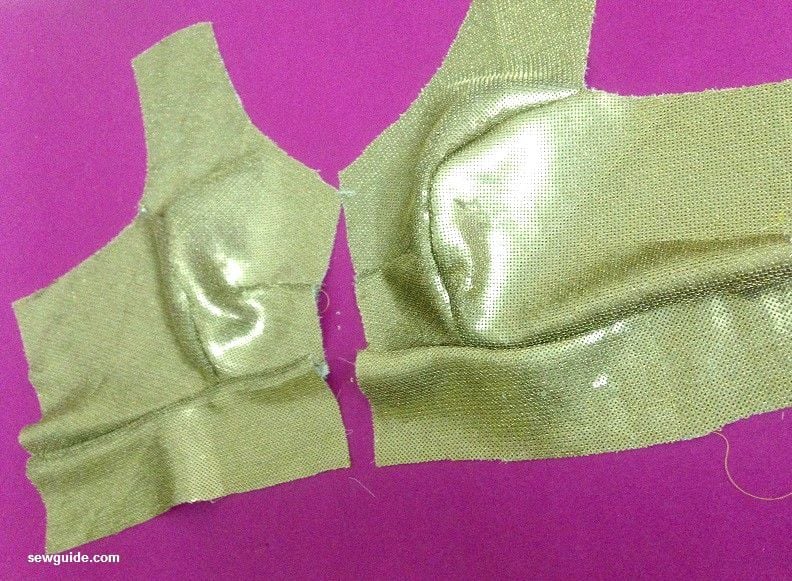
Join the bodice pieces with a 1/4 inch allowance along the princess seam. Trim the seam allowance a little bit so that when you straighten it the curve is smooth; you may also clip the seam allowance.
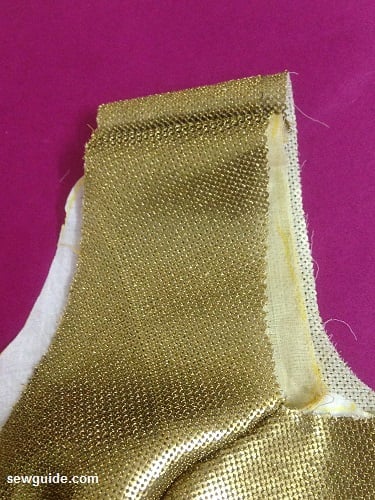
Join the yoke pieces to the upper pieces.
Make a similar lining bodice piece.
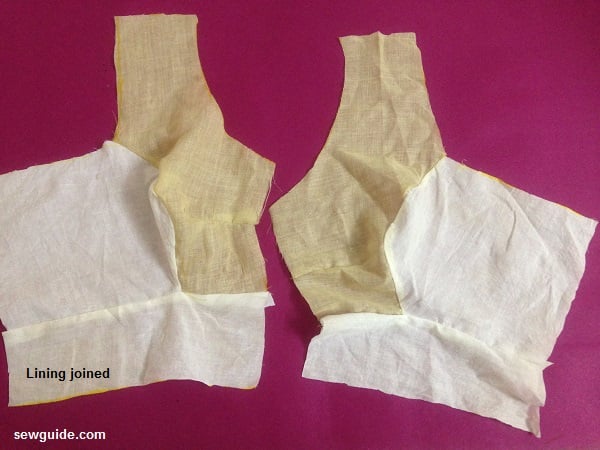
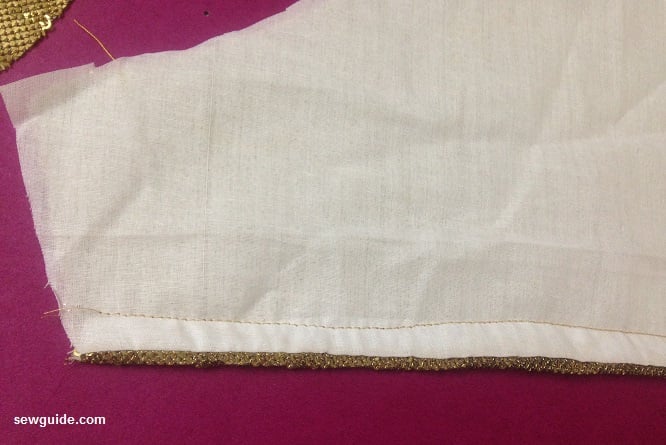
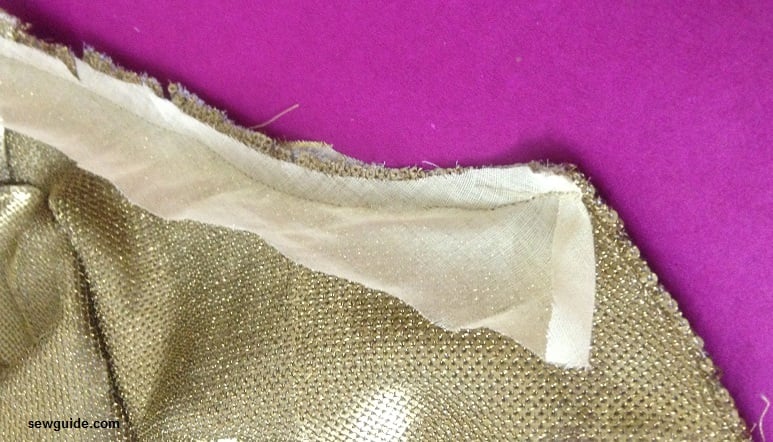
Keep the lining and the main outer fabric right sides together and stitch along the bottom edge with a 1/2 inch allowance. Turn right side out and you will have a lined bodice and a ready made hem all in one go. Top stitch the hem 1/2 inch from the edge if you want to and for a smooth roll to the inside.
Join the shoulders, by keeping the front bodice and back bodice shoulders together ( right sides together). Here the lining and outer fabric is treated as one.Finish the fabric edges with a serger or a zig zag stitch.
Get the sleeve pieces and lining pieces and stitch them right sides together the same way you have done the bodice. This way no need to do a separate hem.Turn inside out. If you under stitch the seam allowance and lining together the lining will roll inside smoothly or you can top stitch the hem some 1/2 inch from the edge. Cut off any extra projecting outside at the sleeve head.
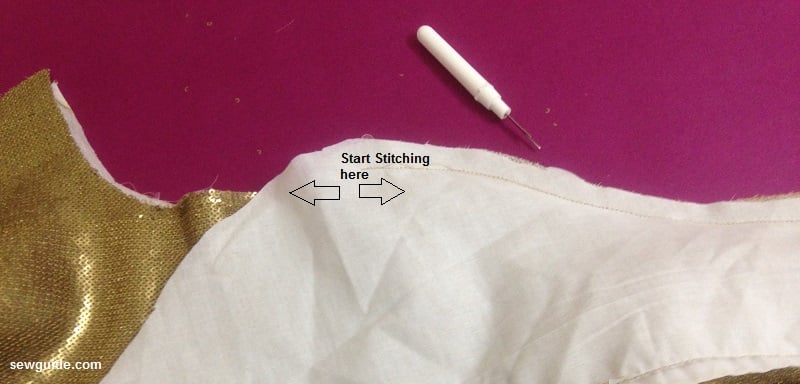
Keep the sleeve head on top of the armhole line, right sides together. Find the center of the sleeve and match it to the shoulder seam. Pin in place start stitching from the center to the sides. You can make double stitches if you want strong stitching line. Finsih the fabric edges with a serger or zigzag stitches
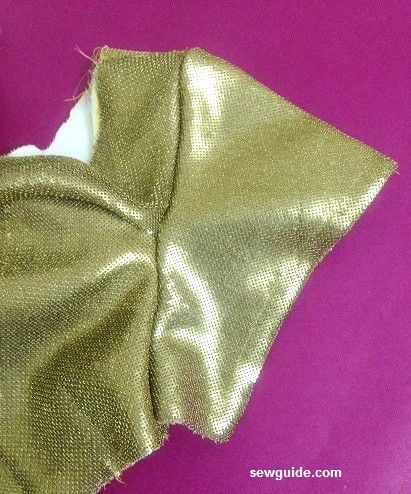
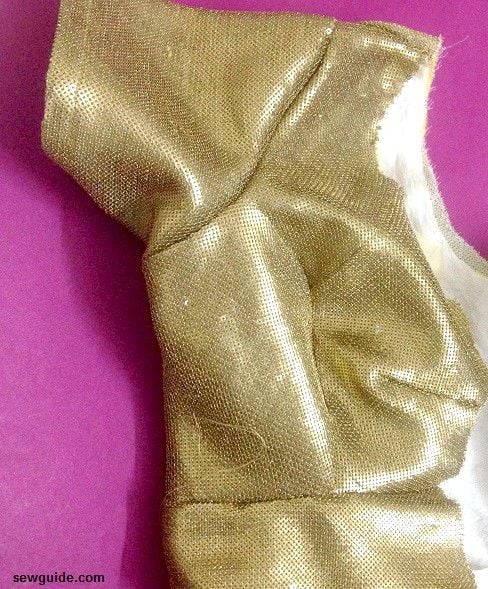
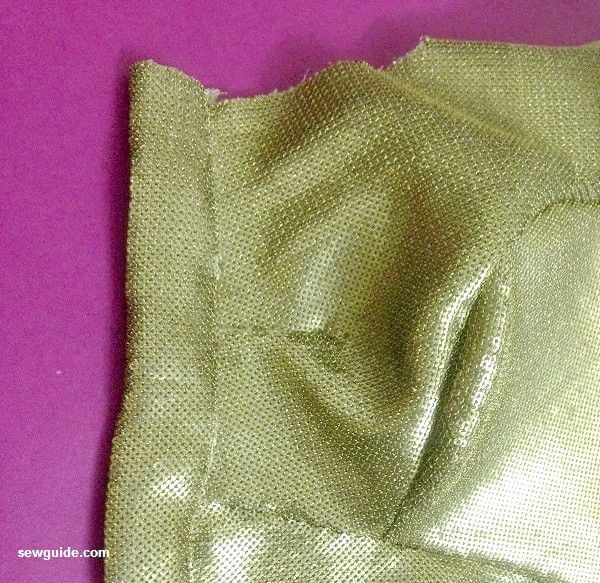
Here the sleeve is joined.
Join the side seams with a 1/2 inch seam allowance.

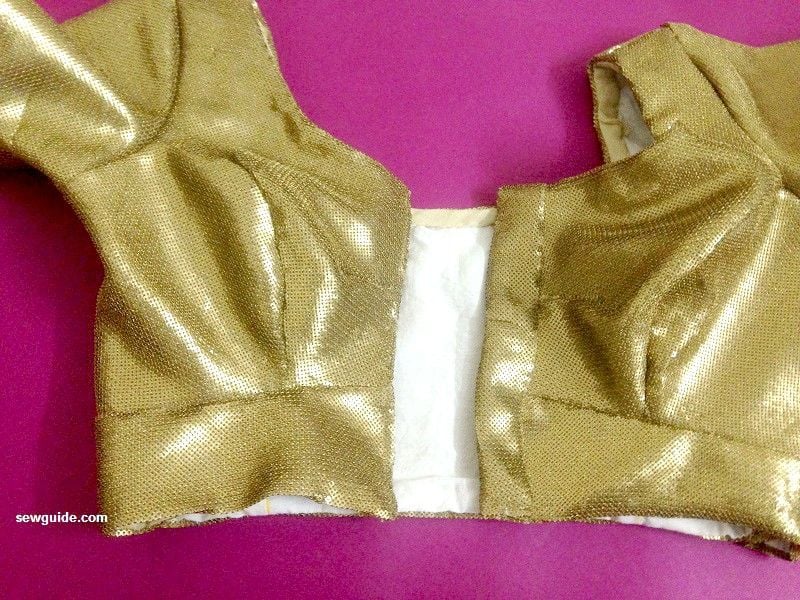
Now we need to attach the front hook plackets. The smaller placket will go to the left side. This will come on the right side of your body when you wear the blouse. The 2.5 inch placket piece is to be stitched to the right side. This is a projecting placket where you will be sewing the bars for the hooks.
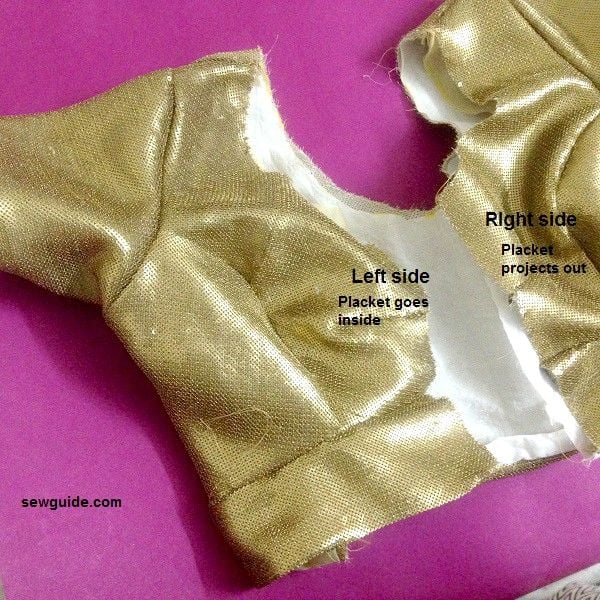
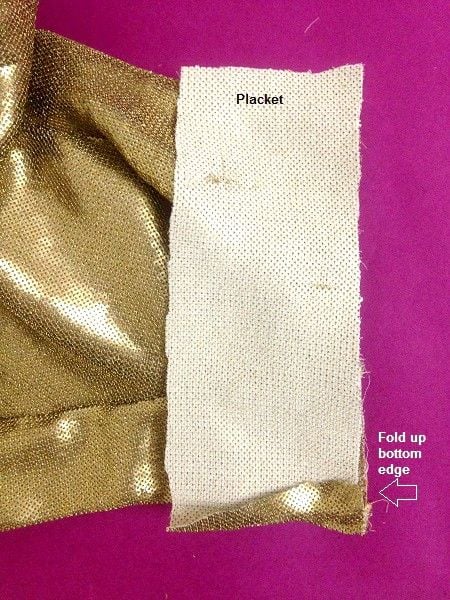
To stitch the left side placket, keep one placket piece and one bodice piece right sides together with bottom edge folded up.The bottom edge should be aligned. Stitch the side edge together with a 1/4 inch allowance. Turn the placket piece to the back of the bodice and pin in place. Top Stitch along the edge. On the wrong side of the bodice, whip stitch the placket piece in place.
To stitch the right side placket which is a projecting placket, stitch the same way as before. Then instead of fully turning to the other side, make a fold of 3/4 inches and then Turn the edge inside. Stitch in the ditch along the seam from the top. Ensure that the backside folded edge is caught in your stitch. You can hand stitch as well.
The right side projecting placket for thread bars for fastening hooks.
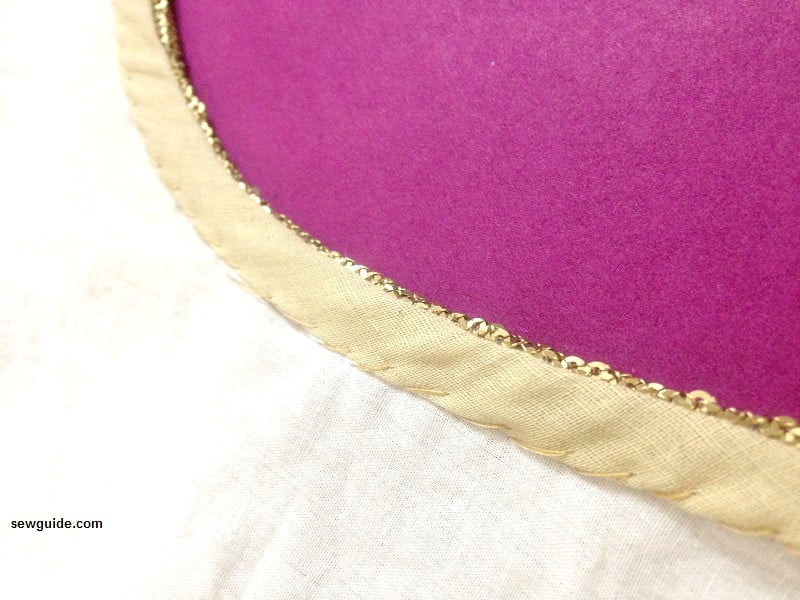
You have to bind the neckline which is practically all that you have left for completing the blouse.Checkout the bias binding tutorial for more details
Turn the binding to the wrong side and hand stitch ( whip stitches) in place with a hand sewing needle and thread
Attach metal hooks and thread bars. Checkout the many ways you can sew hooks on to your fabric
Related posts