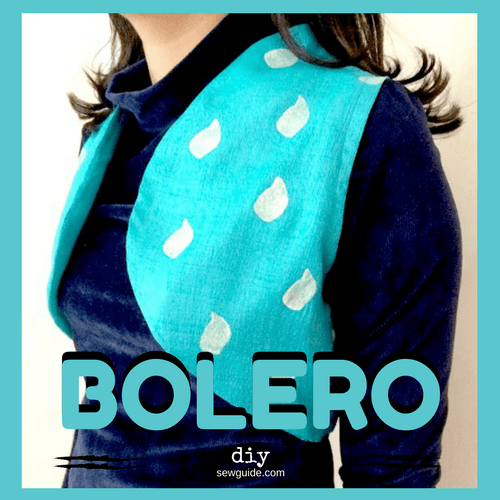
This is an easy sewing tutorial to make a high neck bolero jacket.
A bolero or shrug is a must-have item in your wardrobe. It serves as a cover-up with your favorite camisole top, prevents a chill on a winter night outing, and transforms an otherwise boring outfit when embellished with some pretty embroidery stitches or mirror work. This high-neck bolero pattern will serve all these purposes and more. If sewn in a lace or a sheer fabric, it also fits the bill as a perfect wedding shrug.
This bolero ends at the narrowest part of the body, which is the waist, flatters you, and has a slightly raised back neckline ( a high neck).
Sewing up this one, which fits you to a T, is very easy. Measure your bust round, waist round, and shoulder to shoulder. Get your fabric out, start marking and sewing; in half an hour, you can have a bolero ready. You can add a sleeve if you want to ( Draft the pattern for the sleeves following this tutorial). 
How to draft a Bolero pattern
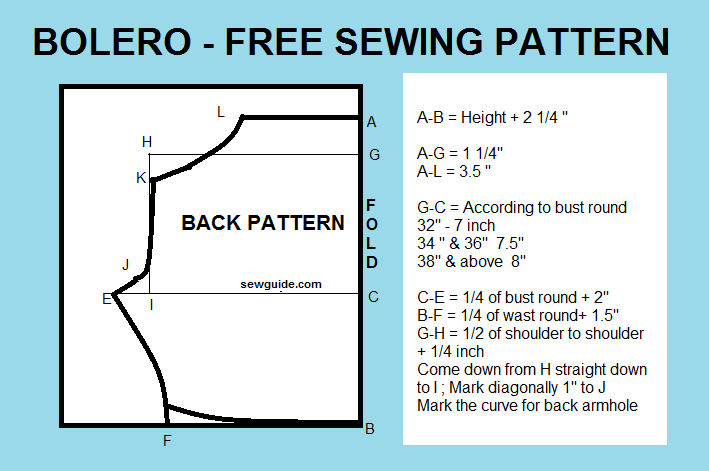
Measure the distance from the shoulder to the waist. Add 2 1/4 inches to it for the high neck and hem. Mark the rest of the measurements as given below. Refer to the picture for details.
A-B = Height + 2 1/4 “
A-G = 1 1/4″
A-L = 3.5″
G-C = According to bust round
- Less than 32″ – 6.5″
- 32″ – 7 inch
- 34 ” & 36″ 7.5″
- 38″ & above 8″
C-E = 1/4 of bust round + 2″
B-F = 1/4 of wast round+ 1.5″
G-H = 1/2 of shoulder to shoulder + 1/4 inch ( reduce this measurement if you want a slightly raised armhole line near the shoulder but only after you have drafted the pattern, and cut the pieces and sewn the shoulder seams- you can cut the portion near the shoulder seams).
Mark K 1/2 inch from H.
Come down from H straight down to I; Mark diagonally 1″ to J
Mark the curve for the back armhole.
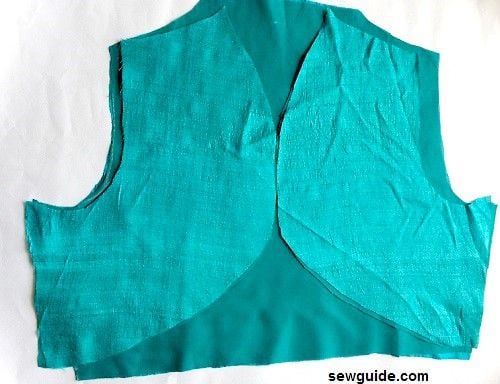
To make the front pattern, Copy the back pattern- Place the back pattern on another piece of paper, and trace around it; (basically make a copy); Just a few cuts as per the picture below, and the front pattern is also ready. The back pattern is one piece; The front pattern has two pieces. I made a self-lining for the front pieces, so I cut four pieces ( Left panel two pieces & right panel two pieces).

Mark M 3/4″ from I
Diagonally mark 3/4 inch from M to N; Join H-N-E as front armhole.
Join L – F in a curve for the front label (Make the curve top wide or lower section wide – your preference).
Cut off the rest of the pattern outside H-L-M -E-H.
When you keep the front pattern on a folded fabric and cut it, you get two pieces for the left and right front pieces.
How to sew the bolero pattern
Step 1
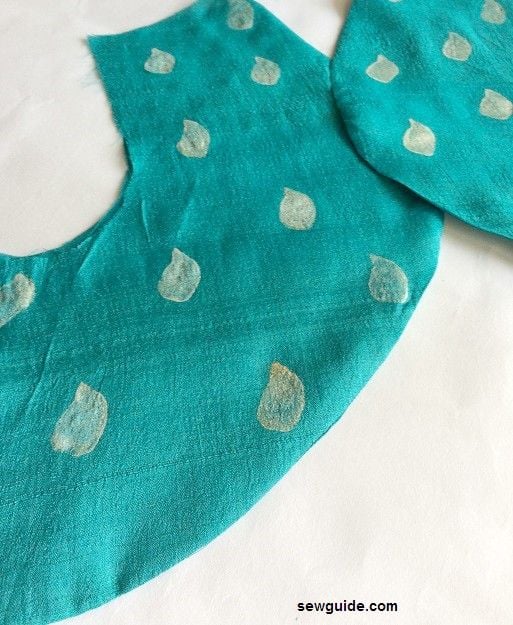
Draft the pattern. First, make the back pattern on paper. Then cut the pieces.
Cut the facing piece for the neck and bottom edge of the back piece as well. A 1.5″ fabric strip will suffice.
I decided to give it some decoration – a touch of block printing. Just used a potato and some fabric paint to make the prints. Checkout the post on blockprinting for more details on this delightful and easy fabric printing technique
 .
.
Step 2
Keep the front piece ad lining piece right sides together and Sew up the front edge. Do not sew the side edges or the armhole edge. Trim the seam allowance and Understitch the remaining seam allowance to the facing so that the lining will roll easily inside)
Turn the piece right side out. Do this for the other side as well. Press in place.
Step 3
Finish the top edge of the back piece – Stitch the facing to the neck edge of the back piece. Turn under and top stitch. Here the lining of the back piece is treated as an underlining ie taken together as the main piece. Keep the facing bias strip rightside together with the neck edge and stitch. Turn under and stitch in place. (Basically binding the top edge).

Step 4
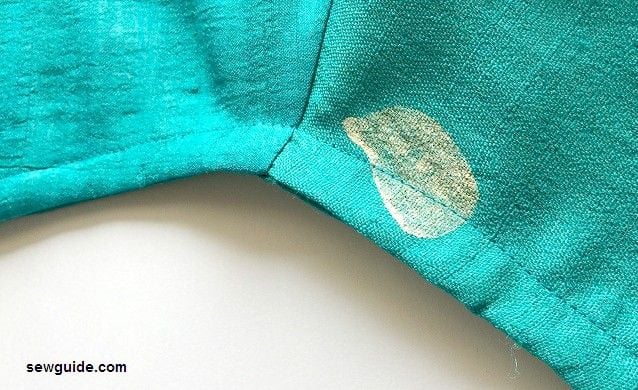
Join the shoulders of the 2 front pieces to the back piece. Trim the seam allowance and finish the edges with a zig-zag stitch.
You may have to tack this seam allowance down and stitch with a hand needle and thread so that it does not poke outside.
Step 5
Bind the armhole edge with a bias strip
Step 6
Stitch a facing strip to the bottom hem of the back piece and stitch or turn under the hem edge and stitch.
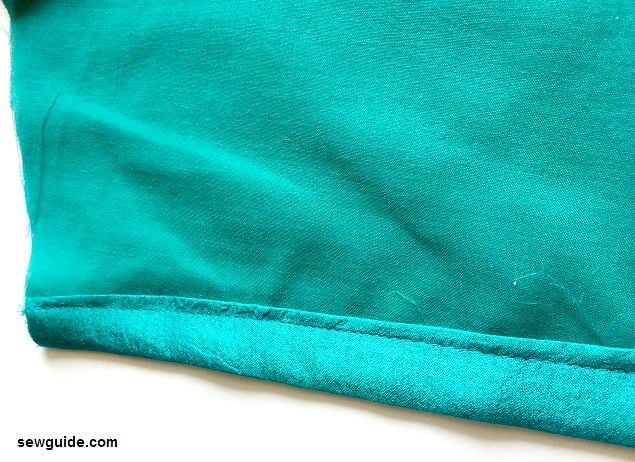
Ensure that the side edges are aligned correctly at the bottom before sewing the facing.
Step 5
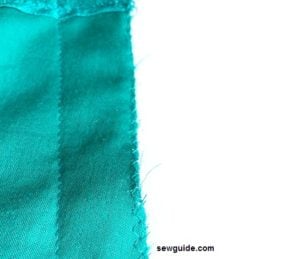
Sew the side edges together with a 1″ seam allowance.
Related posts : What is a bolero?; Make a blanket cloak; Make a slouchy velvet blazer jacket; Make draped jacket; Make a jeans vest
Hi!
Can you tell me what seam allowance is included in the pattern draft? I see from the instructions that it’s a 1″ SA at the side seams, but I don’t know what the others are. Thanks!
1/2 inch
Where is the printable pattern?
You have a shoulder slope of 1 1/4″ when the usual is 1/2″, I use 1″ because I have sloping shoulders. When I tried your measurements the finished item had to be cut down and restitched,my daughter’s shoulder doesn’t slope that much. Great pattern,had forgotten how great these jackets look, takes me back decades to when my mother made me one as a child, thanks for the happy memories.
Sorry nevermind! I figured it out . I think! K is the shoulder to waist measurement without the 2 1/4 inches added to it right? And J is obviously figured after measuring from H to I…. Sorry I’m a beginner at this. I figure things out as I go pretty much. Thanks again for the tutorial and please do correct me if I’m wrong about how I figured it out. Thanks!
What are the measurements from H to K and K to J? Thanks for the tutorial!