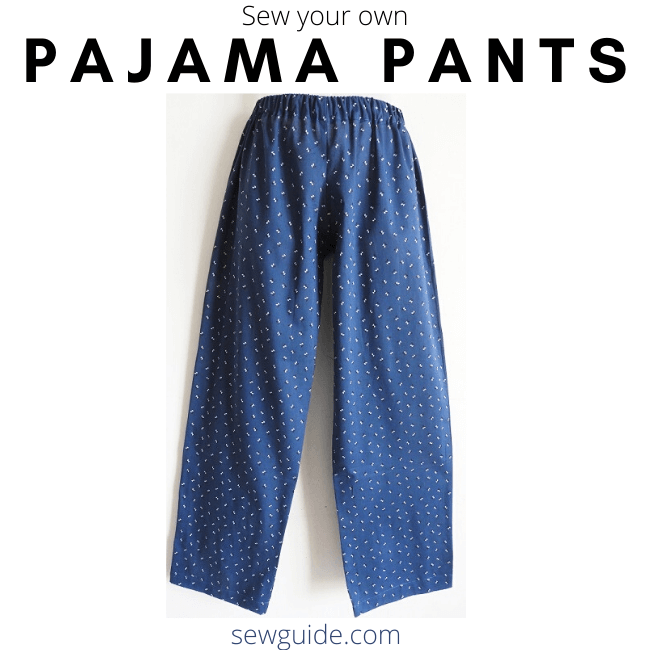
A goodnight sleep is not much to ask for, after a gruelling day of work – be it at the office or the home. At night nothing gives me a peaceful sleep than slipping into a nightwear after a warm bath – be it a nighty (Checkout the tutorial to make a nighty) or my pyjama pants and tshirt combo.
I am especially partial to the Pajama pants. They are the best wear for relaxing or sleeping or lazing around the home comfortably and modestly. And I will teach you how to make pajama pants in different ways.
Fabric suitable for the Pyjama Pants
Comfort is the top qualifier for choosing the fabric to sew the pajama pants. Soft cotton, Flannel, fleece, poplin, rayon – plain or printed ( checked or floral) ; any lightweight fabric can be turned into a comfortable pair of PJ pants. But nothing can beat the cotton ofcourse. Breathable comfortable and lightweight , what more do you need for relaxation.
I love making Pajama pants in special prints even psychedelic prints. Best place to boldly wear them – home. (Though I have been known to go out in them too.)
How much cloth is needed to sew the Pajama pants
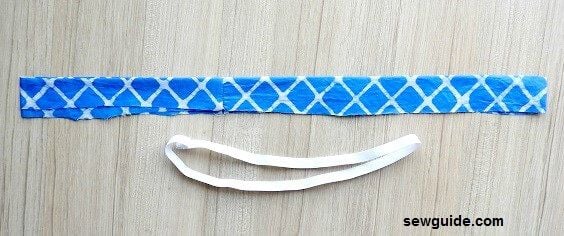
Measure from where you want to tie the pants to the hem. Double this and add .25 meters to this measurement.
Measure your body. Checkout the post on correctly measuring the body.
The Pajama pants you buy at shops usually have an inseam length of 29.5 inches.
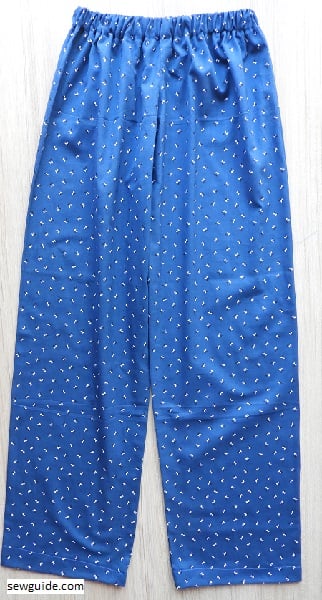
Method 1. Very easy to sew Pajama Pants tutorial
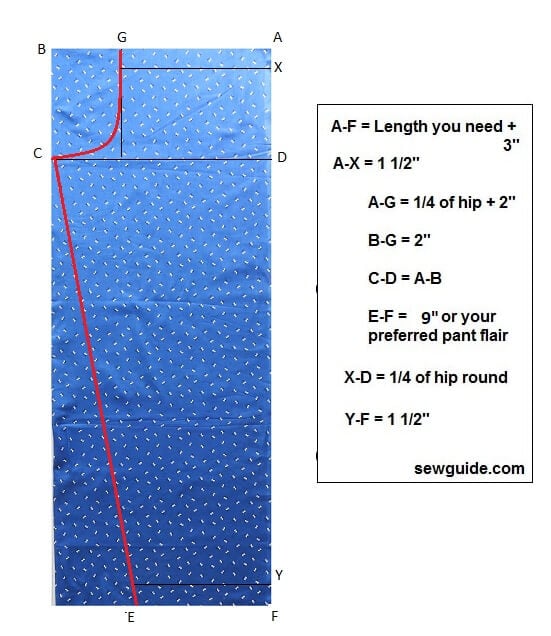
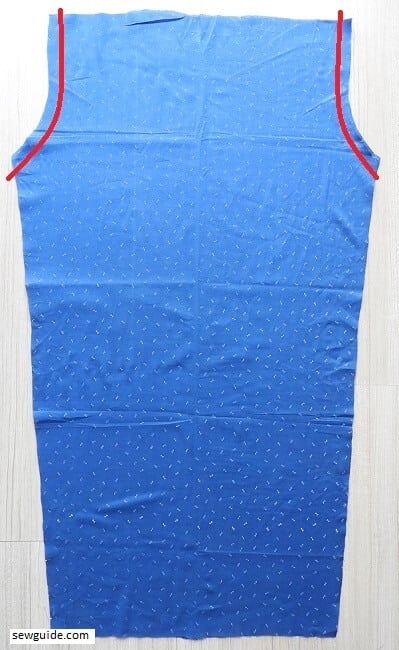
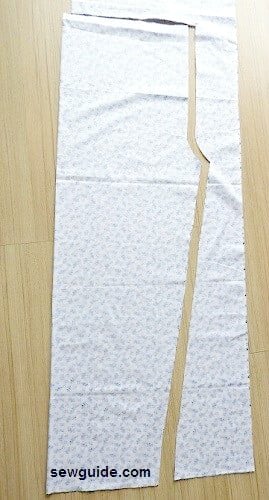
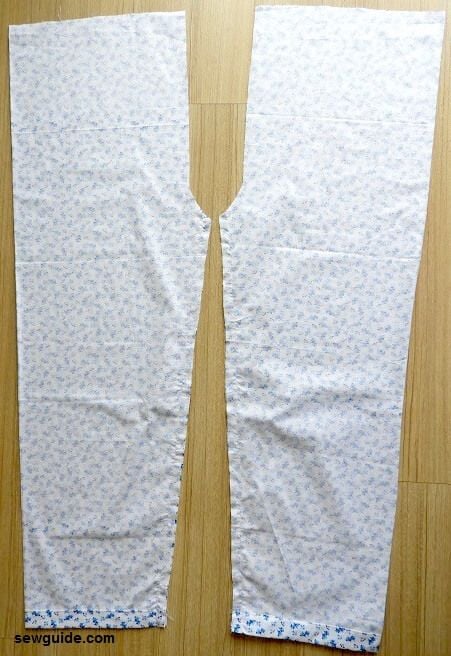
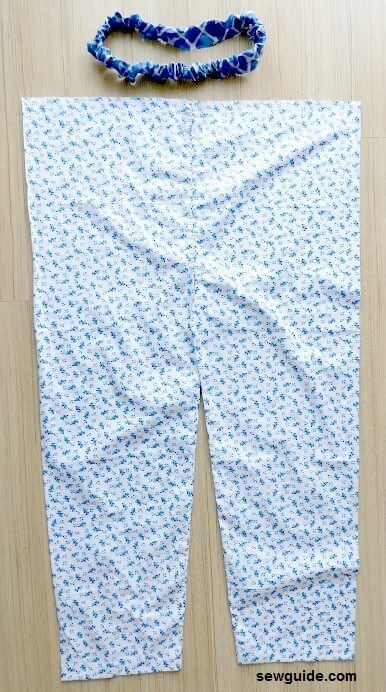
Cut out two fabric pieces of length equalling the length of the pants you need plus 3 inches. Fold by the center and mark as the pattern given below.
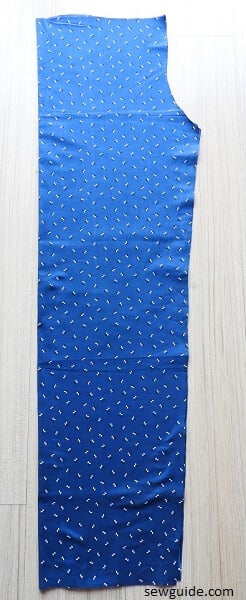
You will get two fabric pieces like this.
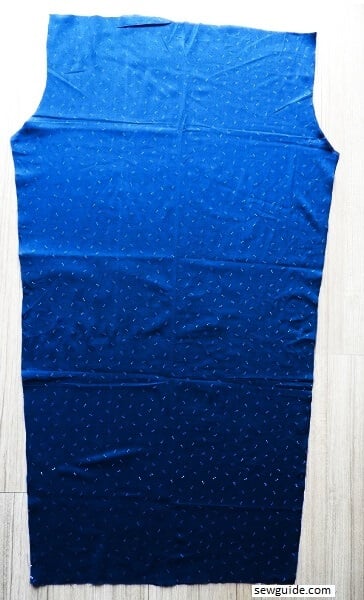
When you open it up it will look like this.
How to sew the Pajama Pants
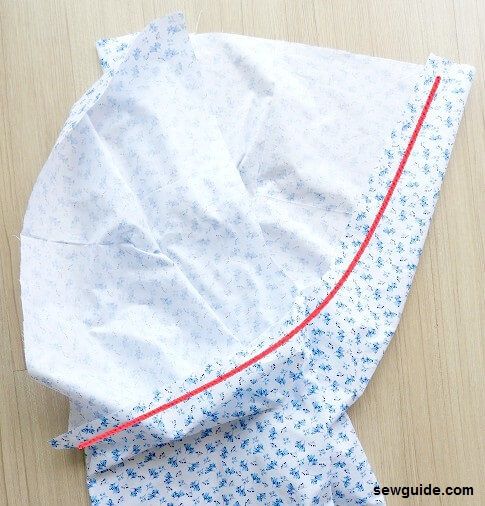
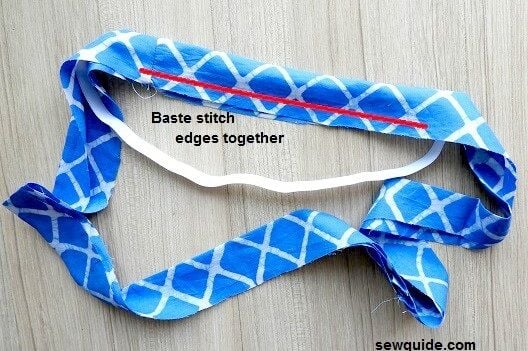
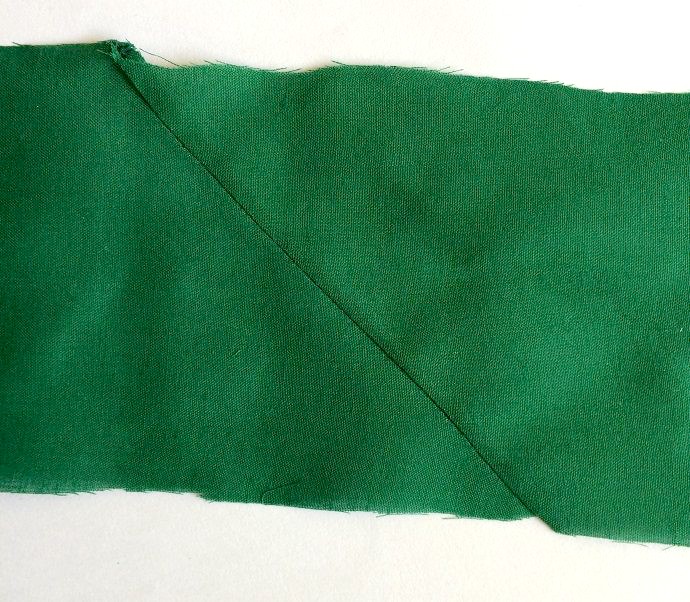
Open up the two pieces and Keep the two pieces and place them rightsides together to the inside. Sew the crotch seams together – the red lines in the picture below.
Bring the crotch seam to the middle.
Now sew the inseam – the leg seams.

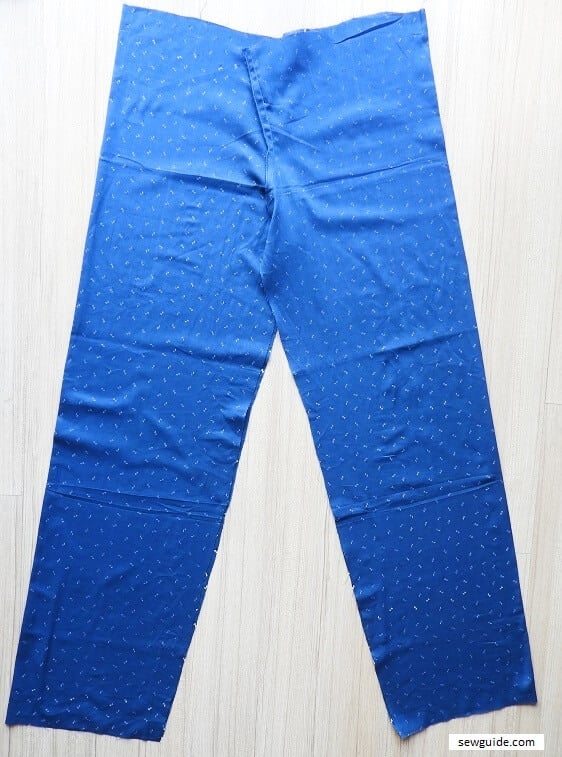
Turn the pants rightside out.
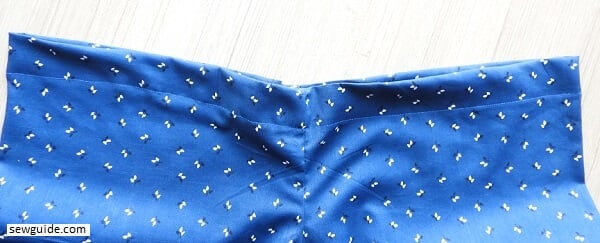
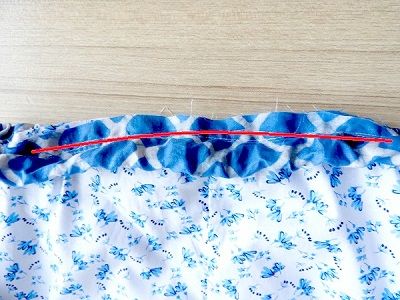
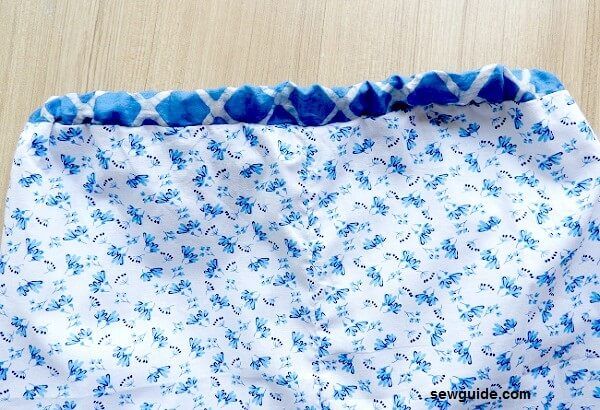
Turn the waist edge to the inside and sew a casing for elastic. Leave 2 inch unstitched so that you can insert the elastic.
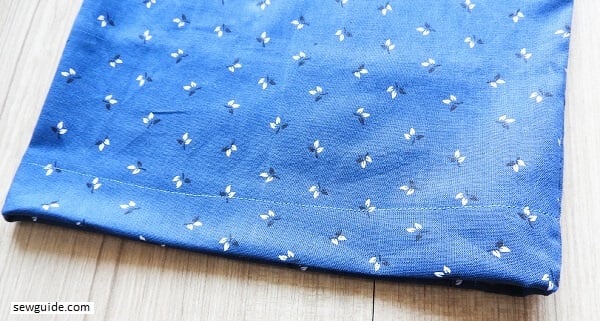
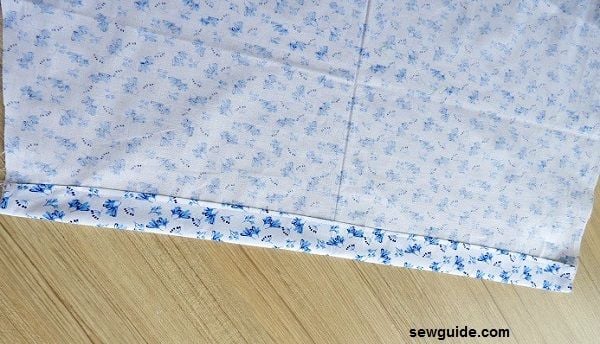
Sew the leg hem.
Insert the elastic through this unstitched space.Sew the elastic edges together.
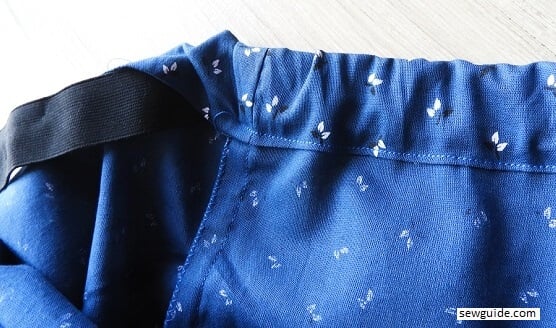
Sew the unstitched portion shut.
Method 2. Pajama Pants tutorial – seperate waistband
This gives you a high waist loose pyjama pants.
Step 1. Cut out the pattern pieces

Cut out the pattern pieces ( 2 legs ) after marking it on folded fabric as in the picture above
If you want an easier version ( with a turned under waistband rather than a separate fabric waistband) you can add 1.5 inches to the top edge up from A & B.
Reminds me of the heroine of the movie Enchanted cutting curtains to make her dresses
Step 2. Hem leg bottom edges
Hem the pant leg bottom edge – both should be the same length after you have turned under the hem and stitched it. Keep it together and ensure they are the same height, as you sew.
Step 3. Join the leg inseams
Now join the two legs separately at the inseams, right sides together. Turn legs right side out
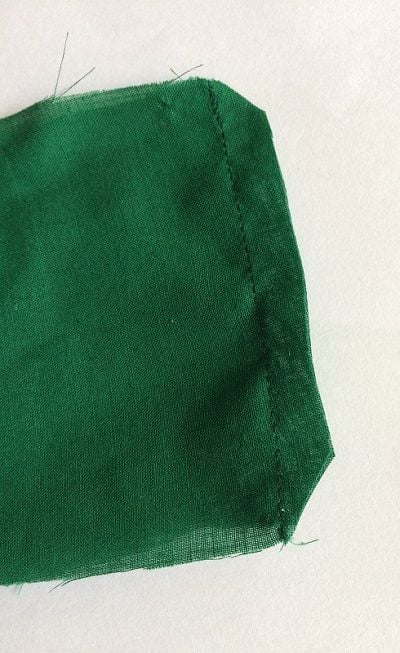
Step 4. Join crotch seams
Keep the crotch seam of the two legs together (right sides together) and stitch. Make two three stitching lines. This is a high-pressure area and you need sturdy stitches.
Your pant will almost take shape now. If you skipped the separate waistband route, you can just turn under the top edge for a casing for the elastic now. Leave 3 inches unstitches and Insert elastic with a safety pin through this opening.
Step 5. Make and join waistband
If you want the separate waistband go ahead to the next step
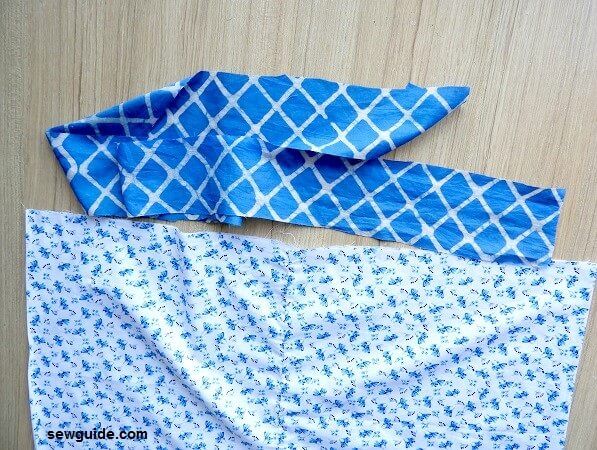
Measure the top edge of your pants. Add I inch to this measure. Cut out a fabric piece 4 inches wide in this length measure for your waistband. You can totally skip this if you want a simpler pant but as I said earlier you should have added 1.5 inches to the top edge earlier. I wanted a different coloured waistband.
Make the waistband
Measure your waist ( or where you wear your pants) snugly with the elastic. cut this out with 1 inch extra for seam allowance. Make a tube by joining the elastic edges. Stitch multiple times to secure it. Join the waistband piece also at the short edges to form a tube. Fold it by the middle.
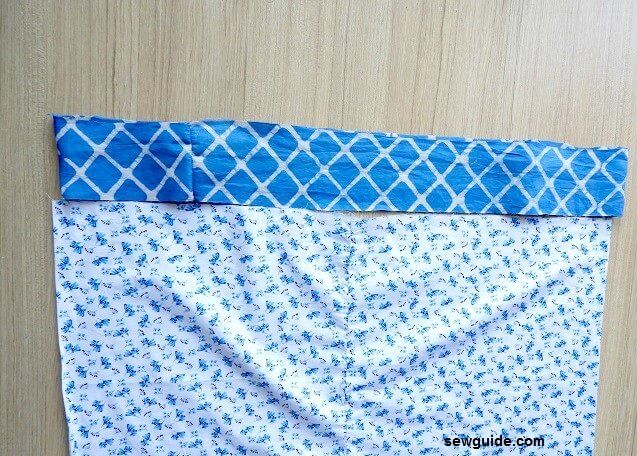
Keep the elastic inside the band and make basting stitches to keep it inside, joining the edges of the waistband piece. As you sew elastic will need to be adjusted backwards because it is smaller. It is easy to do it.
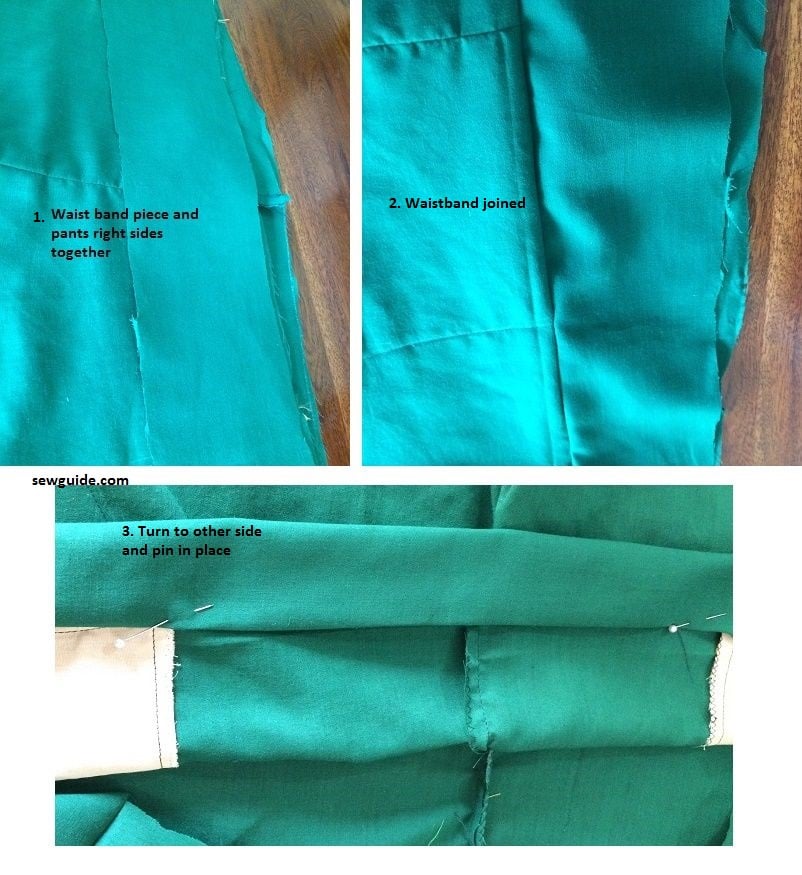
Now you have pants and waistband and they need to be joined together forever.
Keep the waistband and pant edges together and stitch them together.
Method 3. Pyjama pants with pockets
How to make the Pattern for Pyjama pants
Fold the fabric you have first by half lengthwise and then by half again width wise. Checkout the post on cutting fabric for details on this fold. Start marking 1″ from the top edge.
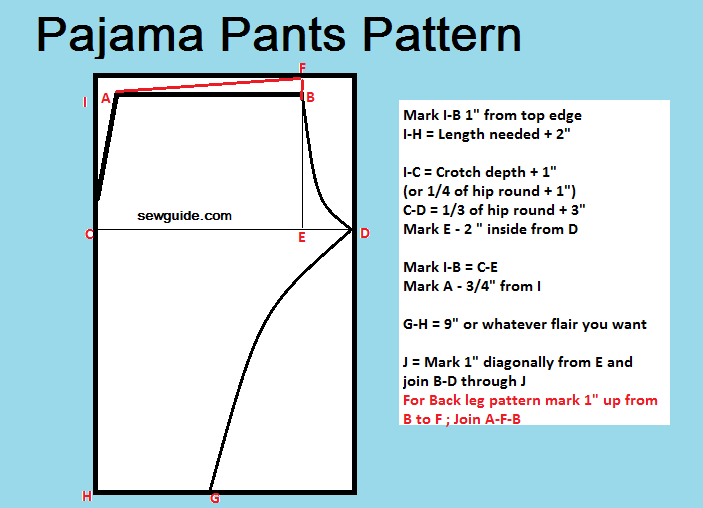
Start marking the following
Make a line I-B 1″ from the top edge of the fabricI-C = Crotch depth + 1″
(or 1/4 of hip round + 1″)
I-H – Height of the pyjama pants needed + 2 ” ( for top edge seam allowance & bottom hem)
C-D = 1/3 of hip round + 3″
Mark E 2 ” inside from D
Mark I-B = C-E
Mark A 3/4″ from I
G-H = 9″ or whatever flair you want
J = Mark 1″ diagonally from E and join B-D through J
For Back leg pattern mark 1″ up from B to F ; Join A-F-B
Join D-G with a slight curve
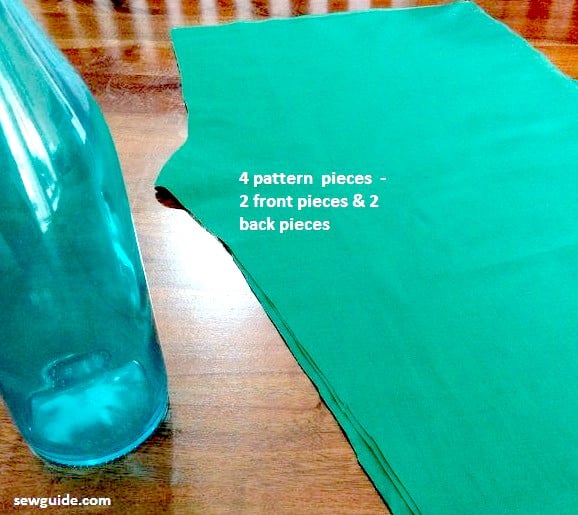
Cut the back leg pieces remove the two pieces, then cut the front leg pieces.
BACK LEG PATTERN – Cut along A-F-D-G-H-C-A
FRONT LEG PATTERN – Cut along A-B-D-G-H -C-A
(Please note that the back leg pattern is slightly raised in the back center portion to accommodate the back depth)
You need to cut out a waistband piece ( checkout the directions below) and some elastic.
How to sew Pajama Pants
Step 1
Cut out the pattern pieces
You have 2 front leg pieces and 2 back leg pieces
Ensure that you have cut the pieces from a central fold fabric piece so that the the pieces are mirror images. If you have fabric with no distinct right and wrong sides this doesnot matter, but you generally have fabrics with right sides and wrong sides so you have to be careful when you cut pieces so that you donot get 2 left front pieces or 2 right front pieces- which is a disaster I have made once or twice. You live and learn; rather cut and learn.
Step 2
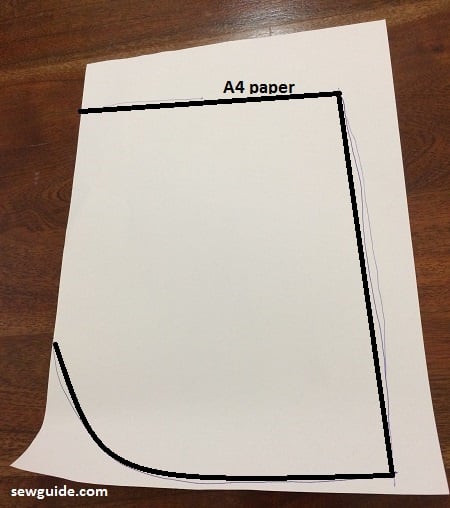
Make pattern for the sash pocket. Keep the top of the pant front piece (outer seam) on an A4 paper some one -two inch from the top and side of the paper. Trace the outline of the top edge and side edge. Remove the paper. Mark the rest of the pocket fully on the paper.

Complete the pocket pattern by curving the left side as in the picture below. Cut it out. This is the pattern for the pocket.
Step 3
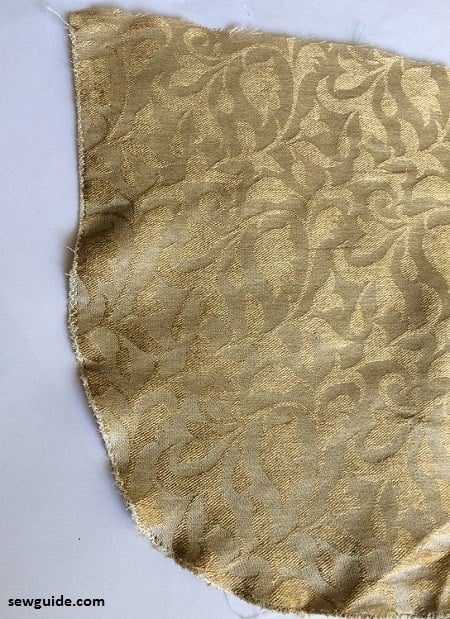
Cut out the pocket piece from the fabric. I have cut a contrasting piece. You can cut from the same pant fabric . Finish the edges with a zig zag stitch or overcast stitch or serger.
Ensure that when you are cutting left and write pocket pieces they are mirror images ; and not the same. Just like for the pant pieces. You can get these by cutting fabric on fold.
Step 4
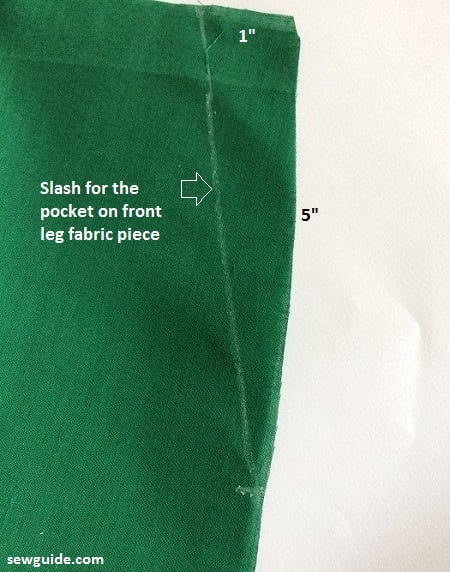
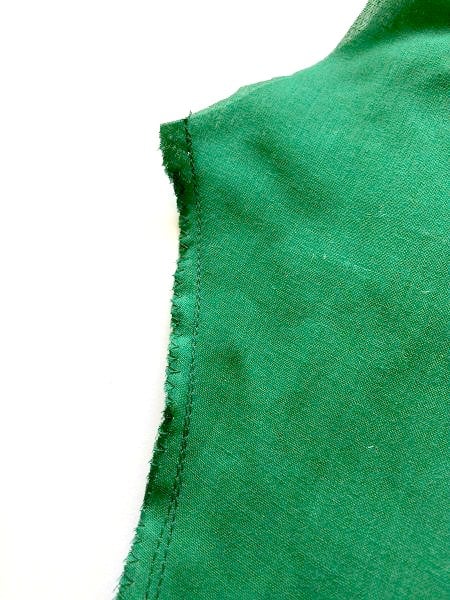
Prepare the pant pocket slash opening. For that you have to cut away the slash . Mark 1″ from the outer side edge of the front pant piece . Mark 5 inches down. Cut the slash. You can change the dimensions if you want a deeper or wider pocket; just ensure that the pocket piece will be extending atleast 2 inches from the slash opening.
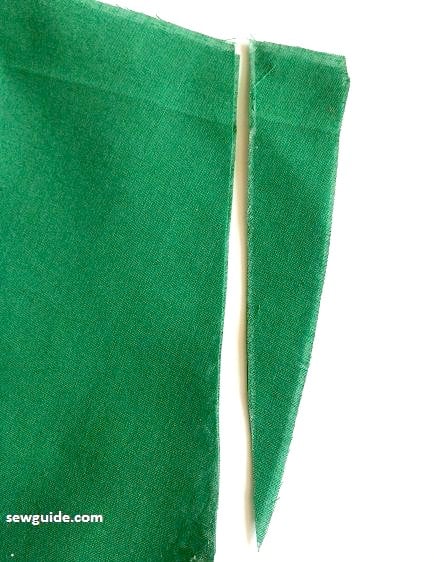
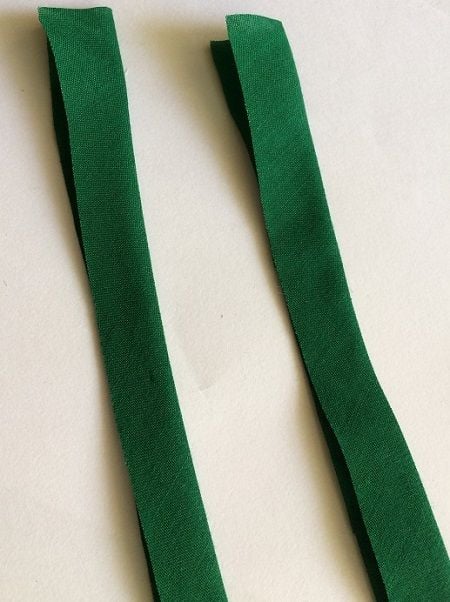
Cut two fabric strips 1.5″ by length of the slash + 2 inches . Fold them by half and press.
Keep the piece on the slash opening from the right side, raw edges together. Stitch along the edge with a 1/4 inch seam allowance.
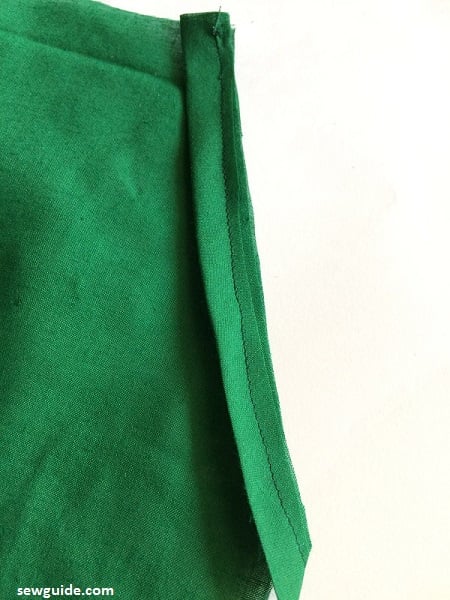
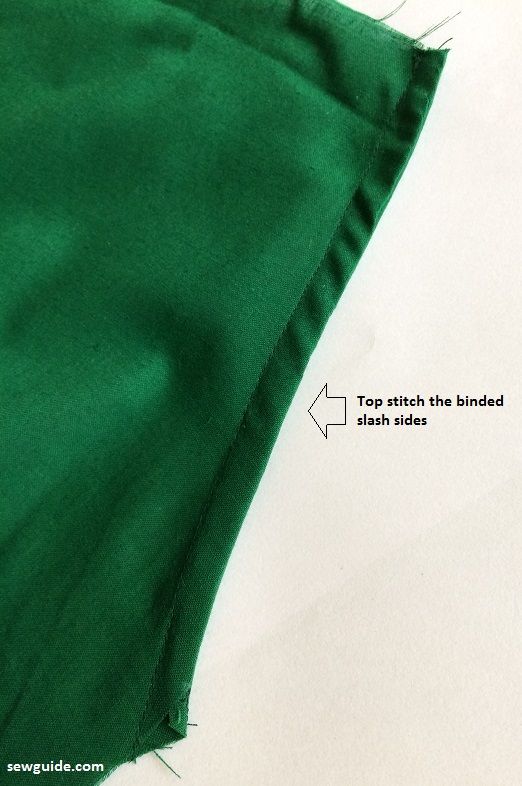
Turn the binding to the wrong side. Pin in place and top stitch. Your slash opening facing is done
Step 5
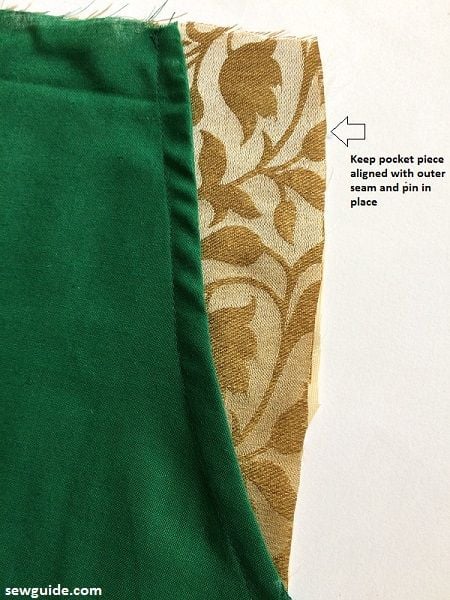
Keep the pocket piece right side up behind the pant front piece and pin in place.
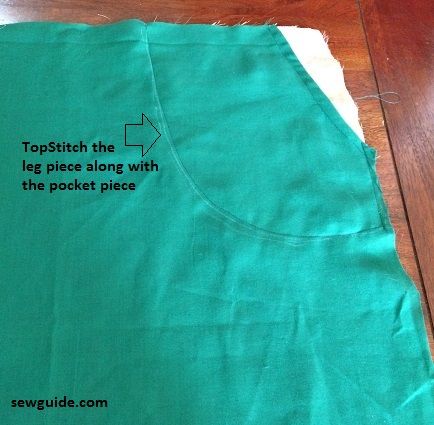
Step 6
Mark the outline of the pocket piece on the top of the pant piece. Stitch from the top of the pant piece . This will join the pocket to the pant and complete the pocket construction
Step 7
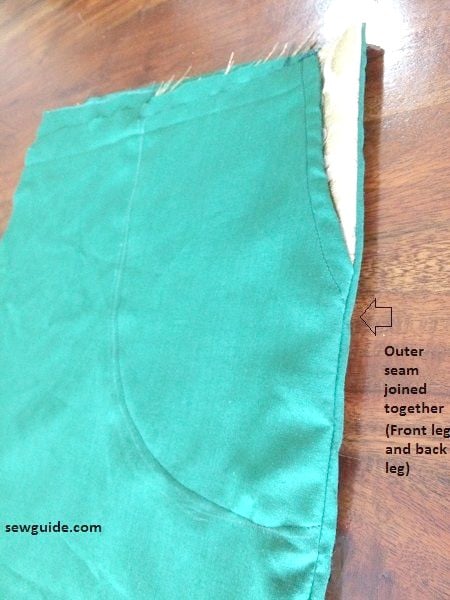
Stitch the front leg piece and back leg piece outerseam, right sides together.
Step 8
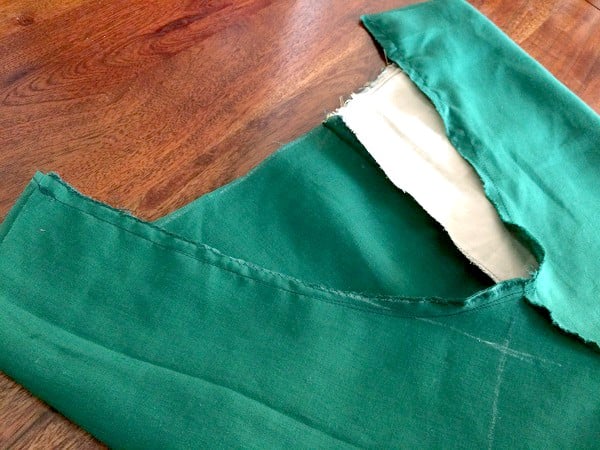
Join the Inseams of the legs, right sides together till the crotch line ( donot sew up the crotch line now). You now have two pant legs ready.
Step 9
Join the crotch line of the pant piece.
You can do this any way. I have inserted one leg inside the other, the outer leg is turned inside out and inner one right side out. Now the right sides are pressed together and the crotch seam is easily accessible to be stitched together
Now you have the pant ready
Step 10
Prepare the waistband. Measure the top edge of the pant piece. Add 1 inch . This is the length of the waistband piece you need. The width of the waist band piece should be double the width of the elastic you have + 1/4 inch ease + 1 inch seam allowance.
Join piece together diagonally you donot have enough length.
Join the waistband edges together with 1/2 inch seam allowance. You have a tube which is your waistband. Snip the edges at the seam allowance as shown in the picture
Step 11
Join the waistband to the pants by keeping the tube wrong side up with the pants inserted inside. Join the raw edges. toether.
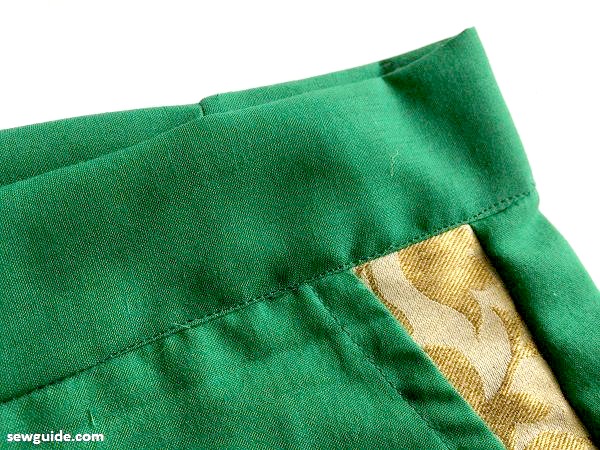
Turn the waistband piece remaining edge to the other side. Pin in place, enclosing the fabric edges inside. Stitch from the right side – so that the line doesn’t go wonky on the face of the pant. You can also stitch in the ditch. Actually I attempted to stitch n the ditch but sadly looks nothing like the ditch stitching.Leave a 1″ – 2″ opening n the back for inserting the elastic.
The waist band is now in place.
Step 12
Insert elastic inside the waistband with a pin. To know the length of elastic you need measure the waist round and then minus 1″ . Or place the the elastic snugly around the waist.
Sew up the elastic edges with a couple of zig zag stitches. Stitch the opening closed.
Step 13
Hem the pants by blind stitch. Checkout the tutorial to make a blind stitch hem by hand and by machine. If you have a very deep hem it will be difficult to hem. So make no more than 1 ” deep hem turning.i.e 1.25 inch total for turning inside twice.
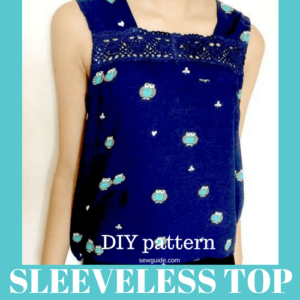
A sleeveless top ( Free sewing pattern and tutorial) to go along with it.
When you are making pants to wear outside the bedroom, going to the trouble to add pockets and your waist is much smaller than your hips, you may not want the bulk that a waistband the width of the top of these pants would provide.
You can use a knit for the waistband. Cut it long enough to easily go over the hips when stretched. A knit fabric will not need the seam allowance on the back of the waistband turned under. It can be finished by stitching in the ditch from the right side and with the other seam allowances inside the waistband.
Hi
Thanks for this tutorial good explanation
I have made for my grand daughter
Elastic length measurements pls
Usually it is (measure round where you will wear the waist minus 3 inches ) plus 1 inch for seam allowance- this will stretch to accomodate your waist or try on your waist . Cheers
Thanks for the patterns. I tried the first one as a very newbie sewist and ended up with ’90s low-rise style trousers! I used 1/4 of hip measurement for X-D but found it was nowhere near enough. Next time I’ll add a lot more. It would be really useful to have an image of someone wearing the finished item just to see where it sits, and maybe have an “add more for a higher waist” note next to this measurement.
Lovely and we’ll detailed, will try mine
Hi,
Is a seam allowance included in the pattern measurements? If so how much? Or do I need to add it after I draw it out.
Hey for method 2 is c-d supposed to equal 1/4? 1/3 would seem to be too big
Hi Haley
C-d is 1/3 of hip alright – you can reduce the extra allowance from 3 to 1
Hello for the pant patterns can people tell me what A=? B=? C=? D=? E=? F=? G=? H=? I=?
Please teach Me how to cut trousers in different styles
Hi, Can you tell me what “Stitch in the ditch” means?
stitch in the ditch means sewing as close to the seam as possible so that the binding is caught in the stitches
It means to stitch from the right side in the groove, or ditch, formed by the previous seam.
Good tutorial
Good tutorial
Hi,
Thank you for this tutorial – I have made it for my daughter