These wrap pants are also known by other names like Fisherman’s Pants, Yoga pants or Samurai pants. They are very loose comfortable pants with waist ties. This is a tutorial to sew two variations of these pants.
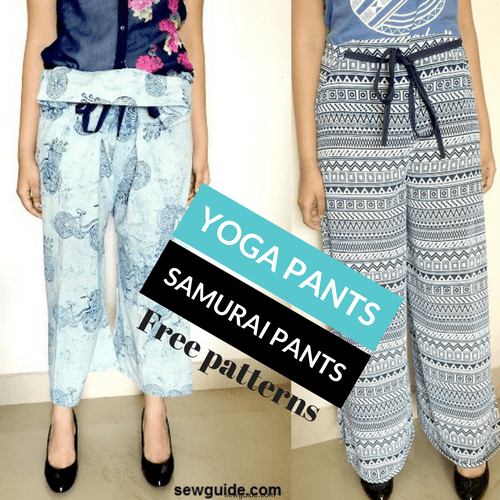
This type of pants can be made in two styles – The yoga pants style has waist ties at the front and back and a side open pattern where as Samurai pants has a strap on the back which ties the loose waist of the pant in the front and results in a folded waistband.
The two patterns are given below; they are very very easy to sew.You can make a dozen of them in an afternoon. Maybe I am exaggerating, but you can try 🙂
The use of these pants are many – they are the perfect to lounge around at home or for a casual outing .
The yoga pants are named so because they do not constrain your movements – the open side seams make them comfortable to move around. The samurai pants are also the same – these free-size pants wrap around your waist with the waist ties that you tie around – so it can be as tight as you want to be – perfect for mothers-to-be with growing bellies.
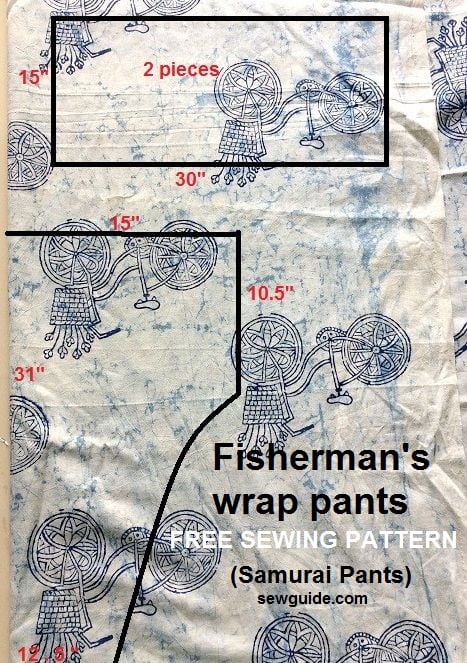
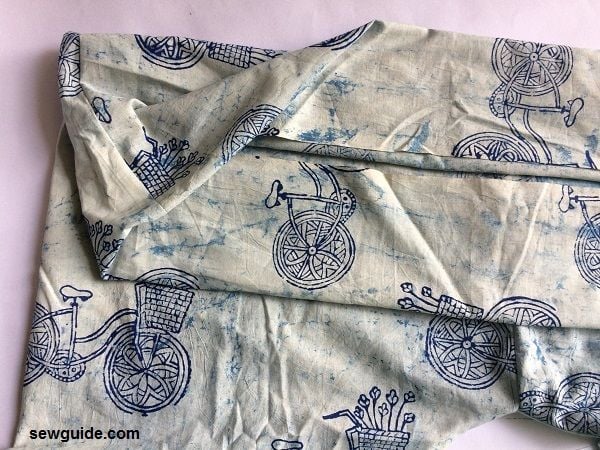
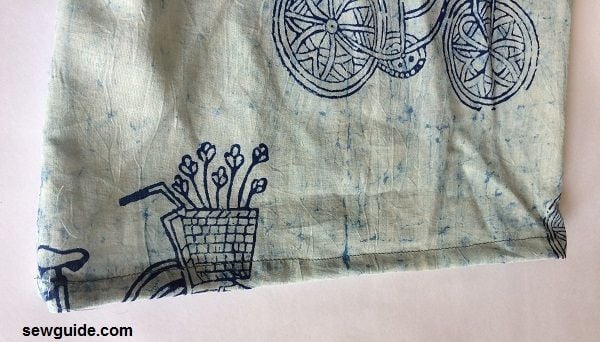
The Fisherman’s wrap pants – samurai style

Full length of this free-size pants pattern (after the top edge is folded down) – 35″
Full waist will be 58″ before you tie it around the waist.
Step 1
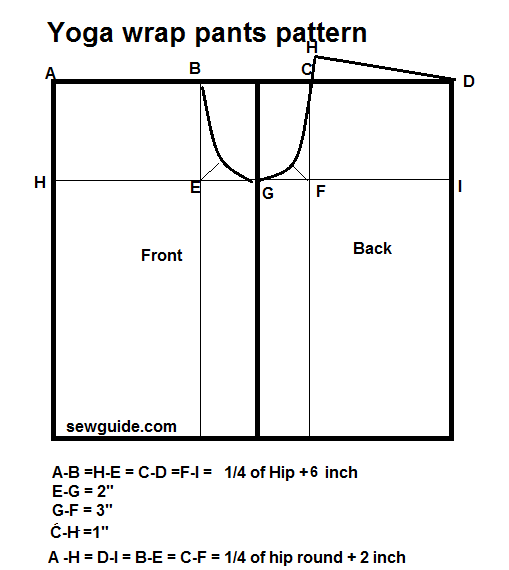
Cut out the patterns as per the pattern below. Remember that the pant legs are cut on fold.
Fisherman’s wrap Pants pattern
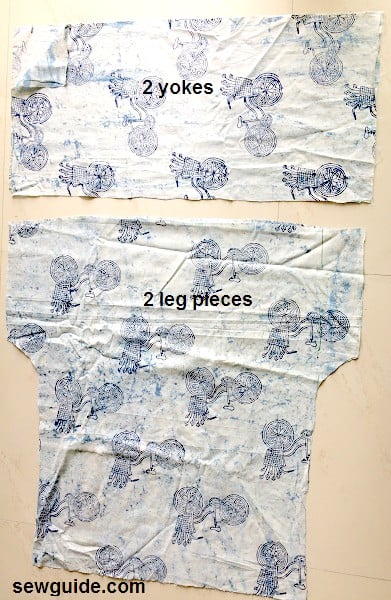
Step 2
Cut out the patterns . You will get two pieces for the yoke and pant legs, as given below.
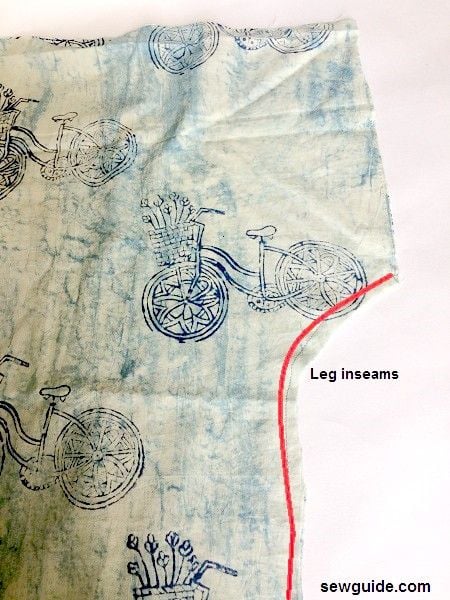
Step 3
Join the leg inseams together. Keep the edges rightsides and stitch each leg.
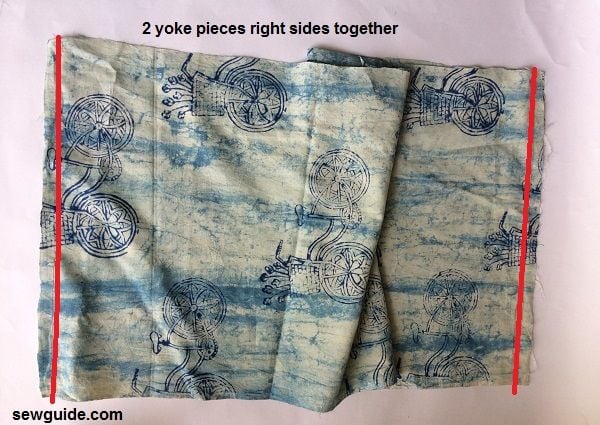
Step 4
Join the side edges of the yoke pieces together (right sides together). You will get a tube.
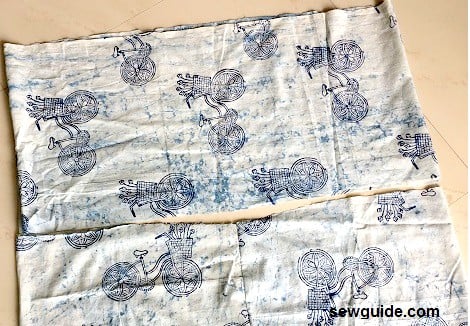
Step 5
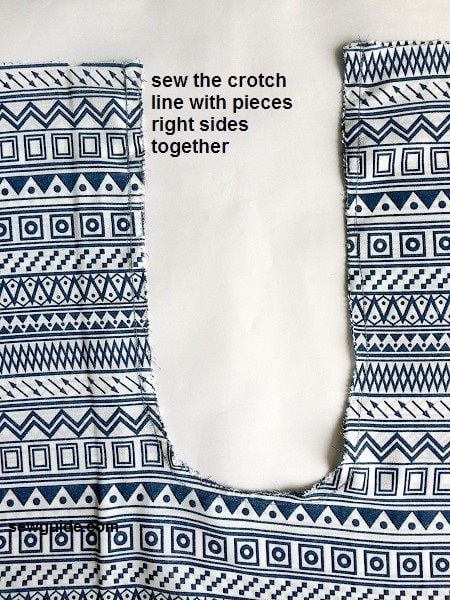
Join the two leg pieces together at the crotch line. Just keep them together rightsides together and stitch with a 1/4 inch seam allowance.

Now you have a leg piece like this one
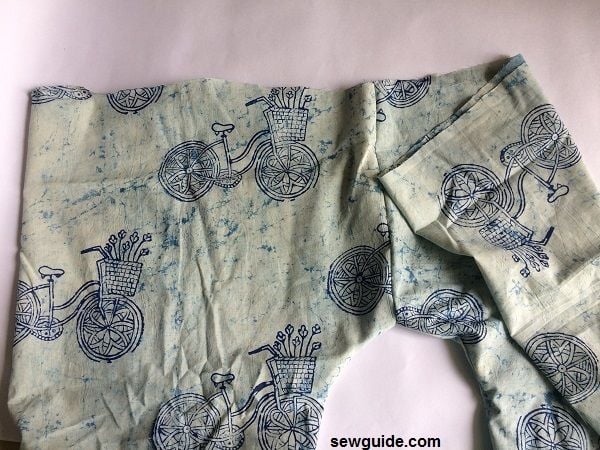
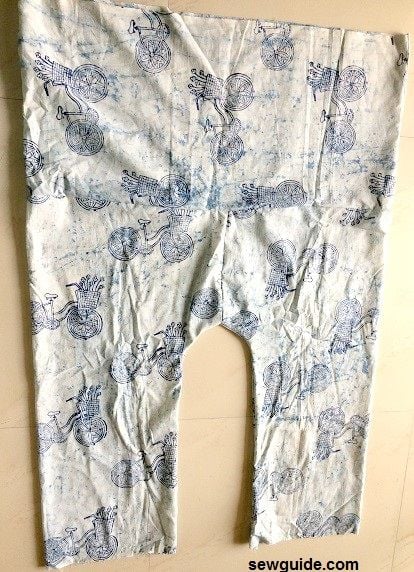
Step 6
Now you have to join the yoke tube to the legs. Insert the legs (right side out) into the yoke tube piece (wrong side out). Sew edges together.
Final piece will look like this.
Step 7
Turn the top edge of the pants to the right side – about 5 inches would do. I have selvage on top, but if you have raw edges turn the raw edge 1/4 inch first and then turn 5 inches.
Step 8
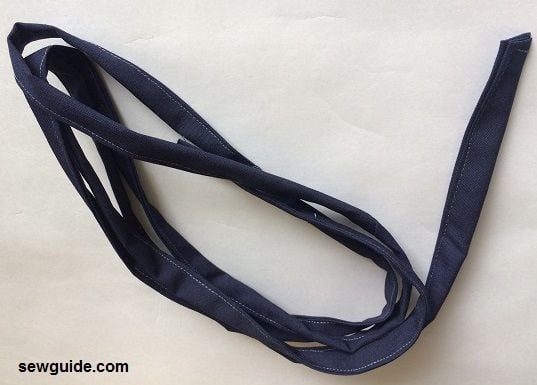
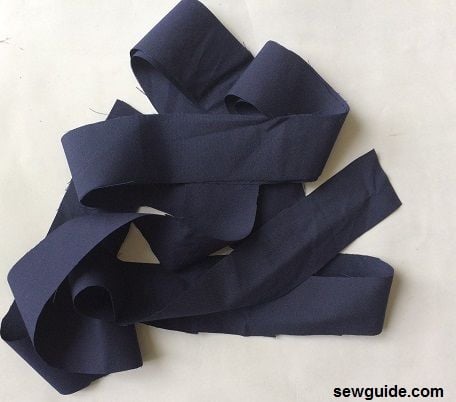
Make the waist tie.
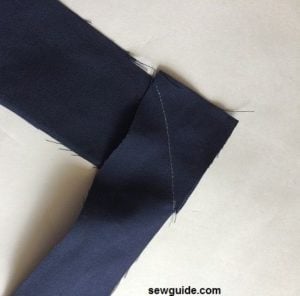
Cut a piece of fabric strip 3 inches wide and 60-65 inches long. Make a strap with this by double folding it. (Turn the two edges inside and the fold by the middle).
Remember to Turn the small edges inside 1/4 inch before the longer fold. Stitch the edge. You will get a long strap. If you do not have a long fabric piece join small pieces together with a diagonal stitch like here.
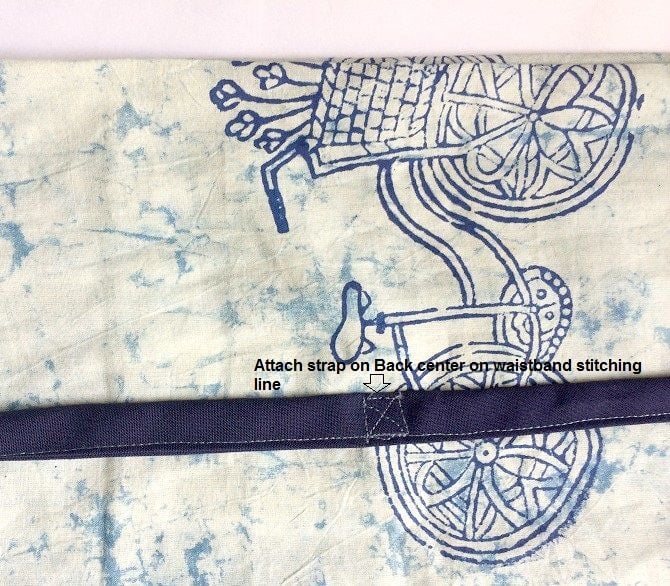
Step 8
Keep the strap’s middle on the back of the pants ( on the stitching line you have made by folding under the top edge). Stitch in place. Make secure stitching.
Step 9
Now Hem the pant legs. Just turn under the edges twice or do a blind hem.
Related posts: How to sew a machine stitched hem; How to hand hem; Blind hem stitch; How to hem pants.
How to tie the Firsherman’s pants – Sumurai style
Put on the pants. Get hold of the strap ends from the back to the front. Your pant waist will be bigger and looser; fold this excess fabric at the waist to one side or fold from either sides to the middle. Use the waist tie to hold the fabric together. Now fold down the fabric above the waist tie. This will give the look of a wide belt.If you are still confused checkout this video
The Yoga wrap pants – sewing tutorial
This is a very comfy pant with side seams open. Because of the overlapped side panels, nothing much is revealed.
The best fabric to make these pants is cotton knit. But I have made them in polyester, and they are just as nice.

Step 1
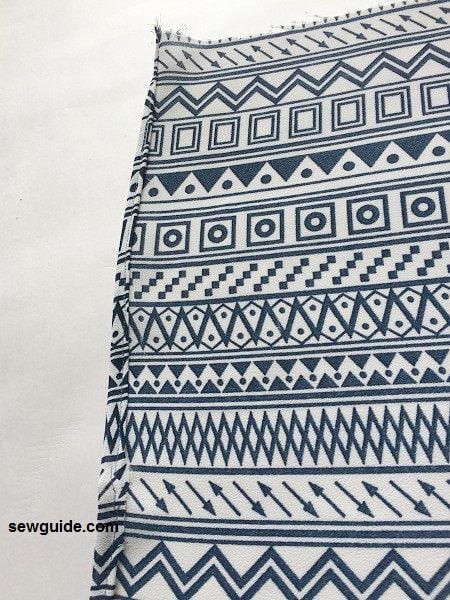
Mark the pattern on the fabric as per the pattern given below.
Step 2
Cut out the fabric according to the pattern.
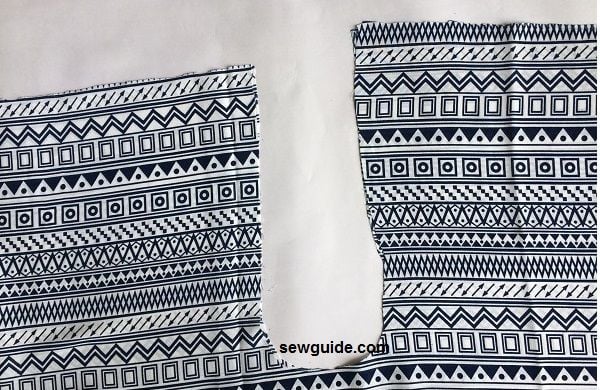
To easily cut it, fold the two fabric pieces by the center, and mark the two crotch lines. Cut out the front crotchline.
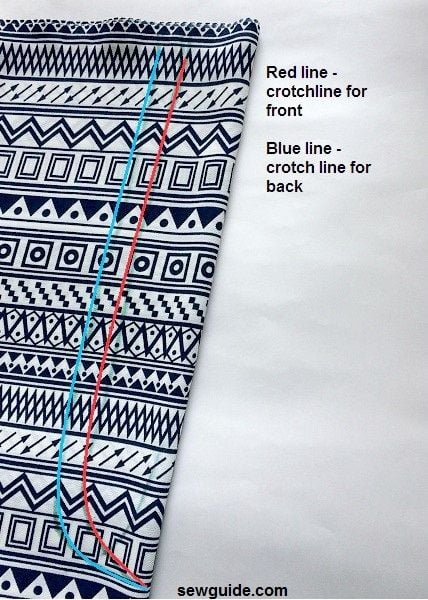
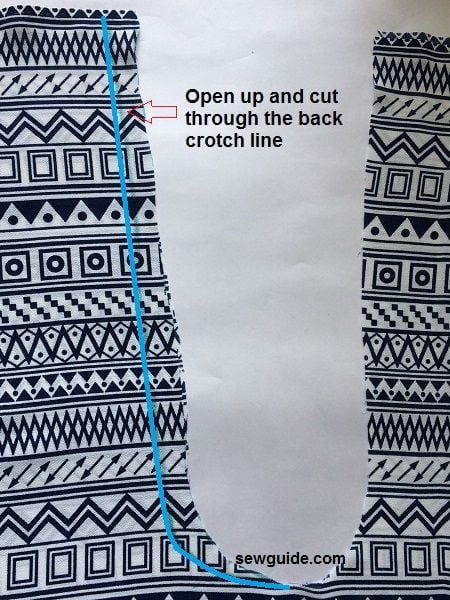
When you open it up, You will get a piece like this here. Now cut out the back crotch line on one side.
Now cut out the waistline as per the pattern. Remember that pattern is inclined (rising) only on one side ( for the back).
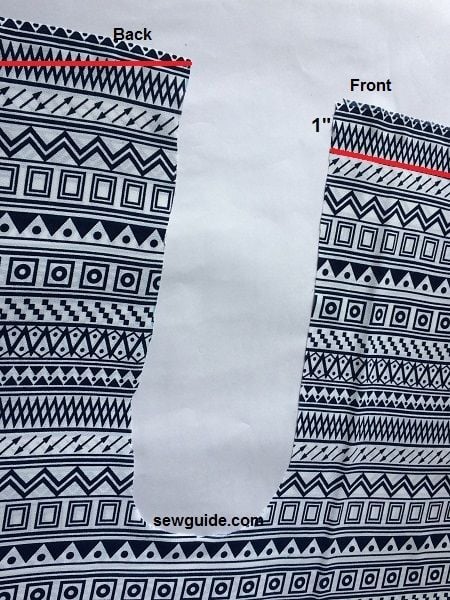
You will have this piece.
Step 3
Keep the two pieces right sides together. Join the crotch line with a 1/4 inch allowance.
Step 4
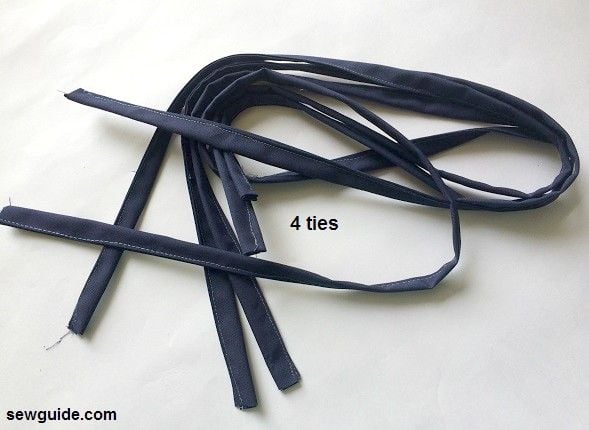
Make 4 waist ties. Cut out 4 pieces of fabric strips. Make straps by folding them like double-fold tape in the middle. Remember that one short end of all the ties should be turned inside as well for a neat look.
Ok, Got the four ties.
Step 5
Turn under the side edges of the two panels (back and front- total 4 side edges) 1/4 inch twice to the inside and stitch.
Step 6
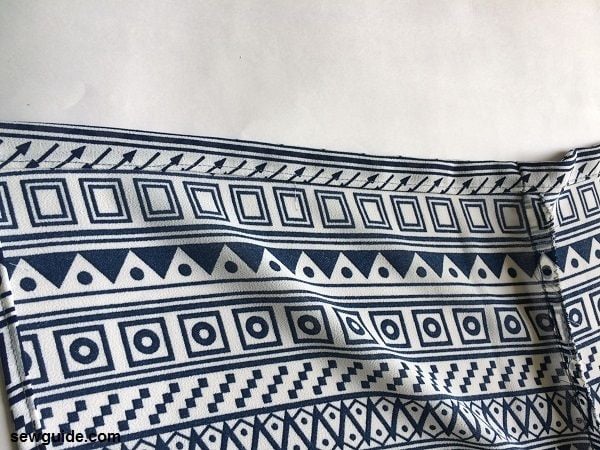
Turn under the top waist edge to the inside and stitch. The width should be slightly more than the width of the straps you have made (so that you can insert the strap ends inside).
Step 6
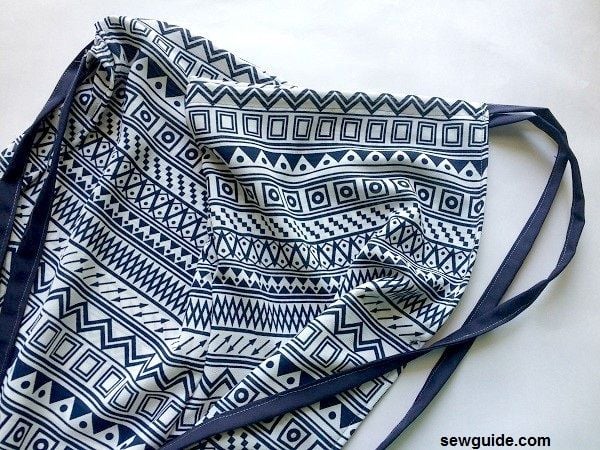
Insert the straps 1/2 inch to all four edges of the waist of the front and back panels. Stitch in place securely.
The only thing that might complicate you about these pants is how to wear them. But once you have the pants in hand, you will know. If you do not, check out this video.
Related posts :


Hi, thanks for this tutorial the drawings will help me, but how do I calculate how much fabric I’ll need please. My hips are 52″ .
Many thanks
Tracey.
Are points “E” and “F” on the crotch “curve” and B-E / C-F measured along that curve, or are “E” and “F” at the at the “Crossroads” of H-I and the vertical lines coming down? Thanks!
I am confused by the difference between what the pattern shows as the crotch on the back side rising an inch at the top and the execution of the cut and picture of the fabric. When folded to make the first crotch cut, the fabric is matched and then opened to cut the deeper cut for back. so far I understand. But when the back is cut at a slant from crotch to outer end, it is still at the same height as the front and then falling an inch to the outside. You do not show cutting an inch across the front from crotch to outside on front piece. So, the crotch at the back piece is at the same height as the front, not an inch higher as in the pattern. Did you leave something out? What am I missing?
Hi
That explanation is given as an easier way of cutting the pattern – ie cut it together as the bigger pattern and then open up and cut off the extra from the other side. Please follow the pattern and cut as you find it convenient. Hope what I said helped
Wonderful pattern for these! (yoga version). All others made no difference in cutting the crotch for front and back and I think this will make them fit so much more nicely.
I really appreciate your “bathroom tutorial”. I work in the garden many hours a day and hike in the forest all day as well. This tutorial will make it much easier to keep the pants from picking up dirt and leaves from the ground. THANK YOU SOOO MUCH!!!
The math on the first pair of pants does not make any sense. It says that the waist is 12.5″, yet it looks half the width of the hem, which is listed at 15″.
yes, my drawing is off. Though it looks only half, it is a wide-legged pant.
Hi!
Great complete tutorial and I really like the wrap pattern!
I have just one question about the patter details or measurements: for length of A-B etc. it says ”1/4 of hip + 4 inches” and then the last one says ”1/4 of hip round + 2 inches” (if I remember correctly). What is difference between hip and hip round and how do I measure them? Both all the way around the widest part of my hips or seam to seam or something else?
I believe both reference your widest hip measurement. I think the word “round” is a typo, or at least unnecessary. So one measurement is hip+6″ and the other is hip+2″ – just ignore the word “round.”
These are a great idea and really look pretty good. I would make them longer tho and definitely have to practice the technique for the ladies room 🙂 Thanks so much for sharing!!!
yes that is a little difficult for the second pants:) but very nice otherwise; But the short one is easy to wear and take off actually – they are just loose pants which are gathered with a cloth belt.