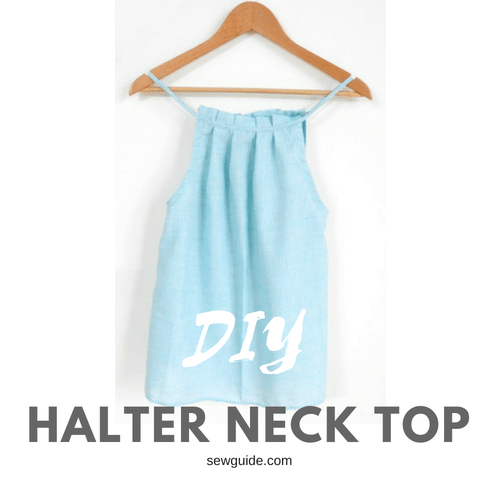
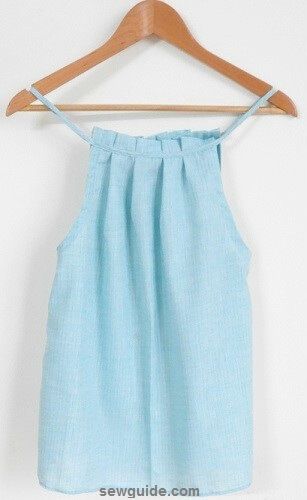
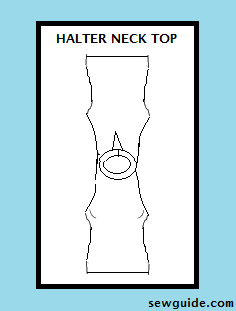
Halter neck is usually said in the same breath as sexy, glamorous and similar adjectives. It is a classic style which never goes out of fashion.
This flattering pattern is based on a Raglan pattern without the arms. It has a band that connects the bodice to the neck, leaving shoulders and arms exposed. The band runs from the front of the garment to the back. It is named after the halter which is placed around a horse’s neck.
The easy fitting style can be adopted to look glamorous in a shimmery fabric or very practical in summer in cool cottons.
Check out the post on the best dress styles for your body shape to know which styles suits you and why. If you are a beginner at sewing do check out the Basics of learning to sew at home
How to sew a Halter neck top
- How to sew a Halter neck top
- Method 1. Pleated Halterneck top
- Step 1. Mark the pattern pieces
- Step 2. Cut the pattern from fabric
- Step 3. Cut Binding for the armscye
- Step 4. Stitch the edges with a 1/4 inch seam allowance
- Step 5. Turn the binding to the back
- Step 6. Sew the binding
- Step 7. Fold and stitch the top edge
- Step 8. Pleat the Top edge
- Step 9. Sew the front and back together at the side seams.
- Step 10. Finish the hem.
- Step 11. Attach Straps
- Method 2. Tie back Halter neck top
- Method 3. Halter neck top pattern
Method 1. Pleated Halterneck top

Step 1. Mark the pattern pieces
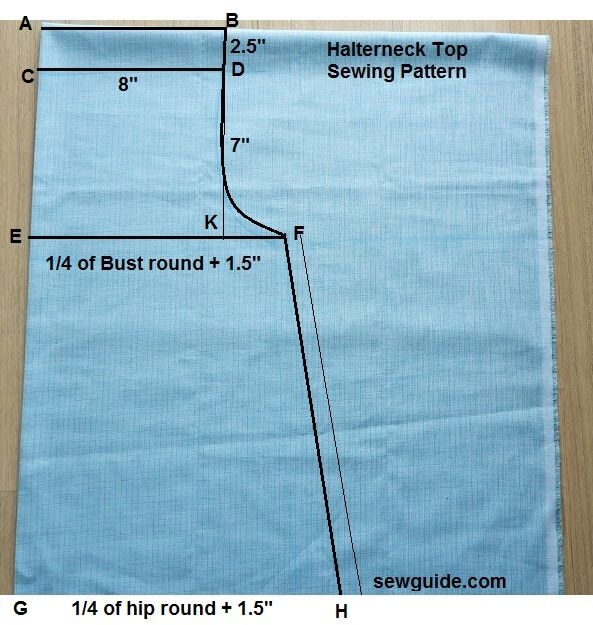
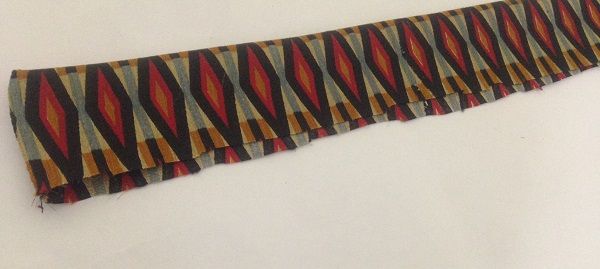
You need two fabric pieces 30 inches long and width equalling more than half of your hip round plus some 5 inches. Fold both these pieces by half and mark the following measurements
You will need to take your bust round and hip round
Halter neck top pattern
Step 2. Cut the pattern from fabric
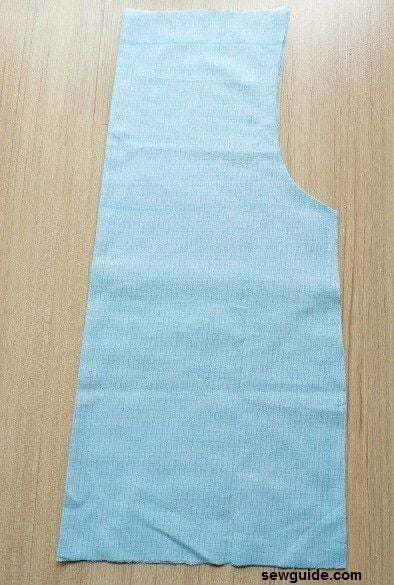
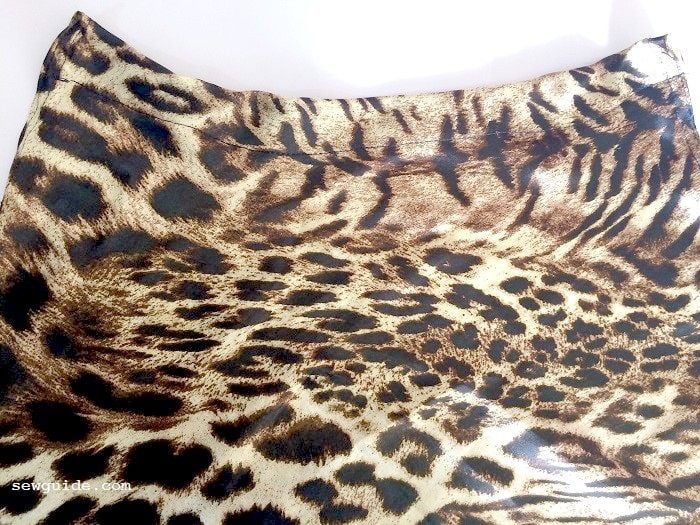
Cut out 2 pieces of the halterneck top pattern from folded fabric.
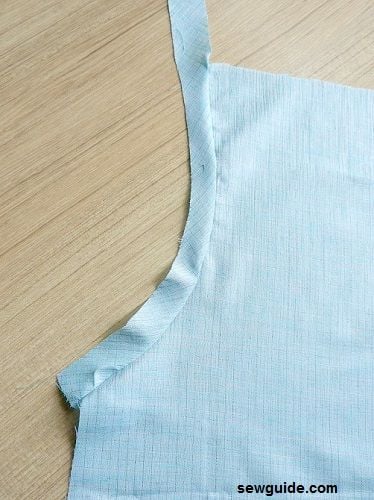
Step 3. Cut Binding for the armscye
Use bias binding strips ( if you do not know how to cut them check out the tutorial to make bias binding strips) and keep them right side down along the arm line.
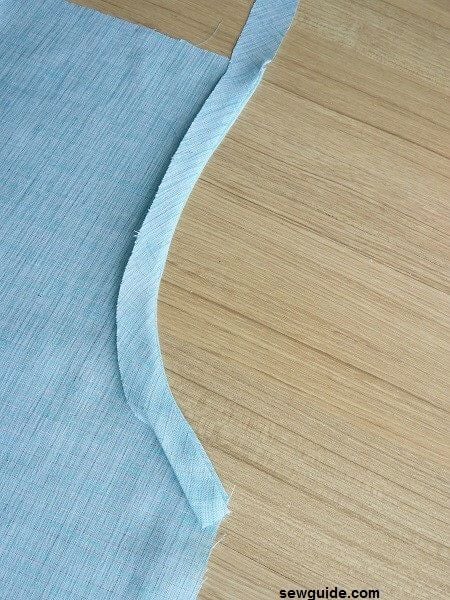
Step 4. Stitch the edges with a 1/4 inch seam allowance
Keep the binding strip right side down on the armhole edge.Sew the binding strip to the armhole edge with a 1/4 inch seam allowance.
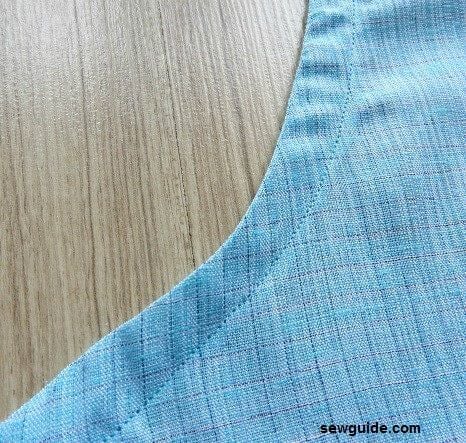
Step 5. Turn the binding to the back
Fold the edge of the binding to the inside. Press.
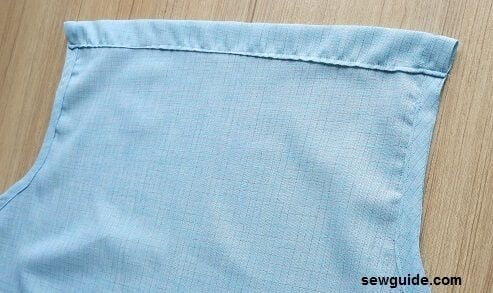
Step 6. Sew the binding
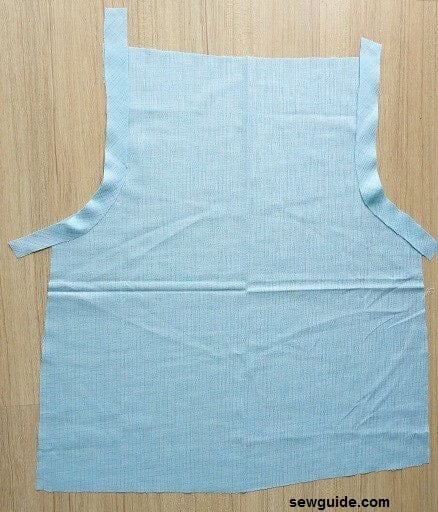
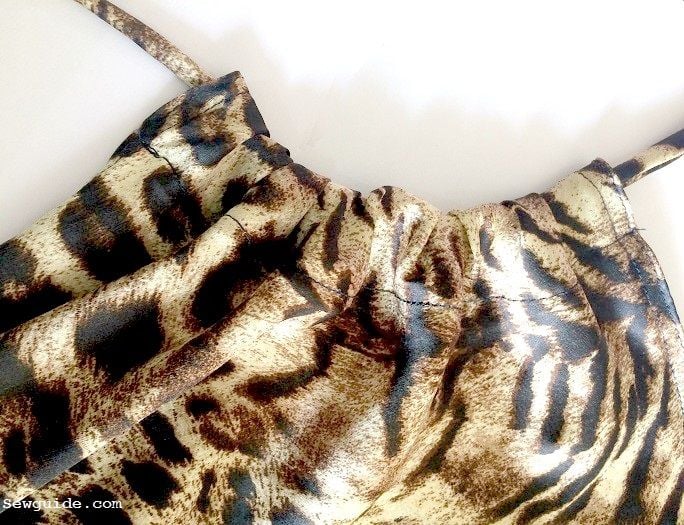
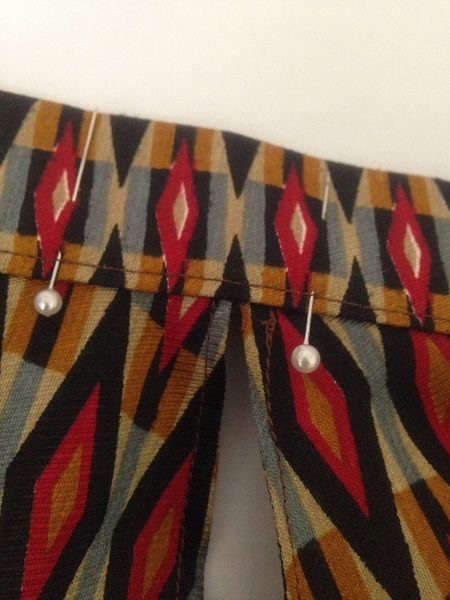
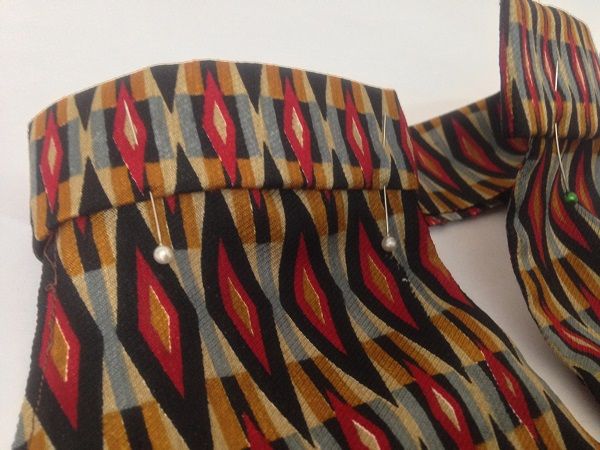
Step 7. Fold and stitch the top edge
In the pattern I have left 2.5 inches extra along the line C- D – this is for the frill along the top edge. First fold the top edge 1/4 inch to the inside, press in place. Then fold again to meet the line C-D. Stitch in place. (C-D is the original top edge – whatever fabric is above is for a frill)
Step 8. Pleat the Top edge
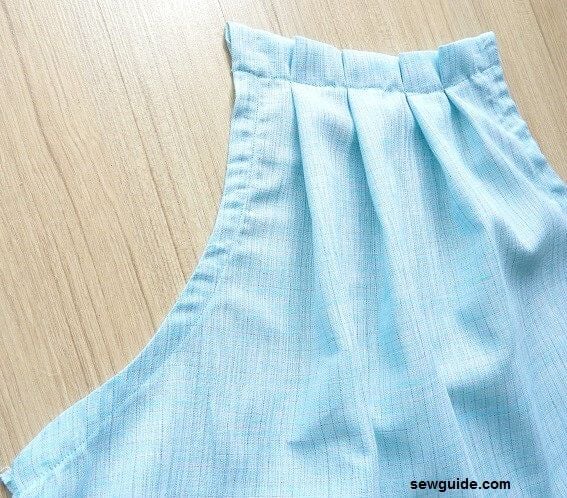
After pleating, the top edge should measure 8 inches. If you are a wide-shouldered person increase this to 9 inch.
Do all these for the front pattern and back pattern
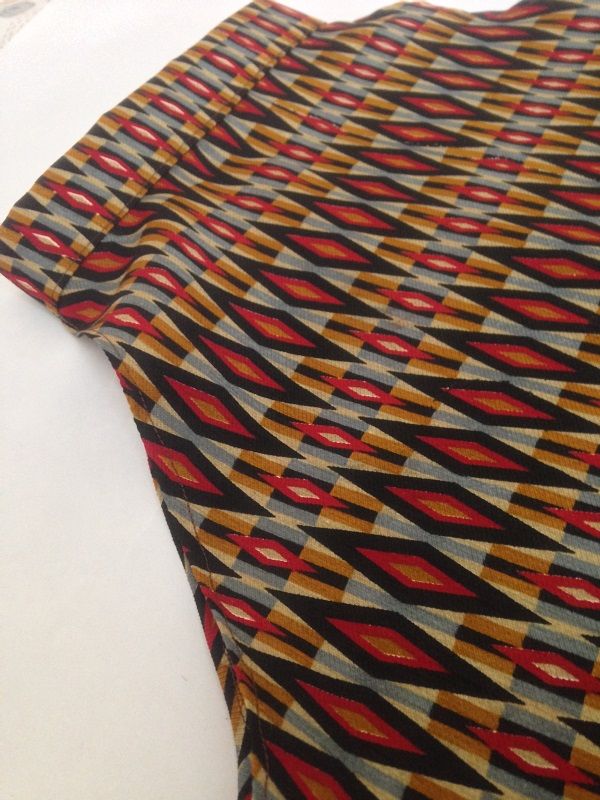
Step 9. Sew the front and back together at the side seams.
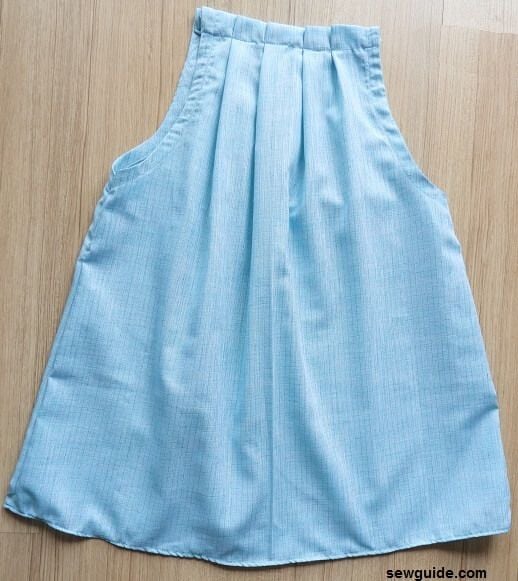
Step 10. Finish the hem.
After joining the front and back finish the hem. To Sew the bottom hem – I made a baby hem – turn over twice very narrowly and stitch in place.
Step 11. Attach Straps
Make the straps following the instructions given below and attach to the top
How to Make the straps
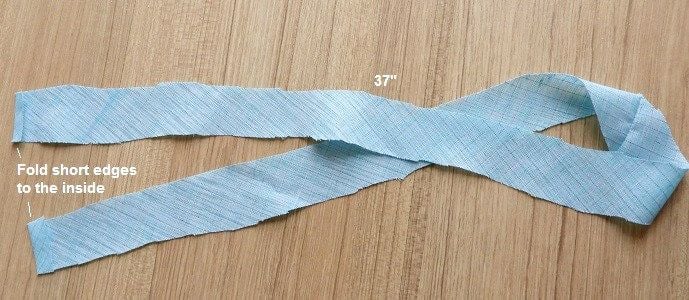
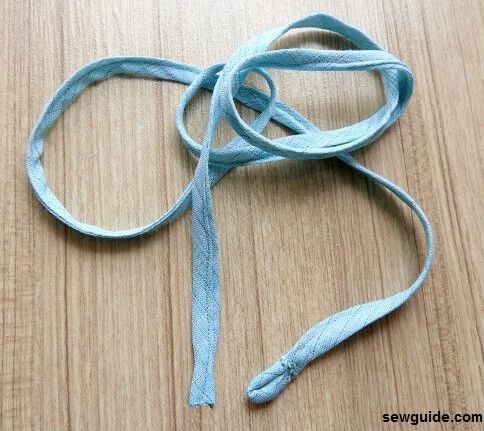
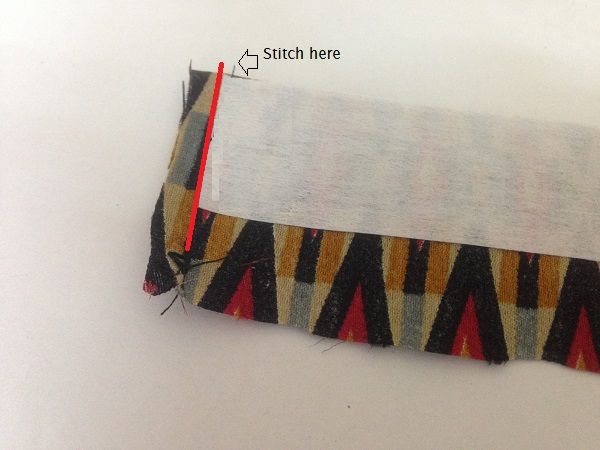
You need more bias strips for this – I cut a 1-inch wide bias tape which is 37 inches long. Fold the short edges to the inside and press in place
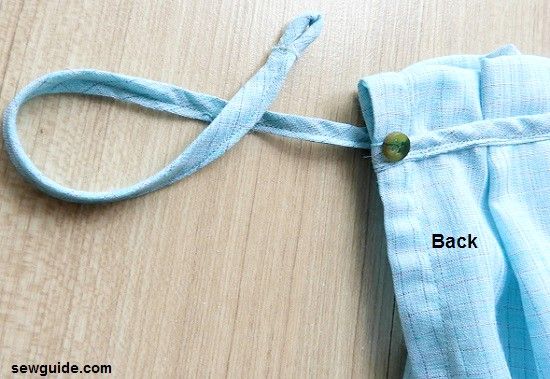
Make a small button loop for the strap
To make the button loop just take a small fabric piece 2 inch long and 1 inch wide. Fold it right sides together. Stitch some 1/8 inch along the folded edge. Attach a thick and blunt needle and thread near one short edge ( anchor thoroughly ) – insert the needle ( or the eye portion of the needle first) through the hole near to where it is anchored. The tube has to be gently coaxed through the space between the stitching line and the fold. You will get a nice thick but thin button loop.
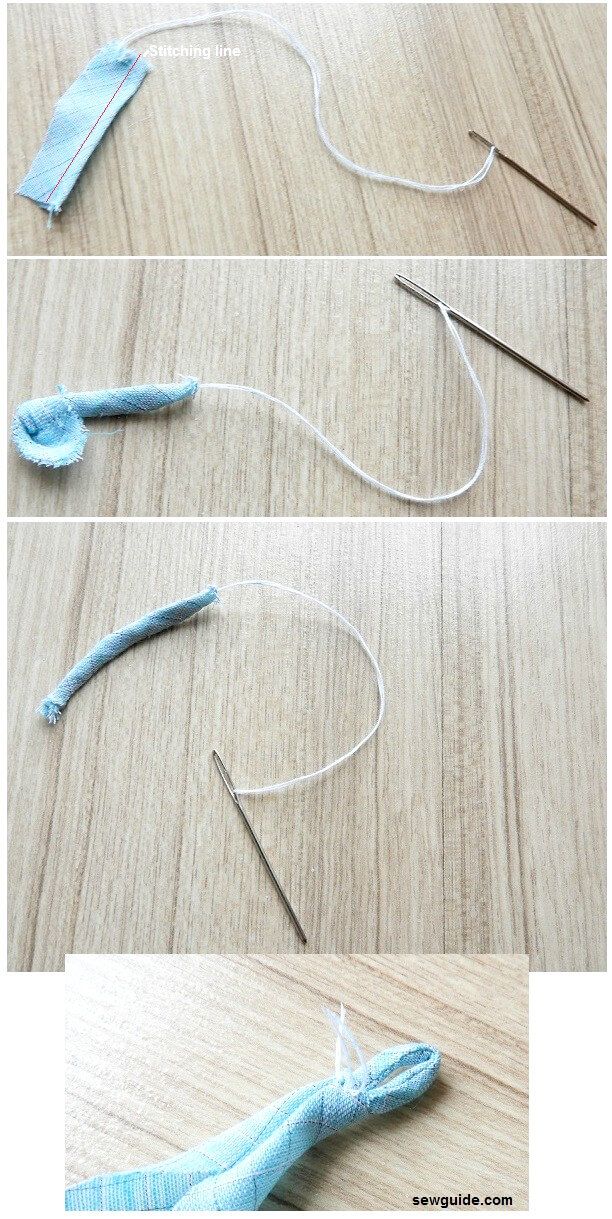
Attach it to one short end of the bias tape you have kept for the straps. Hand Baste it inside the folds of the bias tape.
Stitch the bias tape into a strap by folding the edges to the inside and topstitching. Secure the button loop with machine stitches
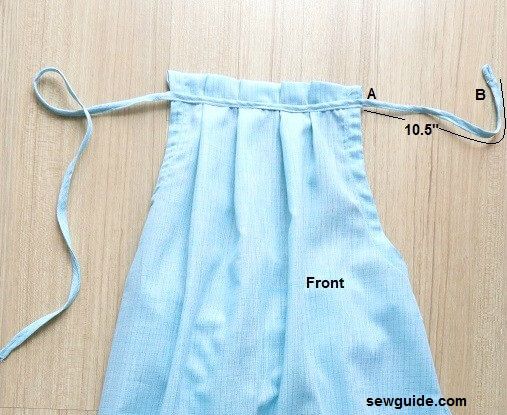
Sew strap to top
Keep the strap on the front of the top such that the button loop is to the right ( when you look at it) – leave 10.5 inches of the straps after the button loop.(10 inch for a short person)
Pin the strap on the pleat stitching line.Stitch in place
Then again leave 10. 5 inches (10 inch for a very short person) and then attach the remaining of the strap on the back pleating line. If by some miscalculation you have extra strap just fold it to the back and stitch in place.
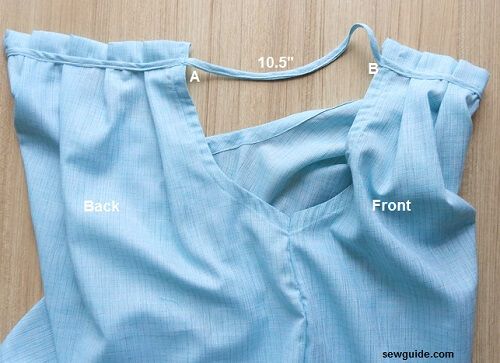
Attach a button on the back, along the edge, where you can fasten it to the button loop you have made. If you do not know how to sew a button look at this post on many ways to sew buttons
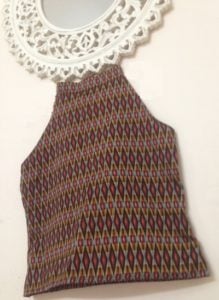
That is it – you have the top sewn
Method 2. Tie back Halter neck top
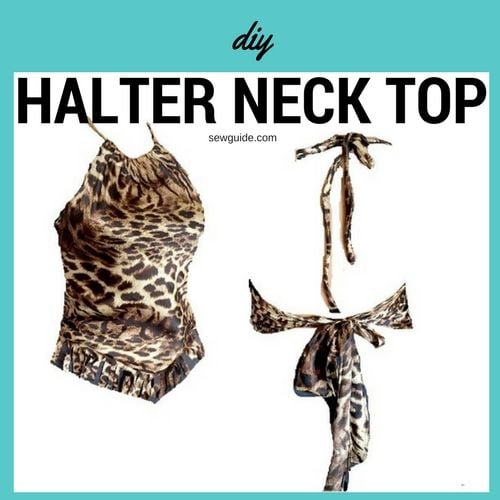
This first pattern is to make a tie back ( in the back and for the neck) top – very easy to sew.
Fold a piece of fabric of length 22 inch and width 25 inch by half . Mark the pattern as below.
Pattern
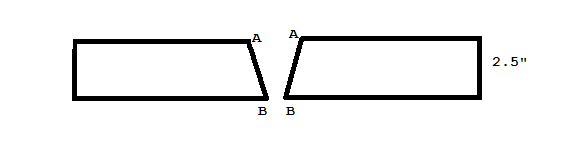
C-D = 21″
C-F = 16″ & F -D = 5″
C-E= 8″
A-B =F-G =Measure your front bust measure – from one armpit to the other over the bust. Divide this by two. Add 1 inch. This measurement is A-B in the pattern
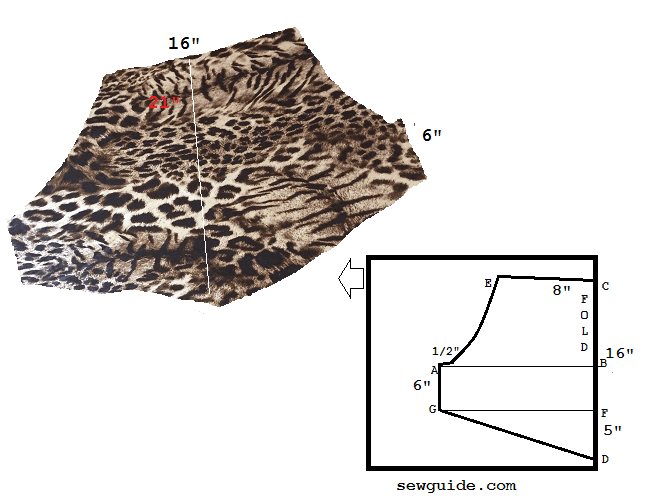
Cut out two more pieces -for the back ties measuring 30 inches in length. One end should have a width of 6 inch and the other end 3″.Ensure that you are cutting mirror images as you need these pieces for both sides (keep fabric on fold right sides together and cut the two pieces – this will ensure mirror image pieces)
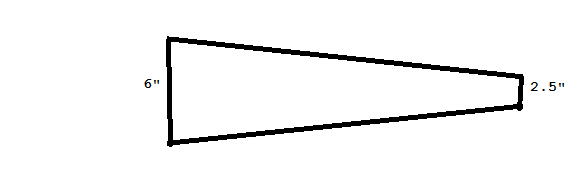
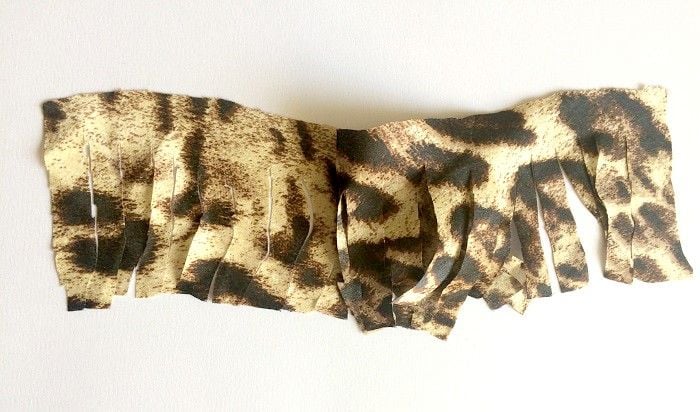
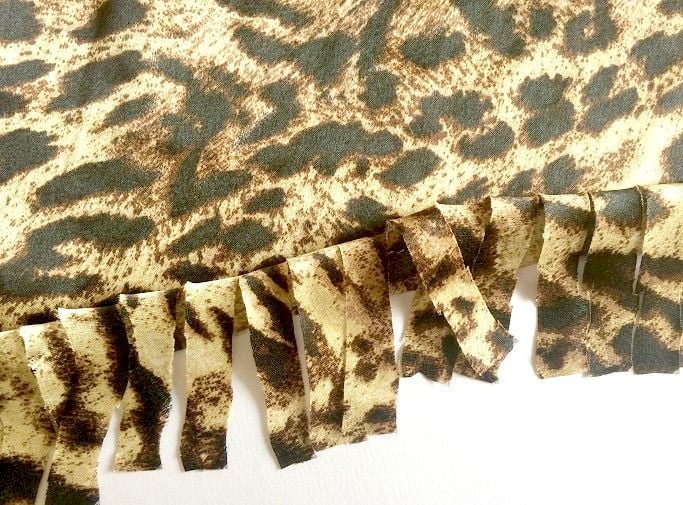
Then cut two bias cut piece measuring length G-D+ 1″ and width 4″ – This is to make the fringes. Cut out the fringes as in the picture below
Cut pieces which are cut slightly angled in one side – this is so that they can be joined properly to the diagonal bottom edge of the bodice
Because the pieces are cut on the bias these pieces would not fray. Please ensure this by trying to pull on your cloth . Don’t rely on what I say too much 🙂
You have to join this piece to the bottom edges of your bodice. First join the pieces together and then join to the bodice

Keep the fringes on the bodice pieces, right sides together and stitch the edges.
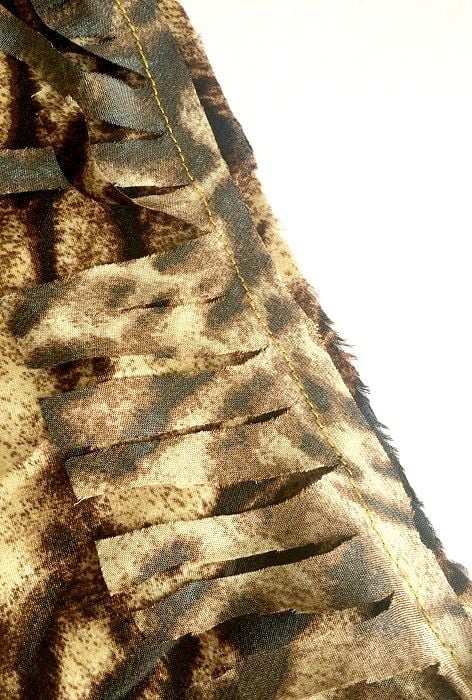
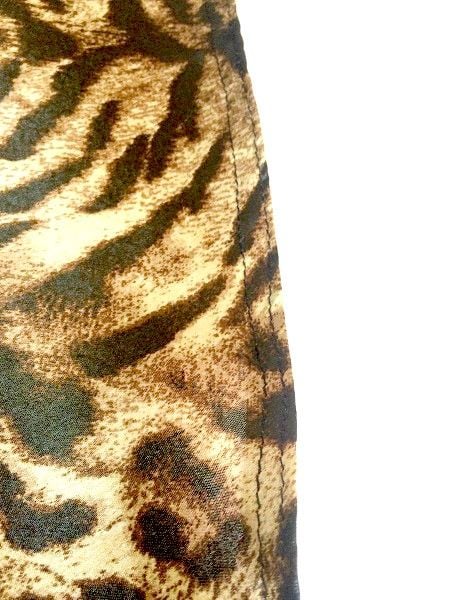
Finish the armhole edges. Look at the wonky edges I have made. I had a very slippery fabric. I should have used either bias binding or interfaced the edge or used double needle stitching.
Finish the edges of the back ties . Join them to the bodice at both ends at A-G

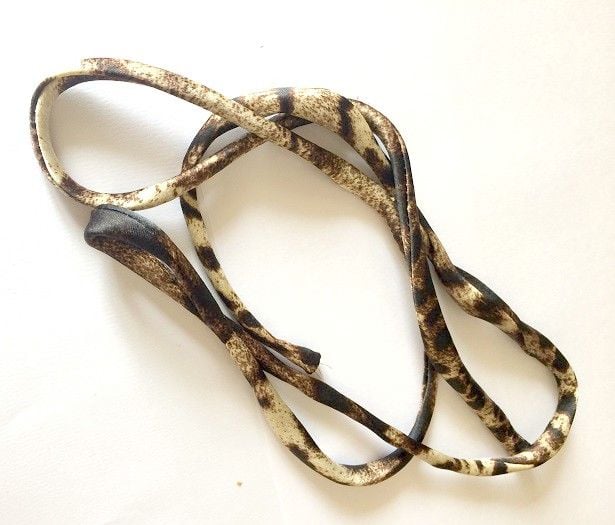
Make the drawstring for the neck ties. Follow the tutorial to make the fabric tubes for this. I made a 50 inch drawstring.
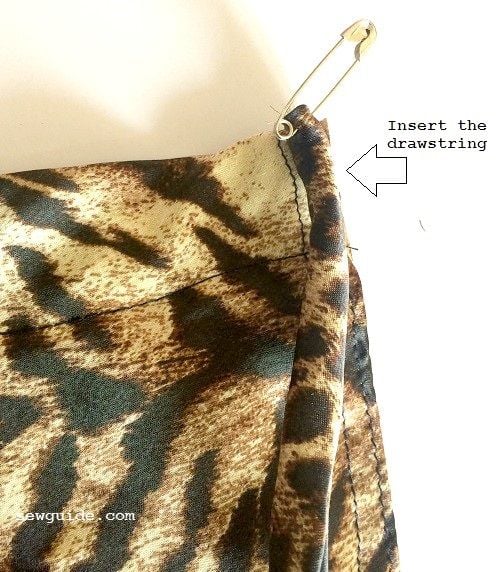
Turn under the top edge twice ; first 1/2 inch and then 1 inch. Stitch. You need a casing here.
Insert the drawstring with a safety pin.
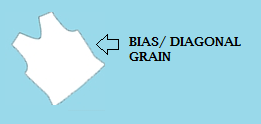
Method 3. Halter neck top pattern
This pattern needs to be cut on the bias fold of the cloth. Make the paper sewing pattern first and then cut the cloth.
If you want more information To make these patterns Checkout how to make the paper patterns and How to cut fabric
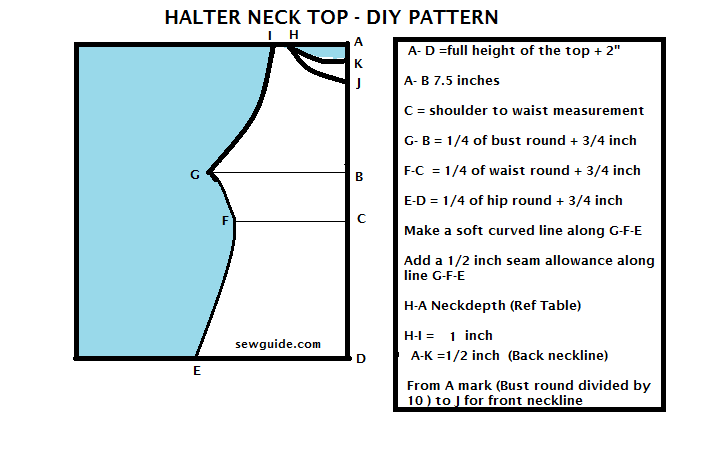
Take a long piece of paper ; Imagine one long side is the center fold of the cloth -A-D
Mark A- D as the full height of the top + 2 inches
Mark A- B 7.5 inches
Mark shoulder to waist measurement at C
Mark G from B as 1/4 of bust round + 3/4 inch ( ease)
Mark F from C as 1/4 of waist round + 3/4 inch ( ease)
Mark E from D as 1/4 of hip round + 3/4 inch ( ease)
(The ease can be reduced to 1/2 inch or taken in by a dart if you want a very fitted top near the waist and hip. Do not reduce ease at armhole because it might get too tight there)
Make a soft curved line along G-F-E
Give a 1/2 inch seam allowance along line G-F-E
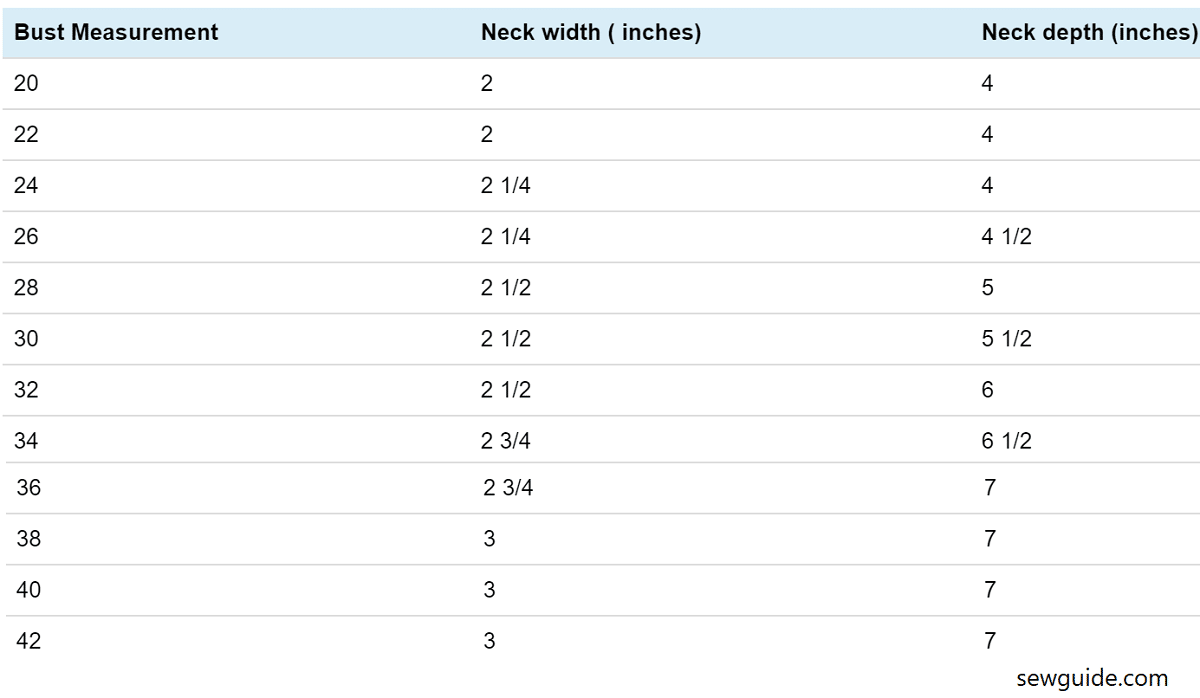
Mark H from A as per the table below
From H mark 1/2 inch to I ie H-I = 1/2 inch
From A mark 1/2 inch down to point K for back neckline
From A mark (Bust round divided by 10 ) to J for front neckline
Join I to G in a soft curved line
Back Pattern
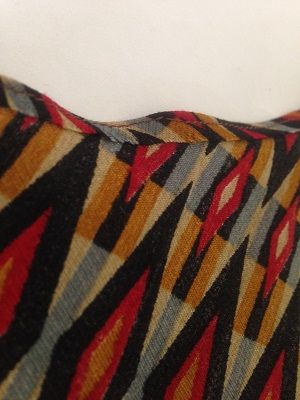
Method 1. For the back bodice pattern keep the front pattern on a fresh pattern paper 1 inch inside to the foldline. This is for seam allowance of zipper) Cut out the portion from B-G-E-D for an exposed back look . ( Do not forget to add 1 inch seam allowance along B-G.) You can add a zipper opening as per the instructions here.
A halter collar will hold the front pattern in place.
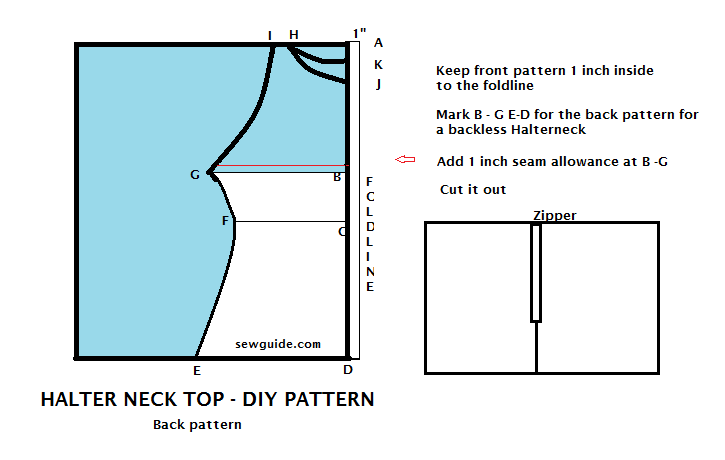
Method 2. Another attractive alternative is to make a back pattern as the same as the front pattern and make a slit opening on top center back, attached to the halter collar. The collar will have a button opening.
Halter neck collar options
For the neckline you have 2 options
- Make a Collar with a center back slit opening and buttoned collar
- Make a casing at the front neckline with a fabric tie (made of the same cloth) that ties at the back neck
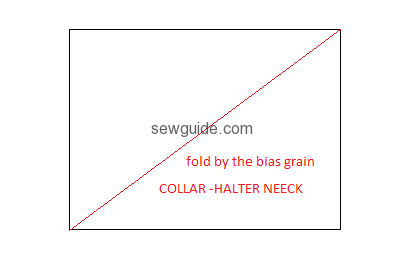
To make a collar you will have to make a paper pattern as below and use it to cut the fabric from a bias folded cloth
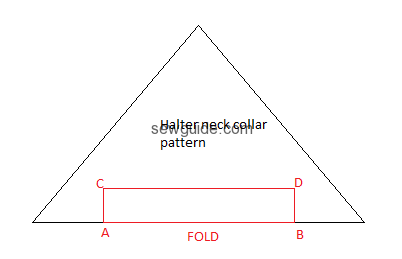
A-C = B-D= 2 inch ( including seam allowance )
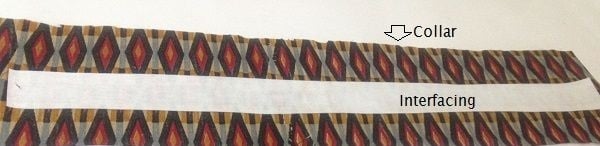
It will be a good idea to iron a very thin interfacing to the collar fabric after cutting it so that it will retain its shape
A-B = measure the neckline of the pattern of the bodice ( after the hemming of armhole sides. ) + one inch over lap for button + 1/2 inch seam allowance
How to sew a Halter neck top
Step 1. After making the paper pattern, fold the fabric by the bias grain. Keep the pattern along the fold line of the fabric and mark. ( Refer to the article on How to properly cut fabric for more details on cutting the fabric). Cut along the marked lines.
Cut the fabric for the collar. You also need to cut interfacing
Step 2. Press the interfacing to the collar piece leaving the seam allowance area clear to avoid bulk.
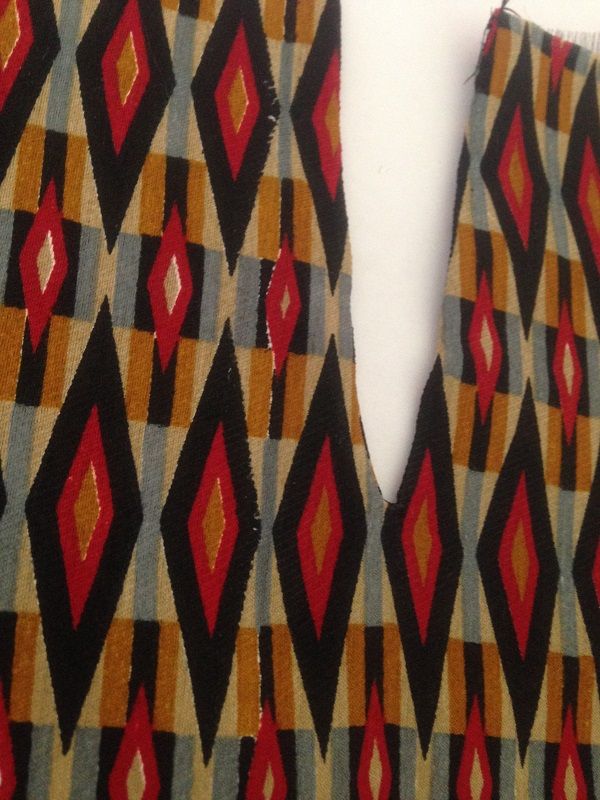
Step 3. Make a facing for the center seam opening in the back bodice
Cut a piece of cloth from the same fabric you are making the top from 3 inches wide and 4 inches long
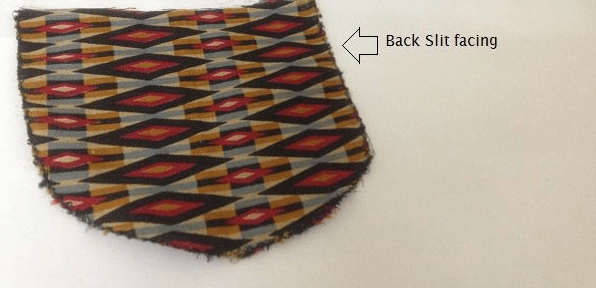
Draw a center line as in the picture below and a long narrow V mark

Zigzag the edges of this cloth so that the fabric will not fray.
Pin this into the center of the neck back matching the top edges and aligning the center fold notch.
Stitch through the V. Cut open through the center line. Make sure that the slit is cut till the end, making sure that stitching line is not cut.
Turn this facing to the inside ; Press seam allowance to the inside. Understitch.
An alternative to understitching is to Pin the facing to keep it together and sew close to the edges on the front side (top stitching)for a neat look
Step 3. Hem the arm hole sides. I have made a very narrow hem – that is made by turning the edges of the armhole edges twice 1/8 inches each and stitching along the edge. Another alternative is to make a bias facing or a shaped facing
Step 4. Finish the collar
Fold the collar fabric by half along the interfacing long edge, right side out. Stitch the sides from inside after folding it.
Turn inside out
Step 5. Mark Button hole on one end Finish the Button hole and sew button to the side edges of the collar piece leaving bottom edges unsewn .
Step 6.
Mark the center of the collar. Sandwich the bodice piece inside the collar and sew in place
When joining the front bodice you can give small gathers . If you want lot more gathers follow the pattern tutorial given below.
Step 7.
Finish the sides and hemline of the bodice.
If you want you can add elastic through a casing sewn at the bottom hem . In this case you will have to add more to the bottom edge for gathers. Do this at the drafting of pattern. Add 3 inches to E-D. Elastic has to be cut 2 inches lesser than the bottom edge opening.
Take from the sides or give darts if you feel that the top is loose.
How to sew a Gathered halter neck pattern
Some times we need some gathers at the front. I love gathers in my tops. We can draft a gathered halterneck with the same pattern given above.
Extend 3 inches (more if you want more gathers) from back neckline K to the point l and front neckline point J to M ( as shown in the pic below; if you can adjust the pattern so that this line L – D and M- D falls on the fold of the cloth you will get a top pattern without a centre seam
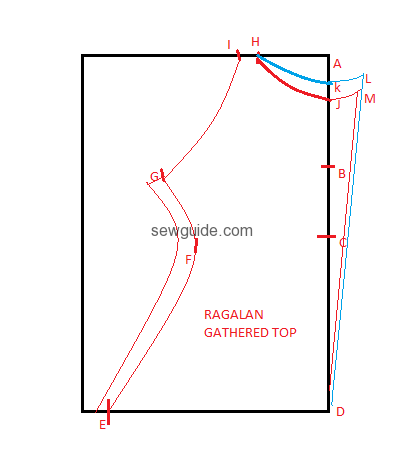
These instructions are the same as in the post about regular raglan top pattern other than the neck depth.
Table for neck measures
Related posts


i love the amount of detail here in the patterns, it is really well explained. thank you so much for taking the time to do this post, you’ve saved me today needing a quick outfit to wear to a rugby game. i’m going to use our teams flag 🙂
Fabulous Thank you
Thank you, I love all your pattern. They are lovely.
I think saying certain people should not wear these is very rude !!!
Thanks I love this pattern, its gonna help me
Thank you so much the halter neck explanation was nice!
Continue the wonderful good article, I just read couple of articles about this web page.
I loved the technical approach to a pattern. I was disappointed however, that it turned out less halter and more boxy. I will be using the approach to fine-tune my own pattern though, and perhaps the fault was my own novice than your elegantly explained methodology. Thank you!
hi Lakshmi
Sorry hear that; hope you will make it in a drapey fabric like a soft knit ; Thanks for the kind words
sarina
All of the images are broken on this pattern. Can you reupload them?
Hi Aimee
I can see them in my desktop browser ; checked on my phone too – seems ok – can you clear the cache and see
Thanx for reading
This is very easy methed to make pattern
I like this
Can u send me more pattern making methed
Of new garment designs on my email
Hi Priya
Glad you liked this pattern- Please checkout https://sewguide.com/stitching-patterns/ for more patterns
Sarina
Pinterest strikes again! I saw a top like this on a shop site, took a screenshot and later on Pinterest read my mind (or my phone, haha) and suggested this helpful tutorial. Thanks for the instructions! Can’t wait to try it.