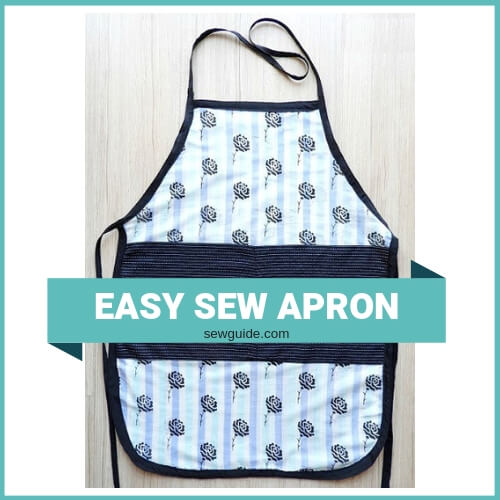
There is this feeling of consequence when I wear an Apron – of doing something important, relevant and worthwhile; even when I am doing totally inconsequential things like checking how much groceries I have left for the week or shifting the house plant from under the TV to the side of it.
A pretty apron can change your outlook towards work – don’t believe me? Make this Apron in your favourite fabric and you will see what I mean.
This is a step by step instruction/tutorial to make a simple Apron which is one size fits most – make one for yourself and you will fight with all in your family to wear it
How to make this Apron.
Step 1 Cut out the Apron body pattern
Cut out the Fabric piece as per the pattern given below. You need a 25-inch square piece of fabric to make this Apron. Fold this 25 inch square by the centre and mark the pattern and then cut it out.
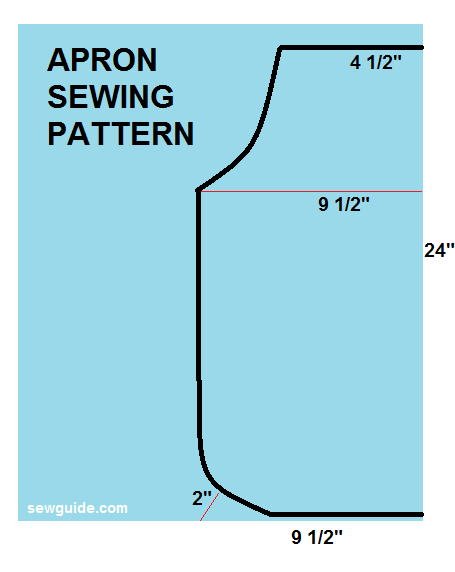
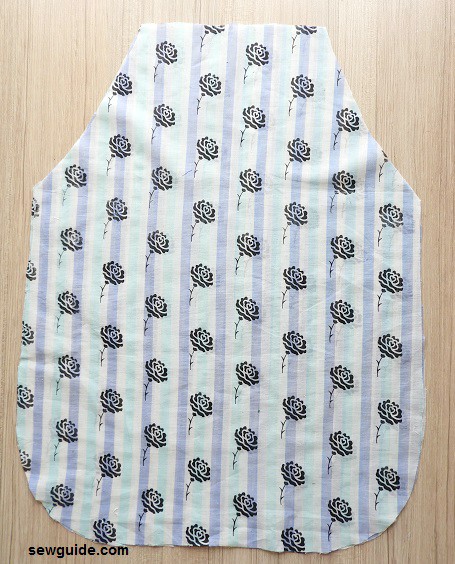
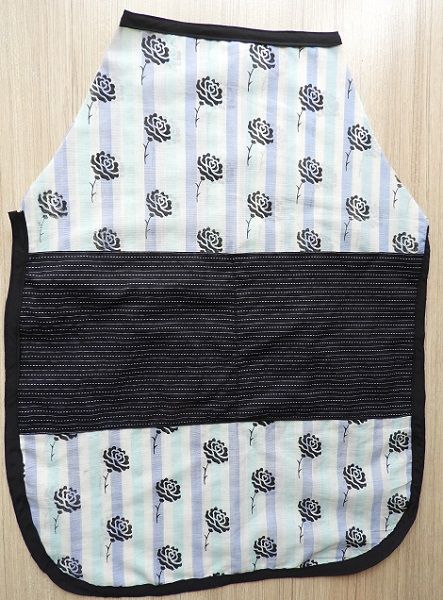
You will get the Apron body which looks like the picture below. If you use a thick enough fabric well and good. If it is a thin fabric it is perfectly alright but if you wish it was thicker use the same fabric or another as an underlining and then treat these fabrics together as one.
If you think that you are much bigger than this and you want more protection and coverage, just increase the width of the pattern – this apron is very customisable.
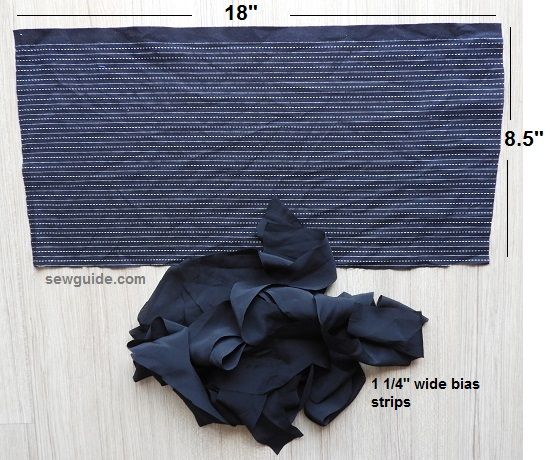
Step 2 Cut out pockets and binding strips
The pocket is optional. You can totally skip this but pockets are so useful.
Cut out the binding strips on the bias – if you have ready-made bias tapes you will need 140inches long bias tape.
If you are cutting the bias tape from fabric you already have cut out one 50 inch piece, one 80 inch piece and one 10 inch piece
Check out this post on making bias tape if you do not know how to cut it out.
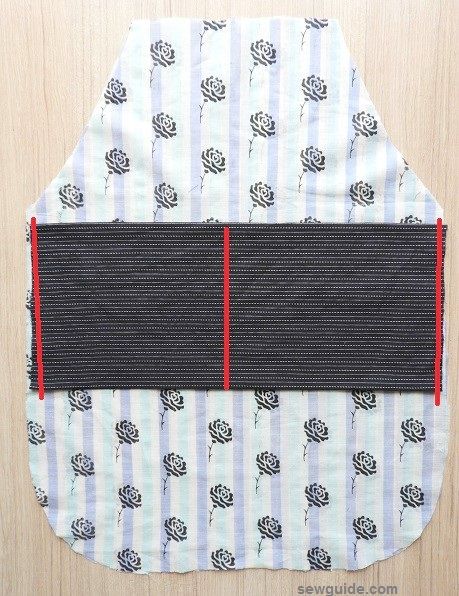
Step 3 Stitch the pocket
First, you have to finish the top edge of your pocket piece – turn under the top edge of the pocket piece and stitch.
Then keep the pocket piece on top of the Apron 1 inch down from side top edge, as in the picture below. Stitch in place at the sides ( this is so that it would not shift when you bind the edges). You will need to make a division stitch by the middle as well.
Step 4 bind the bottom edge of the Apron
Take the 50-inch bias tape and start binding the bottom edge of the apron

To bind take the binding strip and keep it on the back of the apron piece , on top of the edge and stitch with a 1/4 inch seam allowance; all over the edge.
Clip the seam allowance everywhere ; especially near the curved areas. Trim closely.
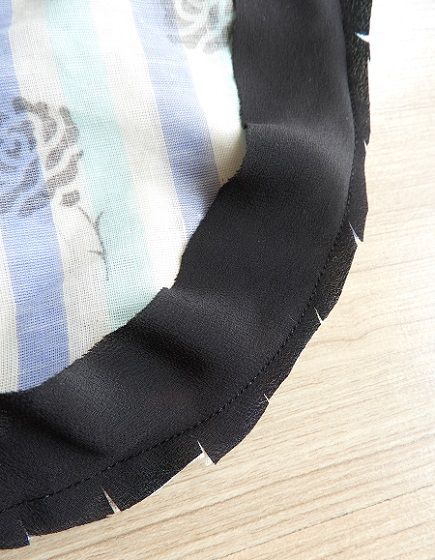
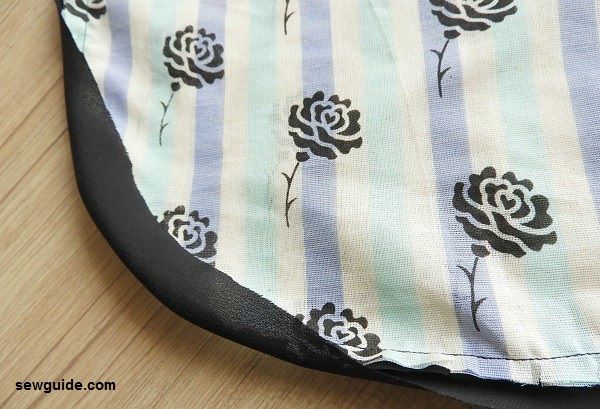
Turn the binding to the front side and turn the edge 1/4 to the inside and then topstitch in place.
Step 5 Bind the top edge
Use the 10-inch bias tape for this.
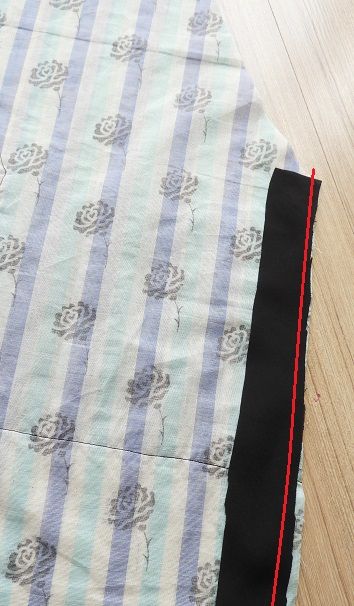
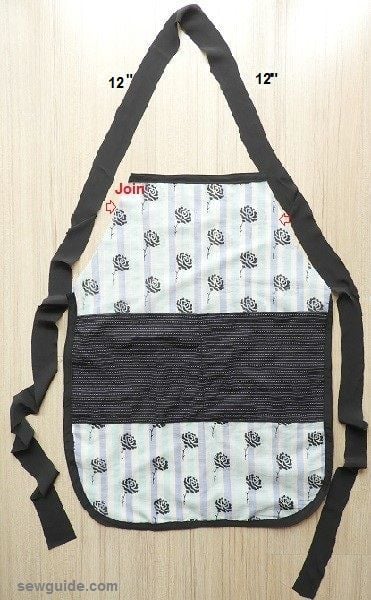
Step 6 Bind the arm line and stitch the sash
Take the last bias tape piece 80 inches in length and keep it on the apron as in the picture below; Form the centre it should measure 12 inches on either side.
Mark this on the bias tape and then start stitching the Armhole binding from that mark. Do this for the other side as well.
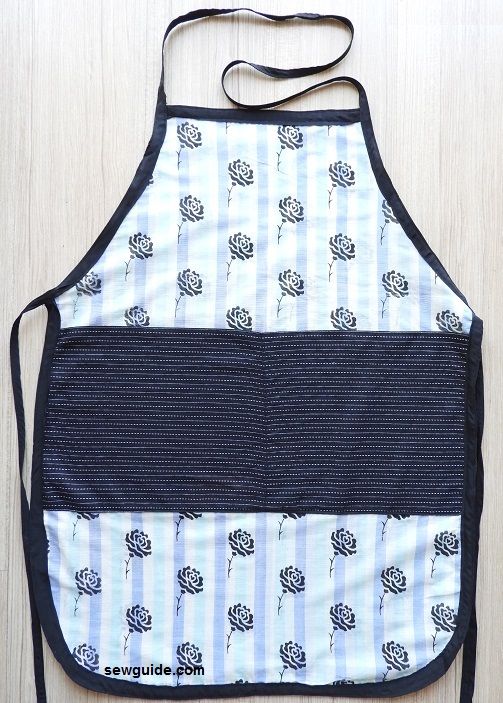
After the armhole binding is done, finish the stitching of the strap at the top and on the sides. You just have to fold the cut edges to the inside and stitch in place.
Do not forget to fold the short ends of the strap to the inside when you reach the ends. If you forgot to do this – do not worry – just fold and stitch, afterwards or add a bead there or just tie a knot.
Related post : 20 + Best and free Apron patterns from around the world.

Nice teaching,
I love it !
Beautiful and easy. I’ll try it in Home Economics class.
IT IS NOT FINE AND THE MATERIAL IS UGLY
Like