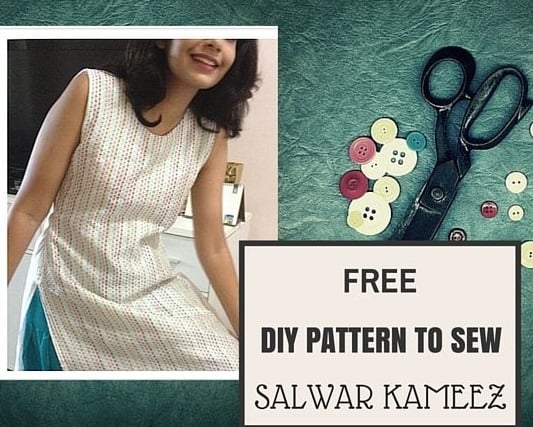
 A Salwar Kameez dates back to the Romans. You do not believe me – check this article on wikipedia.
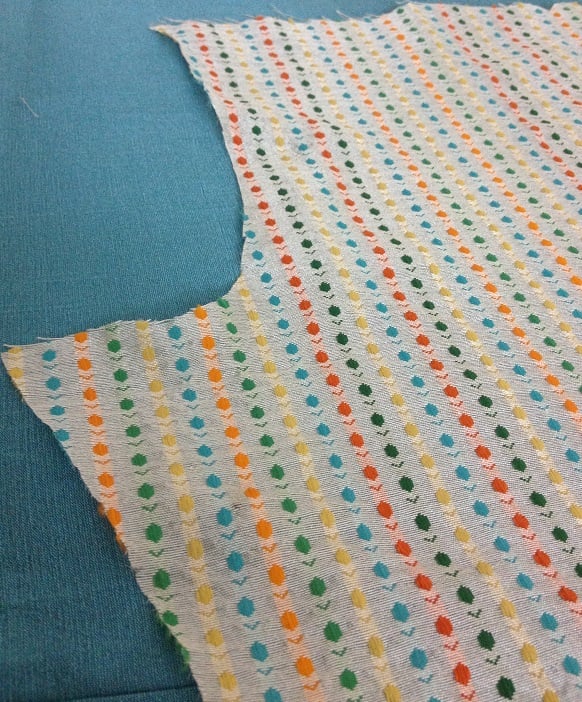
A fitting Kameez is a very flattering garment. You can wear it as a tunic with your jeans, make it very short and wear it with your skirt, or even wear it with shorts for a modern take. A sleeveless Kurta with Dhothi pants is my favorite lounge wear.
Step by step instructions to sew Salwar kameez -Kurta top
If you have decided to sew your own Kameez, make it to your size. I have given the pattern to make it here. Sew it in a muslin first. Adjust your measurements. Then stitch it with a beautiful fabric you adore and wear it with the panache of the ladies shown below.
Make your own pattern to stitch a Salwar kameez top (Punjabi suit)
Measure yourself first. The main measurements you need are bust round, waist round, hip round, neck depth needed, slit opening (Where you want it) Length from shoulder to bust, waist and hip, Sleeve length. Checkout the post How to measure body for more details.
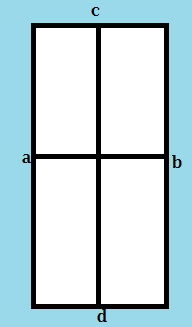
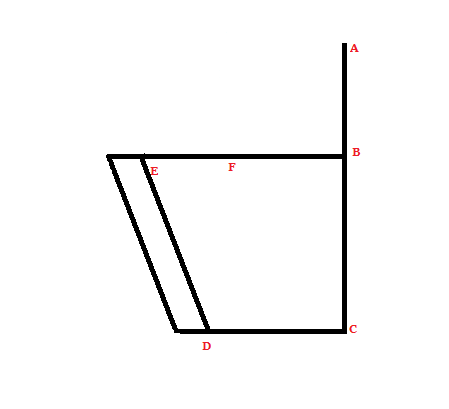
If you are marking directly on to the cloth Fold your cloth half way through width wise first ( along a-b of diagram) you can cut along a-b if you want now, then fold it lengthwise ( along c-d)
You can alternatively make the pattern in a paper (you can use brown paper rolls for this or join newspapers together for an easy recycled pattern paper ) and keep it for making it again.
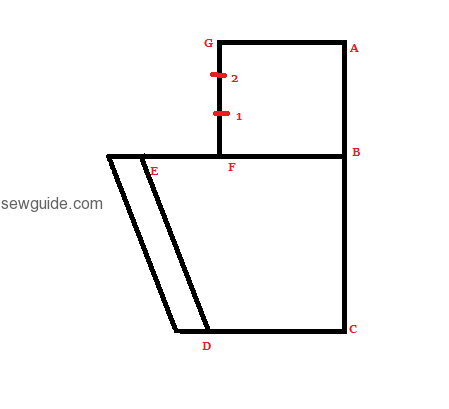
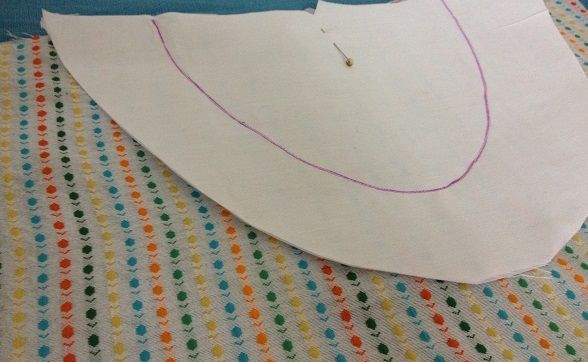
The front and back patterns are marked similar except for difference in neck opening and armhole – so when cutting the pattern you mark the back pattern fully on the 1/4 portion of cloth (as in the diagram).Cut everything out except the neck opening.(Look at this article to see which neck line suits you)
Then remove the back bodice, ( the one without any markings ) and keep it aside. this is the back pattern.
On the top piece you have now, with all the markings you have made, you should continue to make the front pattern.
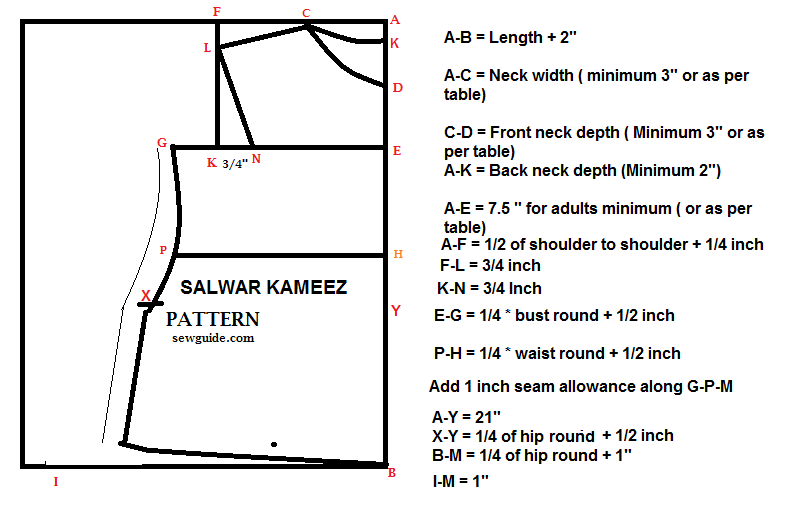
A-B = Full length needed + 2″
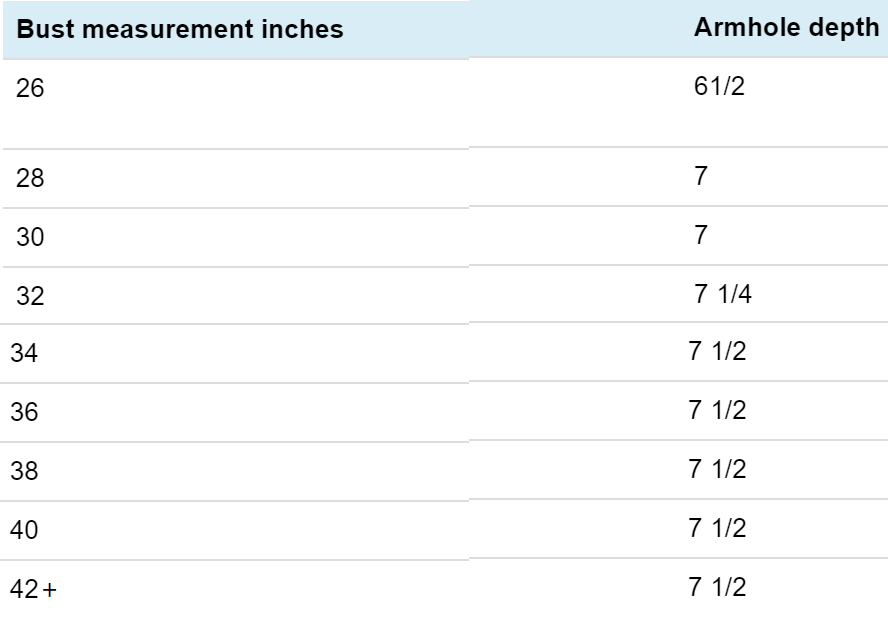
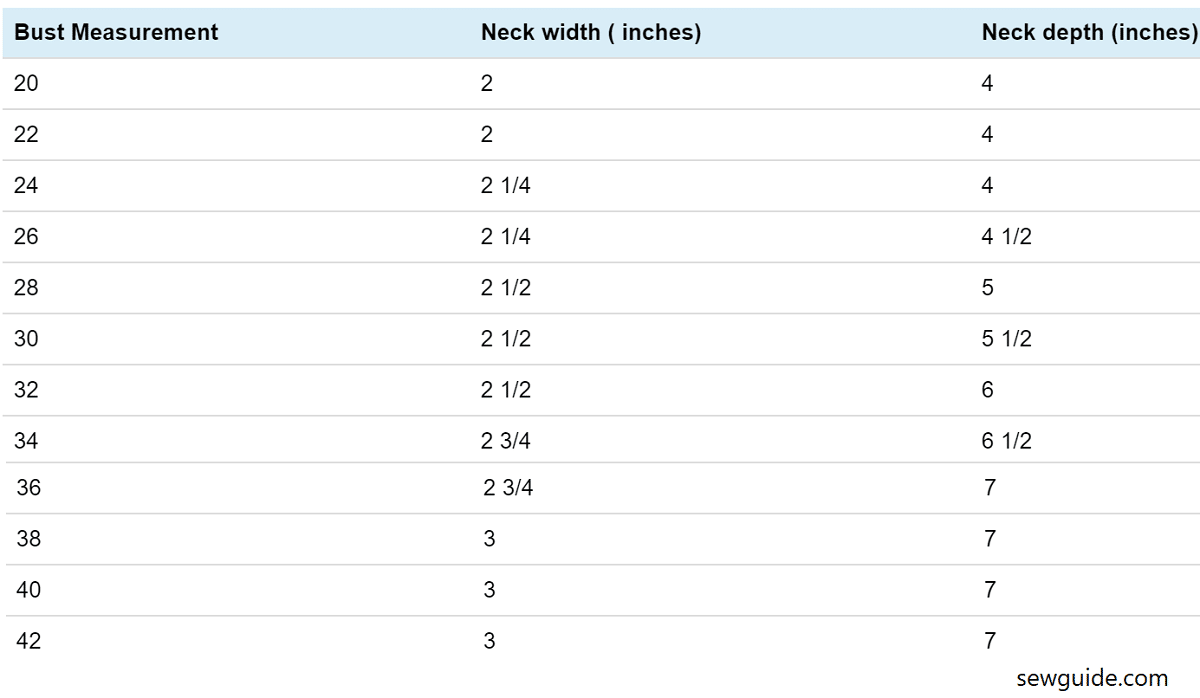
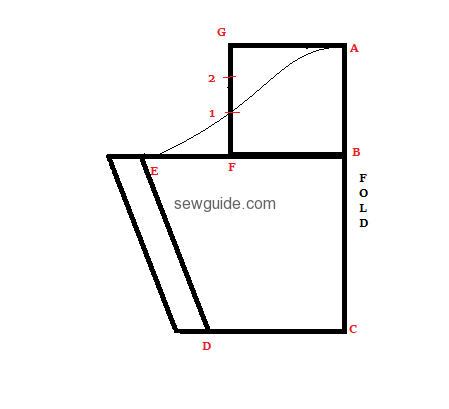
Mark A-E which is the armhole depth Mark 7.5 ” or as per the table below
Mark A-C Neck width as per the table below. This is a very conservative meaurement ie it is tight . If you want a loose neck you may increase this measurement as per your preference. (C-S which is front neck depth can be taken as per table or as per your preference . I usually like a 6.5 ” depth. Again this is preference of the wearer.
Do not forget to checkout ‘Draft the neckline of your choice‘. Here I have given a conservative V neckline but you can choose to make patterns for a number of necklines following instructions there.
The neckline width in this table gives a tight neck. You can adjust the neck width as per your choice based on a favourite tunic or kurta.
A-H = Length to waist
A-Y = Length to hip /Length to slit – This is taken as 21″ ( Change as you need)
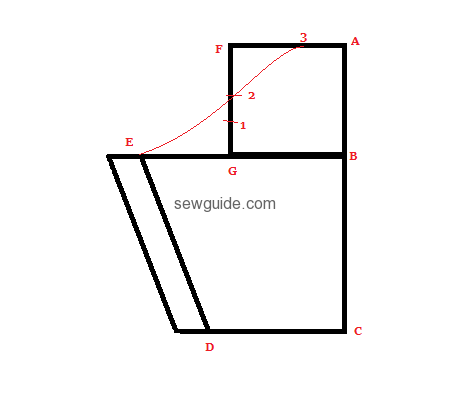
A-F = 1/2 of shoulder to shoulder + 1/4 inch
F-L = 3/4 inch ; this is for shoulder slopeFrom point – F on shoulder tip mark down 3/4 inch to point L ( please make this 1/2 inch for kids) Give the shoulder slope by joining the line C-L.
K-N = 3/4 Inch
Mark A-E which is the armhole depth or the bustline – as per table or 7.5″ for adults. This is the bust line. E-G is marked on this line
Draw straight line down from F so that it intersects with line E-G .
E-G = 1/4 * bust round + 1/2 inch ease
(Ie if my bust is 36 inches, that divided by 4 is 9. Add 1/2 inches ease which will be 9.5 inches ; seam allowance of 1″ shoulde be added later )
A-H = Waist length
P-H = 1/4 * waist round + 1/2 inch
B-M = 1/4 * waist round + 1/2 inch
Add 1 inch seam allowance along G-P-M
Step 2
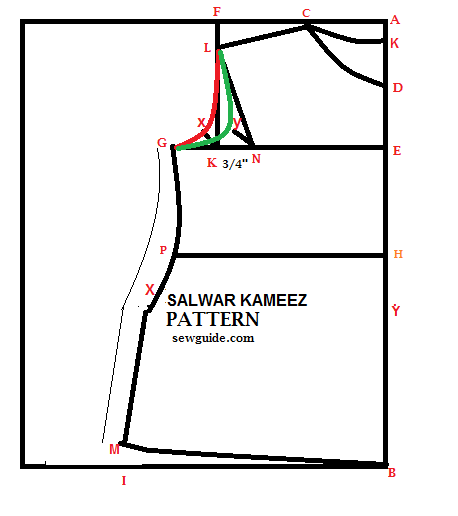
Back armhole – Where the lines from F & G intersected (name it K ) go outside ( measure the distance between G& K and divide by two) . Mark the point as X . Make a curved shape of the armhole from L-X-G – this is the back sleeve line.
To mark the front sleeve line Mark from K to the inside 3/4 inch for adults and 1/2 inch for kids. Mark this point as N . Draw up a straight line to L . From N Go outside 3/4 inches diagonally to Y as shown in the diagram. L-Y-G is the front armhole line
Draw a soft curved line touching Y from L to G – This is the front sleeve line.( Blue line)
Give the neckline you want – refer here for different necklines
Make sleeves as per the instructions for drafting sleeves here and you are good to go sewing. Checkout the post on different types of sleeves for your options
Method to make sleeves for your salwar kameez top
Cut the two sleeve pieces 17 inches wide and your desired sleeve length plus 1 1/2 inches long
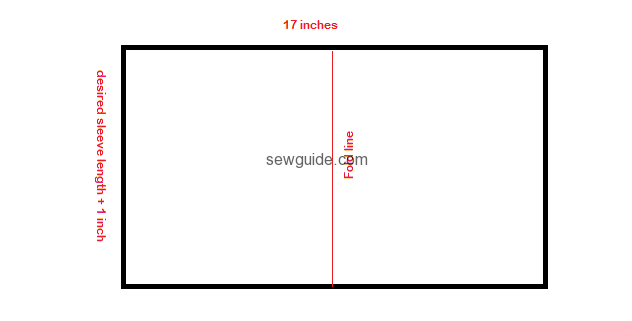
Keep the sleeve pieces Right sides together. Fold them and start the marking. Use chalk to mark the pattern
The line A –C is along the folded line of the cloth. The measurement from A to C is Sleeve length + 1 ½ inch
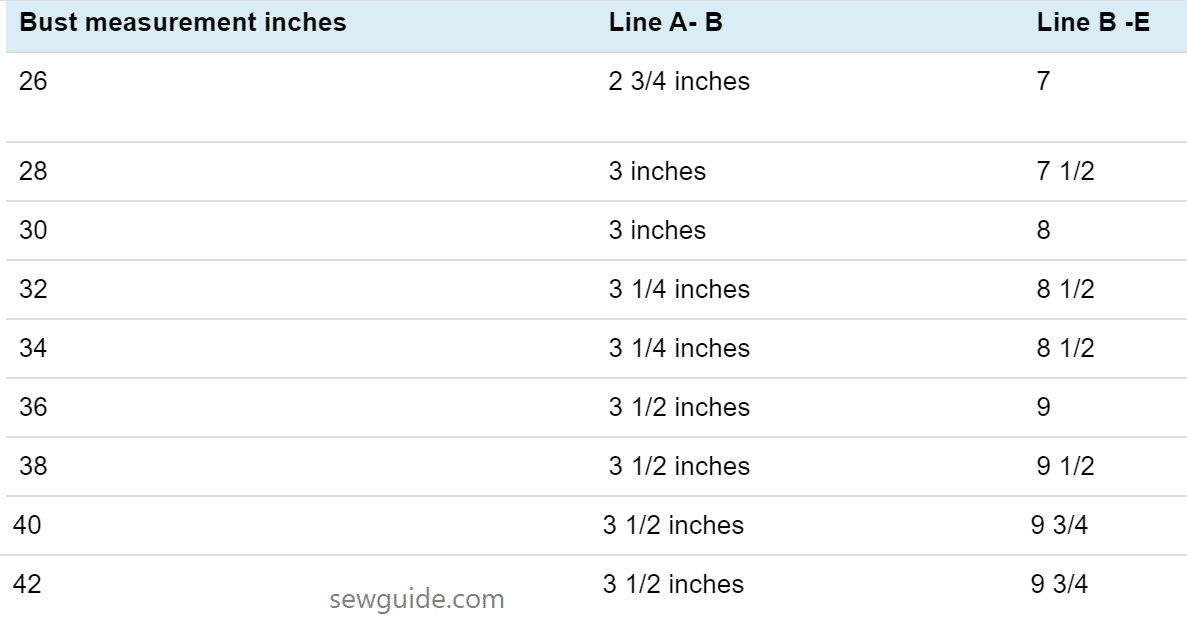
C-D Arm round where you want the sleeve to end
E – B & A – B Mark as per table given below ( this is based on your bust measurement )
Join D- E in a straight line and add 1/2 inch as seam allowance
Mark F as mid point of B-E
Make a straight line from F to G ; Join this line to line A-C in a right angle
Divide the line G- F line into 3 equal parts. Mark the points 1 & 2
Front Sleeve line
Join from A – E so that the line passes through point 1 -This is the front sleeve line
Back sleeve line
From A mark ½-1 inches to point 3 . From point 3 join the line to E through the point 2
Remember that both the sleeves (front sleeve pattern and back sleeve pattern), are marked on the folded sleeve piece on the top. First cut through all the layers of cloth the back sleeve line from I – A. Open the full sleeve and now cut through one half portion through the front sleeve line.
You can draft variations of the simple sleeve by checking out the instructions in the post on drafting different types of sleeves
If you want a different neckline draft it according to the instructions in the post on Drafting different types of necklines . Decide on the best neckline which suits you by checking out this post on 23 necklines – select the best one for you
You can also add yokes to this pattern following the tutorial to draft yokes and sew it up by following the directions given in the post on sewing a nighty. The yoke can be of an interesting patterned / printed fabric or an embroidered fabric.
Stitching the salwar kameez top ( step by step)
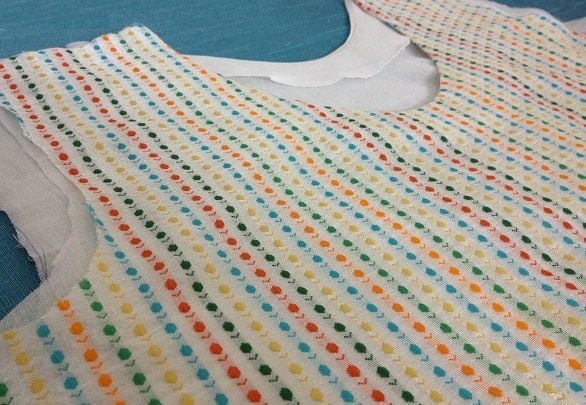
Step 1. Once you have made the pattern markings on the paper, cut out the bodice portion and the sleeves. Do not cut the neck openings now.
Step 2. Cut out neck facing fabric pieces – in two sizes
a. 2 1/2 inch * 10 ” for back neck (this can be cut on bias for stretch)
b. front neck facing 10″ * 9″.
If you want you can iron on an interfacing ( a lightweight iron on interfacing is preferable) to this neck facing pieces . I do. It looks good. Check out this detailed explanation of this step in How to sew facings
Checkout the post on Tips on sewing with Transparent and sheer fabrics if you are planning to sew it with a fine delicate fabric.
Step 3. Mark the neck markings on the facing wrong side. Make center notches on the bodice pieces and the facings.
Finish the edges of the facing pieces with a zigzag stitch or fold the edges and stitch. Alternatively you can hand stitch the facing edges with a whip stitch.
Step 4. Align the front bodice and facing piece with the center notch. (both right sides together.) Pin in place
Step 5. Sew over the marking of neck you have made on the neck facing on the wrong side.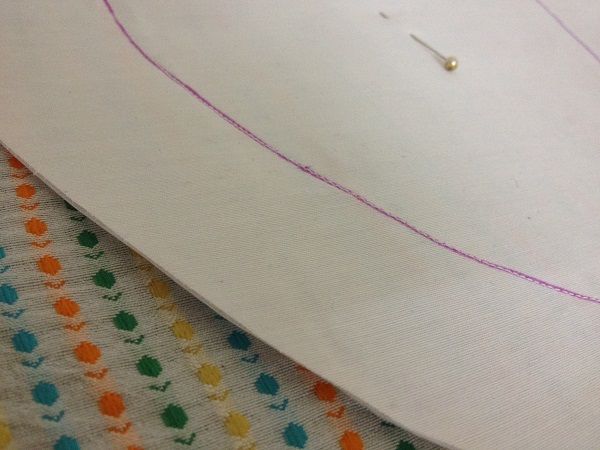
Step 6. Cut out the neck opening with a 1/4″ seam allowance from the stitching you have made.
Make small slits all over the seam allowance in the neck opening, so that when turning over it looks smooth.
(For more details checkout the post on sewing facings )
Step 7. Bring the facing to the other side. Understitch the neck facings so that they do not roll to the front.
Step 8. Shape the edges of the front facing in the shape of the neck. Complete sewing the back facing in a similar way.
Here I have finished the facings of both front and back patterns
Step 9. Join the shoulders
To join the shoulders keep the back and front bodice right sides together. Open the facings and align them also.
Turn both the facings to the front side and pin in place. Stitch everything together along the shoulder line.
Finish the edges of the shoulder.
Step 10. Join the sleeves to the armholes
Step 11.Join the sides till the slit marking.
Now wear it and see if it fits. If it is loose fitting either make darts or stitch the side margin accordingly. After the slit edges are stitched it will be difficult to adjust the fitting. A half an inch to one inch taken in at the side seams around the waist line will be all that is needed.
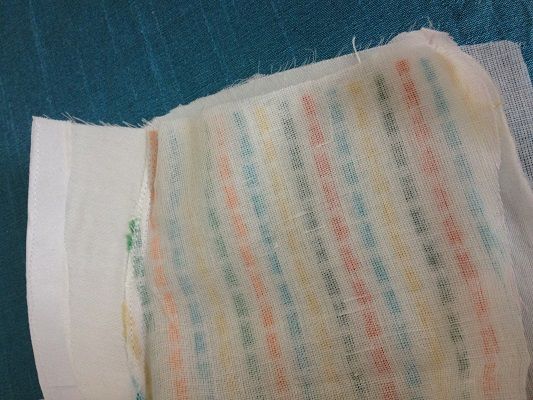
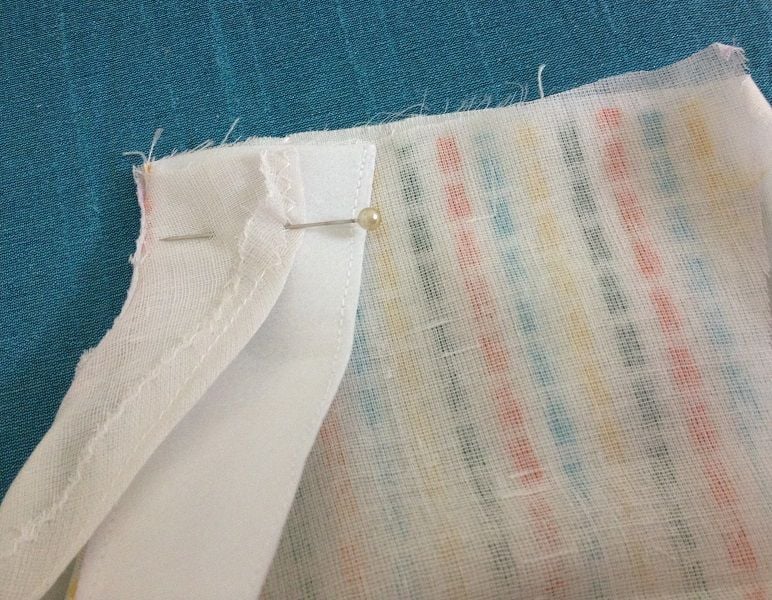
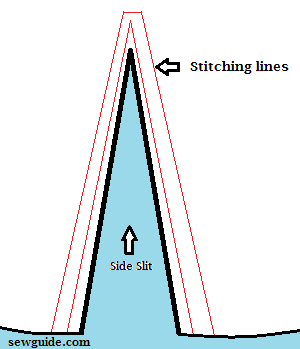
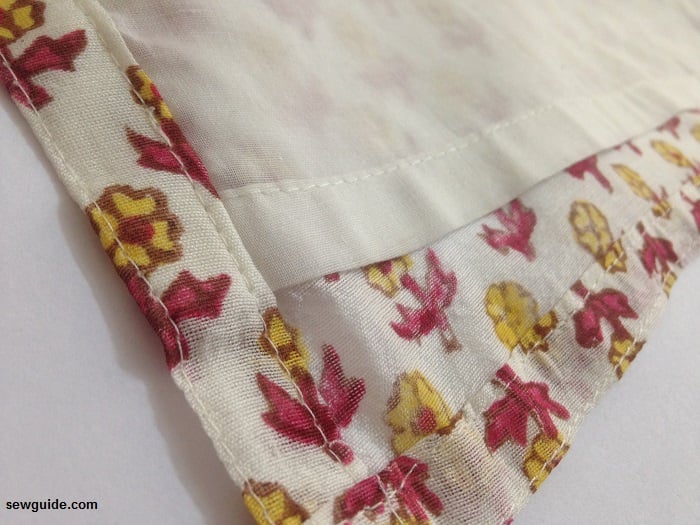
Step 12. Stitch the edges of the slit and the bottom hem edge
To finish the edges of the slit, turn twice the side edges of one side and pin as in the picture below.
Stitch as in the diagram. The red lines are the stitching lines.
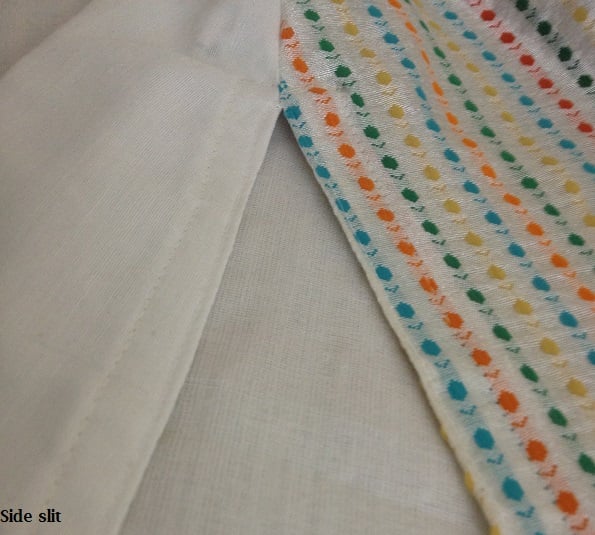
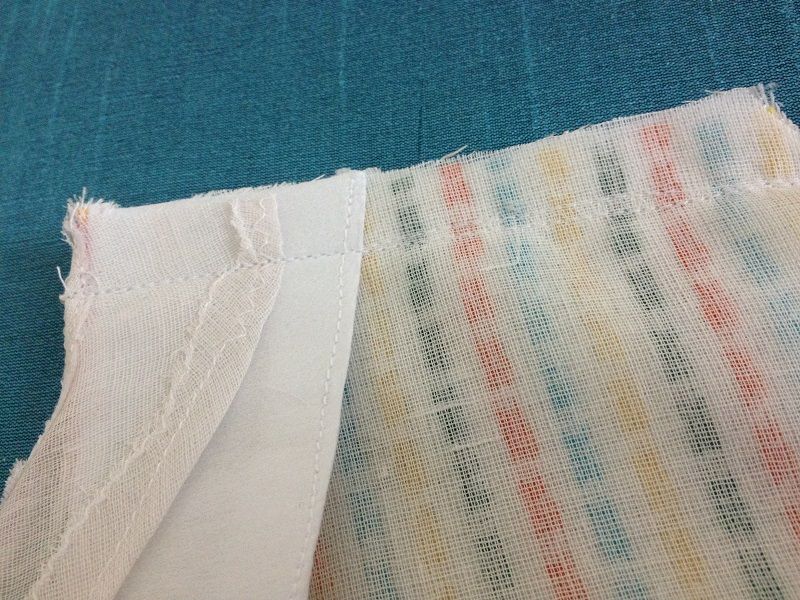
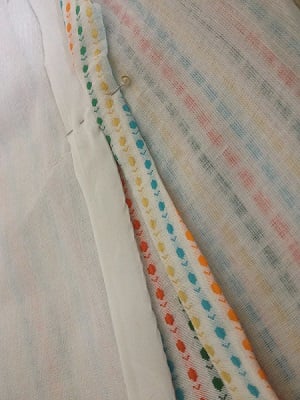
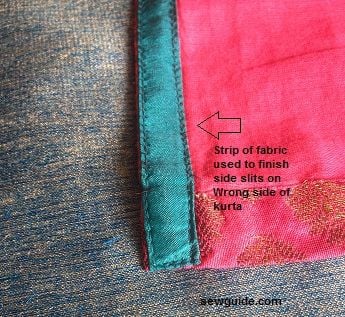
You can finish the side slits by adding a different colored fabric strip to the back. This will look interesting as is shown on the picture below, though it is not visible from the outside.
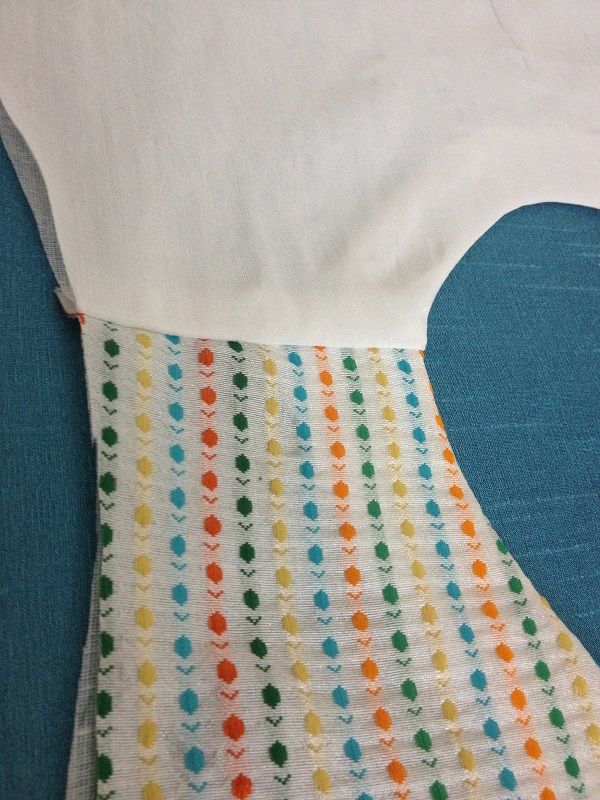
Another option is to add ( stitch to the back of the slit) a piece of golden or silver ribbon to the back of the slit with a little projection so that it looks like piping . You can always do piping but this faux piping looks good as well.
LINING – If you are planning to add lining to your kurta, it is usually cut as a replica of the kameez pattern. It is stitched as one with the main fabric.
If you want, make some basting stitches along neckline and sleeves so that the fabric do not shift when you sew. The only difference is that it will be cut a little shorter than the kurta (1 inch – 2 inch) so that it doesnot hang longer. You can add some extra ease as well. Turn under and stitch the hem of the lining before sewing it up in the slit.
(Checkout the different ways of hemming with a sewing machine and also hem by hand)
If you want to add a zipper to the back of your Kurta you can refer the article on 3 ways to sew zipper to the back of your dress. You can use the method to insert the zipper on dresses without a center seam.
You can add plackets to the front of the kameez following the placket sewing tutorial here and maybe add some buttons or even make some pretty cloth buttons
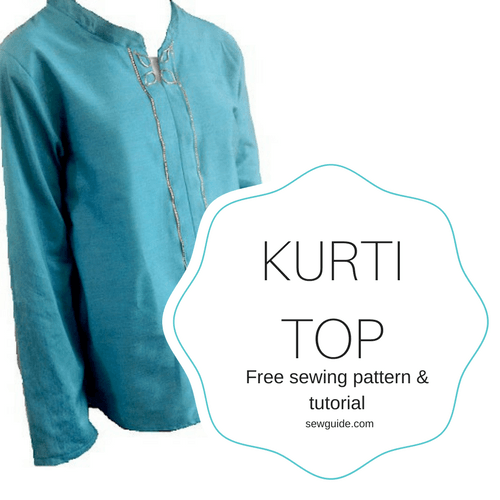
If you want a looser version of the salwar kameez you can try this tutorial to sew a Kurti top with a band collar
Do you want to add a side seam pocket ( hidden ) for your kurta – checkout the tutorial on how to sew a side seam pocket. Sew this before you sew the side seams, ofcourse.
Embellish your Salwar Kameez with any of the fabric trims available or do pretty embroidery designs around the neckline or hem.
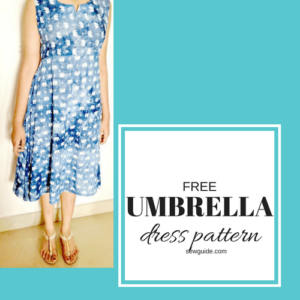
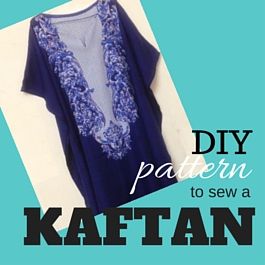
Another alternative to a Salwar Kameez is a Kaftan or a simple tunic. Checkout the tutorial to make a Kaftan dress and the post on how to make a tunic pattern.Checkout the fit and flare panel dress pattern for another option or an Umbrella Kurta
Perhaps you would like to make a pretty bolero jacket /shrug to go with the Kurta – checkout the free pattern and sewing instruction to make a bolero jacket.
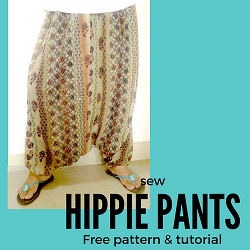
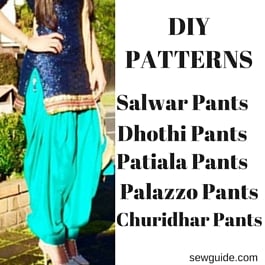
Once you have sewn your salwar kameez it is time for you to make pants for them by following the instructions in the salwar kameez pants tutorial – Dhothi pants, salwar pants, chudhidhar pants, patiala salwars and parellel pants are popularly worn under the salwar kameez.
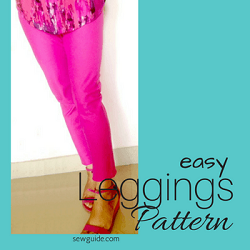
You can also make a leggings to wear with the Kurta with this diy pattern for leggings
You may also want to look at other Fashion sewing patterns

Your wonderful instructions helped me make a beautiful garment which I have since used as the basic pattern to make many perfectly fitting tops. Your website has so much information and I have not used a commercial printed pattern since I have discovered you and your clear ways of designing a great fitting item. Thank you for all your hard work and for sharing with us.
Thanks for writing this, Colette. I always wonder whether others can follow my instructions 🙂 Best wishes.
Hi.. I’ve just managed to read through the instructions and they seem quite simply explained, am hoping to make a draft with them soon. Keep up the good work ..
Hi, when you take 3/4″ for the shoulder slope doesn’t it reduce the armhole width? Further while cutting the fabric with the pattern should we include seam allowance 1/2″ at the shoulder? Else it would further reduce armhole width by another 1/2″ so if my bust is 40, according to the table armhole depth is 71/2″, so the final would be 71/2″-3/4″-1/2″=61/2″ which is believe will be too small… Or is my assessment wrong? Could you please clarify..thank you
Hi Anitha
If you want a nice fit it is how it is. But if you want a loser fit you can add 1/2 inch extra. Please make a mock up with a cheap cloth so that you get the correct fit for you
Hi thank you ..I tried the pattern on a fabric and I would like to know if there is any adjustments that needs to be made to the bodice if the difference b/w upper back width(16′) and front width(15″) of the body is 1″ … Since I see that the sleeves when attatched to the armhole has a difference of 1/2 less fabric in the front and 1/2 excess at the back and don’t meet at the notches of the bodice… What could be wrong…??
Can you please show how to add bust darts to the basic pattern for Kurta?
NICE ONE
On the basis of bust size, how did you determine the size of armhole. This is not clear.
Hi Bishra
Can you check out this post on armhole measurement
Hello, a very quick question regarding the top width of the sleeve. It says 17 inch wide, the when folded the line B-E exceeds the half of the folded length (17 inch width and BE is, say, 9 or 9 1/2 inch).
The sleeve tutorial suggests 20 inch width as the starting point for making the sleeve pattern.
Could you possibly clarify. Many thanks
Hello. Thanks for the tutorial.
Please tell me which page I should refer to make sleeveless Kurta.
Hi Miniki
Please have a look at https://sewguide.com/kurti-sewing-pattern/
hope this is what you want
sarina
its a very good .
Thank you Kavita
Hello,
Thanks for the detailed take on drafting and sewing.
Question: Does the drafting include the seams, if so how much is it for the sides.
Thanks in anticipation.
Hi Subhashree This includes seam allowance – 1/2 inch
Thank you Sarina. At the cost of repetition I appreciate your detail oriented instructions on drafting.
i have followed several different websites. I am attempting one exactly as per your instructions. Shall keep you posted on the outcome.
Thanks once again for your quick response.
I am the beginner to stich the salwar.
I need the simple way to cut and measure
Hi Sujatha , Can you try this pattern – it is simple enough for a beginner – https://sewguide.com/free-tunic-pattern/
Hello i liked the way you explain i need your help plz can you help me, i want to know how to stitch neck with paper alin and how to cut arm hole could you plzz help me
Hello i like the way you explain thanks i need your help plzz i did not under stand how to cut arm hole and stitching neck can you personal explain me
Hi Merj
thanx. please checkout the drafting necklines page and drafting sleeves page for what you want
sarina
How would I make a Kurta for a an eight year old girl ? How would I measure her ? Any help will be greatly appreciated.
Hi Neeta,
I would make it the same way as I do for adults – kurta is a straight column dress without much contours – not complicated – checkout the how to measure body post if you have doubts
sarina
I would like know how to get AE, AN, AP line. how to calculate does lines.
Hi Rashida
Those are measurements you should take on your body – measure from the shoulder to bust, waist and hip with a tape measure.Checkout this one -https://sewguide.com/how-to-measure-body/
Hi
Thanks for the tutorial
Thank you for this – I have been wanting to make a kurta
this is a wonderful way to explain to sew a kurti
thanks a lot