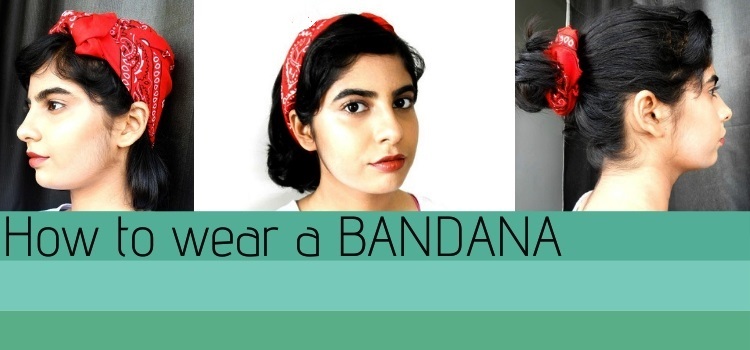
This post gives you all the info you need to sew a bandana.
No longer are bandanas associated with bandits, hippies, outlaws, and cowboys. Today we have all found new ways of wearing the bandana. The fashionistas of the modern world use them as a headband, wristbands, pocket squares, collar cuffs, hankies, skirts, tops – whatnot. This square piece of fabric that is used to cover the head or tie around the neck is a versatile cloth that takes on many roles as occasion demands.
Bandanas are not expensive; compared to a shawl, they come cheap. But you can make them even cheaper and prettier than the ones you get at the store, especially when you can customize them to your special purposes.
If a favorite team is playing, you can wear a bandana scarf on your head with the favorite team’s (football? cricket? baseball? basketball? tennis?) emblem painted or embroidered on your bandana. Display your pride in your favorite team by wearing their color and logo.
Even if you are not into sports, this one will make a good gift for your man to wave in the stands. If you belong to a charitable organization or a club, why not stitch one for all of the members? This way, your unity is displayed for all the world to see in the way you wear your club’s colors.
There is no end to cool DIY ideas to do with a bandana on the internet. Your kids could go crazy on creative juices with a white cotton bandana—something (anything) to keep them quiet and happy for some time.
When you embellish the bandana with rhinestones and other such bling, it reaches another space altogether. You know that embellished bandanas are in high demand and cost much more than ordinary ones. Why not do it yourself with the supplies you have at home?.
Standard size of a Bandana
Bandanas are basically square in shape. It can start from an 18 “square, but I think that size will be more fitting for a child.
A 22-inch Bandana is what I would prefer for myself. The ones we usually get at the retail stores measure 22- to 27 inch squares.
The 27-inch bandanas are usually called Jumbo.
More like this:
- Checkout this post on the sizes of different types of scarves.
But a small triangle-shaped fabric also makes a non-fussy bandana.
Here is how to cut it.
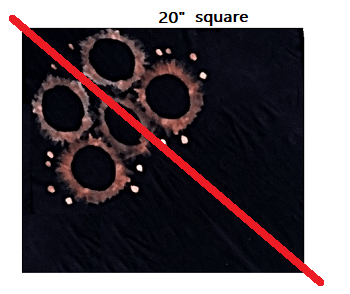
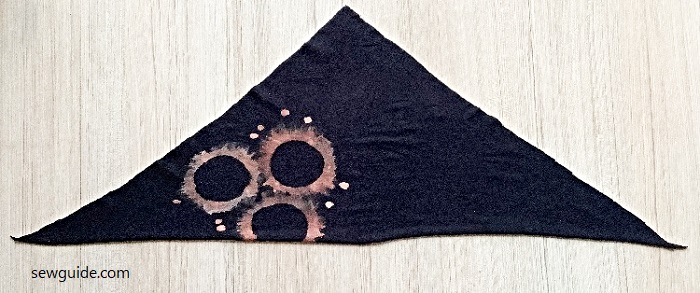
Triangular bandana
You can take a 20-inch square fabric, cut two triangles out of it, give one to a friend, and keep the remaining one yourself. Using an old t-shirt means you do not have to finish the edges. Knit fabrics do not fray.
How many Bandanas can you make from a yard of fabric ?
This is the square bandana – If you are making a 21 inch Bandana from a 45 inch wide 1 yard cloth ( .91 meter / 36 inch) you can make 2.
Fabric suitable for making a Bandana.
A medium-weight cotton like muslin is best suited to make the bandana. You can also make a pretty bandana in silk or satin.
If you are using it on your hair, it had better not be a very slithery, slippery fabric like satin. They will never stay put on your head. Sure they will look incredibly pretty.
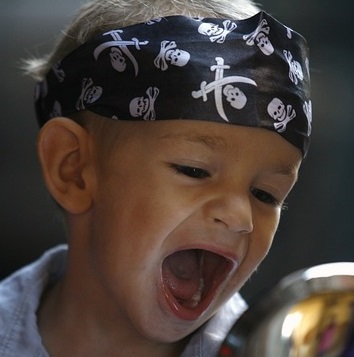
Using a fabric with interesting prints also is popular for making bandanas. Many skull Bandanas are going around.
As a present, I suggest drawing a skull on a bandana and giving it to my cousin, who likes things like that. Look how the scull bandana has made the kid look fierce. Or maybe not. He is still cute.
Another thing to look for in the fabric selection is if it is skin friendly. You might find a good fabric, but if it is scratchy on the skin, you might find it uncomfortable to wear it next to your skin.
How to sew a Bandana
Step 1
Cut a 22 or 21-inch square piece of fabric in your preferred color.
The 21-inch fabric would make a 20-inch square bandana. This is ideal for an adult head. You should know that you will lose 1/2 inch from each side when hemming a rolled edge in the sewing machine. So for a 20-inch bandana, I will be cutting a 21-inch square piece.
If you are making a bandana for a kid, make it slightly smaller. For my ten-year-old daughter, I made one in 19-inch square, which came out to be 18 inches, and it was good, but slightly big is better than small.
Step 2
Make a rolled-edge hem on all four sides.
As we are using medium or light fabrics to make these bandanas, a rolled hem is the best. Use a 10-size needle to sew the rolled edge.
Alternatively, you can hand sew the edges if you want to. Checkout the tutorials for the best hand stitches or different ways to hand sew the hem to make the hem. If you are patient enough and something of a perfectionist, go for a shell edge finish for all the sides of the bandana. They are beautiful.
To make the rolled edge finish for your bandana, thread your sewing machine with a matching thread and load the bobbin with the same thread. You will be using a straight stitch.
Attach the rolled hem feet on the machine. More details on using the roller hem feet to make a rolled hem can be found here.
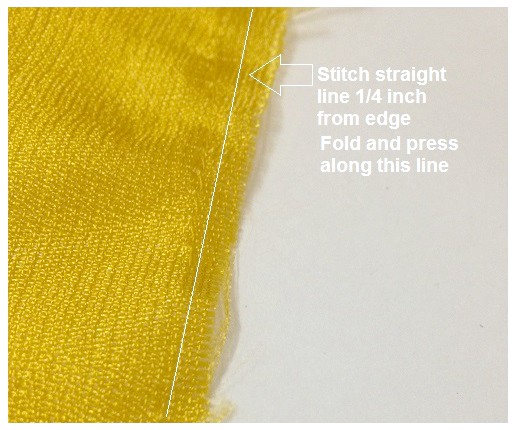
Turn under 1/8 inch from all edges and press in place. If you are using a very thin fabric to sew the bandana, you could make your work easier by first making a straight stitch along the fabric edge 1/4 inches from the edge on all sides – before folding.
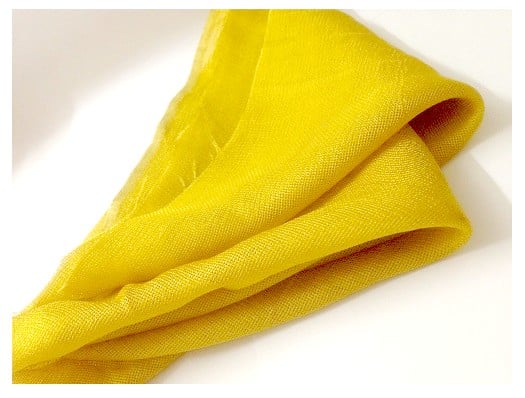
I did it with the georgette fabric I am using. True that it is an additional step, but because the light weight fabric may be difficult to fold and stitching it without this new stitching line will ( may) result in a shoddy rolled stitch).
Fold the fabric edge, once more so that the raw edge is now inside. No need to press now. The continuing fold will be made by the machine’s foot.
Thread a hand-sewing needle with double strands of thread. Make one or two anchoring stitches in one corner of the fabric near the fold. This is just for guidance and will be cut away later so use any colour thread.
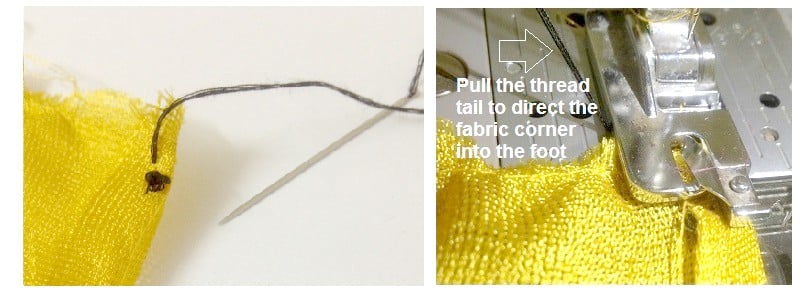
Keep the fabric on your sewing machine so that the needle is on top of the newly made folded edge. You can use the thread tail you have to guide the fabric into the rolled hem foot.
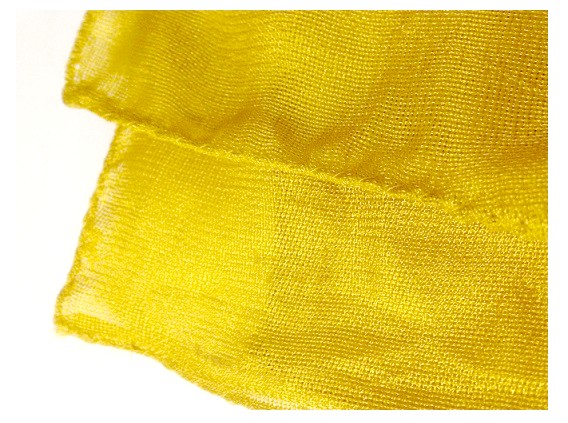
Start stitching. As you sew, a nice narrow edge will be made along the sides.
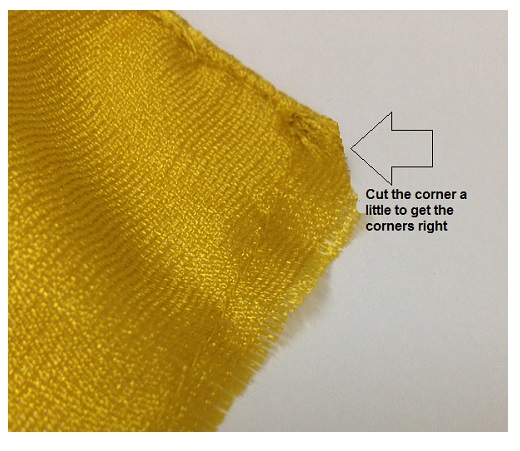
Continue doing this with all the sides.If you are having any trouble folding the corners without the fabric ends sticking out like a dog’s tail, cut a little bit of fabric at the corners or make a mitered corner.
After finishing the hem of your bandana, if there is still fabric sticking out, use a hand needle and thread to roll and work a whip stitch to get the fabric corners in shape.
If you are not familiar with sewing a rolled edge , practice on a scrap of the same fabric as you are going to sew the bandana. Different fabrics behave differently to the rolled hem foot.
So you may get a perfect rolled hem on cotton, but the same may not happen with chiffon. So ‘practice first’ is my advice.
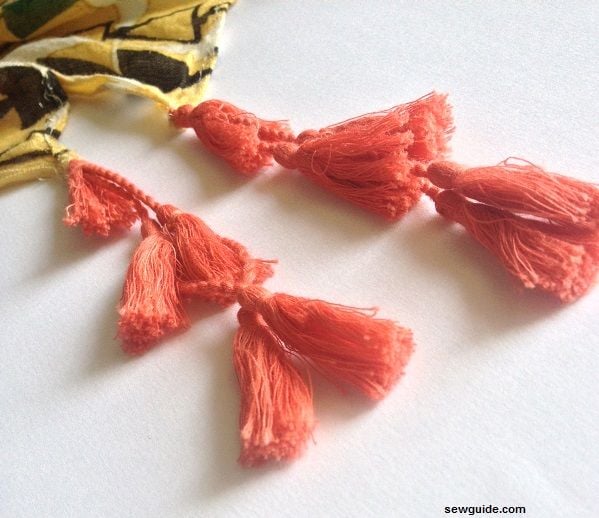
On the bandanas that my sister wears, there are always tassels attached to the corners. She wears these big jumbo bandanas which almost look like a wrap and which are mostly austere in colors like black or white, but the tassels bring something lighthearted to the bandanas and they are always very colorful.
I took a sneak picture of one of them. Checkout the tutorial to make tassels like these.
Step 3
Decorate your bandana.
You could embellish your bandana with some embroidery flowers, tie dye paint, fabric painting, stenciling, bead work, or even sequins. For a dazzling look, try Swarovski crystals on your bandana. Iron-on patches can also be added to the bandana.
Rhinestones can be applied to the fabric on top of the design using glue. If you are applying the stones, try placing them without glue. If you like the arrangement, use a tweezer to keep the stones with glue onto the fabric.

More on decorating the bandana
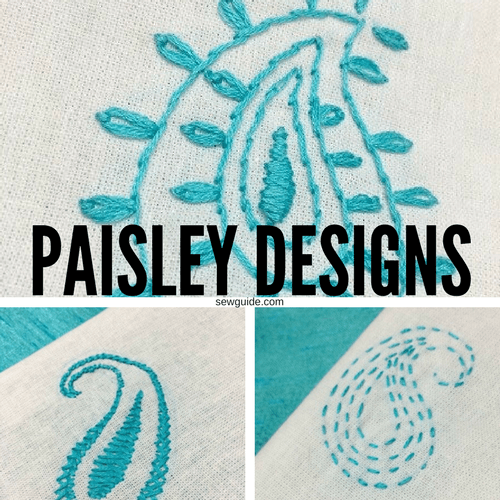
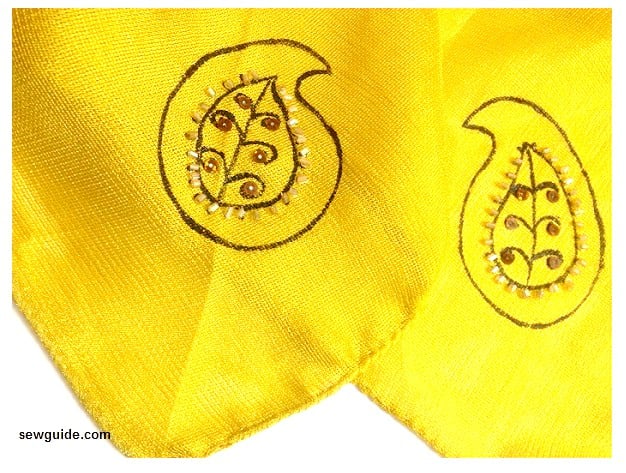
I decorated my bandana with a paisley design in remembrance of my earlier ones. Paisley designs are great and I love them still. I had some black fabric paint left over from some other projects and some bugle beads and sequins.
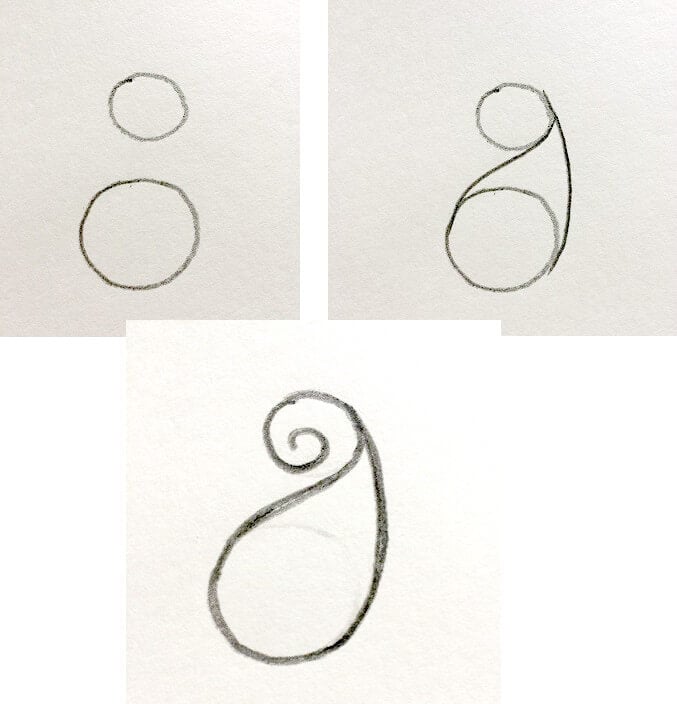
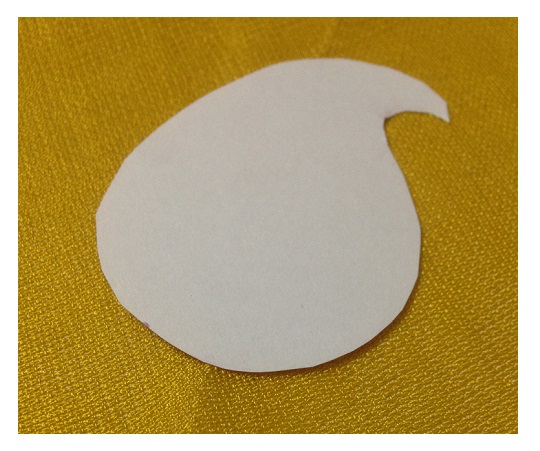
If you are not a ninja in drawing, it is better to make a template of the design to ensure that the design stays the same throughout your cloth. Draw two circles like the above and interconnect them. Tracing it from a book with carbon copy paper is another idea.
I made the template for the paisley design and drew around it with paper. In fact I made a template for the smaller paisley shape inside the bigger one too.

I dipped a thin Number 0 brush in fabric paint and outlined. You can also make small chain stitches as the outline in gold embroidery thread. Then apply fabric glue in small drops. I picked up beads and sequins with a tweezer ( so that my fingers are not drenched in glue) and dropped them on the designs.
Can you now sew the bandana?
When I was a kid, I had two bandanas – a red and a black one. On any long journey, either one was a constant on my head or around my neck. I had a bad tendency to get cold at the drop of a hat. So these bandanas protected me, and I liked to wear them. They were colorful and had those cute paisley prints, which I loved.
Since then, I have known several other ways to tie a bandana. Nowadays, I see many wearing bandanas – even dogs. Dog bandanas are ever so popular. Boys have them tucked in their pockets. My cook wears them when making food, and she has a couple that change with her clothes.
I can see myself making a couple now that I am into it – so many small fat square pieces and other scraps lying around.
Checkout this post on block printing for doing this easy diy decorating your bandana.

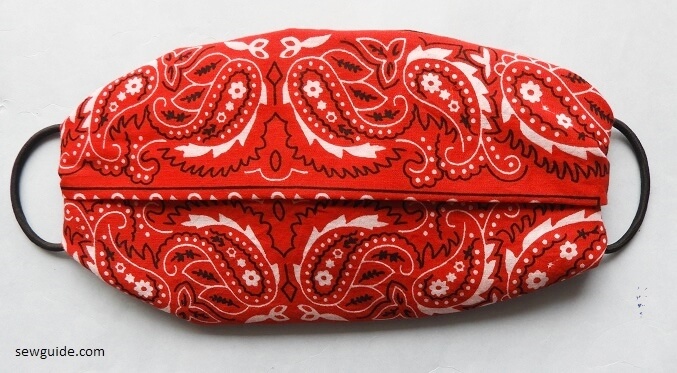
If you are looking for instructions for tying a bandana as a mask, you can checkout this post ” How to fold a fabric into a no-sew face mask “
Great information! Thanks!
your cook? are you on a cattle drive?
Hi some guy
Sort of : ) but I do have a cook, believe it or not ; )
Thanks for the hemming tips. Getting ready to sew 12 bandanas for a hiking group to France.
Very useful.lwill try this bandana