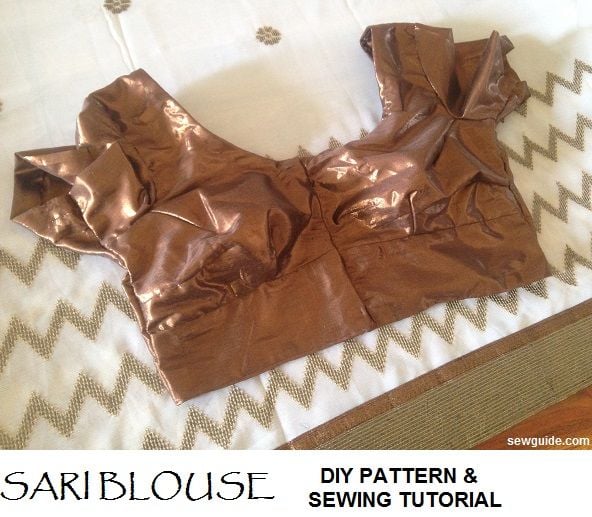
How to sew a Sari Blouse or Jacket
Sari is the sexiest of all ensembles. It could also end up making you look the drabbiest. It all depends on the way you wear it and the BLOUSE.
A fitting sari blouse is a number one priority when wearing a sari.
I am not a frequent sari person but for the occasional weddings and functions nothing is better than a Sari to make you look fab. A salwar Kameez, however ornate, just does not cut it.
A Saree blouse is a fitting garment which molds our body showing all the curves you have ( or you don’t have) – It has darts near the bust which gives its shape – but you can also make a Saree blouse without this shape. Infact the princess line saree blouse is my favourite. But this one with darts also looks great especially for ladies who are curvy.Checkout the tutorial for the princess cut sari blouse

Or make a simple bodice top like this one if you want a simple dartless blouse for your sari. If you want you can make it a little more fitting by giving two darts near the waistline.
To make the sari blouse in this post we have to take the body measurements first, then make a paper pattern ( best way, but you can also mark directly on to fabric) keep the paper pattern on the fabric, cut the cloth and then stitch it – sounds easy right ?- not as complicated as the sari blouse looks.
How to sew a Saree Blouse
Take the following measurements
- Length
- Front Bust measure ( from front armpit to the other over the highest point of bust)
- Back measurement ( From back armpit to the other armpit)
- Shoulder to shoulder
- Sleeve length
- Sleeve round
- Armhole measurement. All around the armscye.
- Back neckline
- Front neckline
- Waist round ( Where the blouse will end )
Checkout this post on How to take body measurements to know more on how to measure your body.
How much cloth is needed to sew a sari blouse
A minimum of 3/4 meters ( 75 cms ) is needed for sewing a saree blouse. This is for a bust round of 32 inch . 1 meter is the maximum you need for stitching a saree blouse, for most sizes. This is for a blouse with a sleeve length of 6 -8 inches. If you want a longer sleeve length you will need more cloth
If you are a serious juggler you could sew the blouse with lesser cloth, like scraps from your salwar kameez sewing .In fact I would suggest that you make your first blouse from such scraps you will definitely be having if you are into sewing. Make any necessary changes and then make it in your prized fabric.
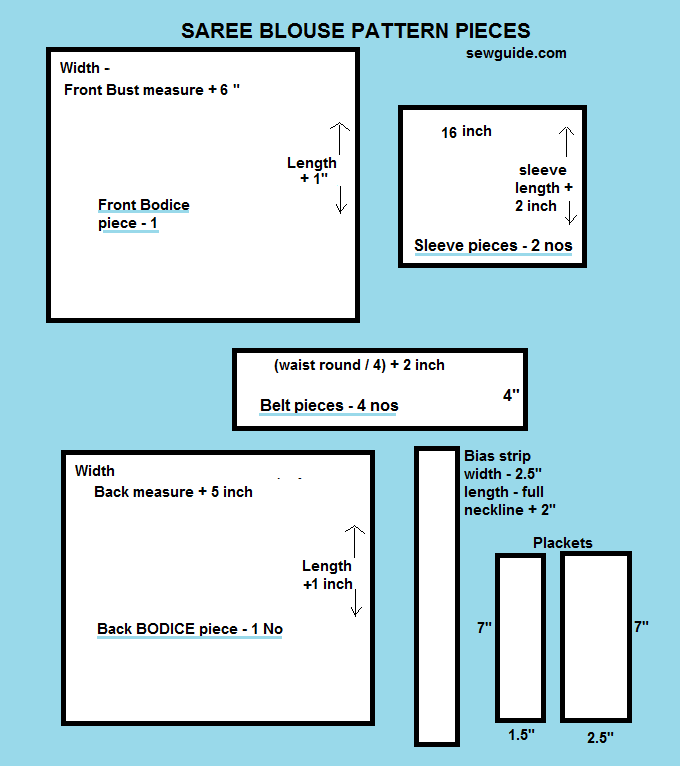
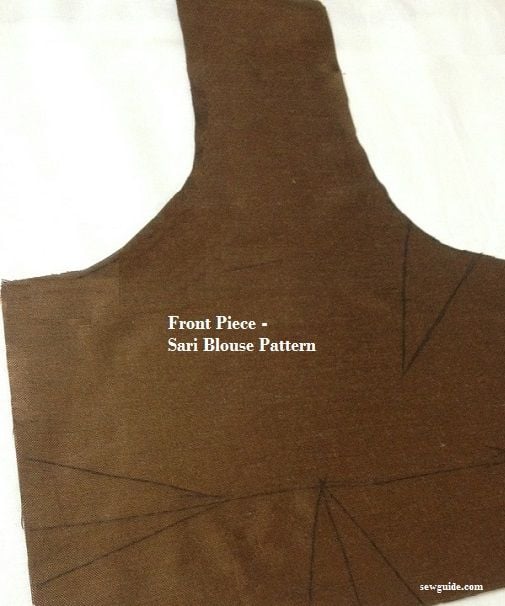
Pattern pieces for a Sari Blouse
You need to cut the following pieces ; refer picture given below for details.
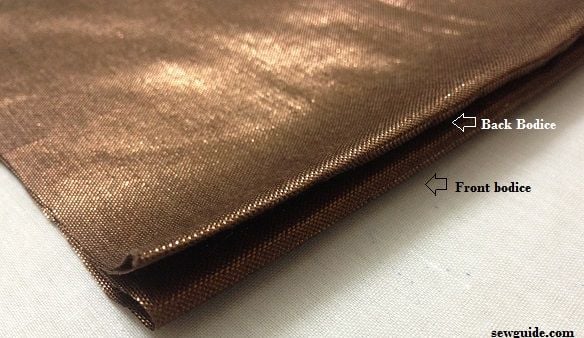
1.(FRONT & BACK ) BODICE PIECES -2
For the front bodice piece take 1 piece of cloth of the following dimensions
width – Side to side measure ( from the armpit) in the front over the highest bust point. Add 6 inches ( just to be safe)
Length – Length taken earlier plus 2 inch
For the back bodice piece take 1 piece of cloth of the following dimensions
width – Side to side measure ( from the armpit) of the back. Add 6 inches
Length – Length taken earlier plus 2 inch
2. Sleeve pattern pieces (2)
For sleeves take 2 pieces of the following dimensions
width – 16 inch
length – sleeve length + 2 inch
4.Yoke or Belt pieces ( patti)
Cut 4 pieces with the following dimensions
width- (waist round / 4) + 2 inch
length – 4 inc
You will be having 9 pieces of pattern in total.
You also need a bias strip of width 2 inch and length equaling the whole neckline plus 2 inch ; and two strips of fabric
- 1.5 ” wide and length of the front opening
- 2.5″ wide and length of the front opening
Drafting the Sari Blouse pattern
Mark the back pattern with a chalk on fabric ( or make a sewing pattern on to paper) with the following measurements
Step 1
Back bodice Pattern
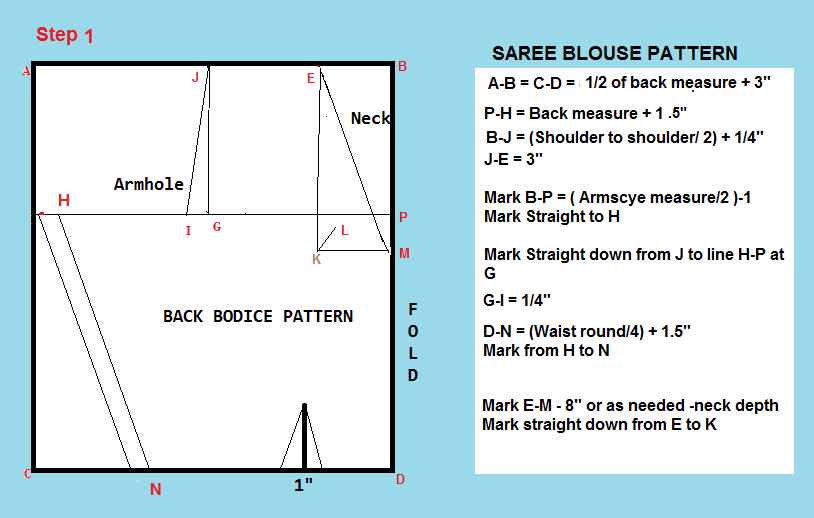
P-H =Back measure + 1.5″
B-F = (Shoulder to shoulder/ 2) + 1/4″
J-E = 3″
Mark B-P = ( Armscye measure/2 ) – 1″
Mark Straight to H
Mark Straight down from F to line H-p at G
G-I = 1/4″
D-N = (Waist round/4) + 1.5″
Mark from H to N
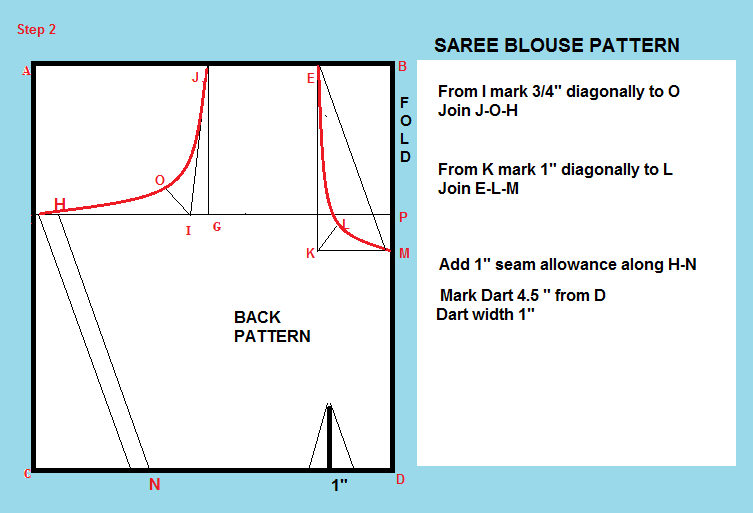
From I mark 3/4″ diagonally to O
Join F-O-H
Mark E-M – 8″ or as needed – this is the back neck depth
Mark straight down from E to K
From K mark 1″ diagonally to L
Join E-L-M in a soft curve
DART – Mark a dart 4.5 inches from the fold . The dart length is 4 inches. If the blouse is long increase dart length till 6 inches. Width of the dart is to be 1″ . ie 1/2″ wide on either side of the mark
Step 3
Front bodice pattern
A- B = Front bust measure ( from one side to other side over the highest point of the bust) /2+ 3″
Make the measurements like neck width, shoulder on the front bodice piece as on the back pattern. Then continue as the picture.Please note that waist measure is not taken for the front pattern piece.
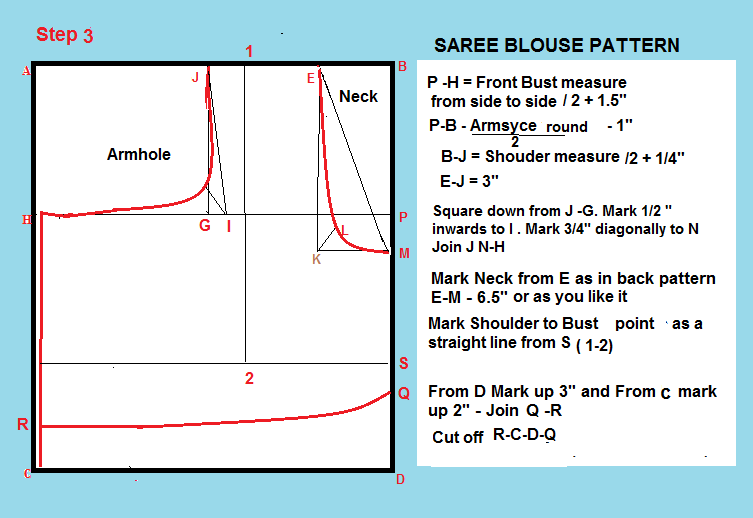
Cut off the piece where yoke should be joined. We will be cutting and stitching a separate yoke piece here.
Mark the darts.

Add a 1″ seam allowance along H-N
Cut through the center fold M-Q. This will divide the front pattern into two pieces.
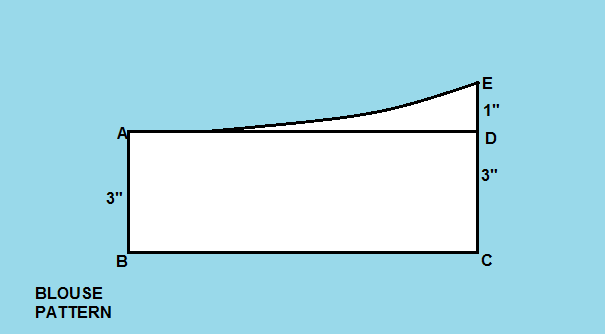
Make the yoke pattern
B-C will the same as R-Q at the front bodice pattern
.
Cutting the Saree Blouse pattern
Place all the paper patterns and then mark on the fabric around it with a chalk.
Remember that the back and front bodices and sleeves are marked on fold so the fabric should be kept on fold too.
It is necessary to pin the pattern to the fabric as otherwise the whole thing will shift and the measurement will be off.
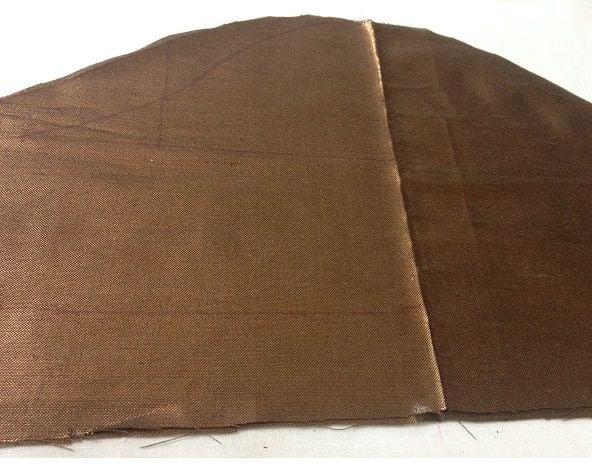
Keep the two bodice fabric pieces on fold.
Cut the pattern pieces; If you are adding sleeves follow the directions to make a simple plain sleeve pattern .
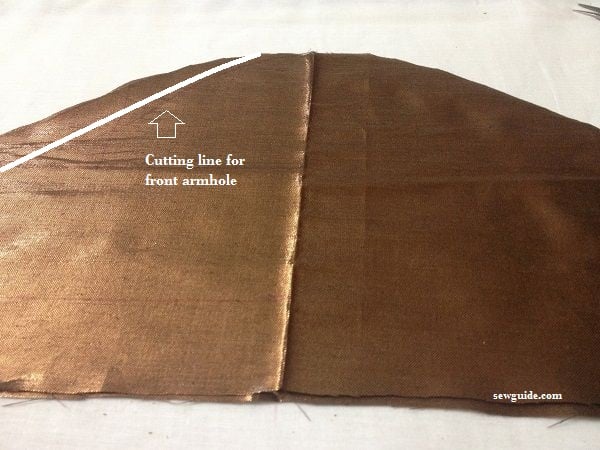
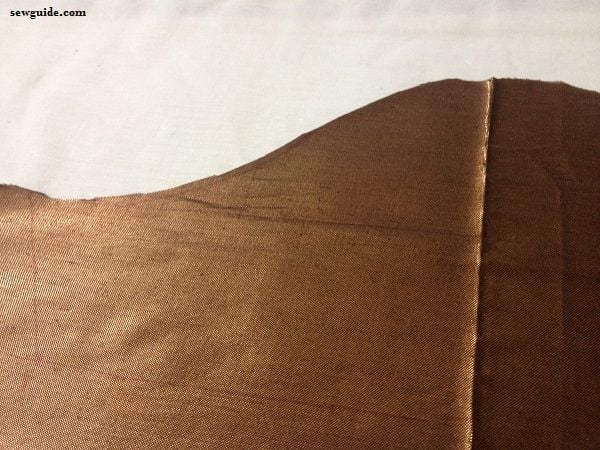
Cut out the sleeves.When cutting sleeves, keep the 2 sleeve fabric pieces folded and aligned. Mark the back sleeve and front sleeve on the same piece. After marking, cut through the back armhole line. Then open it up and cut through the front armhole line . So now you have one side back armhole line and other side armhole line.
Cut the bias strip and the placket pieces and keep them aside. These are sewn last.
How to sew the Saree Blouse
Step 1
Sew the darts from the inside of the front bodice. Do not forget to leave long tails of thread at the tip of the dart. This is for tying up to secure the stitches.( instead of back stitching )
Step 2
Sew the dart in the back pattern too
Step 3
Join the top edge of the yoke piece to the two front bodice pieces
Keep the right side of one waist yoke piece with right side of the front pattern piece.
Keep the right side of the other yoke piece with the wrong side of the front pattern piece
3 layers of cloth
1. 1st yoke piece right side up
2. bodice piece right side up
3. 2nd yoke piece wrong side up
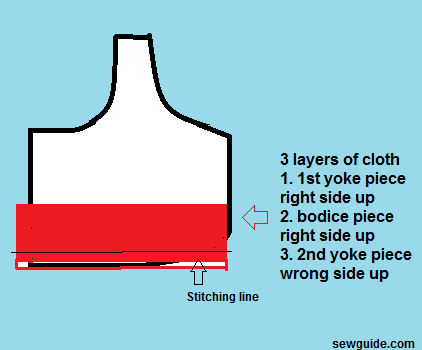
That is the front pattern piece fabric edge is sandwiched between the two yoke pieces top edge
This will make the seam edge inside after stitching and look neat. Now the yoke and front piece are joined together for left and right front pieces
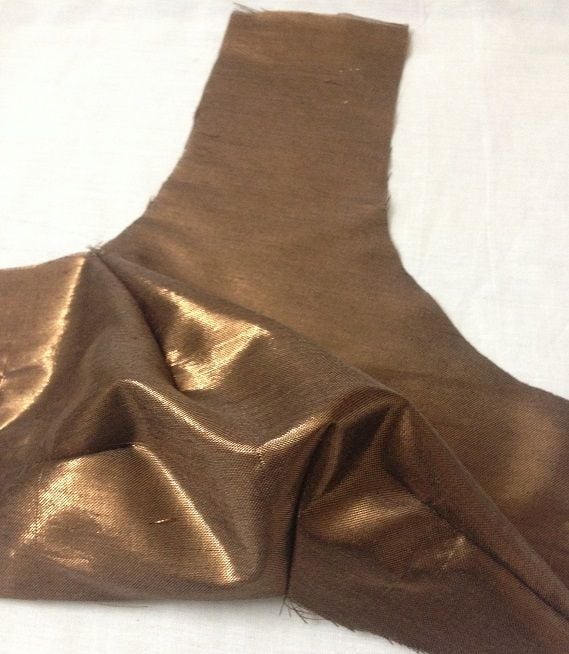
Step 4
Join the shoulders of the back and front patterns. Do not forget to finish all the fabric edges, for the blouse to look professionally sewn.
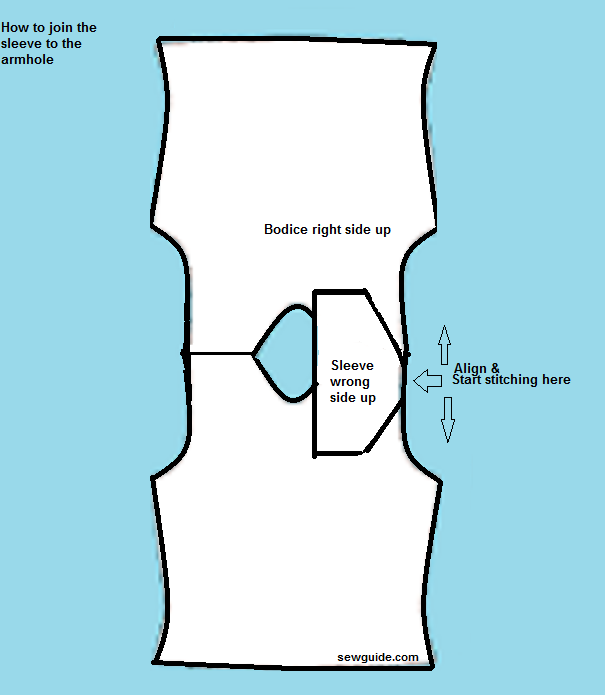
Step 5
Join the sleeves to the pattern – basically like in the diagram below
Checkout the post on Sleeve patterns to learn about drafting sleeve patterns in different styles and how to join sleeves to the bodice.
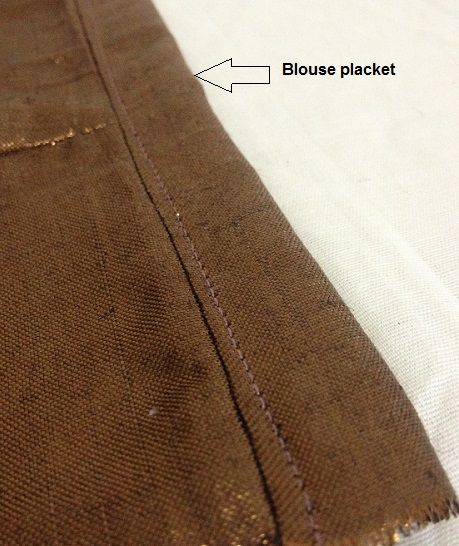
Step 6
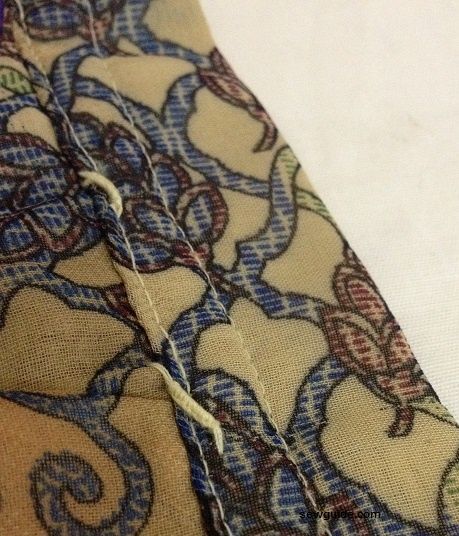
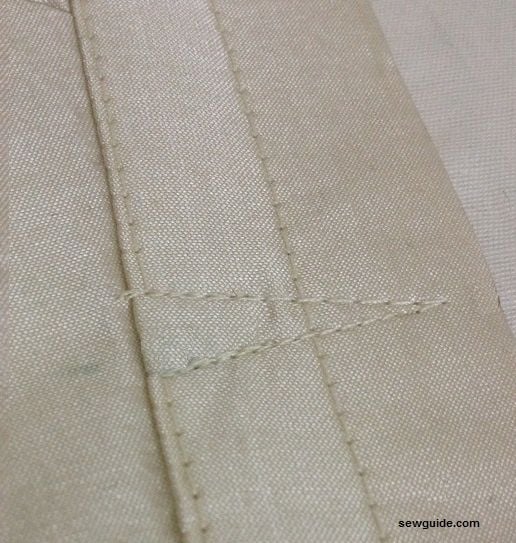
Add placket to the front opening. The placket facing strip is sewn to the edge of the front opening and then folded by half and turned to the other side to conceal the back fabric edge
Right side placket is folded completely to the back.(ie when you look at the blouse the one on the left) This is where you will sew the small metal hooks. On the other side you need a projecting placket to sew the thread loops for the blouse hooks. Left side one is left for sewing the hook loops.
You have two choices to make the hook loops.One is a thread loop and the other is a clever method of sewing the placket which leaves space for the hook eye.Check out the 5 + ways to sew hook on to your clothes
Step 8
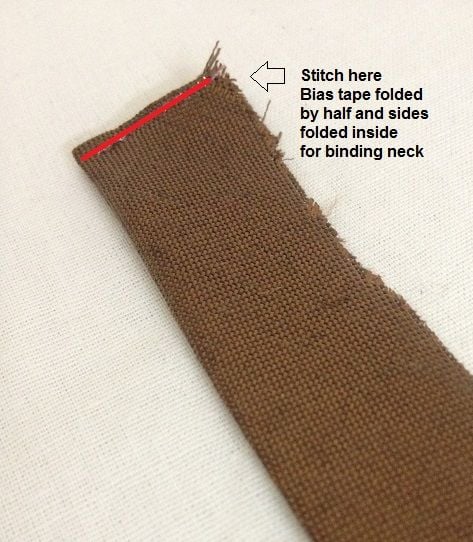
Make a bias tape binding for the neck. First cut out the bias tape. If you donot know how to make bias tape checkout the tutorial. Checkout the bias binding tutorial as well if you donot know how to.
Fold the bias strip by half. Fold the edges of the binding strip inside. Stitch the edges.
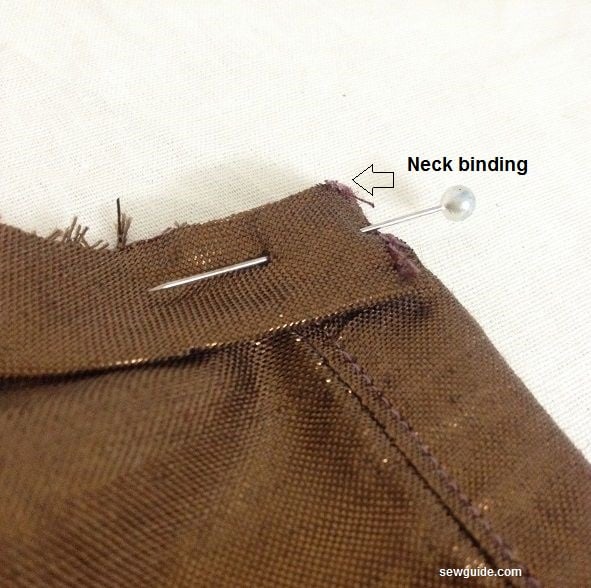
Stitch the binding and the neckline right sides together together, starting from one side of front bodice
Step 9
Align the front and back bodice pieces at the sides. Make them the same size.Do the hem of the front and back bodices.I do binding here too. I like the look of binding on hems. The facing when turned inside looks very neat. This is then whip stitched by hand.
A blind stitch or whip stitch also works well. You can also sew a machine hem but hand sewing stitches are better looking
Step 10
Join the side seams
Your beautiful blouse is ready.
If you feel like doing some embellishment on your blouse, do some mirror embroidery or kutch embroidery or phulkari embroidery. You can also freehand draw some flowers and fill it up with long and short stitches
( If you have any questions please ask in comments )
You may wish to make a halter blouse for your sari like this one here. It is simple tie back pattern and can be made very easily.You may want to shorten the length a little
Related posts: Different Types of Sarees. ; How to sew a sari petticoat; How to wash saris
Related posts