Blazers, Vests, Jackets – they are always in demand. They go with everything, be it dresses, skirts and blouses, pants. Layering starts there.
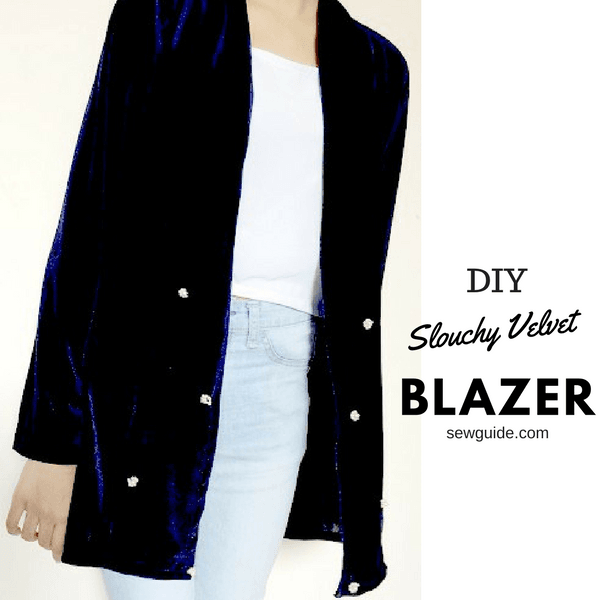
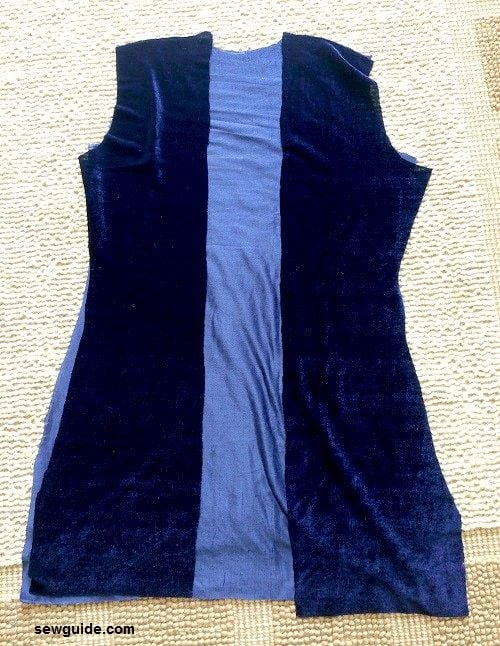
We always have room for one more blazer. And here it is – the all time favourite in Velvet. This hip length ( or longer) slouchy blazer has a shawl collar, an open front and long sleeves
How to make the pattern
It is better to make a paper pattern for the back pattern first and then base this paper pattern to cut the front panels. This way there is no waste of the precious velvet fabric.(rather than marking directly on the fabric as I normally do for other inexpensive fabrics)
Back pattern
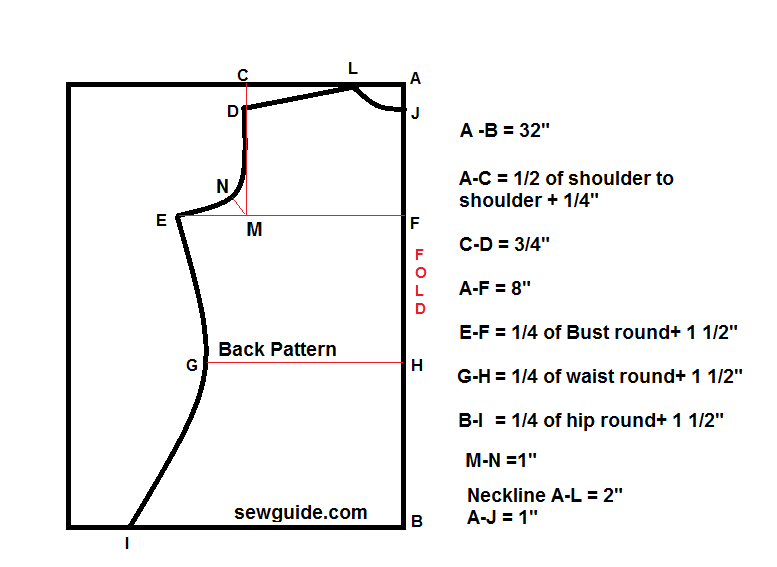
A <span “>- B = 32″ – this is the height of the blazer plus 2 inches. You will get a blazer of about 30 inch ; this is hip length or longer depending on the height/build of the person.
Mark A-F a line parallel to the top edge 8 inch from the top ;
A-F = 8″
A-C = 1/2 of shoulder to shoulder + 1/4″ ; You will have to measure from your left shoulder tip ( Where your sleeve begins) to the other shoulder tip. Divide this by 2 and add 1/4 inch.
C-D = 3/4″. This is marked for the shoulder slope.
E-F = 1/4 of Bust round+ 1 1/2″
G-H = 1/4 of waist round+ 1 1/2″
B-I = 1/4 of hip round+ 1 1/2″
Mark straight down from C to the line E-F to M; From M mark diagonally 1 inch – N
M-N = 1″
Join D-N-E in a soft curve for your back bodice armhole.
Join E-G-I in a soft curve for the side seam.
Mark the neckline width A-L = 2 inch
From A mark down 1″ to J ; Join from L- J in a soft curve for the neckline
Your back pattern is ready. Cut the fabric piece with it.
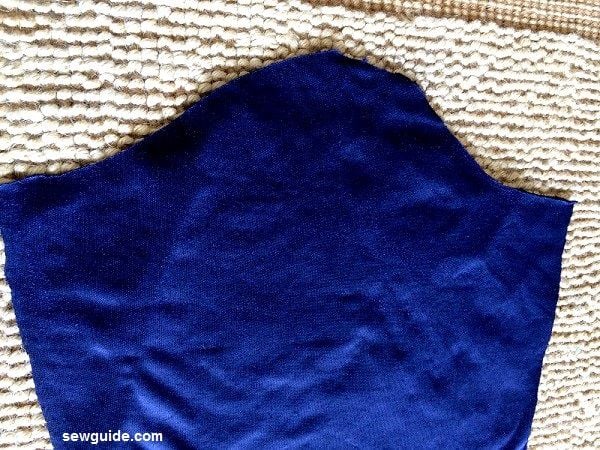
Front panel pattern
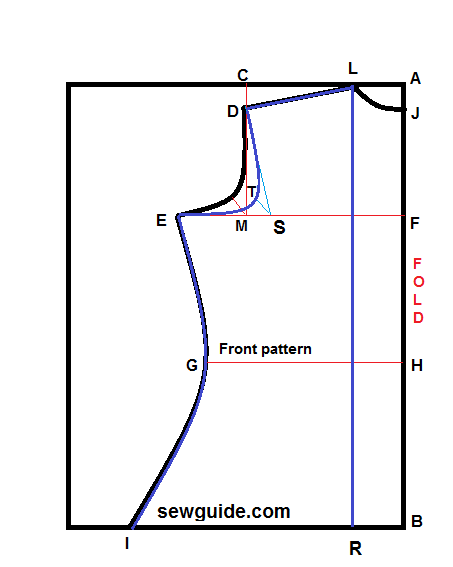
Keep the back pattern on another piece of paper. Make the following changes
Mark inside 1″ from M to S. Mark 3/4 inch diagonally to T; Join D-T-E in a soft curve for the front armhole line.
Cut along L-R-I-G-E-T-D. This is your front panel pattern. You need to keep this on a center folded fabric so that you get 2 fabric pieces which are mirror images- left and right panels
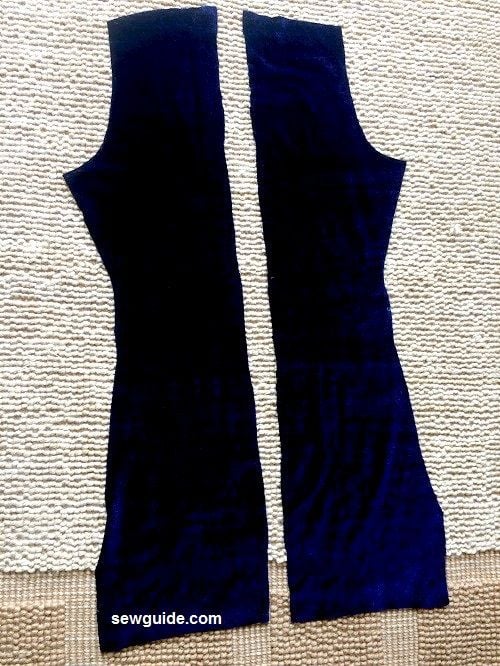
Keep this front panel on the folded fabric and cut pieces. Ensure that you have cut everything as you should.
Shawl Pattern.
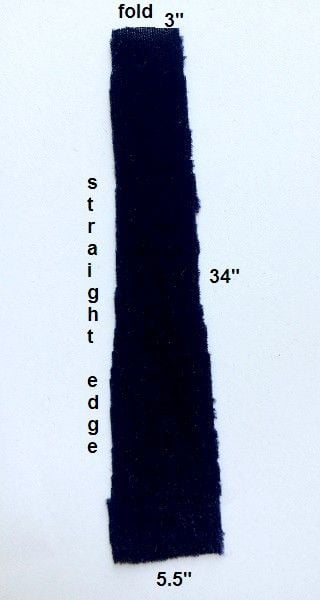
Now to make the shawl pattern; You need a long fabric strip of about 70 inch long for making this.
You will have to join fabric pieces unless you have that long a fabric piece. Fold it by half and mark the pattern. One side is straight and the other slightly slanting. The straight edge will be sewn to the front panel edge.
How to sew the blazer
Step 1 Embellish the blazer
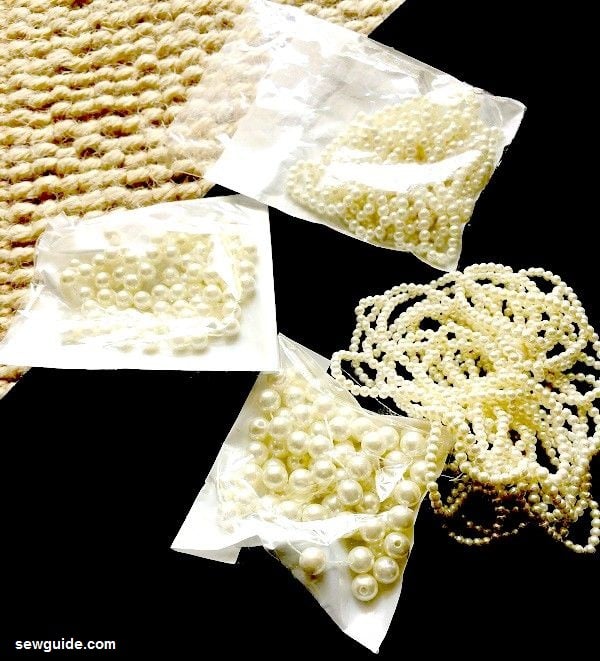
There are many ways you can transform the fabric you have. Velvet takes to embossing, embroidery, sequins and beads very well . I have chosen to do bead Embroidery.
Checkout the post on the basic bead embroidery stitches here
I have decided to do a simple bead embroidery motif on the shawl porion of the blazer. You can totally skip this. I will understand, because my daughter has refused to wear the Blazer unless I remove the beads. Is it her age?. I love bead embroidery!
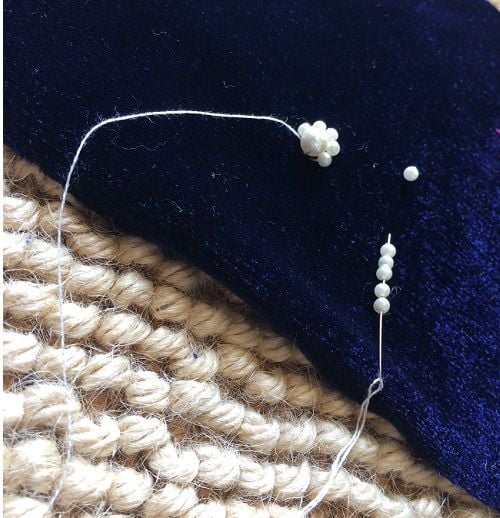
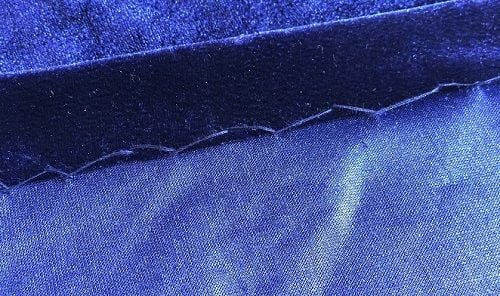
You will have to mark on the back and do the work, because it is velvet and marking on velvet with chalk or other embroidery transfer methods are difficult. You can make some basting stitches to mark where you will be doing the work . Checkout tips on sewing with velvet here
Step 2 Cut out the sleeves
Follow the sleeve pattern in this page. Make long and wide sleeves. I have taken 12 inch width at the bottom edge of the sleeves ( total width). This is totally dependant on you and your wrist measurement or the style of sleeve you want.
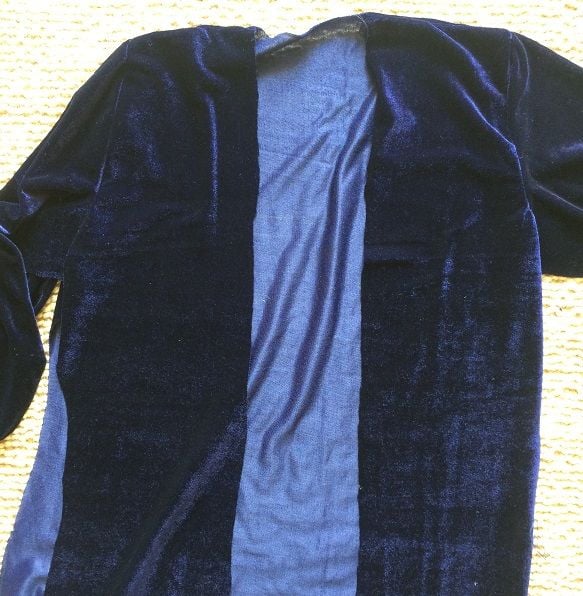
Step 3 Join the shoulder seams of the front panel and the back pattern.
Keep it in place like below picture and see which goes where. Pin and then stitch right sides together.
Step 4 Hem the sleeve wrist edge.
I am using catch stitch ( hand stitching ) to do the hem. You can machine stitch as well
Step 5 Join the sleeves to the bodice
Remember to keep the center of the sleeves aligned with the shoulder seams and pin
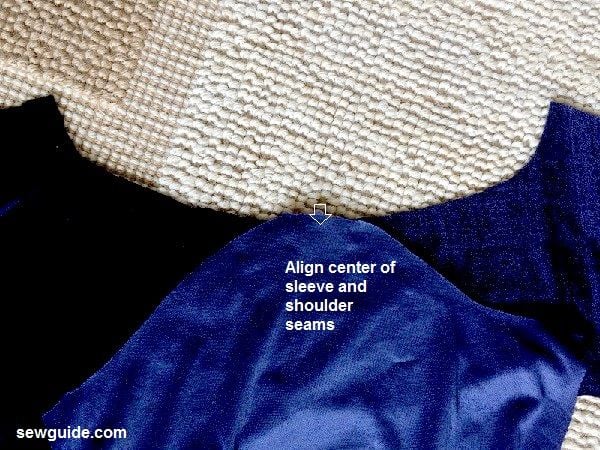
Stitch with a 1/4 inch seam allowance.
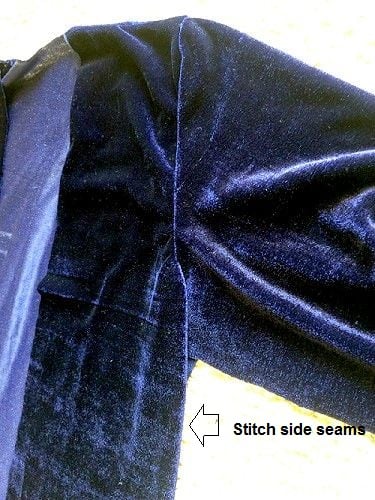
Step 6. Stitch the side seams of the bodices as well as the sleeves.
Step 6 Finish the edge of the shawl piece
Turn under one edge ( the slanting edge ) of the shawl and stitch.
Step 7 Join the shawl to the blazer
Keep the shawl and the front panel right sides together and stitch the shawl to the front panel. I would start from the center of the back bodice and then reach one side end go back to the back neck and proceed stitch to the other end.
Step 8 Hem the blazer. Finished
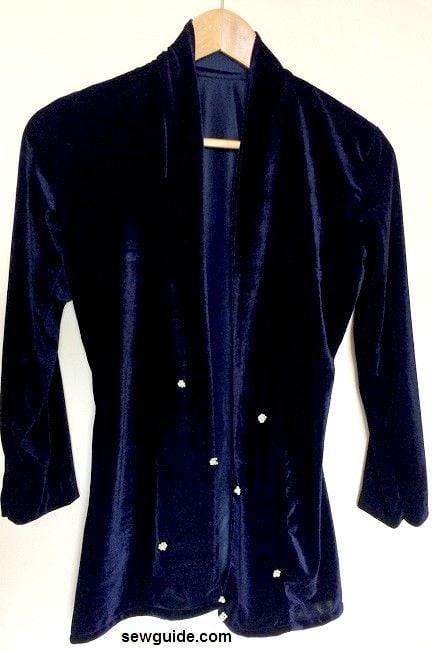
You can wear your slouchy velvet blazer any way you want it , but blue jeans seems to suit it best . Checkout Tony Braxton if you do not believe me.
Embed from Getty Images
Related posts

Very nice simple to understand sew
i love the blazer and yeah your daughter is right… less the beads.
i love the blazer though… thanks for the idea. so easy to follow.
Hello Sarina.
Thank you for your amazing work, simple to understand and sew. Much love from Ghana.
Cannot get back to the page with the adding of beads to edges by hand on blankets and such. Could you email it to me? Thank you.
Karen
Hi Karen
Do you mean these posts – Beaded borders ; DIY Beaded tassels
I did want to try this pattern, but I can not download the pattern without agreeing to install software on my computer that I do not need or want or trust.
This is NOT a ‘free sewing pattern’ if it has such a condition attached, and should not be claimed as such.
Hi Bee
This is not a downloadable pattern; I am sorry if you did get that impression. You can make a paper pattern following the instructions ( or mark directly on the fabric) and make it matching your measurements
It is free for you to make anything with it ( wear it, give it away) and it is a sewing pattern and nowhere do i say it is a downloadbale pattern ; hope it clears the confusion
Hope you will make the blazer with the pattern
Thank you for your reply Sarina,
I can see now that the big green ‘Download’ button just below your introduction description of the blazer is actually an ad for whatever the download software is, rather than part of your post as it appears to be.
I appreciate your taking the trouble to make that clear, and thank you for your generosity in making the free pattern available. I look forward to giving it a go.
Cheers
Bee
🙂 Thanks for reading