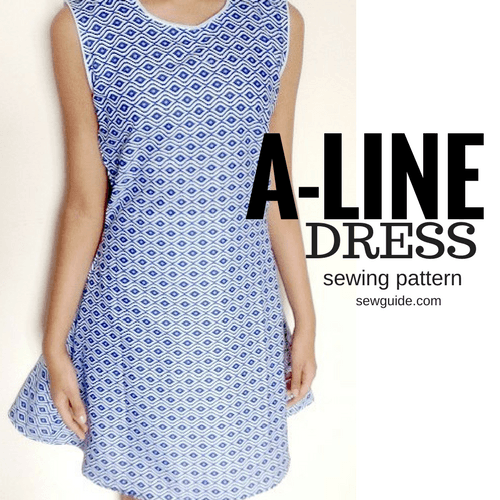
A line is a dress silhouette which suits almost everybody. You can use this silhouette to design your own clothes in many ways. The variations and versatility of this style are endless.
You can alter the pattern to draft and add your own sleeves or make it suit your body shape – like add a puffy sleeve or long sleeves or make it knee length or change the neckline to a deep V or make it in a single colour or pattern or add a fabric bow( which you can make following this tutorial for 7 types of fabric bows) or a sash ( tutorial for making sashes), eliminate the front placket altogether or add darts to make it look better.
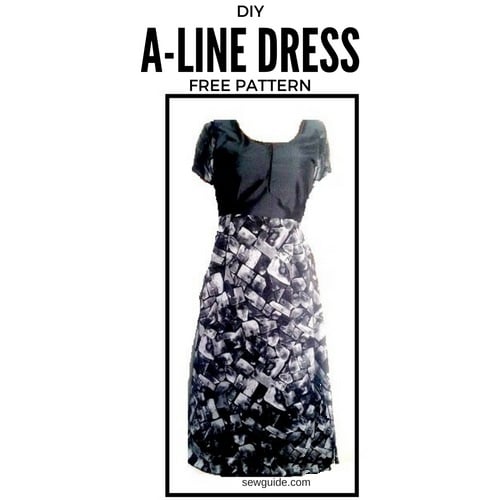
3 sewing patterns for Aline dresses
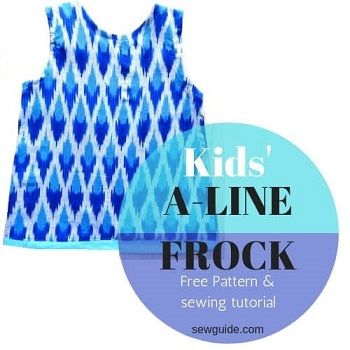
If you are on the look out for an A-line frock pattern – for a little girl/baby head over to the post here
Related posts :Checkout the pattern and tutorial to sew a variation of this dress – sew a flare dress with bell sleeves. or this simple dress sewing pattern with square neck and flared skirt or the easy to make sundress pattern


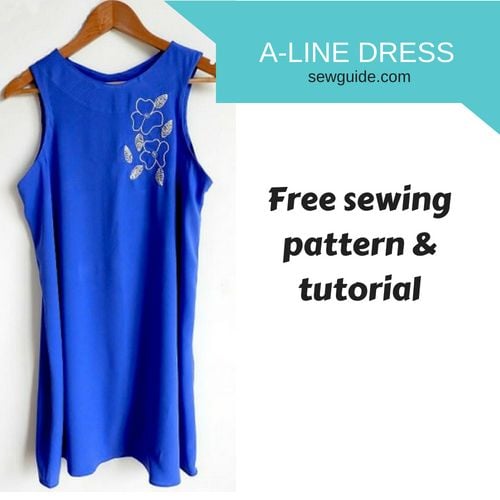
Method 1. A LINE DRESS – FREE SEWING PATTERN & TUTORIAL
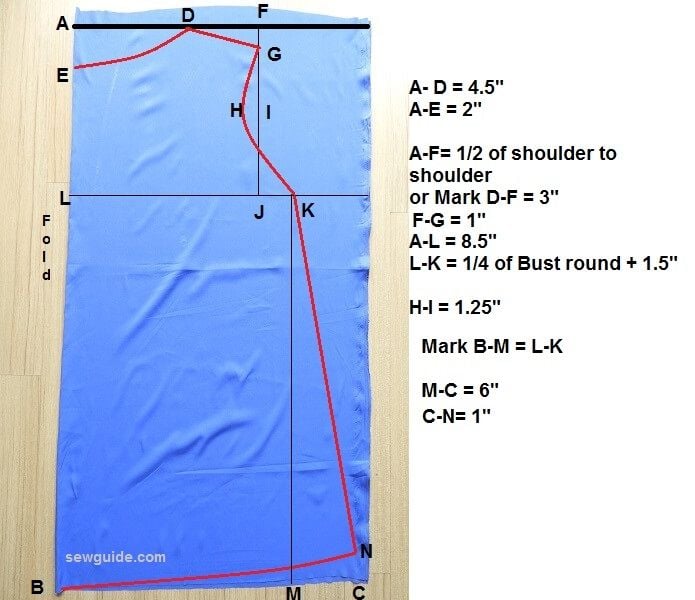
Step 1 Cut out the pattern piece for the back
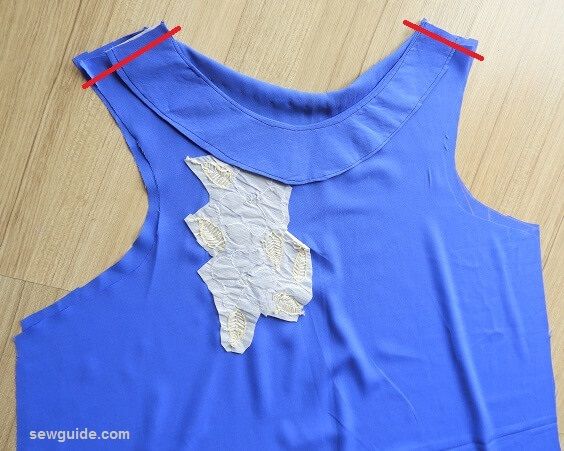
You need to take body measurements – bust round, shoulder tip to shoulder tip. Decide on the length of the dress you want, preferably under the knee. Check out the post “take body measurements” for more details on correctly taking your body measurements.
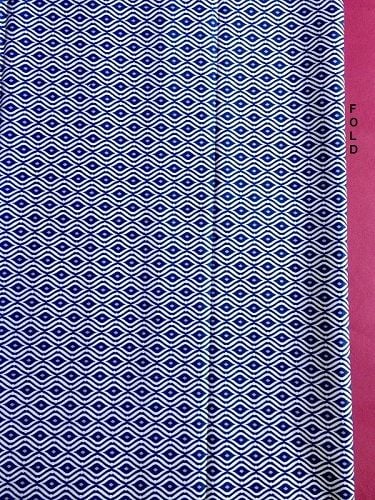
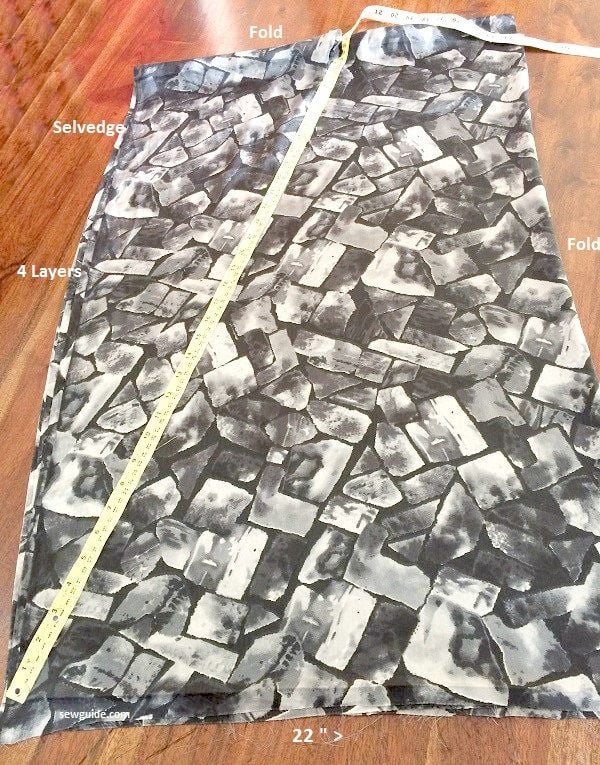
Cut out 2 pieces of fabric – 40 inches ( or the length you want for the dress) long of a 44-inch wide fabric.
Below given is the markings for the back piece. Fold one of the fabric pieces by the center. Keep the center fold to your left and mark as in the following diagrams.
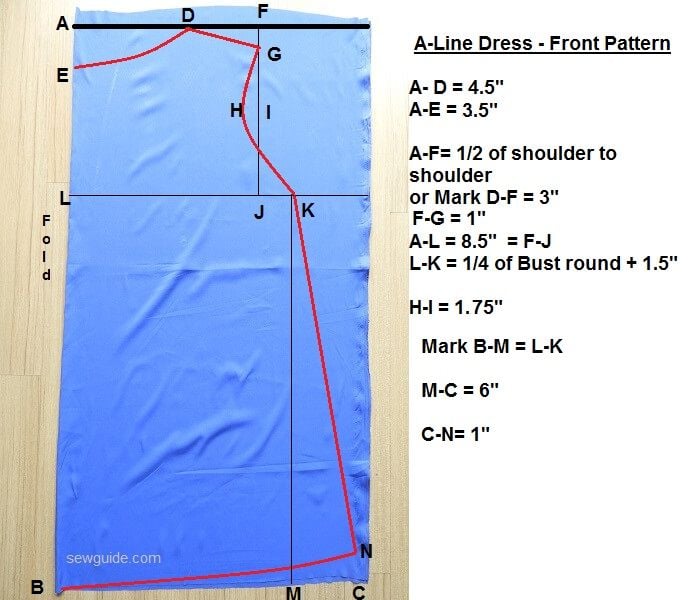
Step 2 Front piece
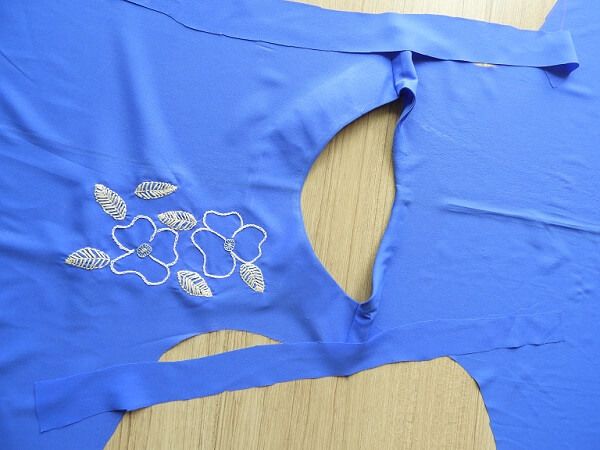
Mark the front piece as per the pattern given below but do not cut out immediately
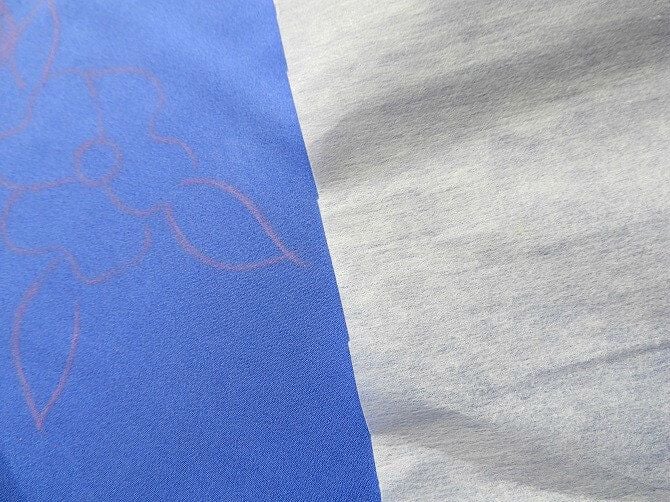
If you are doing embroidery do not cut the pattern piece AT ALL. Mark the pattern markings and then draw the design
Even if you are not doing embroidery do not cut out the neck portion. All other markings are cut out except the neckline
For alterntive ways to mark the armhole check out the post – armscye/armhole measurement or the dress pattern given down below.
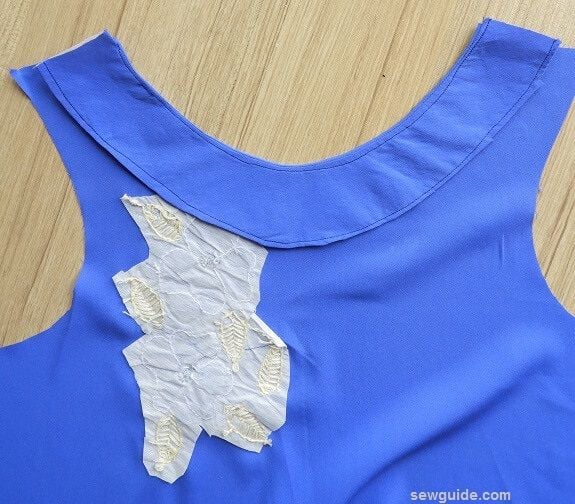
Step 3 Do embroidery
Draw the embroidery design. You can copy from some embroidery book or look at some simple designs online or simply draw from your imagination
If the fabric of your choice is thin you will have to interface the back when doing embroidery. Otherwise, it will sag. A paper-thin interfacing would do. Keep the sticky side to the back and press in place. Cut it in the shape of the embroidery with some space outside.
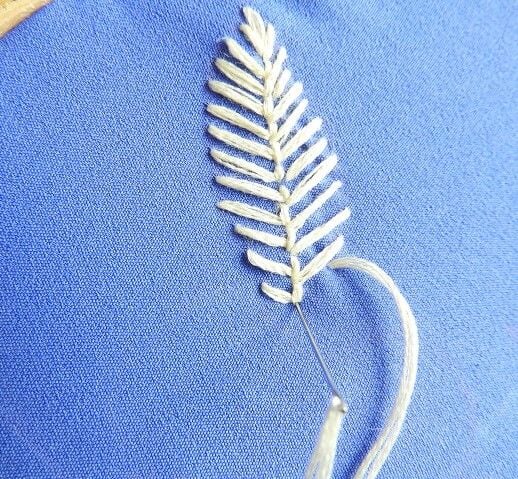
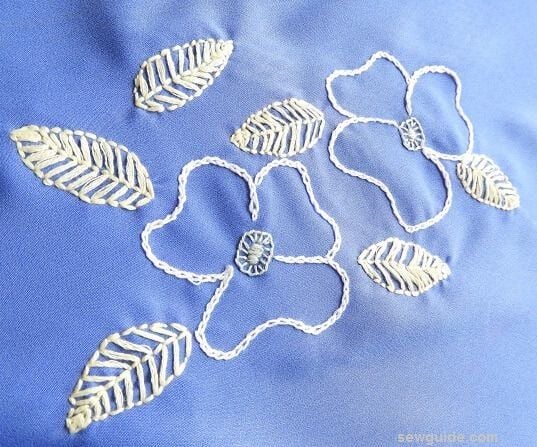
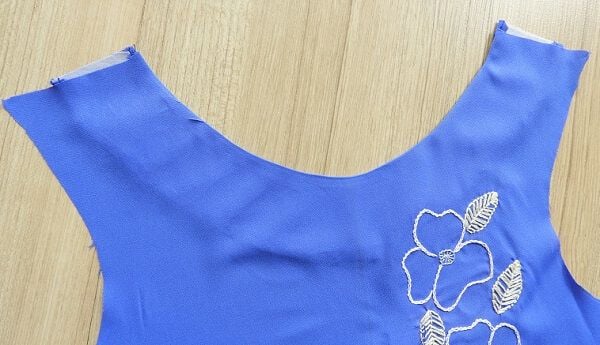
I have outlined the flower with chain stitch and did the leaves with fishbone stitch.

A backstitch outline is given to each leaf. For learning about stitches to finish the leaf, check out this post on leaf embroidery. The center of the flower is finished with blanket stitches and satin stitches
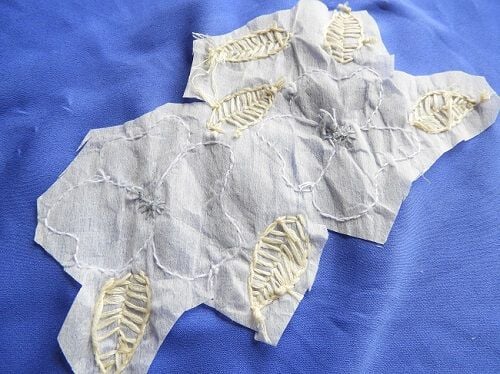
When the work is done the back of the work will be a mess unless you are not me and do the embroidery with more finesse.
But the front will look good even when it is done in a hurry. That is the magic of embroidery.
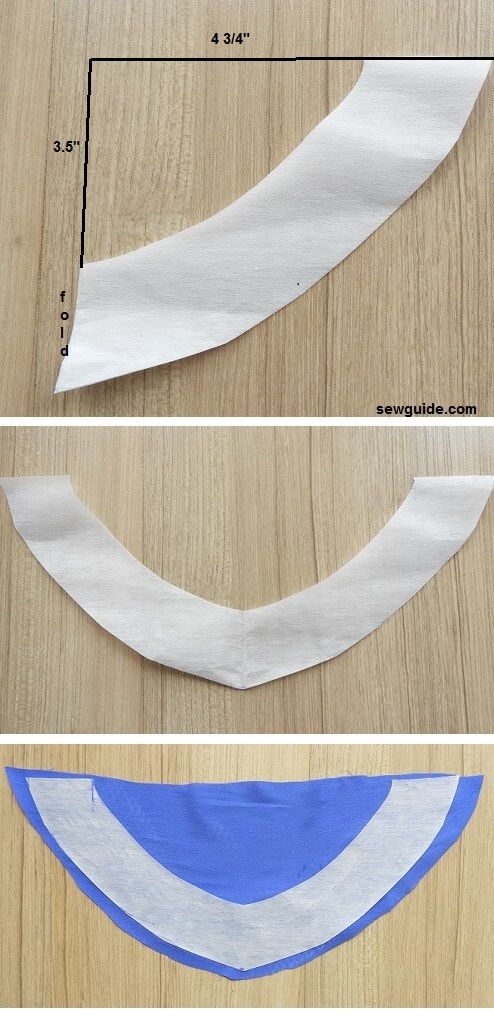
Step 4 Make the facing for the neckline
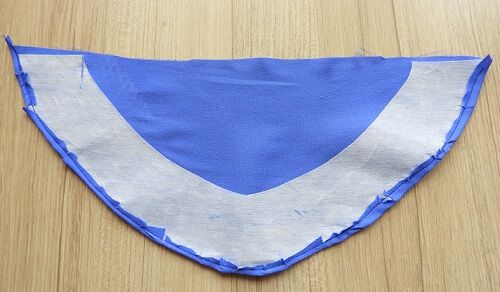
Take an interfacing fabric (paper thin) which is 15 inch wide and 10 inch long. Fold it by the center and keep the fold towards the left of you. Mark the neckline measurements on this as in the picture below.
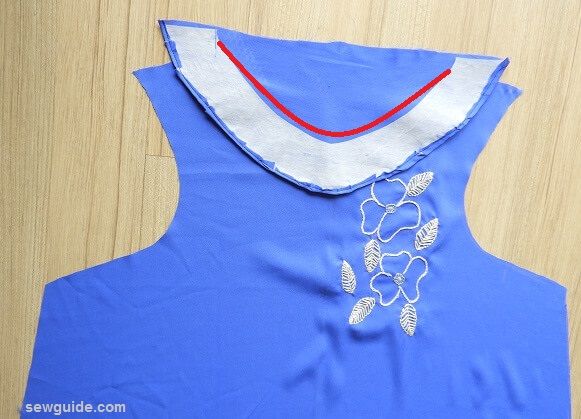
When you open it it will look like the picture above. Cut a fabric piece and adhere this interfacing to the fabric with hot iron. Cut out the bottom edge in shape leaving some 1/4 inches along the curve
Clip along this curve. You will be turning this portion towards the interfacing and stitching in place
As you clipped the fabric it will be somewhat easier to turn and stitch. Trim the allowance or leave as it is. Do not bother that it is a mess. Mine is always as you can see in the picture below. But as it goes to the inside not even visible from the inside of the dress it is ok.
Step 5 Stitch facing to neckline
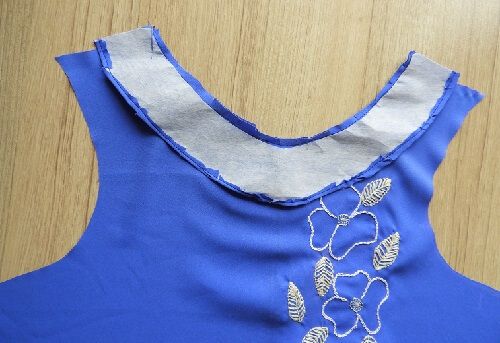
Keep the facing on the front neckline, rightsides together.
Align the center of this facing with the center fold line of your front pattern. ( If you had earlier made a clip this would be easier to align)
I had not cut the shoulder slope of the facing piece which is why it looks not aligned in the picture. Pin in place or baste stitch in place – this is absolutely necessary because if the facing shift you will have a horrible neckline.
Sew close to the interfacing with short stitches.
Cut away the extra from the neck area leaving a 1/4 inch seam allowance
Clip the seam allowance every 1 inch or so.
Unerdtitch the seam allowance and the facing piece. This will allow in easy rolling of the facing to the back.
Turn the facing to the inside. It looks better now, doesn’t it, better than the mess earlier?
Press
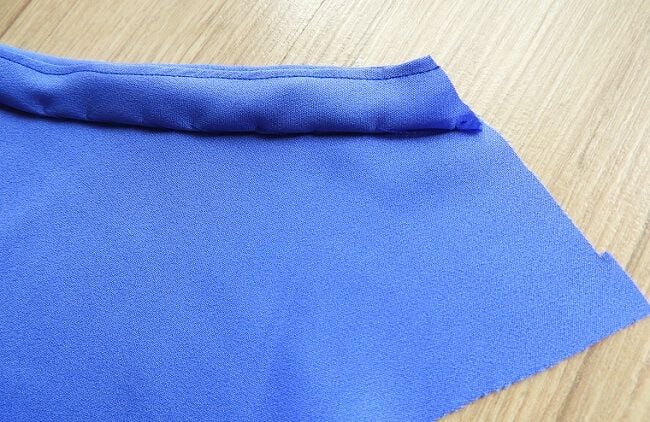
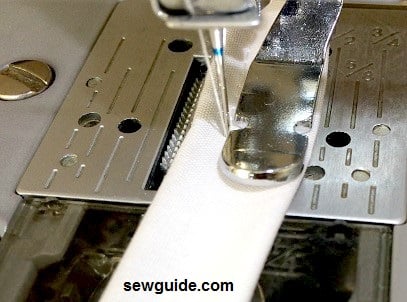
Step 6 Finish the back neckline
You can use a bias strip to do this. Check out posts on making bias binding strips and sewing bias binding for more details
Do not forget to understitch the binding; Hand stitching the binding as you turn to the other side is preferable as it will keep the stitches from showing in the front. For printed fabric it is alright but plain fabric will look better with small almost invisible hand stitching
As you whip stitch take only one thread from the main fabric. (If you use underlining you can stitch the binding to this and it will look even better on the front – no stitch marks on the face at all)
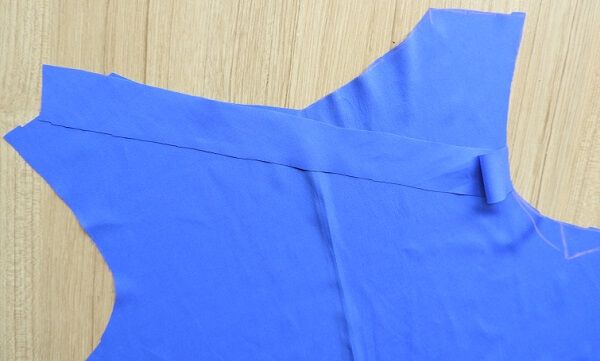
Step 6 Join the front and back pieces at the shoulders
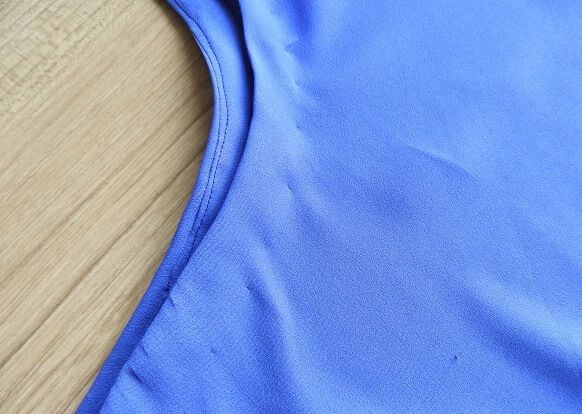
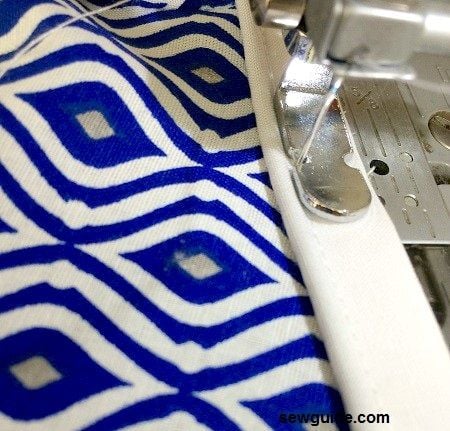
Step 7 Bind the armholes
Bind the armholes with more bias tapes. For armholes, you will need longer bias strips
Understitch and Hand stitch the binding as discussed earlier so that only a teeny weeny stitch shows in the front
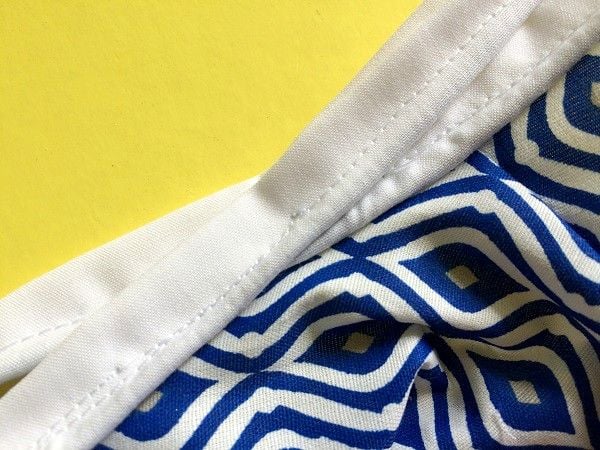
Step 8 Sew the side seams together
You will now have the a-line dress almost ready with just the hem to finish.
Step 9 Sew the hem
When there is a curved shape my favorite way to hem is a baby hem. Simply turn under the edge 1/4 inch, fingerpress and stitch 1/8 inch away from the folded edge.
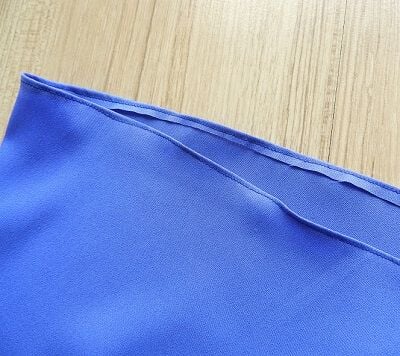
Clip away the excess fabric and then turn under again and stitch. This will give you a teeny weeny hem which is just right for thin fabric and curved cuts
Finish the inner fabric edges with your serger or whatever means so that they do not fray and create a mess inside
If you want to sew this bodice with a lining you can follow the different methods discussed in the post – How to sew a sleeveless bodice with lining – 3 ways
Method 2. A simple A line Dress with neck binding
Step 1
Fold 2 pieces of fabric by the center ( For each of the fabric piece – length should be equal to length of dress you want +2″ and width equalling your hip round for a glood flare)
Make pattern as below.
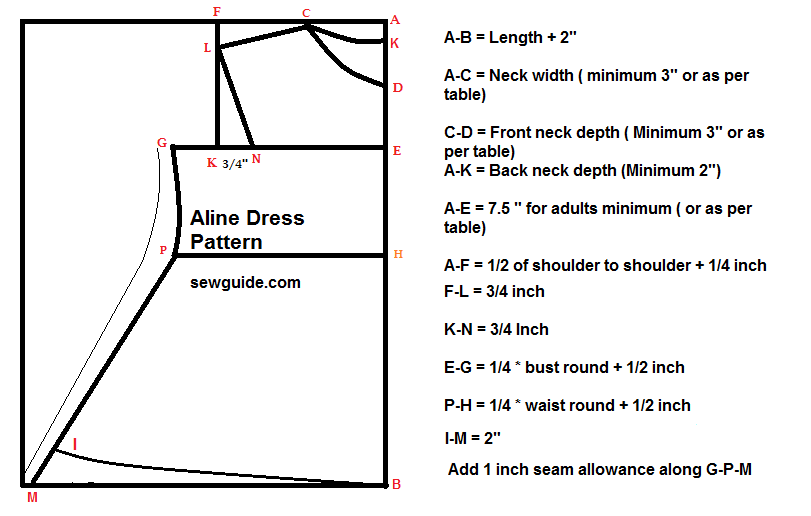
A-B = Length + 2″
A-C = Neck width = 3″ or 3.5″
C-D = Front neck depth -6 -6.5″ ( If you are using a facing following the tutorial here and donot cut the neck width or the neck depth on the fabric as this will be cut on the facing piece. or check out the post on sewing a basic bodice here for more directions; Infact for a beginner facing is the way to finish the neckline) Check out the different types of neck designs, as many as 60 you can use for your Aline dress.
A-K = 2″ = Back depth
A-F = 1/2 of shoulder to shoulder + 1/4 inch
F-L = 3/4 inch ; this is for shoulder slope
From point – F on shoulder tip mark down 3/4 inch to point L ( 1/2 inch for kids) Give the shoulder slope by joining the line C-L.
K-N = 3/4 Inch
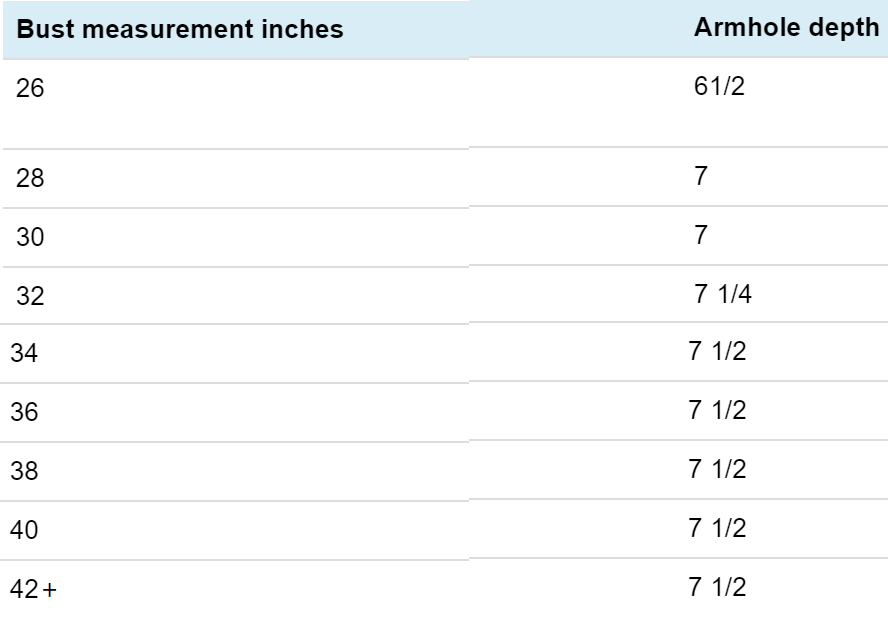
Mark A-E which is the armhole depth or the bustline – as per table or 7.5″ for adults. This is the bust line. E-G is marked on this line
Draw straight line down from F so that it intersects with line E-G .
E-G = 1/4 * bust round + 1/2 inch ease
A-H = Waist length
P-H = 1/4 * waist round + 1/2 inch
B-M = 1/4 * waist round + 1/2 inch
Add 1 inch seam allowance along G-P-M
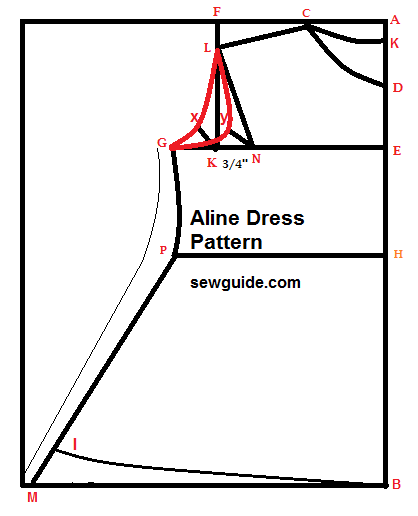
Mark the armholes
Back armhole – Where the lines from F & G intersected (name it K ) go outside ( measure the distance between G& K and divide by two) . Mark the point as X . Make a curved shape of the armhole from L-X-G – this is the back sleeve line.
To mark the front sleeve line Mark from K to the inside 3/4 inch for adults and 1/2 inch for kids. Mark this point as N . Draw up a straight line to L . From N Go outside 3/4 inches diagonally to Y as shown in the diagram. L-Y-G is the front armhole line
Draw a soft curved line touching Y from L to G – This is the front sleeve line.
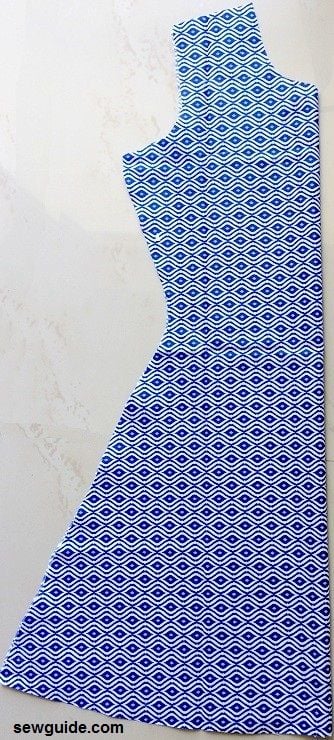
This is the back piece which is cut on both the pieces
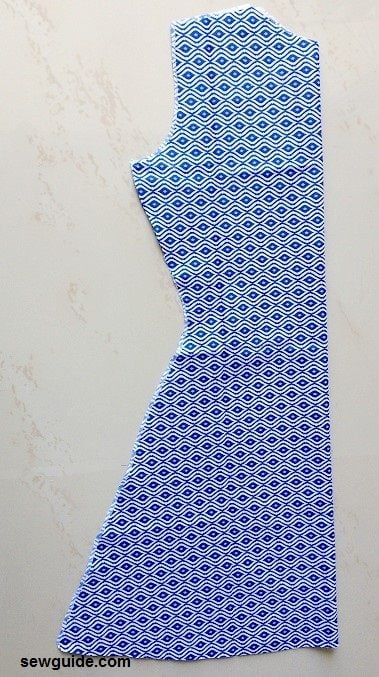
Remove one of the pieces and mark the front armhole and the neckline on the remaining piece
Step 2
Join the shoulder seams of front and back bodice with a 1/2 inch seam allowance
Step 3
You can finish the neckline with a simple facing or make piping like I have done here.Checkout the post on facing pattern for more details on making facing for the neckline.
Piping – Make a piping for binding the neckline and armhole with a bias tape. Measure around the neckline and the armhole lines to cut the piping fabric.
Checkout this post on piping for more details on how to make and sew them
Stitch the piping on to the neckline with a zipper foot. Align the cut edge of the neckline and piping cut edge. Start from the center of the back bodice.
When you reach the back over lap the ends like below so that you will get an almost seamless line.
Turn the piping to the other side and top stitch the piping in place. For the neckline I would clip the piping seam allowance to make sure that the piping stretches and press in place. Hand stitch the piping edges to the bodice with whip stitches.
Step 5
Join the side seams and do the hem.
Method 3 Aline dress with front open placket
Mark the measurements either directly on to fabric or make a paper pattern. Checkout the post on cutting fabric for more details. If you donot know how to read a tape measure or take your own measurements read the posts before proceeding.
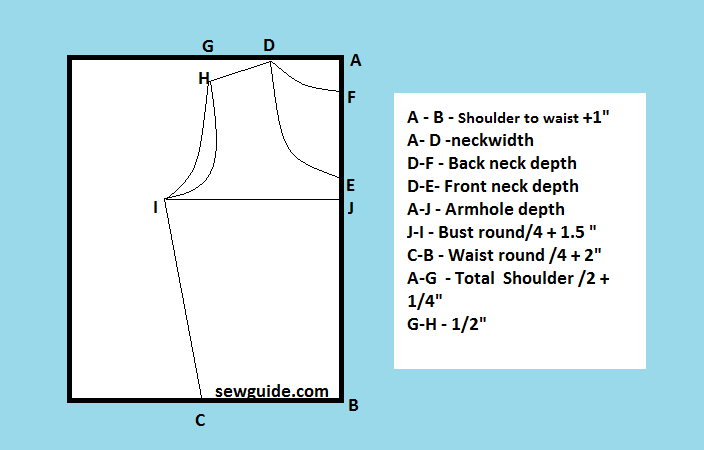
A – B – Shoulder to waist +1″ Measure from the shoulder bone to the narrow part of your torso
A- D -neck width
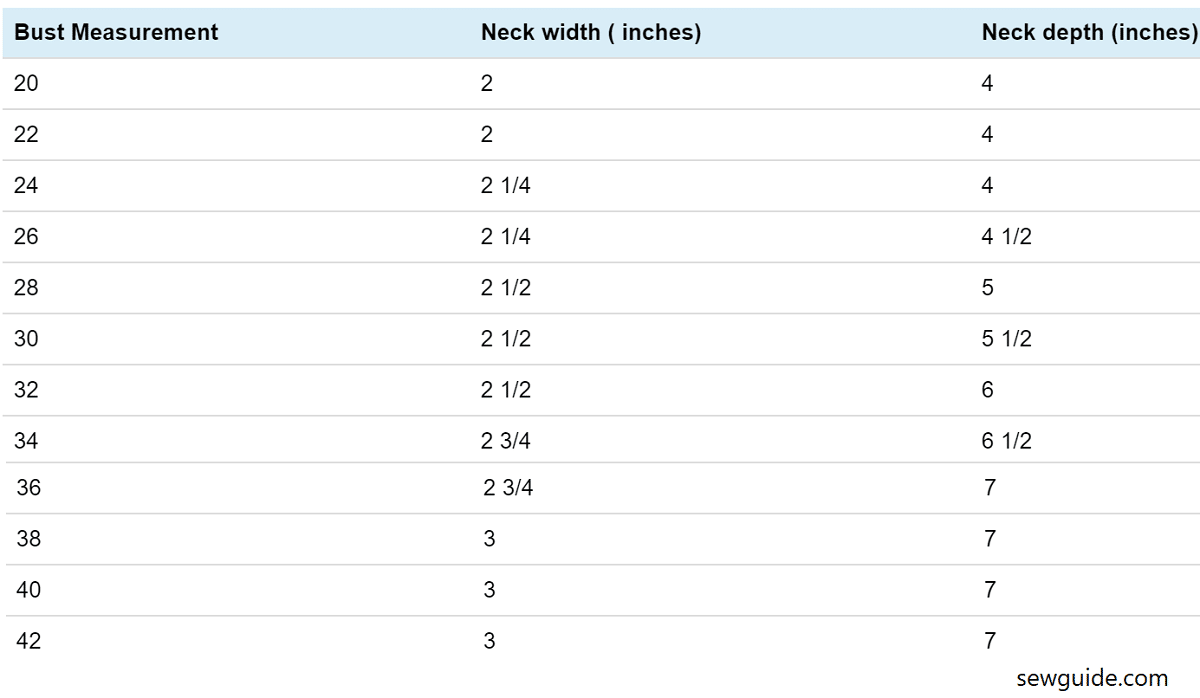
Check the neck width table and armhole depth table given below for A-D & A-J ; You can also take this measurement from a favourite top or dress you already own. Neck depth of back neck and front neck are personal preferences.
A-J – Armhole depth
J-I – Bust round/4 + 1.5 “
A-H – Total Shoulder /2 + 1/4″
G-H – 1/2″ – Give a slope to the shoulder from the top edge to H
C-B – Waist round /4 + 2″
D-F – Back neck depth
D-E- Front neck depth
The front neck depth I have taken 7″ from D-E & Back neck dept 3″ from D-F
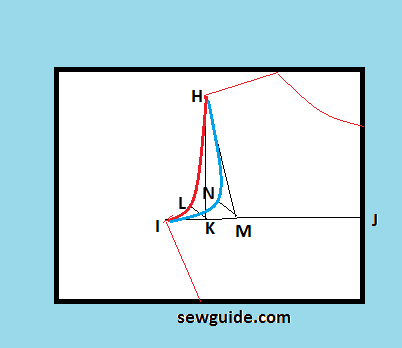
For the back neck line square down from H to the bust line at K . Then mark up diagonally 1″ . Join I-H through this point. This is the back armhole line.
Mark the armhole as follows – Square down from H to the armhole depth line you have drawn at J-I . Go up 1″ from K to L. Join I-L-H. This is the back armhole as shown in the picture as red
For the front armhole Mark 3/4 ” inch inside from K inside at M . Mark up 1″ diagonally to N. Join H-N-I as the front armhole line
Make sleeve pattern following the drafting tutorial here. There are more than 40 types of sleeves you can make for your bodice . Check it out if you are interested
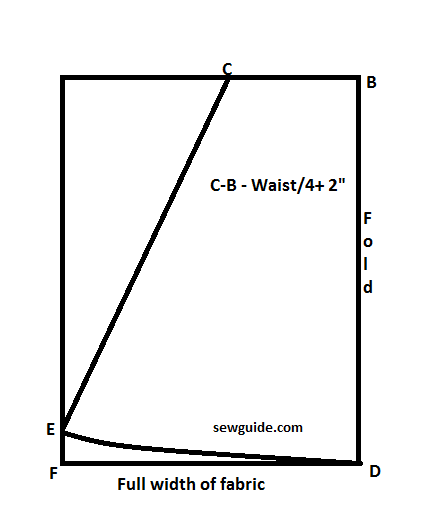
The skirt pieces (2 numbers) should be cut out as per the diagram below. Please note that you can make the whole dress in one piece of fabric without the joint if you want the full dress in one fabric – just combine the patterns and cut.
The length is as per your preference – just measure from the waist to whatever length you want . I have taken a 36 inch length so when you take the back piece as well you need 68 inches of cloth which is about 2 meters ( 2.2 yard)
How to sew the Aline dress
Step 1
Cut out the pieces for the bodices and the skirt pieces and the sleeve pieces.
Fold the fabric by half lengthwise first and then by half again width wise. This is so that you can mark the front and back pieces together. If you are sewing with a slippery fabric or a sheer fabric you may want to cut in single layers
Mark the pattern markings. Cut out through the back pattern markings especially back neck, back armhole line. Take off the inside fabric and keep it aside – that is now the back pattern. Then cut the front neck and armhole line on the remaining fabric piece and you will now be having the front bodice pattern – easy right?
I am using a lining for the bodice part – infact it is an underlining which is treated the same as the main fabric. You can baste along the armholes and diagonally with long basting stitches with a hand needle and thread so that they stay in place without slipping.
To cut the skirt pieces I folded the 2 meter cloth by half first and then folded them widthwise . Marked the measurements – basically just one measurement at the waist which is the same as B-C in the bodice pattern – for the bottom edge I have taken the whole width. I had a 45 inch cloth so took 22 inches for each folded side. If you have 60 inch cloth you will get more flare. I rounded the edge by going up some 3 inches otherwise it will hang down awkwardly.
I also cut out the neck line for the front and back bodice pieces – If I was joining facing I would not have cut out the neckline now.
Step 2
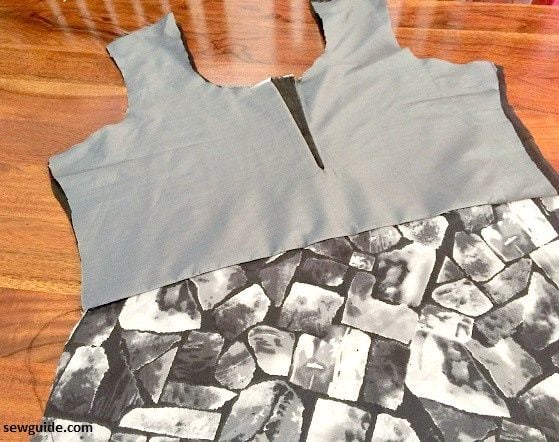
Make the front button placket for the front bodice.You can easily make the placket with a single piece of fabric .
Just follow the directions given below – it is the same directions as I have given in the post on 3 ways to make a placket.
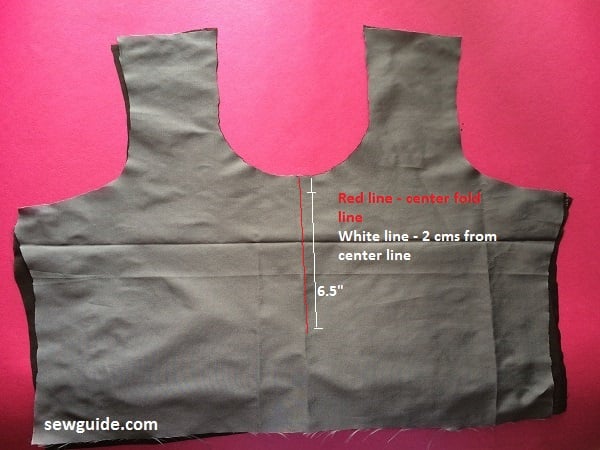
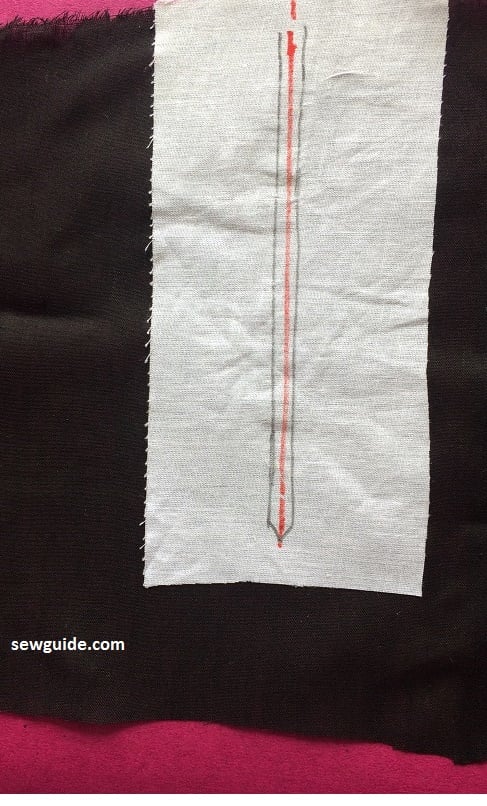
Mark a parallel line 2 centimeters to the right on the bodice – ie as you look at it on the right side of the center line- white line in the picture below the measurement of the line is 6.5 inches . Mark 1/4 inch from the top edge on the same line on the right side
Mark the center fold line of the bodice
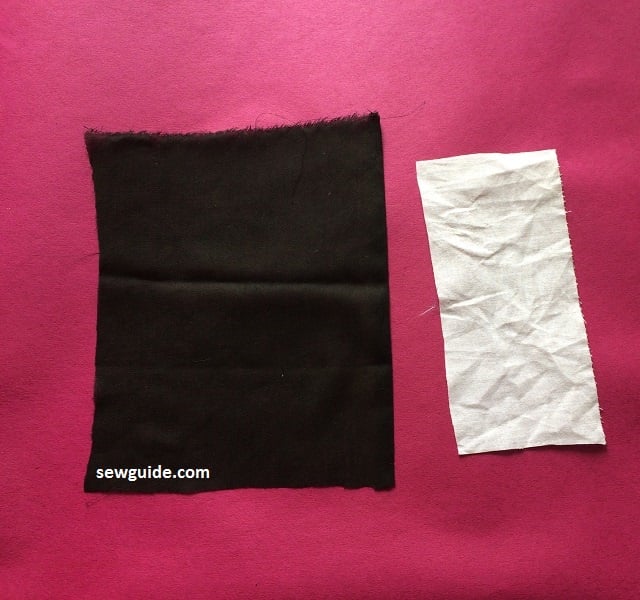
Prepare the placket facing
1. Cut out placket facing measuring 6 5/8 inch width ( 5/8 translates to 1.5 cms I find it easier to mark 1.5 cms after I have marked the 6 inches) and 8 3/4 inch length
2. Cut out an interfacing strip 3 inch wide and 7 inch long.
Fuse the interfacing to the placket fabric 1″ from the left side edge
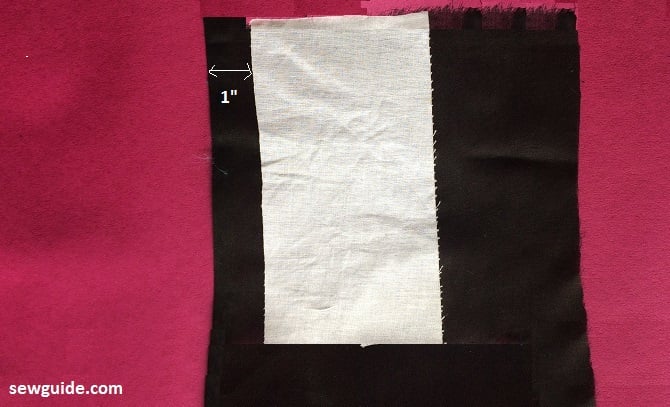
Mark a line on the center of the interfacing strip, 1/2 inch from the top edge . The line should be 6 inches long
Mark two lines parallel to this center line on either side 1/16 inches from the center line . These lines should stop 1/4 inch from the bottom end of the center line and join the center in a tapered line
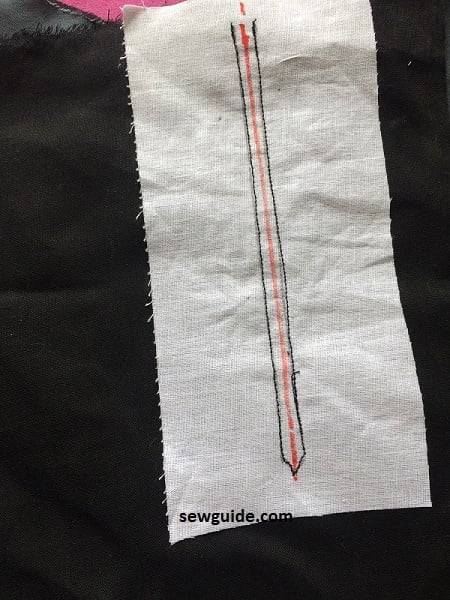
Keep the placket facing interfacing side up on the bodice, placket extending 1/2 inches from the top edge , the long marked lines aligning correctly. pin in place
Stitch the placket to the bodice along the parallel lines you have drawn on either side of the center line. When you reach the tapered bottom edge, reduce the stitch length. Be careful that you donot waver from the drawn lines.
Cut through the center. Use sharp scissors and stitch to the absolute end but make sure that the stitching line is not cut.
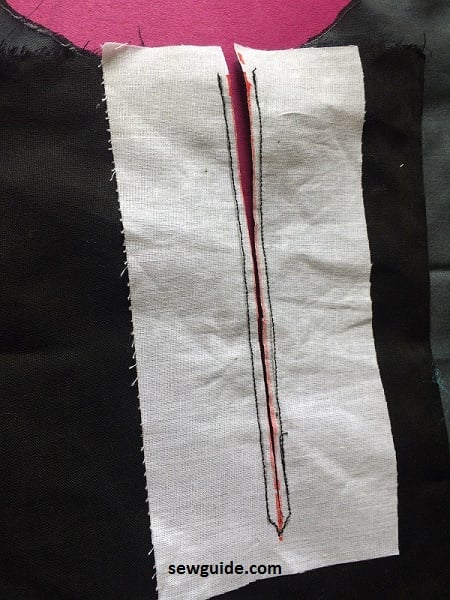
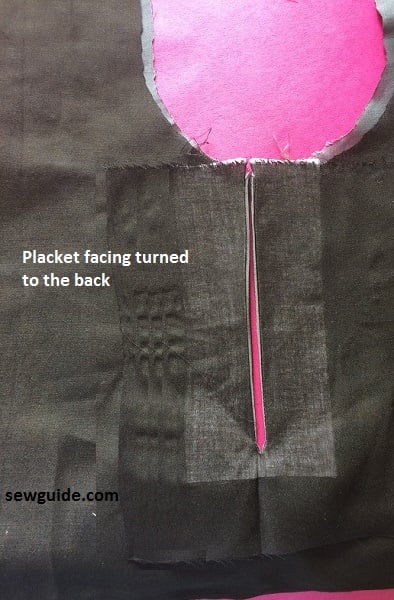
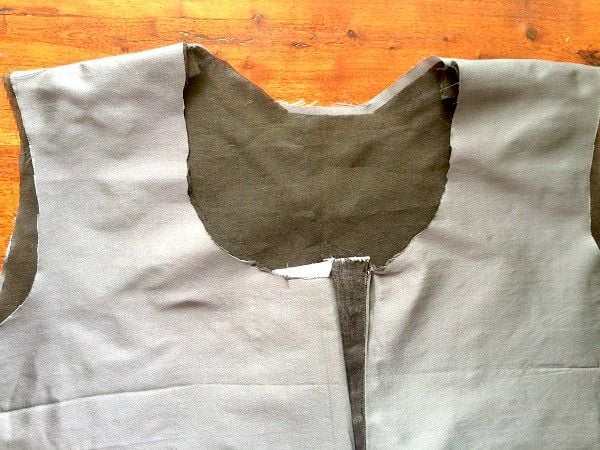
Turn the facing to the back of the bodice.
Fingerpress everything in place
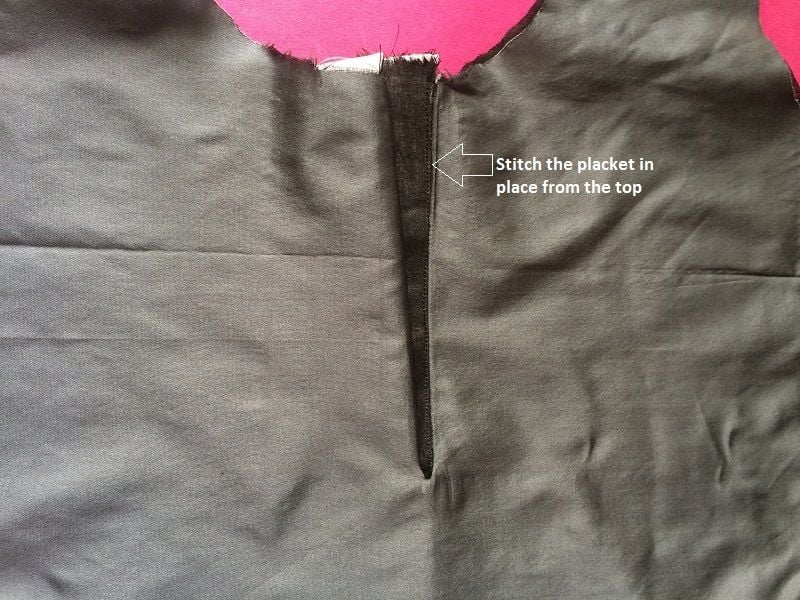
Fold the placket facing on the left side, turned inside. Pin in place
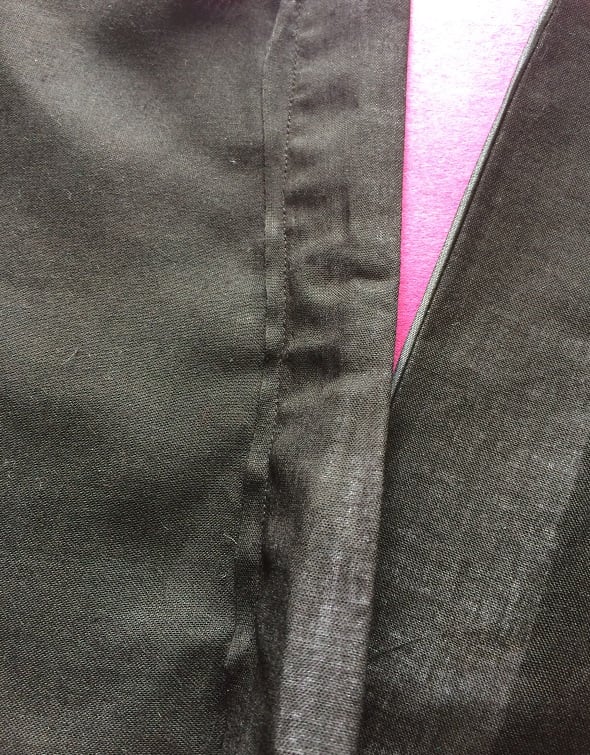
Stitch the placket. This is better done from the top.The placket will extend a little to the top ( just for safety). You can cut it off on level with the bodice neckline when sewing the neckline.
Step 3
Join the bodice to the skirt piece for both front and back. Finish the fabric edges
Step 4
Join the shoulders
Step 5
Join the sleeves. Skip this if you are going sleeveless and bind the armholes as well.
Step 6
Bind the neckline edge. You can checkout the post on bias binding on learning how to do it. I have used a double folded bias tape to bind the neckline. You have to measure around the neckline and then add 1″ for folding – this is the length you need for the bias tape. It is wise to cut bias binding tape some 2 inches more to be safe.Finish the insides with a whip stitch on the inside.
Step 7
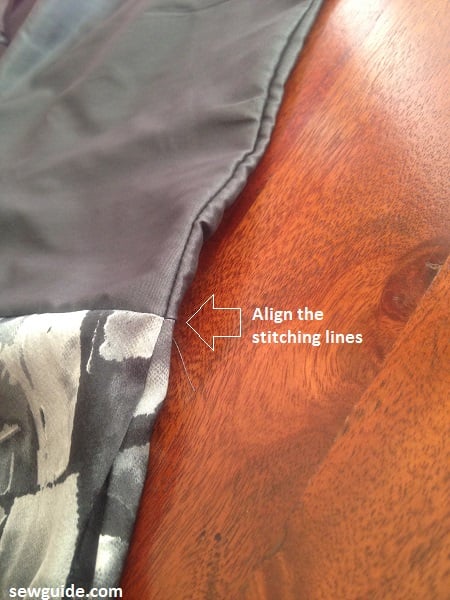
Join the side seams. Make sure that the stitching line is aligned properly.
Step 8
Make the darts. I Marked equal distance from the side seams on the inside , pinched 1/2 inches ( total take in 2 inches; reduce this if you donot want fitting near the waist ) and then stitched the seam near the joining of bodice and the skirt – very unscientific way of sewing darts I know but does the work.
If you want loose fitting dress donot make the darts – simple.
Step 9
Hem the dress. Use a narrow hem .To get the narrow hem I folded the hem once 1/4 inches inside and stitched along the edge.
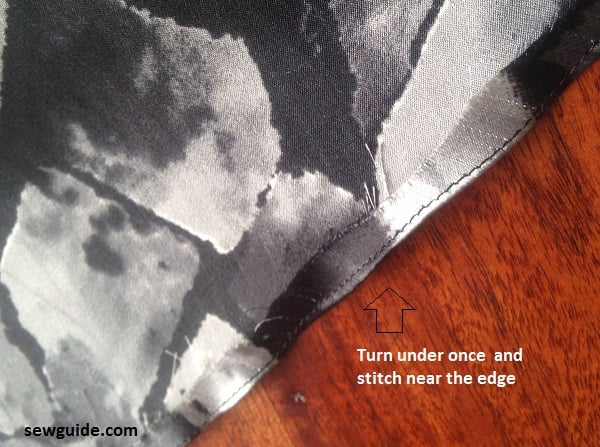
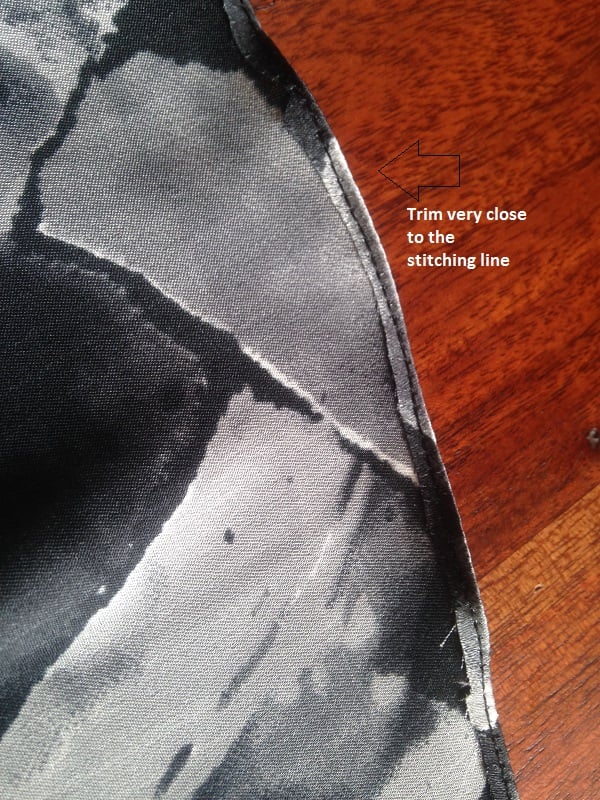
Then trimmed the edge close to the stitching line
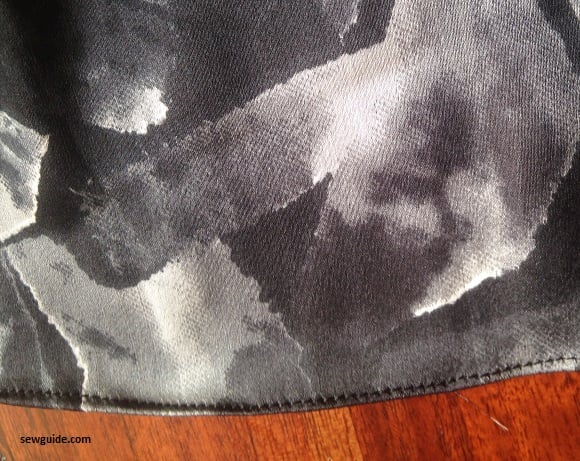
Turn the hem again and stitch the hem .
Step 10
Attach hooks and eye on the placket.If you donot know how to, checkout the 5 ways you can attach the hook and eye .You can also attach buttons with buttonholes.
Please share with your friends if you like the instructions 🙂
Checkout the neckwidth and neck depth table and the armhole depth table you can use as reference.
Related posts : A line silhouette ; Different types of hemlines