 A Super easy DIY bean bag
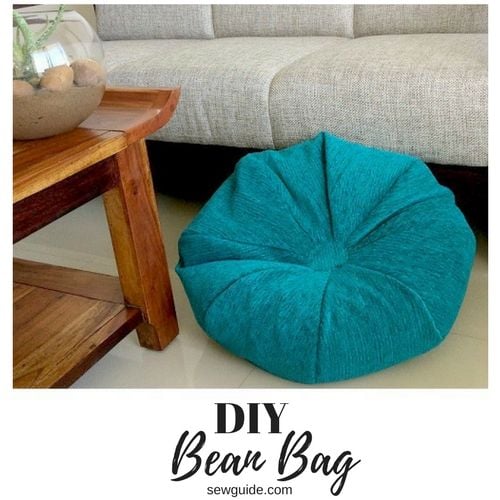
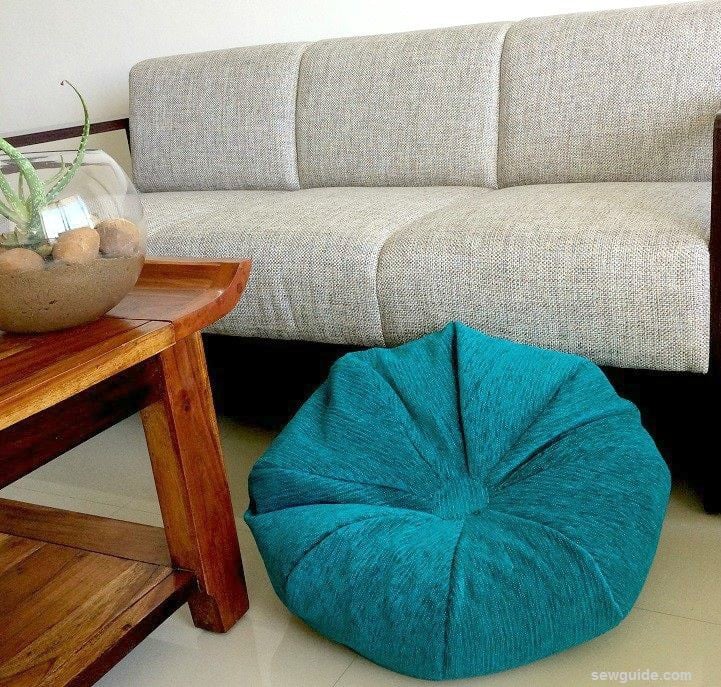
This is a pattern to make an easy DIY bean bag which can be customisable to the size you want.You can fill it with polystyrene beads and you have a comfy seat to relax on.
Why should you make a bean bag when you can easily buy one ?. This is the question that my husband asked me when I started this project. Yes, the furniture shops are filled with many different types of bean bags in all shapes and colours.
But Making a bean bag allows you the freedom of choice – much more than the store bought one – texture, print, size, colour, pattern – all in your control and at the fraction of the cost of the one you get to buy.
I am making this one in a beautiful chenille fabric – in a teal colour, the likes of which I have never seen in a bean bag shop. Fill it with the polystyrene beans and you have a unique bean bag no other house will have ( unless you made them for others too)
Fabric for the bean bag
You can make this bean bag with about 1.5 meters of 54 inch wide upholstery fabric.( It is smaller than the usual bean bags, measuring about 24 inch in height ) A big sized bean bag measures about 50 inches in height. If you want a bigger bean bag, alter the pattern accordingly; the fabric requirements will also change.
I used same measure of cotton lining fabric as well. So strictly speaking that makes it about 3 meters of fabric of 54 inch width. But if you have a tightly woven fabric which can withstand constant plopping down on it with many different body weights, no need for lining.But lining is preferred
How to make a bean bag sewing pattern.
The sewing pattern for the bean bag consists of 2 circles – one bigger than the other and several leaf shaped panels . One circle forms the base of the bean bag and the smaller circle is attached to the top. I have cut 8 panels of the leaf shaped pattern. This is as per your choice.
You can make this in any size you want. Simply increase the girth of each pieces or the number of the panel pieces and / or the length of the panel pieces
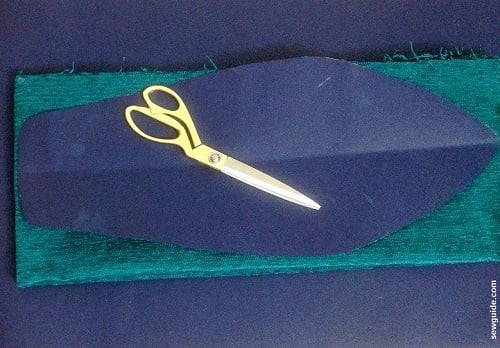
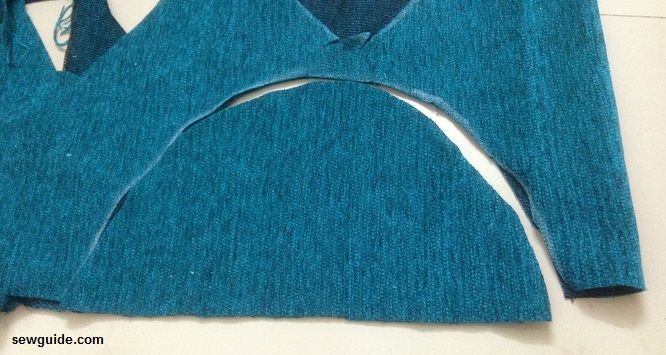
Cut out the leaf shaped fabric pieces as per the pattern.
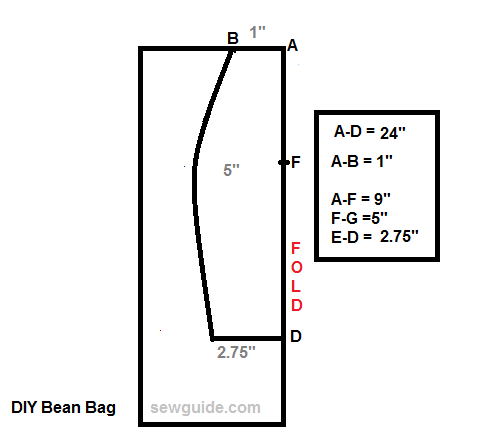
The pattern is made on paper first. Then use it to cut folded fabric. If you are making a bean bag with 8 panels you need to take 8 fabric pieces which are 24 inch long and 10 -11 inch wide folded by the center. Mark the paper pattern on the fabric and cut each piece individually . Remeber to cut off the outline marks.
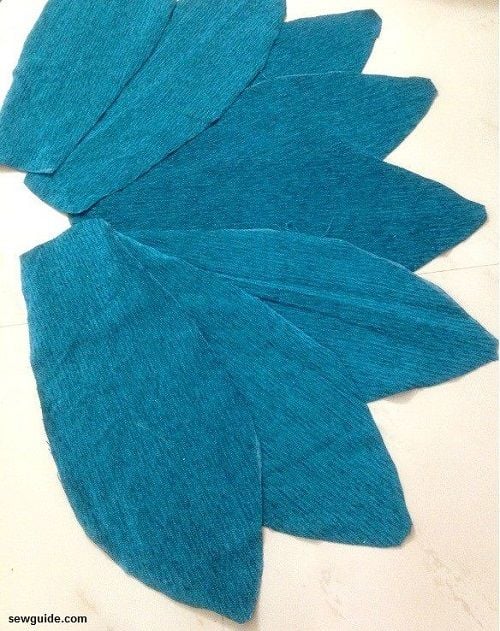
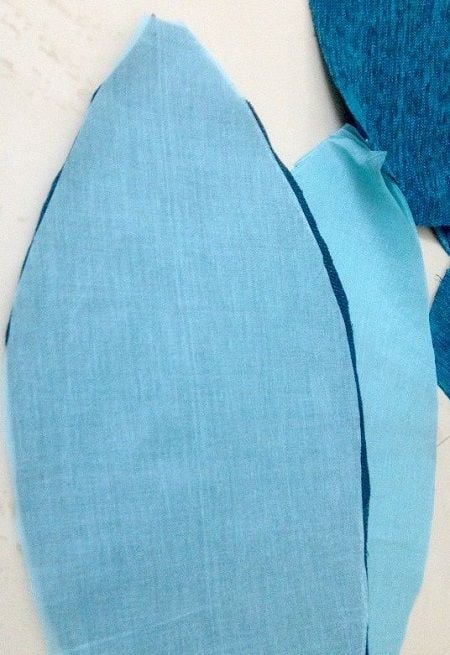
When you open up you will get 8 leaf shaped pieces like the picture below
I am using upholstery fabric for making this bean bag. Why does beautiful upholstery fabric always have loose weave – which is what I have found after I have had many projects unravel at the seams . An underlining will somewhat solve the problem, giving some needed strength to the fabric altogether and especially at the seams.
Cut as many lining fabric as the top pieces
Keep the lining pieces on the backside of the top fabric pieces. Now you will be treating the lining pieces the same as the top fabric
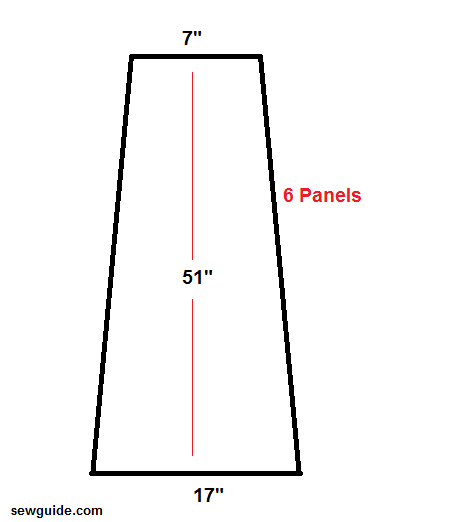
{You can make a bigger adult sized bean bag with the following pattern. You will have to cut out 6 pieces of this along with two circles for the top and bottom}.
How to sew the bean bag sewing pattern.
Join the sides seams of the fabric pieces to make the sphere that is the bean bag
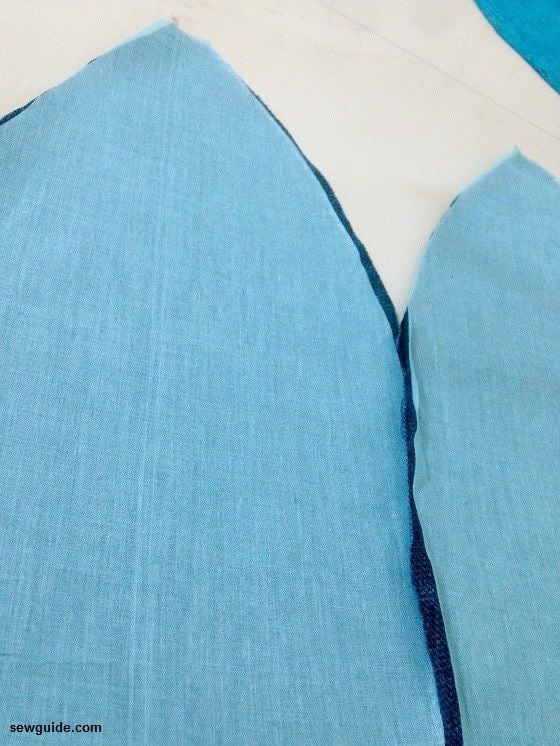
Keep the pieces rightsides inside and stitch edges with a 1/4 inch seam allowance. Make two strong stitching lines . Finish the edges with serger or zig zag stitch . This will strengthen you seam lines; even if the seam stitching line comes undone, the finished edges will keep the polystyrene beads inside (You donot know the mess polystyrene beads make on a floor. They find the corners of the house that you never knew existed )
When you get to the last piece, you will be joining this to the first piece to make the sphere. You need to make an opeing for inserting the beads inside. I choose a zipper opening for this. It is a regular zipper attachment. Checkout the post on sewing zippers here.
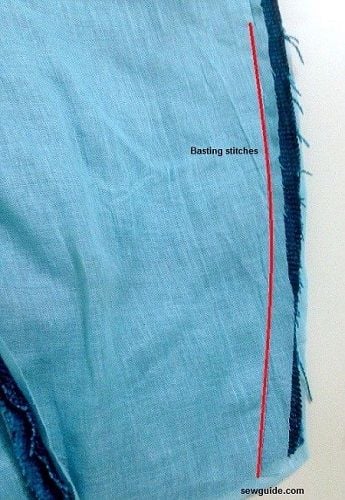
On the last seam you need to mark 8 inch from the bottom edge . Make regular seam above this mark. But on the 8 inch you have marked you should make long basting stitches. The process is as follows
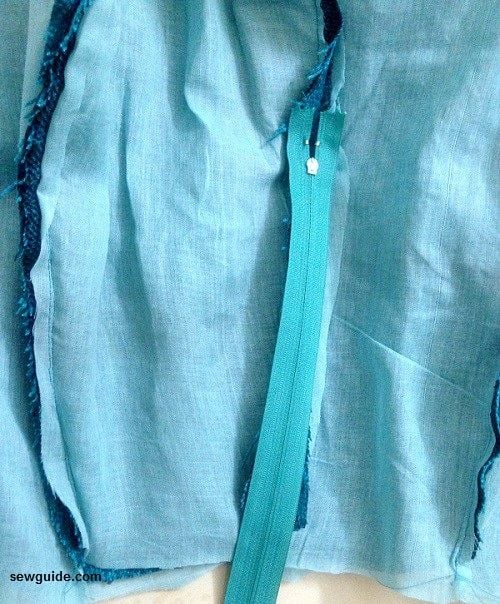
Make a 1/2 inch seam along the edges.Open the seam. Keep the zipper face down on the seam. Choose a long 12+ inch zipper. you need an opening of about 10+ inches for comfortable filling of beans ( I made 8 inch opening and the beans seemed to be getting every where other than inside the hole)
Remember that if you have small kids at home who takes whatever they get on their hands to their mouth, be very careful with the zipper opening . it can open accidentally and beans can be a choking hazard. You can simply sew the opening shut with hand stitches instead of zipper. In some countries it is mandatory for zippers in bean bags to have a parental locking mechanism.
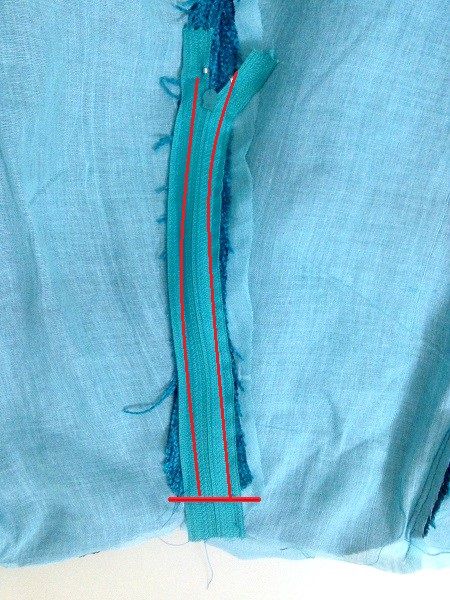
Stitch the zipper ( red line on the picture below) from the wrong side of the seam. The zipper edges will be stitched together with the seam allowance. Stitch the bottom edge as well.
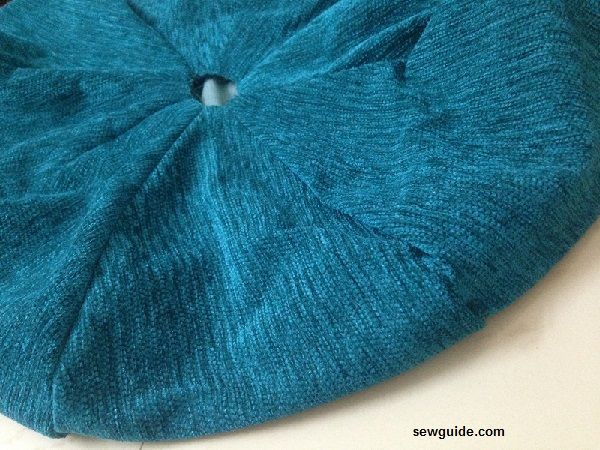
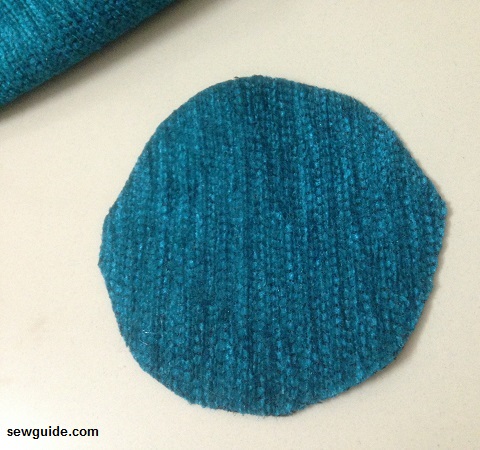
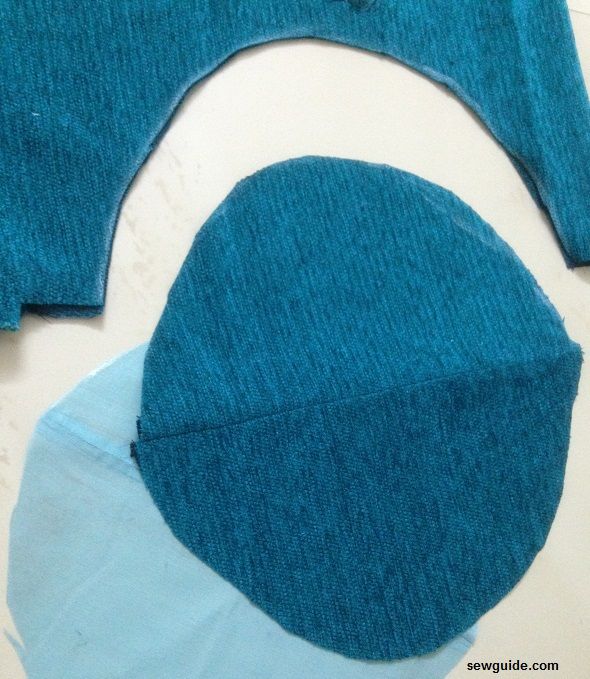
Now you have a small hole on the top of the cover. You need to cover this hole with a small circle.
Cut out the appropriately shaped circle ( donot forget to add 1/2 inch extra for turning under the edges.)
Cut the lining fabric as well
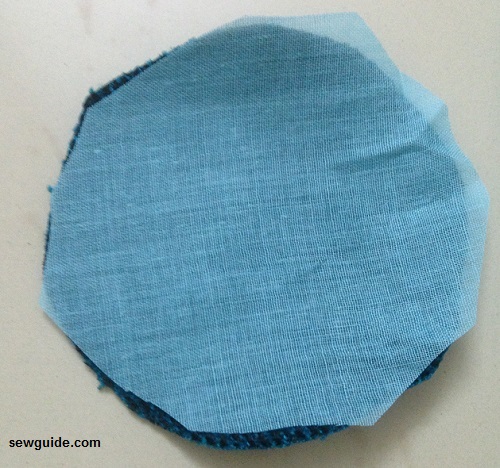
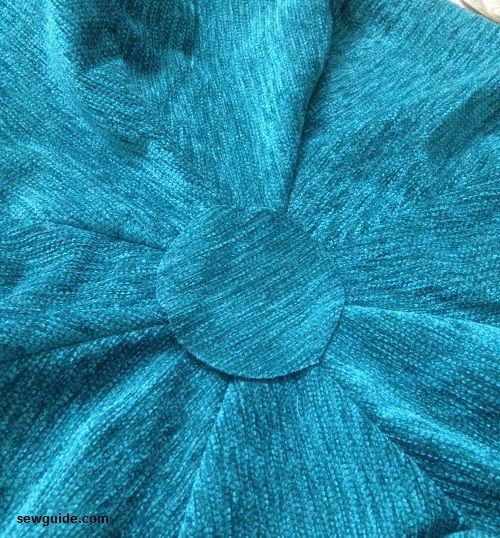
Keep it on top of the hole. Turn under the edges. Top Stitch over the hole. Ensure that circle covers the hole properly.
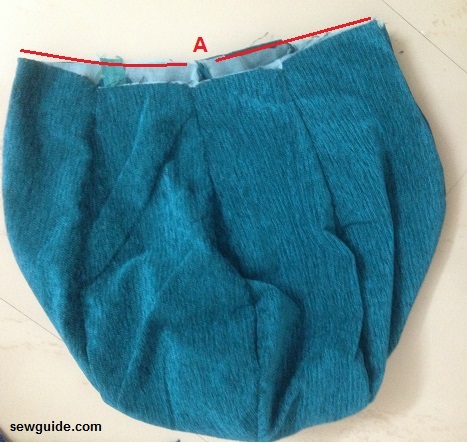
You need to sew the bottom of the bean bag.
For this you need to measure the circumference of the circle. Measure the edges of the cover . A in the picture below is the one edge of the top . You need to multiply this by 2 to know the circumference of the circle you need to cut. I have 19 inches as A. So my circle circumference is 38 inch
To find the diameter of the circle you need to cut from the circumference you have here, simply divide it by 3.14 . I have got 12.10 as this measure . So I need to cut a circle with 12.10 diameter . Because I am using a 1 meter cloth I will need to cut half circles and join together to get the circles. Remember to add seam allowance of 1/2 inch extra in this case down the center for joining the half circles.
Cut circles of lining as well. press open the seams .
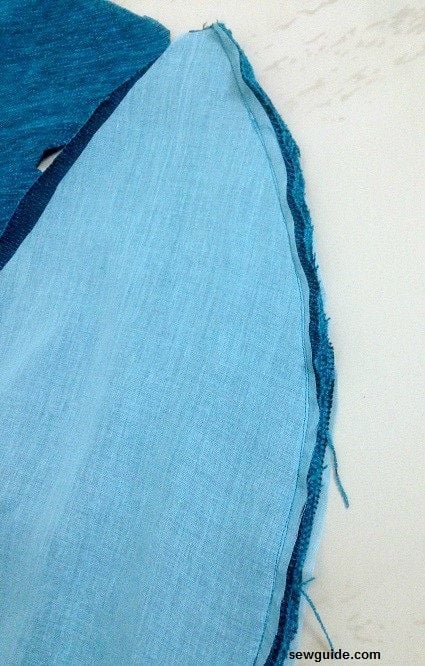
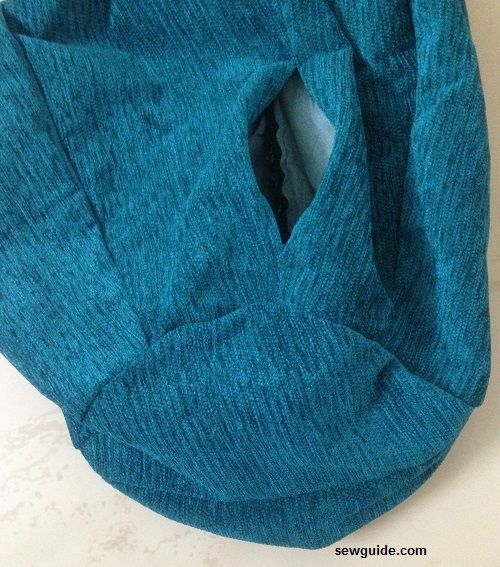
Finish the fabric edges of the circle and the bag bottom edge. Join the circle to the bottom edge, rightsides together. You will not be able to finish the whole bottom circle this way. When you reach a point that you can’t, stop. Open the zipper opening and take out the fabric through this opening and stitch the rest of the seam.
You have the cover ready with the zipper opening.
Fill the polystyrene beads as much as needed through the zipper opening. 3/4 full is enough ( a 500 gm bag of polystyrene beads is more than enough with enough to spare for another bean bag).
Be prepared with your broom or vacuum cleaner to sweep the beads running around afterwards. ( A fair warning -if you have guest coming over in half an hour donot try this tutorial. )
Related post
Bean Bag 101 – Best options for fillers and how to care and maintain your bean bag