
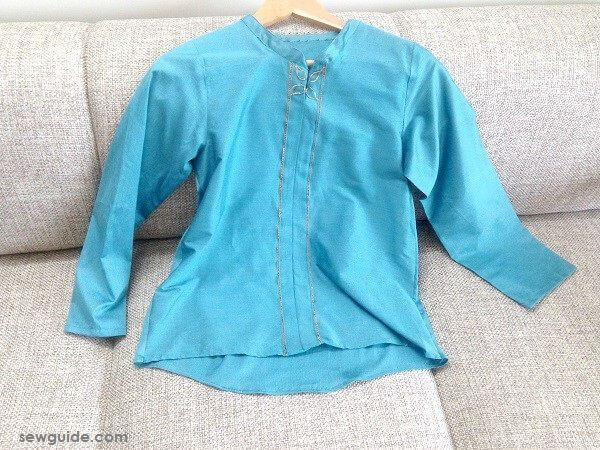
This is a pattern for a long sleeved collared Kurti top. If you are looking for a Kurta which is longer and/ or more fitting around the waist checkout the Salwar kameez tutorial.
Step 1
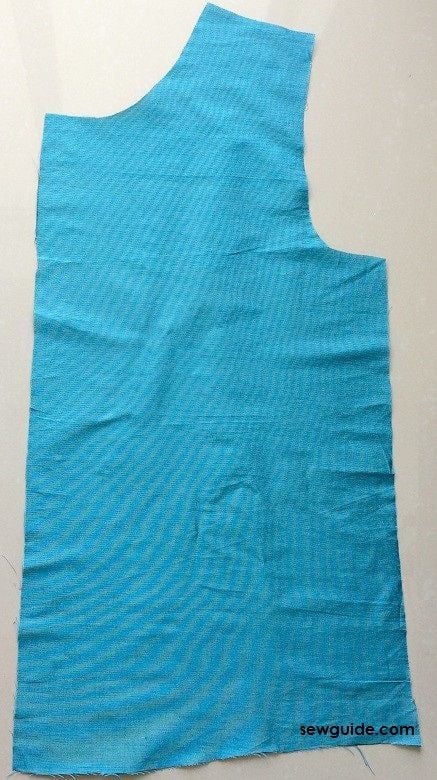
Cut out the front and back bodices as per the pattern. All dimensions are same for the back and front bodice except for the length and the neck depth and the extra 1 3/4 inch along the center fold for the pleats in the front bodice. The front pattern is cut as two pieces;It will be cut along the center fold line, and then joined later.
So You need to take about 4 inch extra wide fabric to cut the front pattern compared to the back bodice piece. For both the back and front bodice take the fabric of height 27 inches.
Pattern For the Front Bodice of the kurti
Leave 1 3/4 inch extra along the center fold line and then mark the pattern dimensions ( donot count this 1 3/4 extra when marking)Mark along the line A-C.
Mark A-K – this is the bust line; Mark down from A. This is marked as 8 inches
A-C = 26 ” – This is the length of the front bodice
A-F = 3.5″ – This is the neck width
F-E = 5 3/4″ From the neck mark diagonally to the center at E ( Usually this neck depth is taken as 1/10 of the bust round for a more closed neck but I am taking a somewhat looser neckline)
A-G = 7.5″ – This is the shoulder measurement ( customize this measurement as per our shoulder – 1/2 of shoulder to shoulder measure + 1/4 inch)
G-H = 1″ This is marked as shoulder slope
I-N = 1″ From H mark straight down to the bust line. Meeting at I. Mark diagonally to I.Mark the armhole. Curve 1/2 inch to the inside as in the pattern picture
J-K = 1/4 of bust round+ 1.5″
B-M= 1/4 of Hip round + 1.5″
L-M = 2″
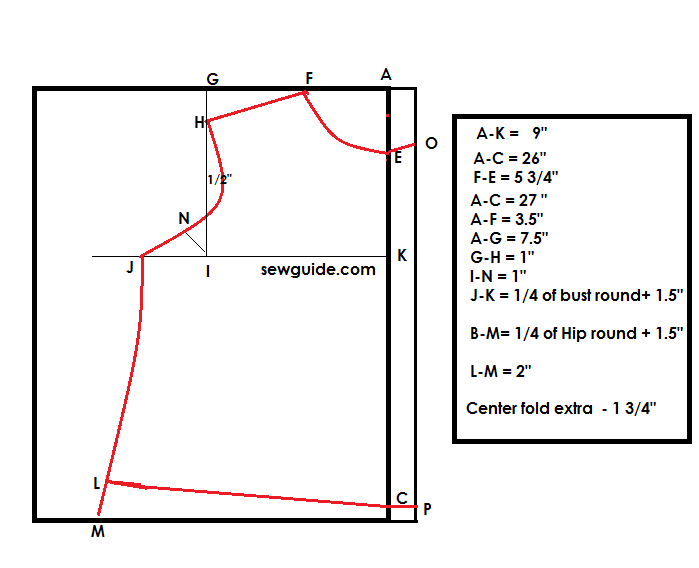
The marking is extended from the neckline and bottom edge to the extra you have left in the middle. Curve up the marking at the neckline to O ( I have not done because of which I had to cut the neckline further down)
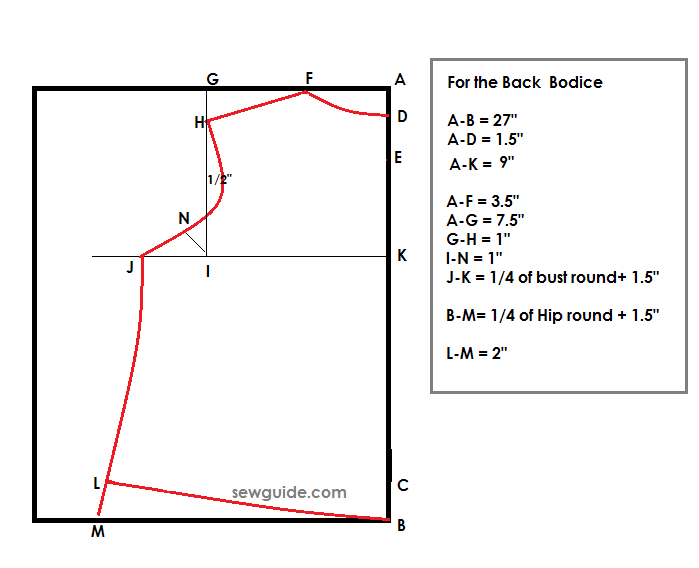
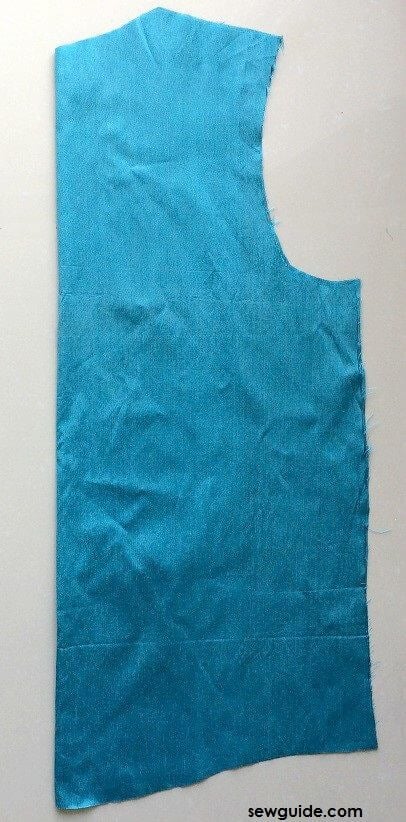
Pattern for the back bodice of the Kurti
Sleeve Pattern
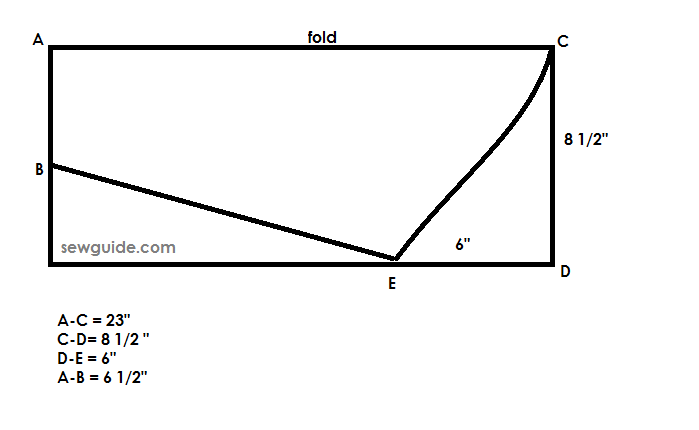
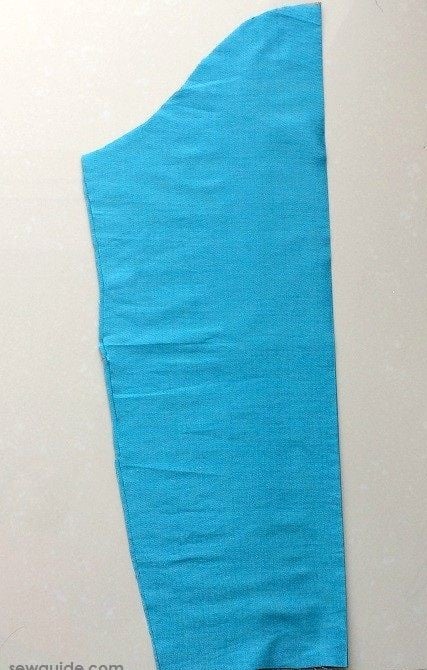
Cut out the sleeves as per the pattern
Step 2
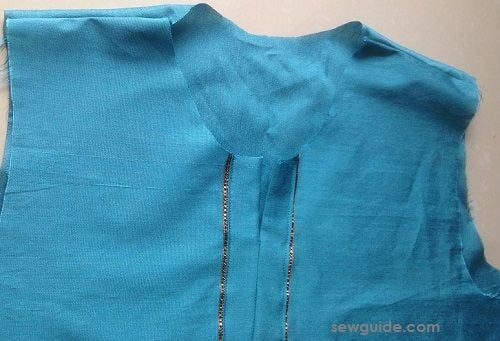
Make the center pleat
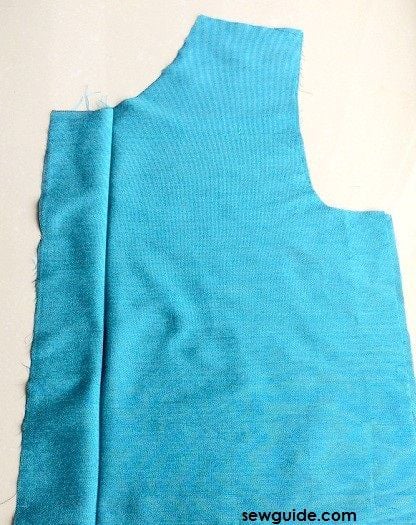
Press or mark the original center foldline on both the front bodices. ( which means the extra 1 3/4 inch will be marked along the edges – this is your center seam stitching line)
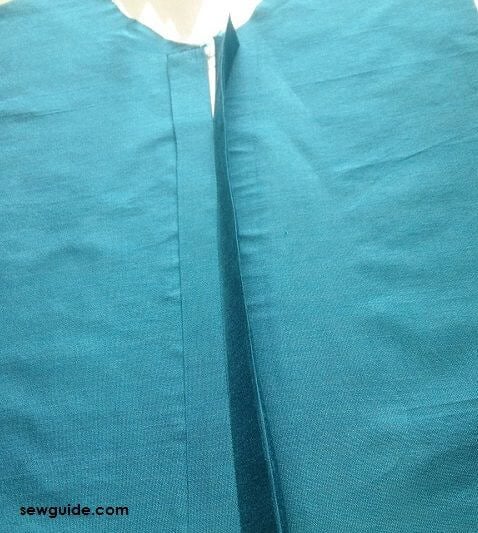
Press the edge along the center line 1/4 inch turned towards the front of the bodice as in the picture below.
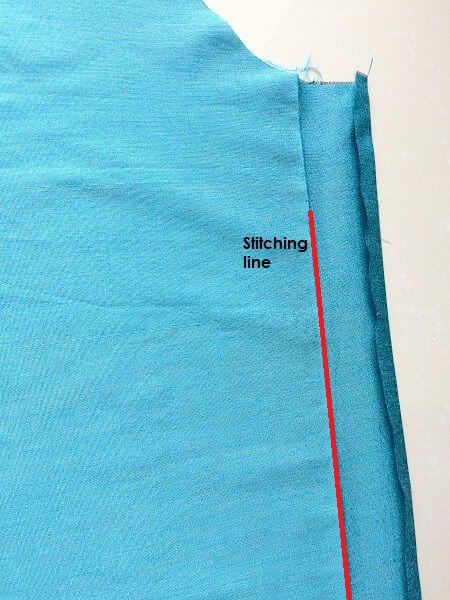
You want a small opening at the top. So leave that much, for me 2 inch from the top edge.Stitch the two front bodice pieces together along the original center fold line, WRONG SIDES pressed together.
Press the two edges by the middle so that you have two folded strips along the center seam line which is about 3/4 inch wide ( on either side of the center seam)

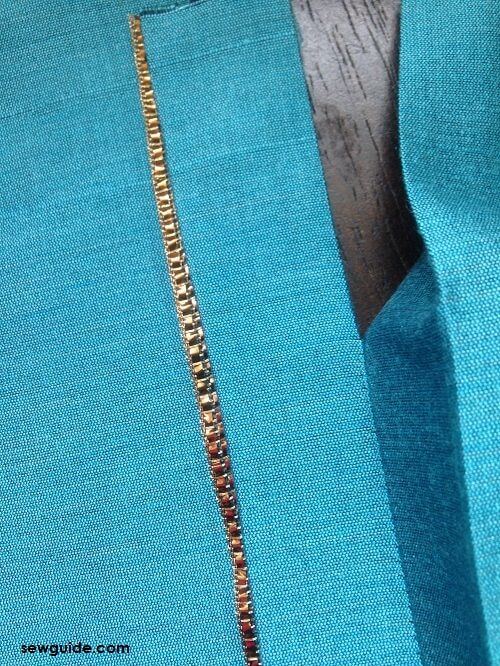
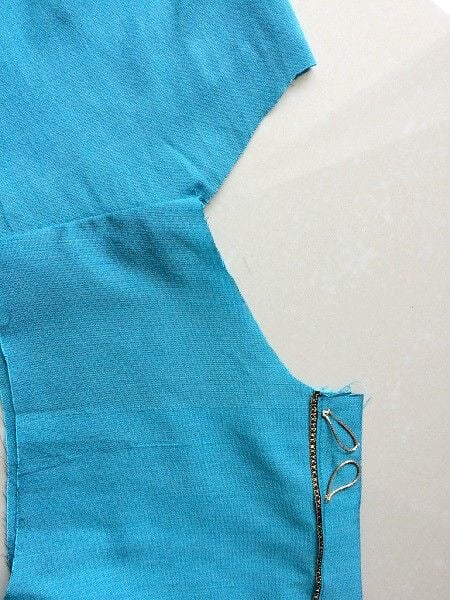
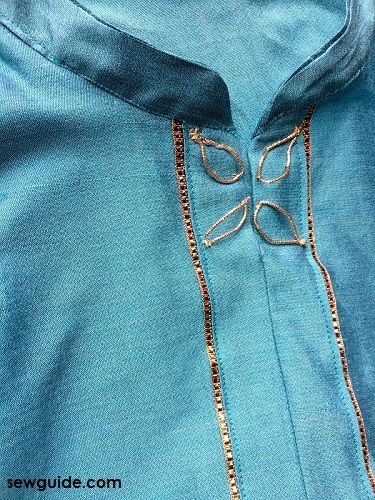
Now you should stitch these two pleats in place. I have inserted a gold trim under the edges and topstitched the fabric pleats in place.
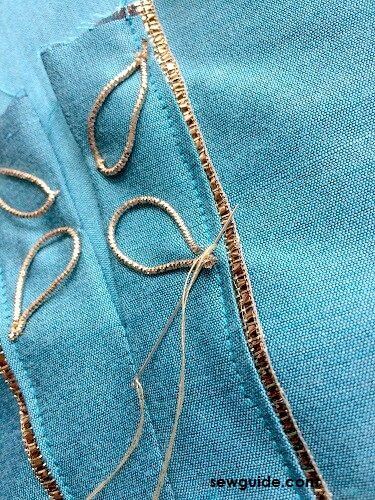
Add bead embroidery or any other embroidery along the folded pleats
Step 3
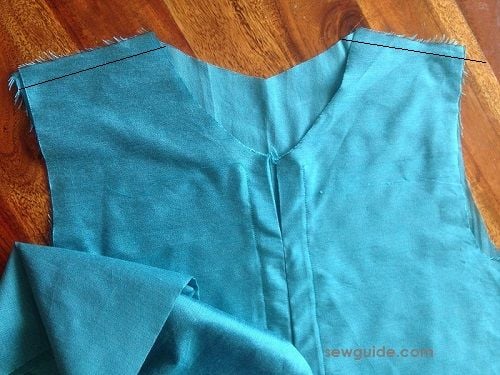
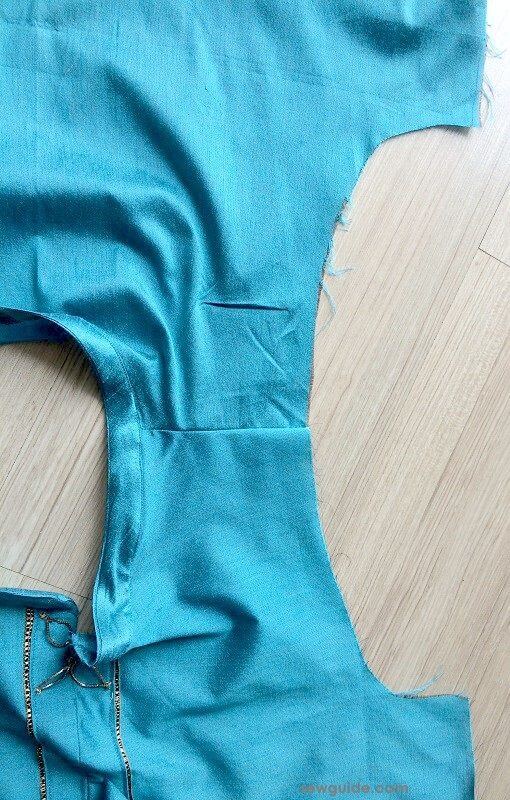
Keep the bocices right sides together and stitch together along the shoulder seams
Step 4
Make the collar. An alternative way of making the band collar is shown in the post on making Mandarin collar

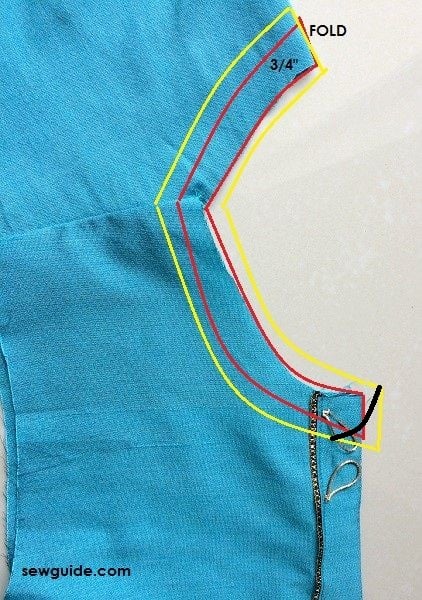
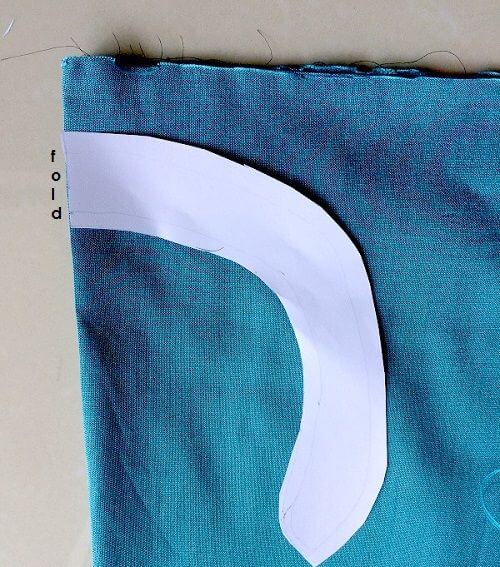
Trace the neckline of the kurta bodice. You need to trace only one side of the back and front neckline. Fold the bodice so that one half of back and front neckline is facing you.
Keep this on a piece of fabric and trace the neckline on to it
Remove the bodice and mark the collar 3/4 inch wide . Leave 1/4 inch all around except for the back short edge.This is for the seam allowance – the yellow line in the picture below is the cutting line . Make a small curve along the cut edge
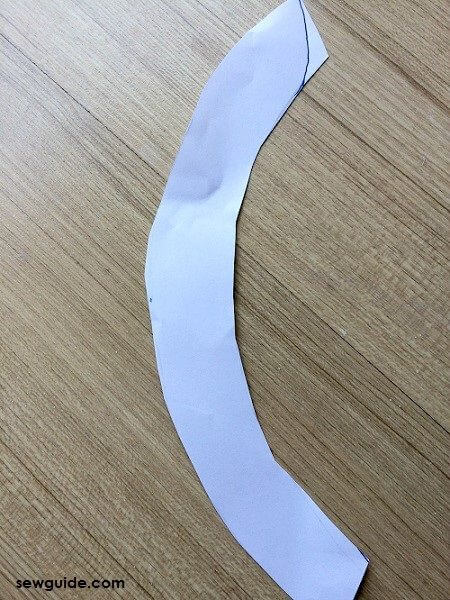
Cut out the paper pattern piece.
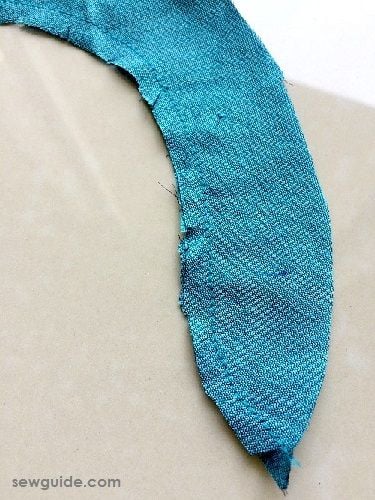
Keep the pattern on a folded fabric ( you need two such fabric pieces for making the collar for the kurti)
Cut the fabric
Keep the collar piece right sides together and stitch along the top edge.
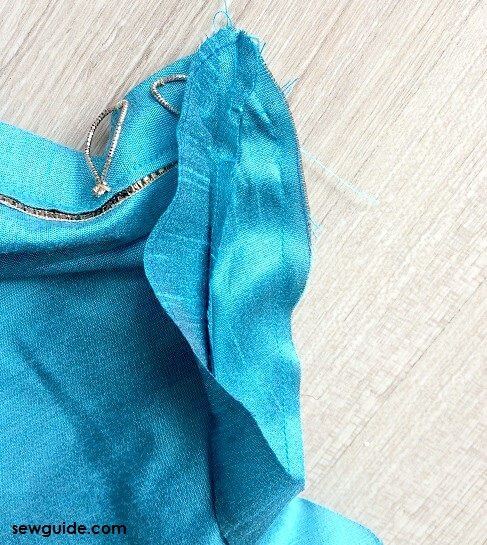
Clip along the seam allowance every 1/2 inch, so that when you turn the collar it will turn smoothly. Remember not to stretch the collar piece of the neckline. I have stretched the collar piece somewhat when I pressed. DONOT.

Turn the collar. Press neatly. Stitch the collar in place. ( If you want more structure you can add interfacing )
Step 5
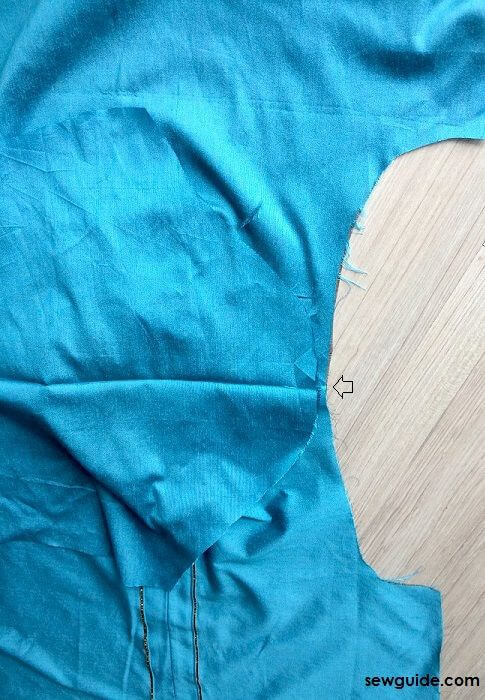
Finish the sleeve hems- turn under 1/2 inch and stitch. Attach sleeve to the armholes
Align the shoulder seam and the sleeve head.Stitch to either side. Stitch twice for a strong stitching line
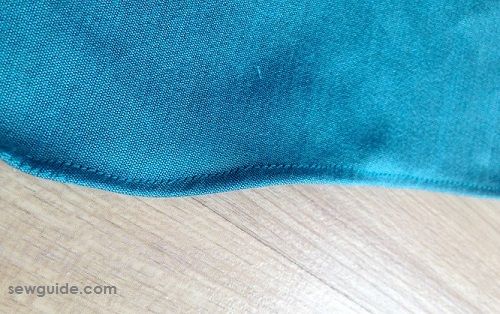
Step 6 . Make a baby hem along the bottom edge of the back bodice and front bodice. Stitch the side seams.
Kurti is waiting for someone to wear it.
Thanks, I will be grateful if you can send me some of your books to the following address
Amurawaiye Matthew
I/c Mr Adenuga
Education Resource Centre
P.O.Box 2946
Garki Wuse
Abuja FCT
Nigeria
Do you have any You Tube Channel , if Yes please let me know the channel name .
Thank you !
Hi Selvi
No Youtube channel, I am sorry
Mama you are just more than awesome. I can see but I can’t cut. But now I can sew and cut almost anything. And you are doing it all free. You are amazing. Thank you
Thanks Ayodeji. You are awesome for writing this.
Dear Madam, An amazing tutorial. I am hungry for more such turorial. Thank you very much.
Mala Viswanathan.
Thank you Mala for the sweet comment and encouragement