
Step 1 Cut out the pattern pieces
You need 2 bodice pieces, 2 skirt pieces, 2 ruffle pieces, 2 bias strips and 2 strap pieces to make this dress
Measurements: Take bust round; measure from one armpit to the other armpit for elastic length for the top edge. Measure the length needed for the dress – from under the base of neck to the skirt length.
Disclaimer: For a person with a bust round of more than 34 inches, this dress would look slightly different than in the picture above – the bodice will be slightly shorter according to the curves and consequently so would the dress. So increase length accordingly.
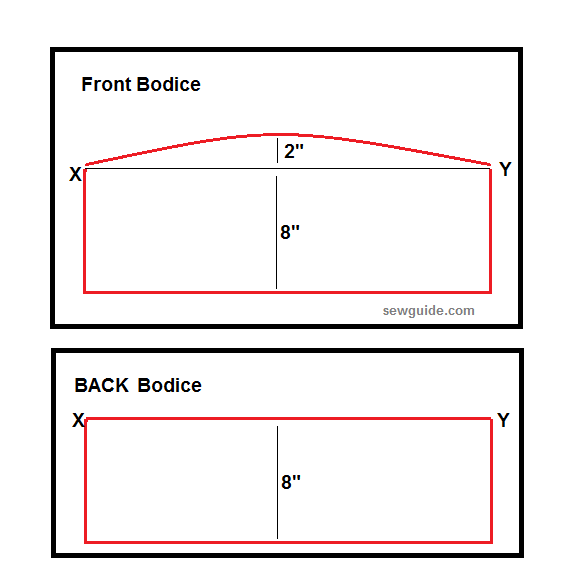
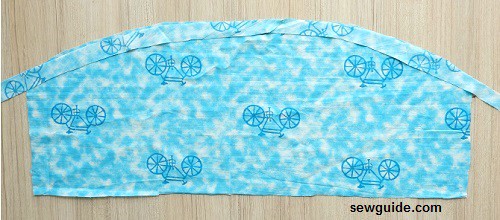
Cut out 2 bodice pieces
Use the pattern given below to cut 2 bodice pieces
X-Y = 1/2 of Bust round * 1.5 + 2 inches
When you look at the pieces I have cut and see the incongruencies, please do not judge me – my brain is strange that way – I never notice that the patterns are upside down until I have cut the pieces and there is no extra fabric to rectify this. But with this dress, I lucked out. The shirring makes the pattern go unnoticed. Thank god for small mercies.
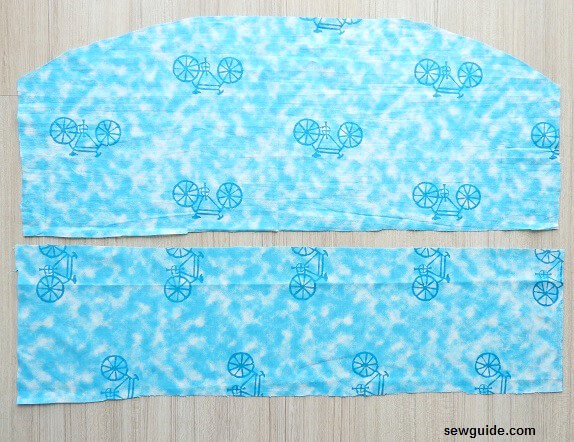
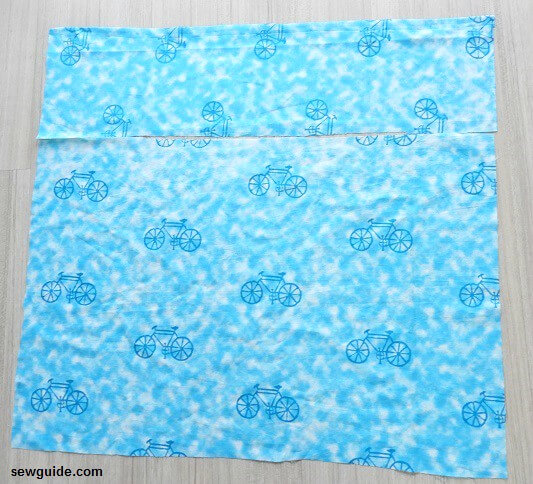
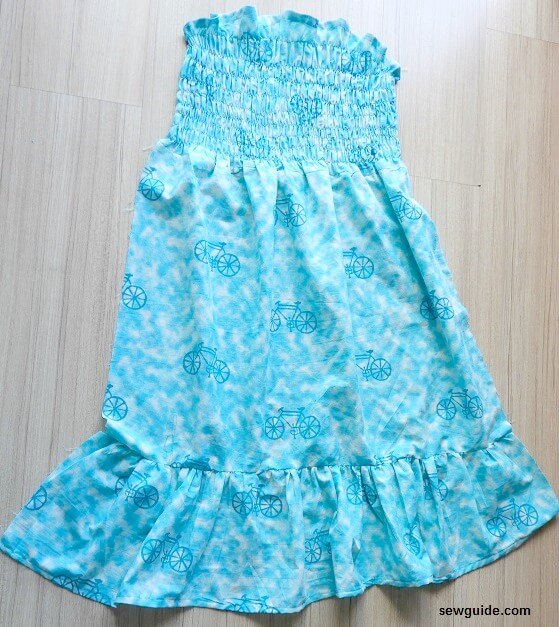
Cut out the body pattern pieces ( 2 skirt pieces and 2 ruffle pieces). For the skirt you will be cutting two rectangle pieces – top edge will be equalling the bodice width (x-y) you cut earlier. The length will be depending on the length you want for the dress. I have taken 20 inches. Remember there will be ruffles added to this.
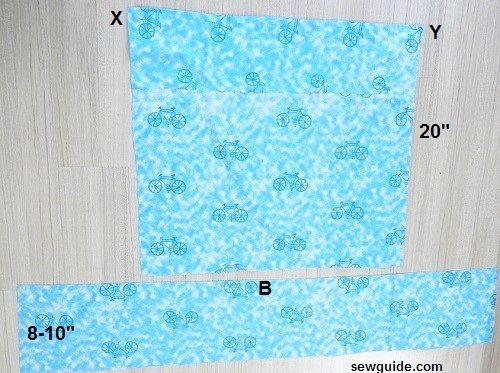
For the ruffle pieces (2 for the front and back) you will need rectangle fabric measuring B = 1.5 * the measure of X-Y. (If you take 2 times you will get more gathers.). I have taken a length of 8 inches.
Step 2 Bind the bodice top edge
Cut out 2 pieces of 1-inch bias strips. These are for binding the top edges. If you want to insert elastic, this serves as a casing too.
Bind the top edge of the back piece
Bind the top edge of the front bodice piece
Step 3 Join the bodice and skirt
Keep the two pieces right side together and stitch to join the bodice piece to the skirt piece. Do this for the front and the back
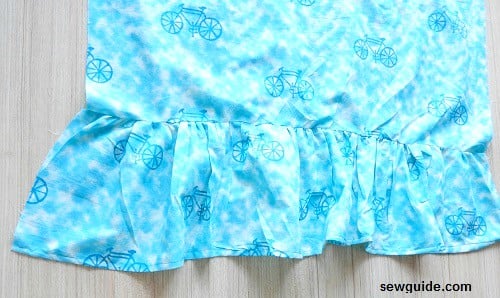
Step 4 Make and join ruffles
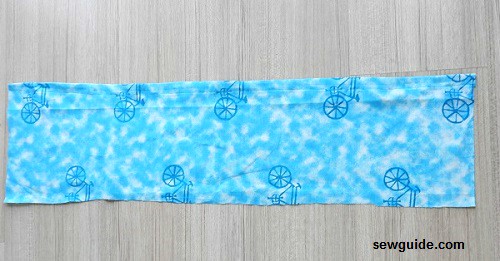
Now you have to join the ruffle piece to the body. For that, you have to gather the long strip. Make long basting stitches along the edge and gather the fabric piece to the length equalling the skirt piece bottom edge.
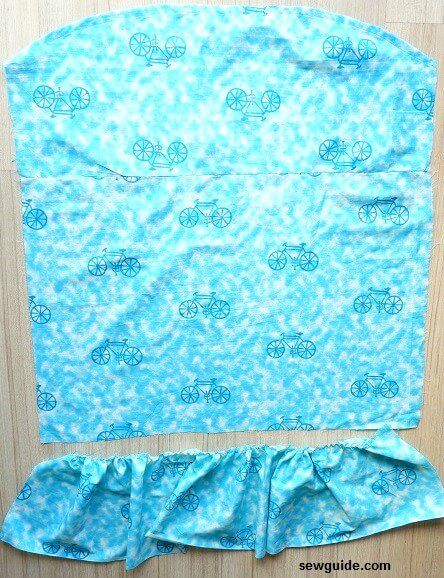
Join the ruffled piece to the skirt edge
Step 5 Shirring the front and back bodice pieces
Start with the front top. You will have to mark straight lines on the top on the right side of the fabric 1 inch apart equidistant to each other ( if you want closer shirring, make it 1/2 inch apart). For the front bodice make curved lines at the top edge.
Start stitching the shirring ( check out the post on shirring with ealstic thread for more details – basically it involves using the thin elastic thread on the bobbin – you will have to loosen the bobbin tension by loosening the screw on the bobbin case.
If you have a drop in bobbin case, look for instructions in your sewing machine manual)
Stitch carefully. Shirring is easy and magical.
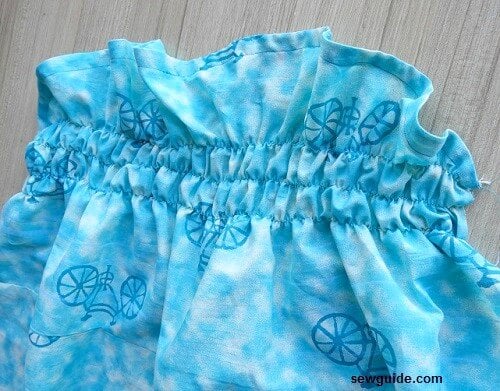
Use a steam iron one the shirring – it will really look great after this
How to finish the top edge of the dress – you have two options – either shirr the top edge or insert elastic through the casing at the top edge.
Measure and cut an elastic 1/4 inch wide of length equalling the front of our body from one armpit to the other, with a snug fit. Insert this 1/4 inch elastic through the casing on the bodice at the top edge. ( I have not done this – I have simply shirred the top edge – elastic works better if you do not fancy the frilled look at the top edge). Do this for the back bodice as well.
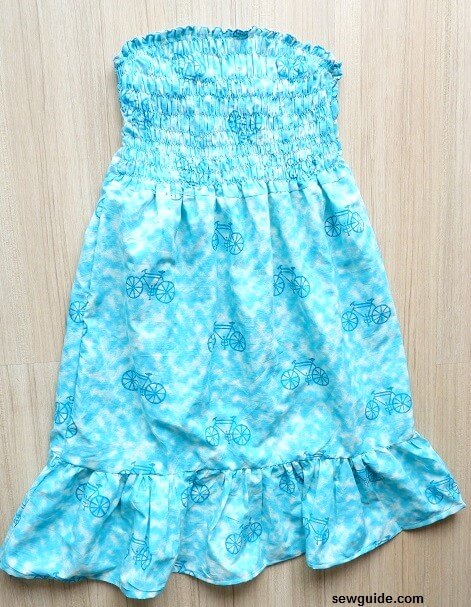
Step 6 Join the front and back pieces.
Keep the two pieces ( front and back pieces) right sides to the inside and stitch the side seams. This will complete your dress.
Now you have to add straps(Optional)
Step 7 Add straps to the dress.
Make simple spaghetti straps with crosswise cut fabric strips folded in a double folded bias fold; or make thin fabric tubes (follow the tutorial to make thin fabric tubes here). Keep the straps some 3 inches from the side seams and stitch in place.

Very nice thank you so much