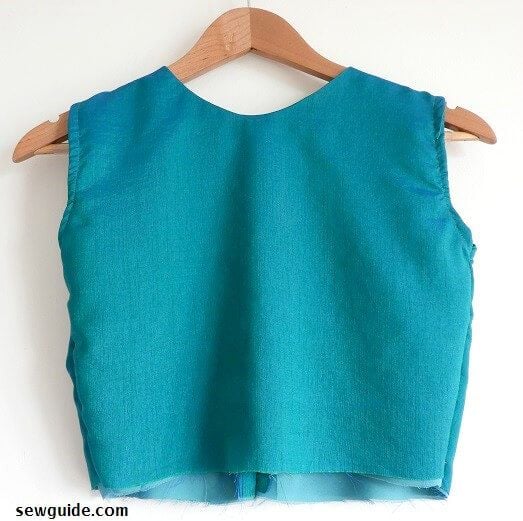
Party dress for little girls – Free Sewing Pattern & tutorial
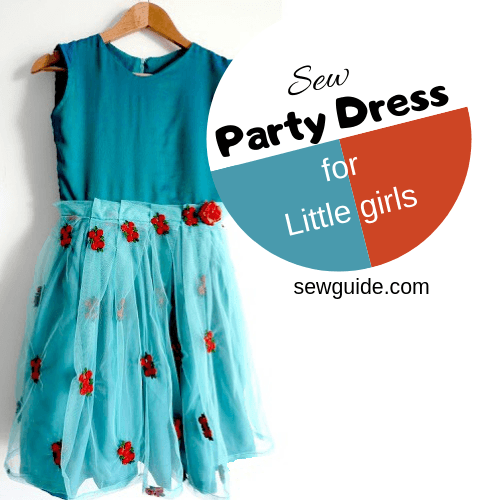
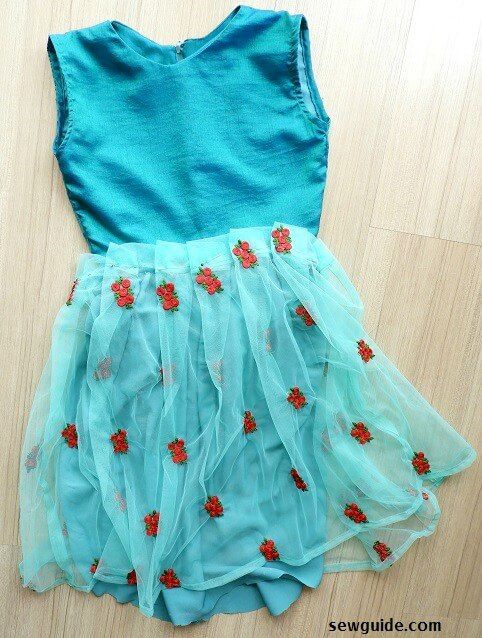
This is a sewing pattern for making a party dress for a girl – you can draft it to any measurement. The bodice is lined and has a zipper back, with a tulle overskirt sewn with a paper bag waistline.
You will need to take the following measures on your little girl for making this dress – the chest round ( or waist round whichever is bigger), length from the neck base to the waist, length from the waist to the length you want the dress to end, measure from the shoulder tip to shoulder tip and neck depth
Step 1
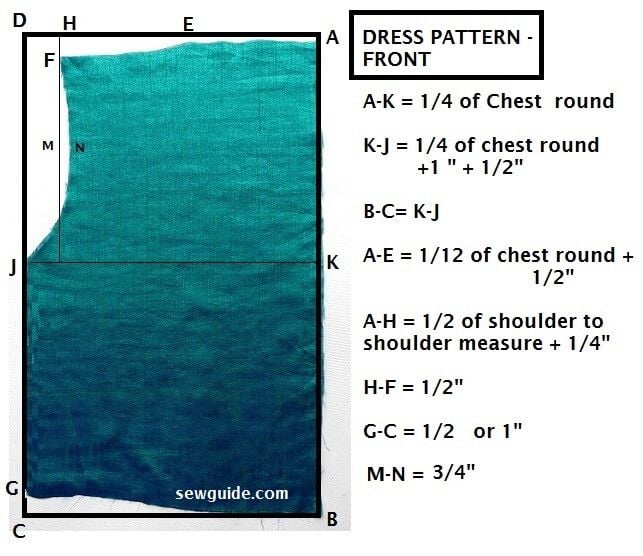
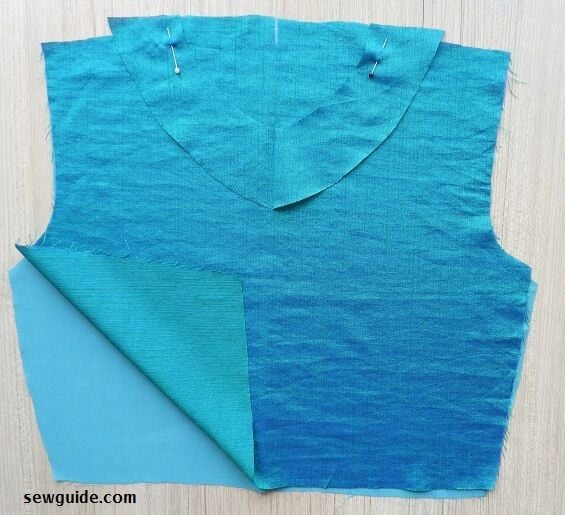
Front bodice
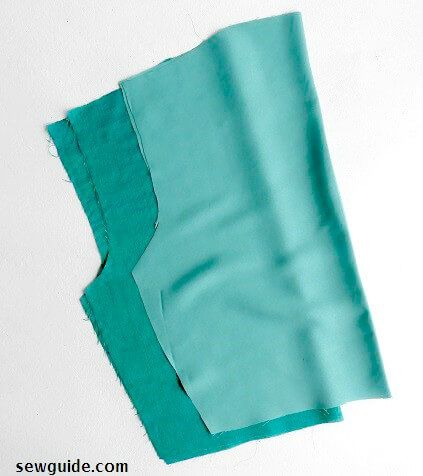
Cut front bodice and the lining material with the same pattern on folded cloth. You can change the neck width or any dimension to your preference – just refer any old favourite dress belonging to your kid.
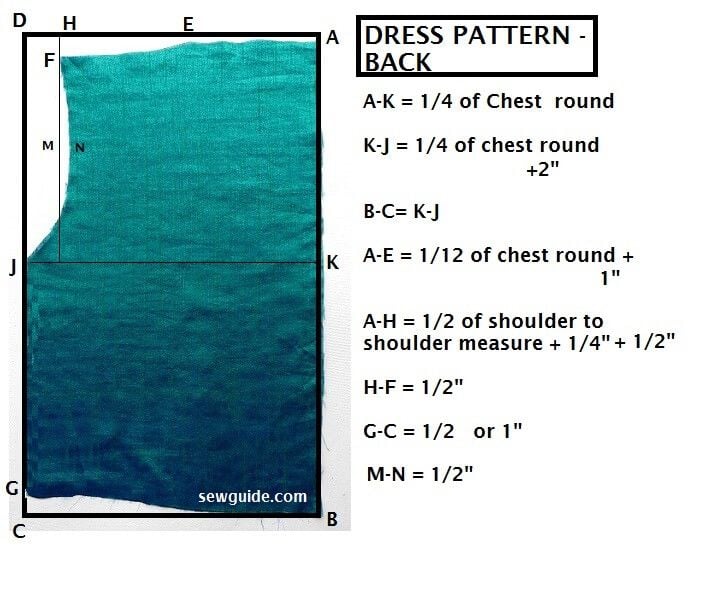
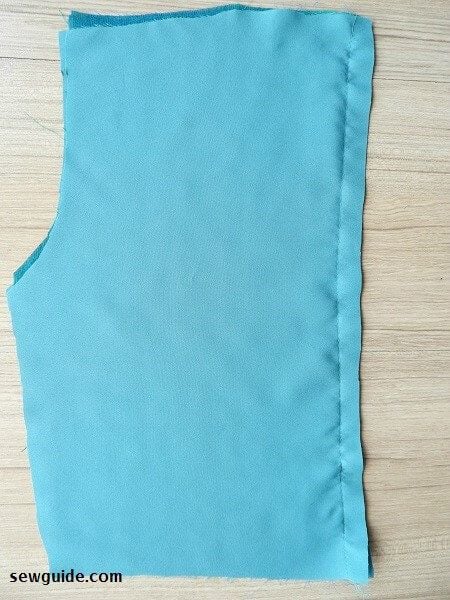
Back Bodice
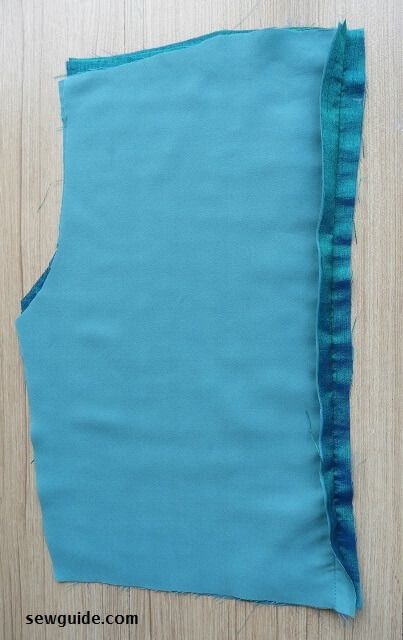
Cut back bodice and the lining material with the same pattern on folded cloth. After the bodice is cut, the back is cut by the middle to include zipper opening – you have two pieces for your back pattern.
The neckline as such will be cut later with the facing. If you want a simple neckline just cut it out and bind with bias binding strips
Step 2
Cut out facings for the front and back and mark the necklines on the facing. Facing is cut as per the neck markings you want for the front and back – neck depth and width are marked on the facing and then cut after adding 1/4 inch extra at the neckline edge as seam allowance.The facing should have a minimum width of 2 inches . You can affix interfacing to the facings for added strength. I have used the outer fabric as the facing fabric.Lining fabric can also be used
Know more about facings here
Step 3
Finish the front neckline
Keep the facing face down on the bodice and pin accurately in place. Stitch together along the top edge of the facing
Clip along the seam allowance , every half inch or one inch
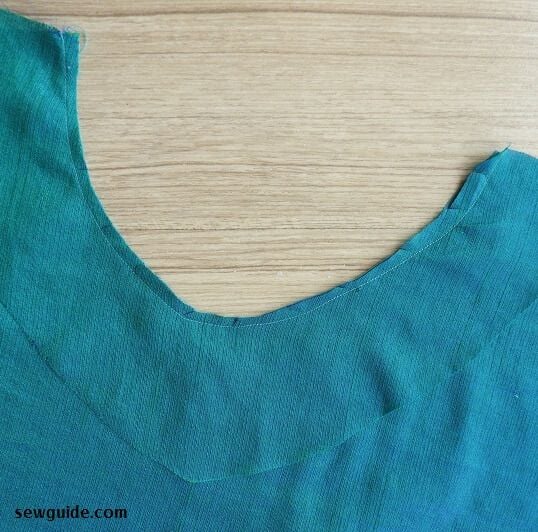
Understitch the facing and the seam allowance. Turn the facing to the back of the bodice.

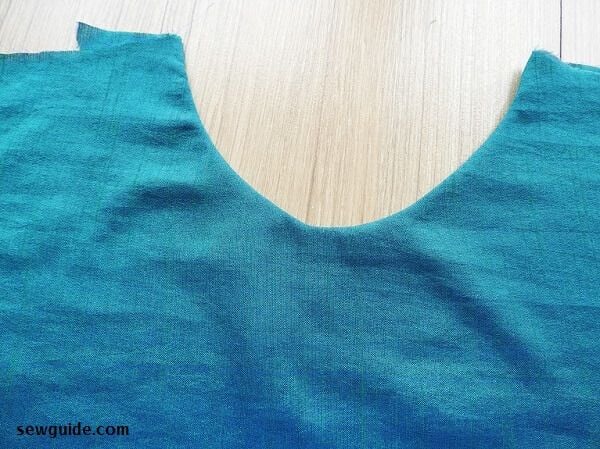
Fold the lining edge and hand stitch it to the lining on the back- this will keep the facing secure inside
Change the neckline to your preference – follow neck drafting tutorial here.
Step 4
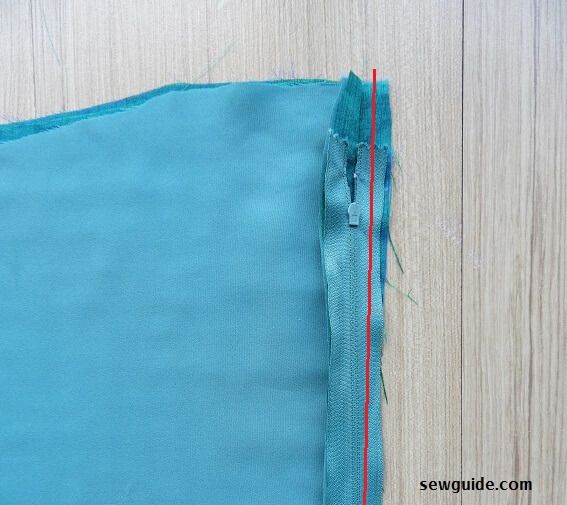
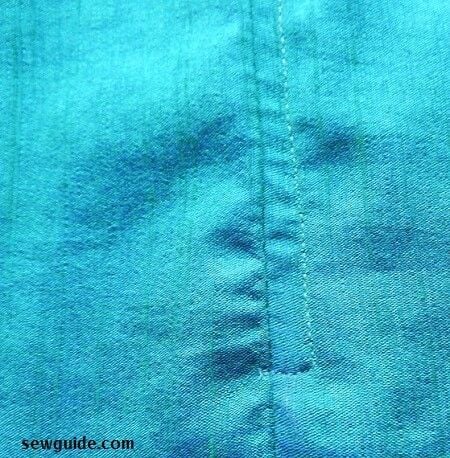
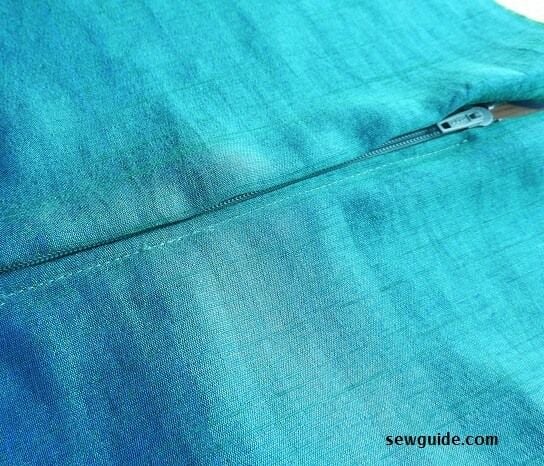
Sew the back zipper .
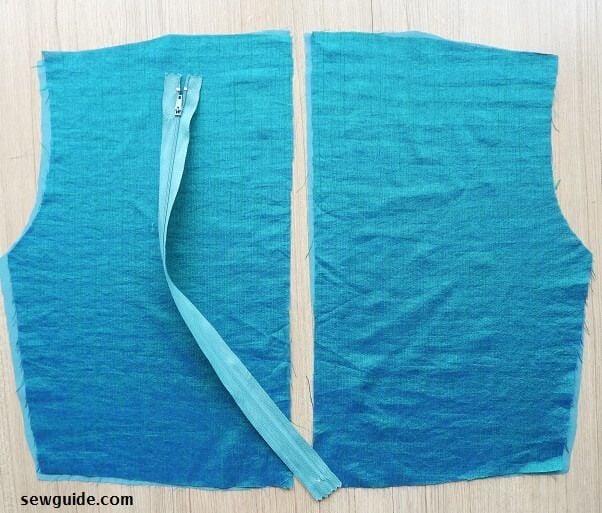
Keep the two back pieces rightsides together and sew basting stitches from the top till where you want the zipper to stop. After this ake regular sewing stitches. (Check out this post on the loose long length basting stitches – they are made to temporarily hold a seam and are mostly meant to be cut open later)
(For fitting dresses the zipper is placed well past the waist -till the hip. Here I have used the zipper only for the bodice – it is ok for small kids).
Keep the seam to the side and open it .
Keep the zipper face down on this open seam allowance such that zipper teeth is aligned on top of the seamline- stitch in place with the zipper foot on.
Now open the bodice and align the next zipper teeth on the other seam allowance. Pin in place.
Here we will be stitching through all four layers – zipper teeth, seam allowance, lining and outer fabric. You can do in from the back or from the front of the bodice ( so long as you have pinned neatly or basted everything in place)
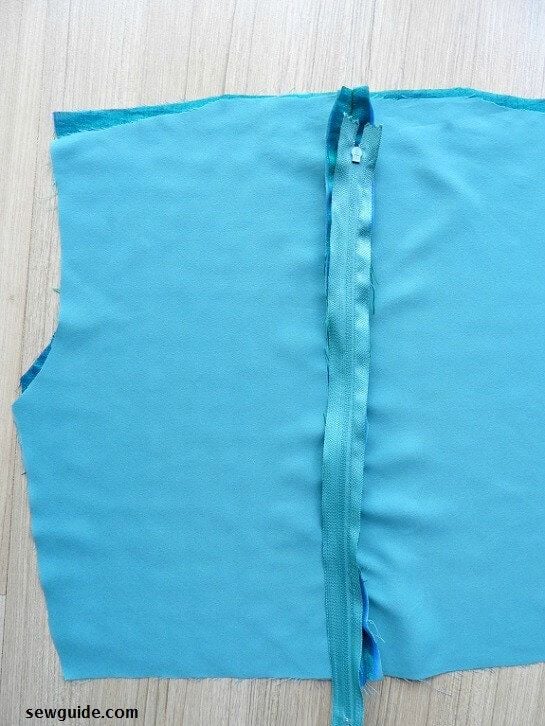
Sew at the bottom across the zipper teeth.
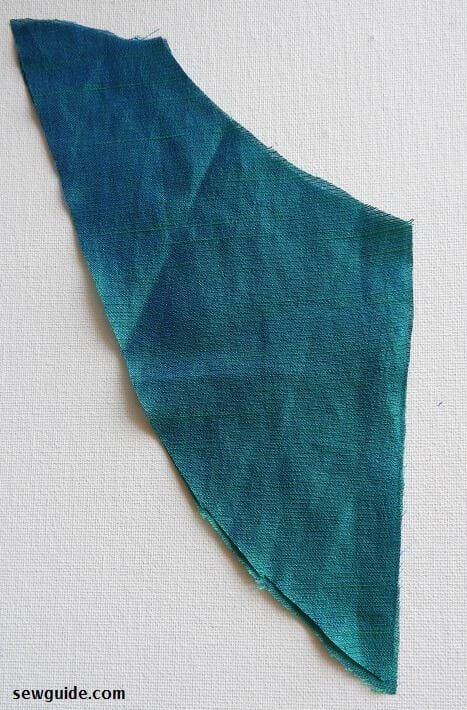
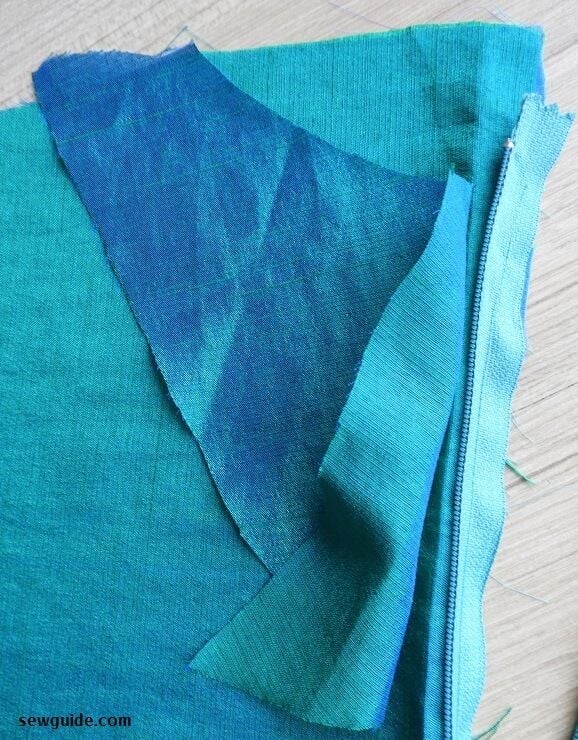
Step 5 Sew the facing -back bodice
Cut out the back facing
Keep the facing on the left side of the back bodice ( facing you) so that the zipper seam is open. Sew the top edge in place.
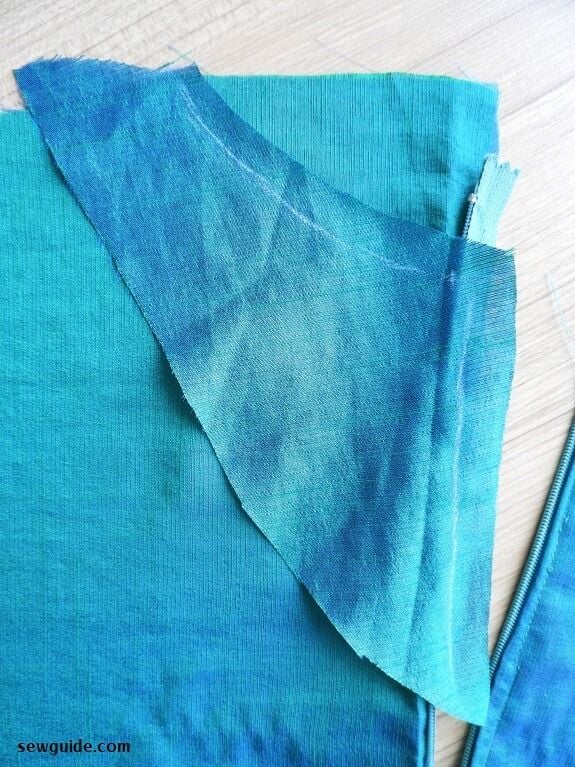
The zipper teeth is open – this is important.
Clip the seam allowance.
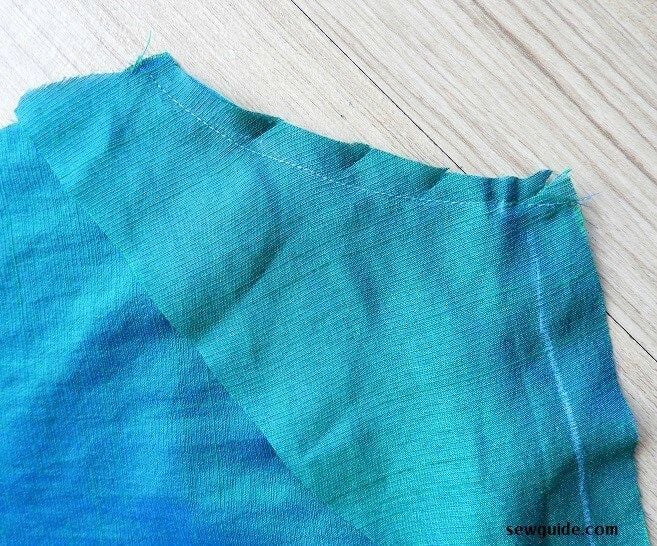
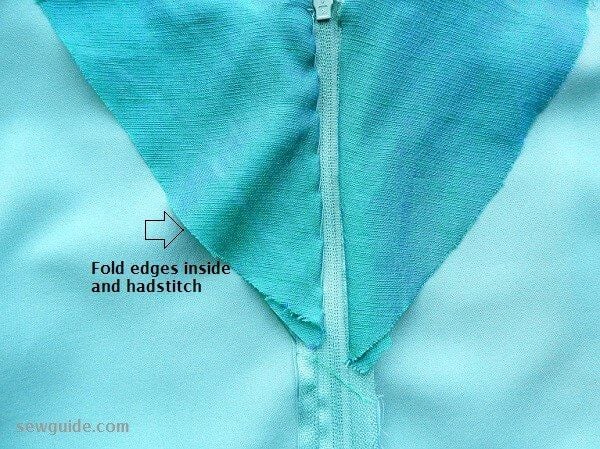
Fold the top edge down and pin in place (see below picture). Now sew the side of the facing and zipper tape together starting from the top ( which is folded down).
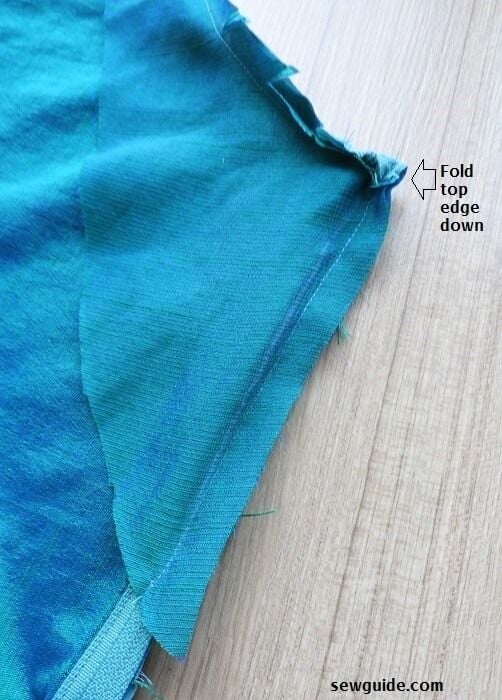
Turn the whole thing right side out – one zipper side facing is finished
Now the next side – take the facing and pin it with the side folded to the back, as in the picture below. Sew the top of the facing (neckline)
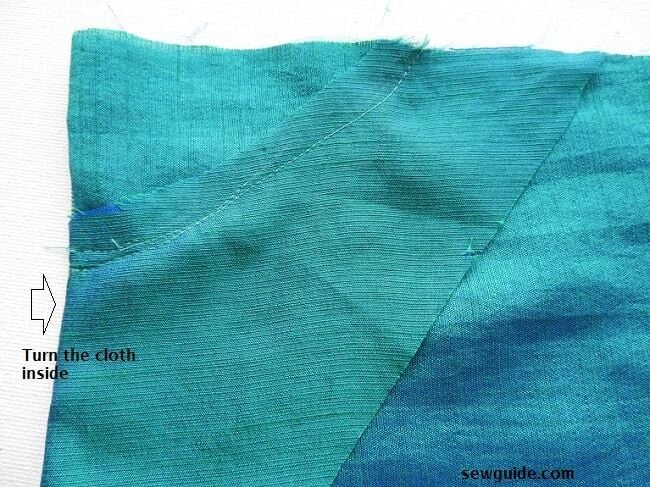
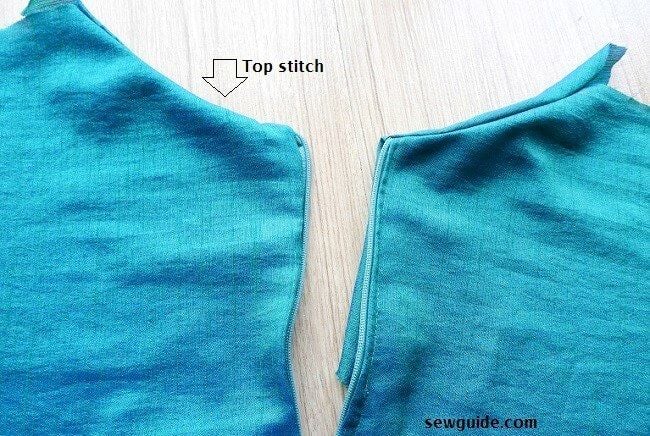
Turn this also rightside out- you have two back neckline facings finished – just waiting for the final finishing touches – topstitching the neckline edge and hand stitching the facing to the lining for a neat look.
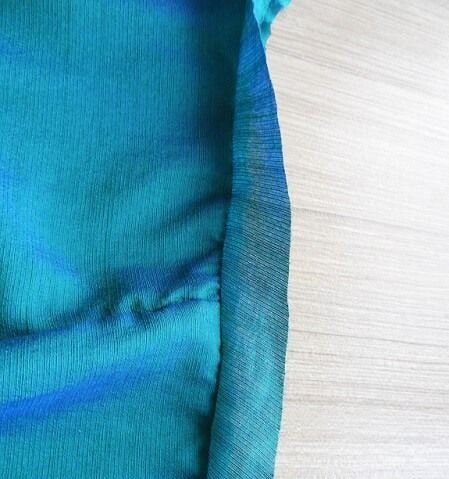
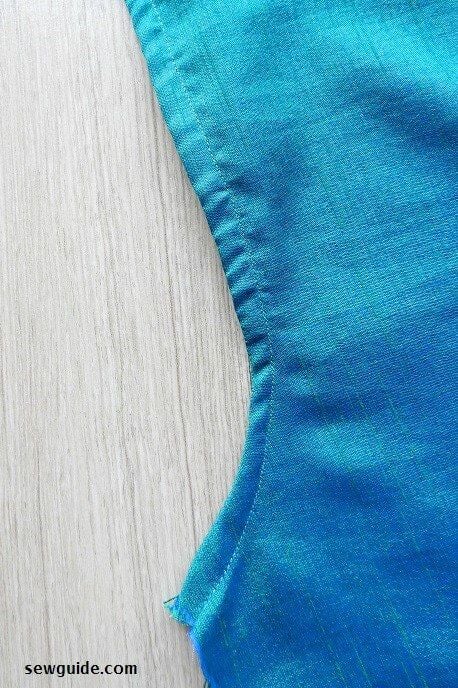
Step 6 Bind the armhole
Use long bias binding strips (3/4 inch wide) to bind the armhole
Clip along the seam allowance
Turn to the other side, fold and stitch in place
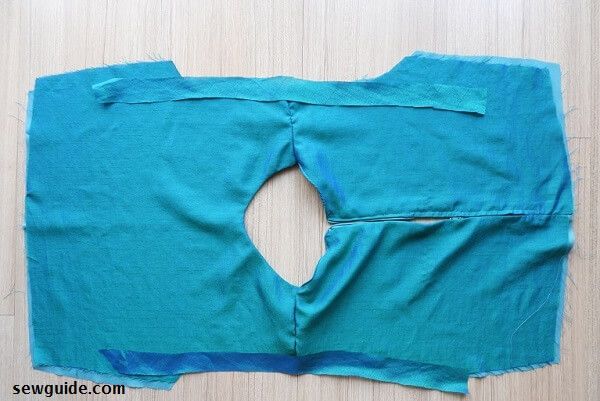
Step 7 Join the shoulder seam
Join the two bodices together by the shoulder seam keeping them rightsides together
Step 8 Join the side seams
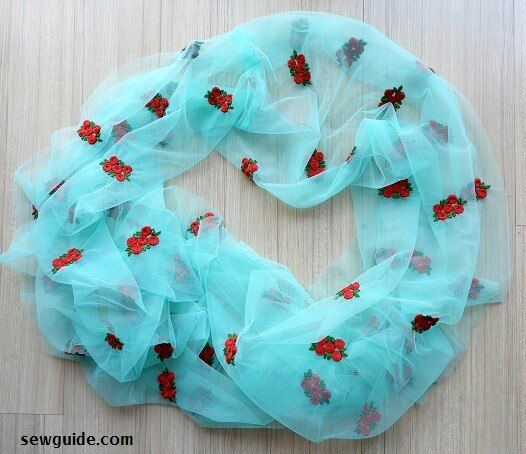
Step 9 Cut out the skirt pieces
You need two pieces from the tulle fabric of the following dimensions
Length = measure from waist to the length you want for the dress + 2 1/2 inches
Width = Hip round * 2 (or 1.5 ; I used 1.5 but I think it gives not much fullness).
and two pieces from the lining with the same dimensions
Step 10 Make the skirts – outer and the lining
Join the skirt pieces by the short edges to form the skirt tube – do so for the outer fabric and the lining separately.
Hem the tule skirts bottom edge

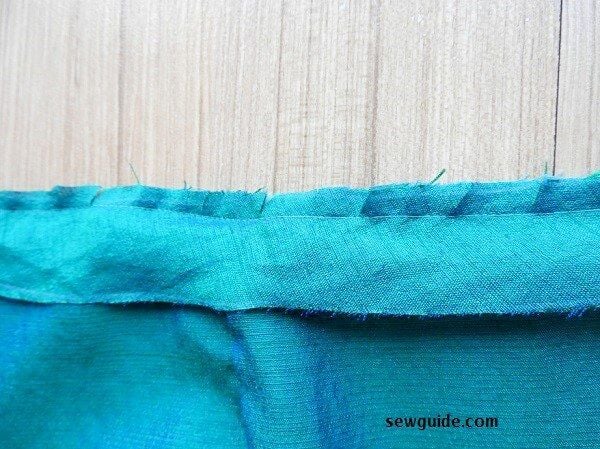
Fold the top edge some 2 inches to the back and stitch in place.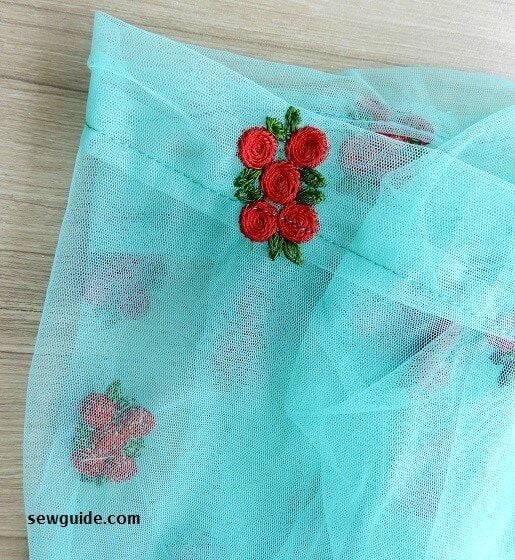
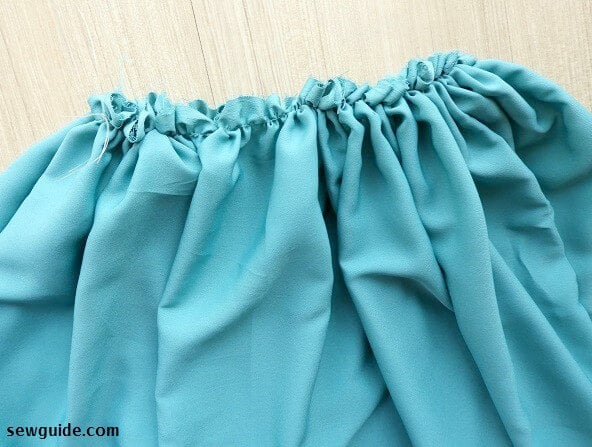
Step 11 Gather the lining skirt and join to bodice
I used the fishing line technique to gather the top edge of the lining skirt. Adjust the gathers to fit the bodice’s bottom edge.Learn how to gather fabric here
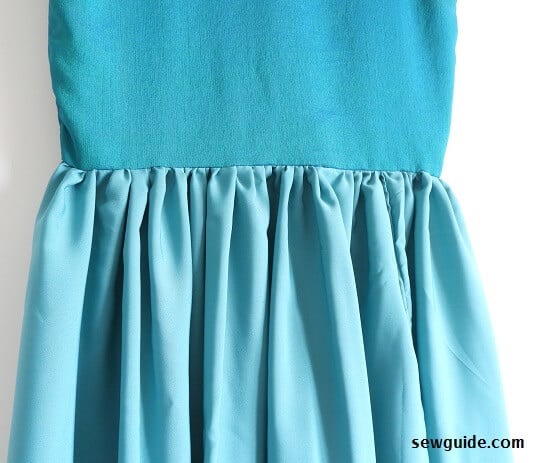
Join the lining skirt and the bodice. If you want the tulle skirt to be joined similarly (instead of the waterbag effect) do so now.
Step 12 Make pleats in the outer skirt
Fold the top edge of the tulle skirt to pleats and pin in place – it should be fitting over the waistline of your dress.Adjust pleats accordingly and pin in place. The final adjustment can be done when kept on the skirt.
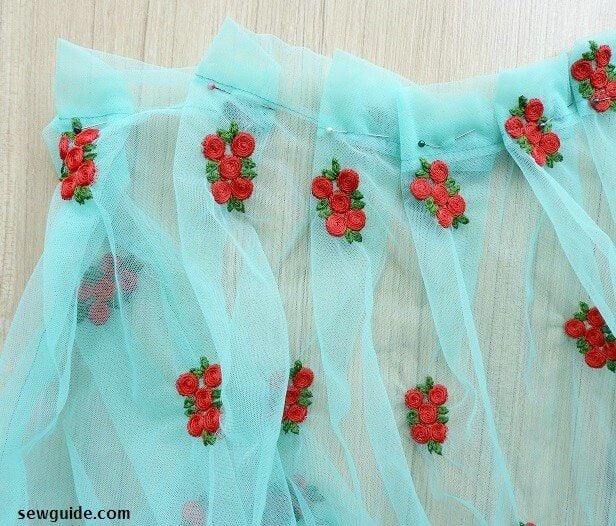
Baste the folded pleats in place
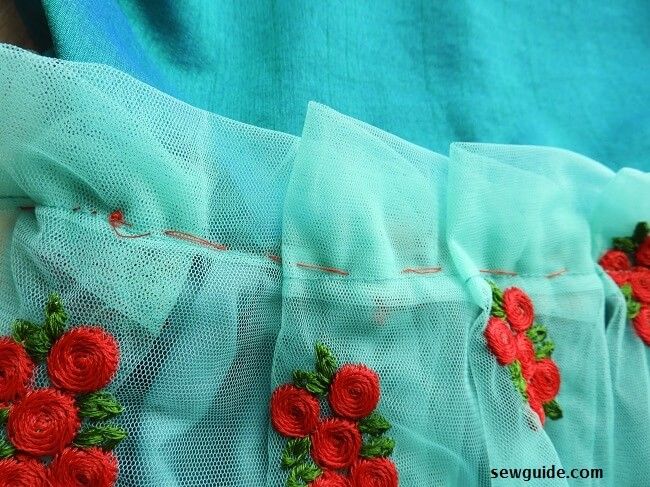
Step 13 Join the tulle skirt to the dress
Keep the skirt on top and carefully topstitch – the basting helps.
Hem the lining skirt – the hem should be 1/2 inch smaller than the overskirt.
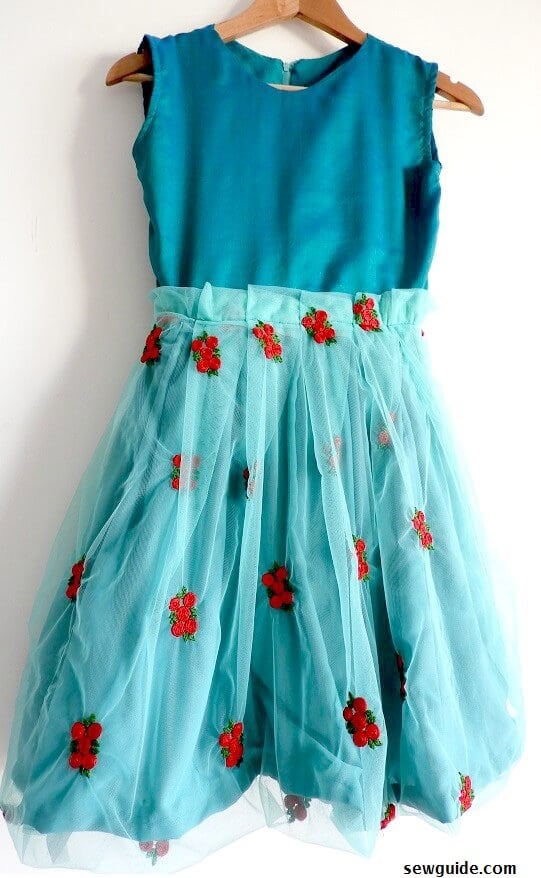
Add a sash to this dress for fitting. Check out this post on making sashes or tying sashes into pretty bows
For decorating I have added a simple rose flower made with a ribbon. Check out the post on ribbon roses or Make flowers out of ribbon or making fabric flowers for tutorials for making such decorations
Related posts
I need assistance in getting started with my sewing. Thank you.
I would like to know how to get started with my sewing. Thank you for the opportunity.