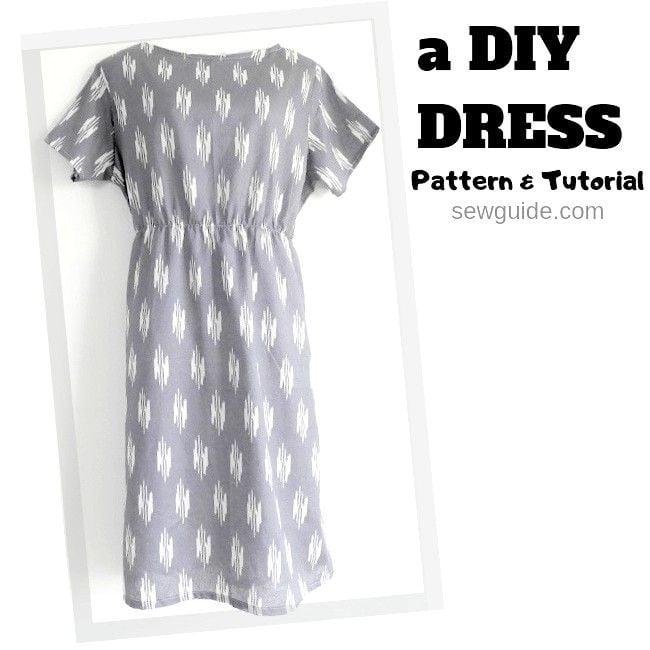
Let me start with a disclaimer – I made this easy peasy ‘DIY Dress in an hour’, copying a dress I already had. First I wore it to death. Then I copied it and made another. And then I made another and then more. And some more. Now I literally live in them. In the sweltering heat of the summer, nothing like a free size dress. So I thought why not make a tutorial of it. It is easy to make, easy to wear and looks nice. A perfect DIY dress.
Free size means you will get into the dress if you have a chest size under 42 inches. You can change the dimensions if your size varies and the instructions are given below. Free size dresses are not your most fitting clothes – but one thing is a guarantee. You will be super duper comfortable in them.
What Fabric to use to make this easy DIY dress?
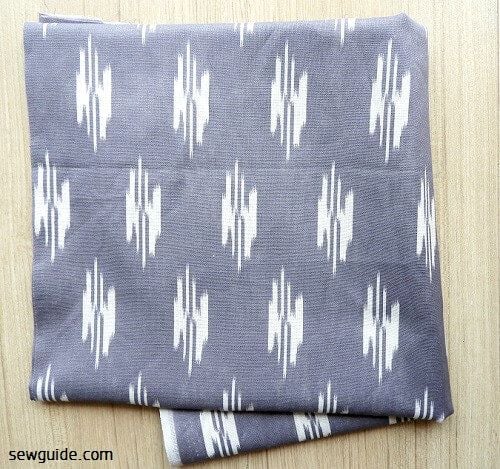
Cotton ofcourse – any thin, lightweight cotton is good. Prewash and iron the fabric. 2 and 3/4 meters (3 yrds) of fabric make a knee length dress. You also need a 1/2 inch wide elastic the length measuring your waist round.
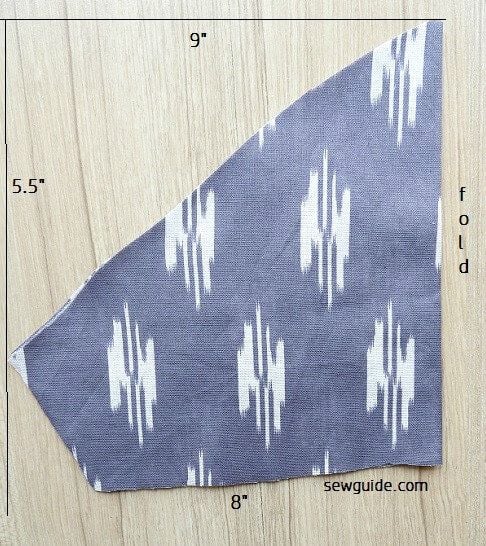
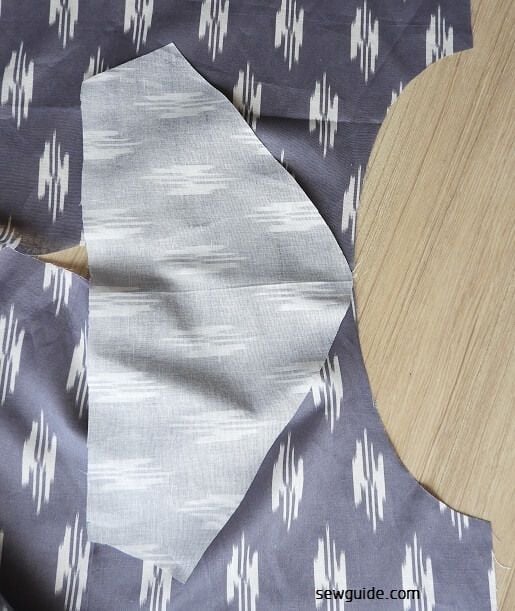
Step 1 Cut out the pattern pieces
Cut out two fabric pieces of height 44 inches (or the length you want for the dress). These make your front and back of the dress. Fold them by the middle and mark the following measurements.

The difference between the front and back pieces is only in the neckline. The front neckline is cut a little deeper. You can first mark and cut the back measurements on both the pieces, and then remove one piece and mark the front neckline on the remaining piece
If you want to make variations to the size you can do at the bust level – E-F and make it 1/4 of bust round + 1 1/2″.Change the hem width also correspondingly ( E-F + 1″)
Cut out the sleeve pieces – 2 pieces of width and length. Fold by the middle and mark the following dimensions
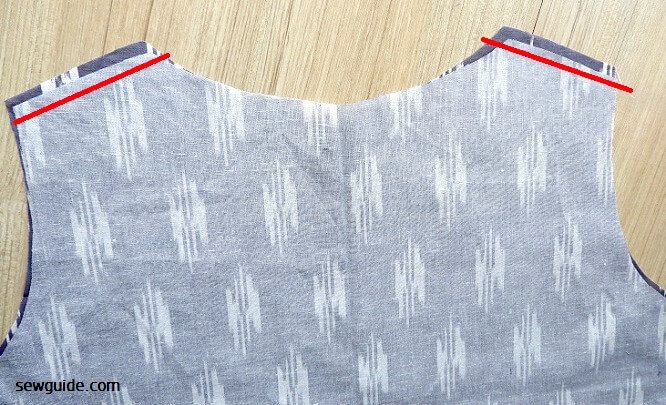
Step 2 Join the front and back bodices at the shoulder
Keep the fabric pieces right sides together and join the shoulders.
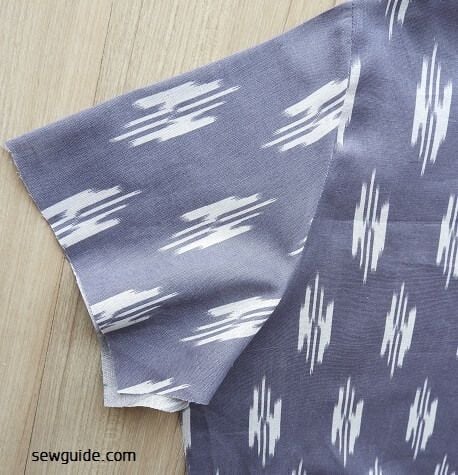
Step 3 Join sleeves
Keep the bodice open and place the sleeve right side down as in the picture below. Start joining the sleeve on the armhole line to either side with a 1/4 inch seam allowance
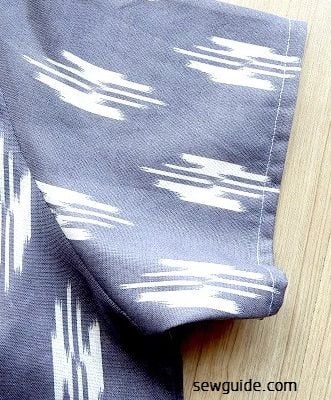
Hem the sleeve bottom edge.
Step 4 Join the side seams
Join the side seams of the front and back pieces .
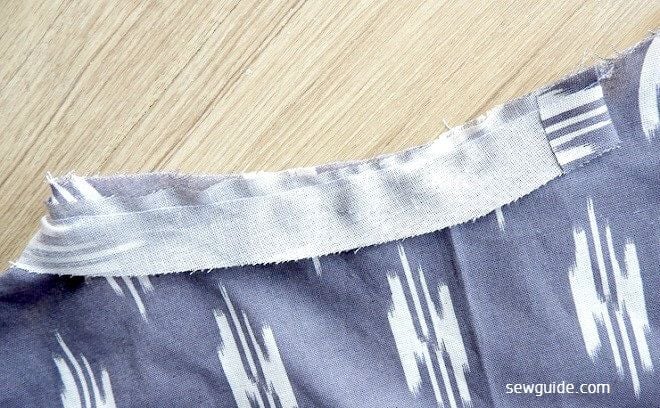
Step 5 Bind the neckline
Use a 3/4 inch bias binding fabric strip to bind the neckline
(Alternatively, you can sew the binding before joining the shoulder seams – then bind the front and back separately and then join the shoulder seams).
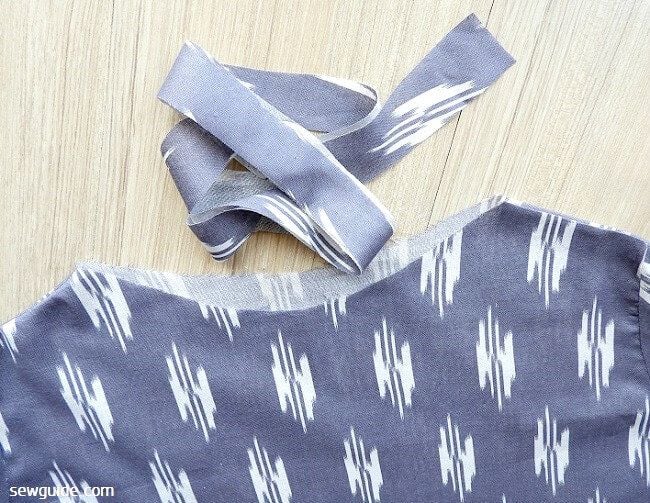
To bind in one go join bias strips to get enough to cover the entire neckline
Start from the back. Fold the short edge of the binding piece and keep along the neckline edge, right side down on the right side up neckline edge. Sew with a 1/4 inch seam allowance
Remember to clip the seam allowance and trim it where needed.
When you reach back to the starting do not fold but overlap the binding over the folded edge
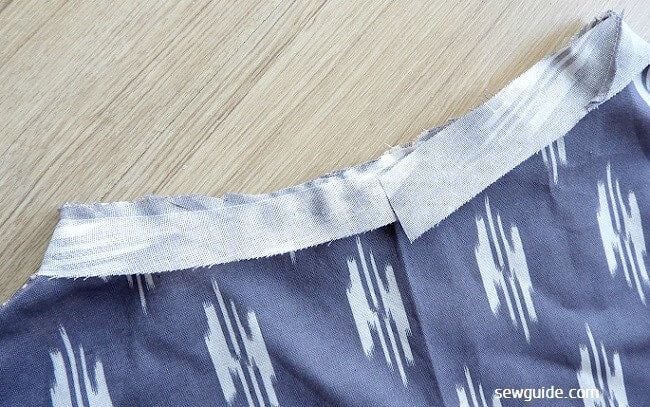
Turn the binding strip to the other side and fold the edge inside and stitch in place .
Step 6 Do the hem
Turn under the edge and hem stitch the bottom edge of the dress
At this point, your dress will look like this.
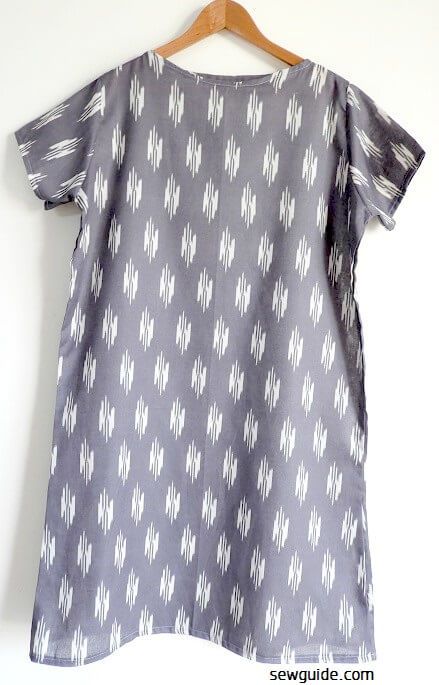
But you may need a little shaping at the waist or this may look like a sack on you.
Step 7 Attach elastic to waist
Take a piece of elastic (1/2 inch) . Keep it around your waist. It should be comfortable around your waist. Add 1/2 inch extra as seam allowance. Cut it out.
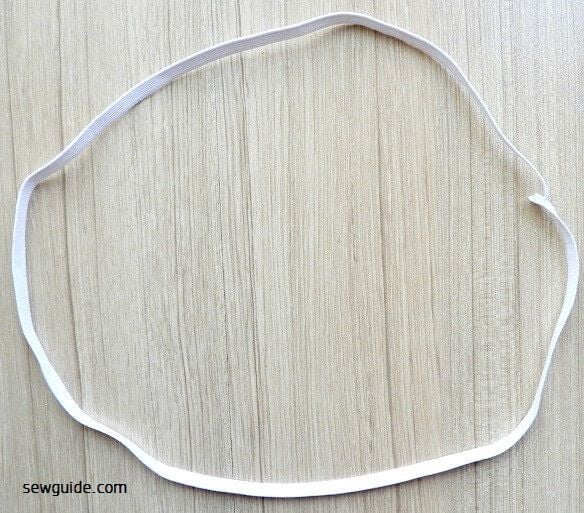
Join the edges to form a circle
Divide this circle into four equal portions and mark this on the circle with chalk.
Mark where you want the waistline to be.
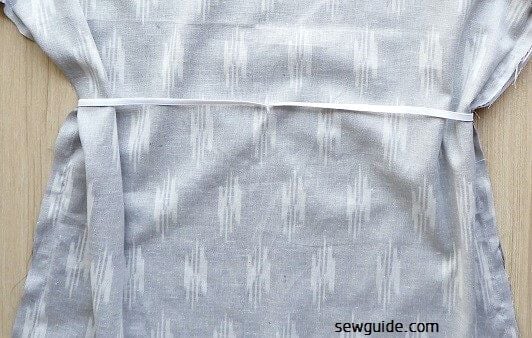
Turn your dress inside out. Keep your dress inserted inside this elastic circle -placing the elastic on this waistline mark
Align the markings you have made on the elastic with the middle of the front and back and the side seams. Pin or baste stitch in place. This should be secure or else when you stitch it will come loose

Stretch the elastic (if needed) to accommodate the fabric and stitch in place.
Related posts : Sew a Nighty ; Sew a simple loungewear.
Thank you so much for sharing. . .
can i please have the pattern?
Same fabric kaha milegi
Are the front and back neck measurements switched? You state after the picture that the “front is cut a bit deeper” but the picture shows the front as 2 1/4″ and the back at 3 1/2″. I suppose if someone has finished making this dress, they can simply turn it around if the front is too high.
Interested information, will you be able to make a wrap skirt knee lenght .
This will be my next ‘project’ it looks simple but I know it will be a struggle on my part lol. Wish me luck 🙂
Same 🙂
This is my new favorite sewing resource site. I have been on here daily for about 2 weeks and still am discovering so much. I’m an intermediate sewer and was looking for ways to simplify sewing. And here they are! Thank you for sharing this plethora of information with us on the interwebs. So useful and so many ideas to help think outside the box. Many thanks and much appreciated!
Thank you Veronica for the appreciative words
This is a great dress that will look completely different depending on the fabric. I just discovered your site today and I am thrilled. I cannot believe how extensive your content is and I have about 50 ideas running around in my head to attempt to make a dent in my extensive fabric stash. I have read dozens of “sewing” sites, but yours is definitely my new favorite. I love the scarf ideas, kimonos and the Boho bat wing top. You are a true gem! Thank you.
I love this. It is easy to understand. Thanks so much.
I am still a novice but I really want to learn sewing online. Can I learn it very well online? Pls can you coach me??
Hi Kasie
Thanks; I am sorry, I do not coach.
Wow! What an insightful way of sewing a simple free dress.
oh i love this pattern but how do u make a casing for elastic?
Hi
You can add a casing with a lightweight fabric or lining fabric or bias tape and then insert elastic through it.
You indicated this dress was good if your chest was less than 42. What if it is larger?
Hi Lila
You can adjust the dimensions according to your bust round
Great work sewguide! Simple to do
Thank you Virtue
nice and easy dress to sew and to wear… i would, however, put in a quick casing for the elastic (not hard to do at all) i could see myself making several for this summer. Thanks!
Hi Carol
Yes, a casing is a good choice- no irritating of skin with elastic and the elastic won’t be damaged as well. Thanks for the input.
Thank you for making sewing easy. I’m a beginner and I’m trying to learn on my own. This site is of a great help. I will be trying this soon.
I really understood this pattern and would try it out soonest. Thanks for this tutorial, I appreciate your good works.
Thank you Joy
Wouldn’t it have been easier to insert the elastic before stitching the side seams. Especially since there is no casing for the elastic. Stitch one side seam and sew elastic before stitching the second side. trim elastic in the seam allowance and reinforce seam where the elastic meets. Trying to sew elastic in the round with no casing is harder especially if the elastic has to be stretched. and there is so much fabric to work under the presser foot. Just wondering.
Hi Judy
You are right ; thanks for the input
Oh my goodness! Thank you so very much! Finally, a dress pattern I understand and like. I am not an accomplished sewer, but I do enjoy it. This dress is attractive and looks like it could even be slightly altered with little trouble. For example, I would like to do a V neck and maybe 3/4 sleeves on one. I bet the choice of fabric could take this in many directions from everyday to something much more elegant. I’m going to start on it today!
Hi Pamela
Have you looked at the basic bodice pattern here https://sewguide.com/basic-blouse-pattern/ and make a more fitting pattern for your dress
WOW! That site gives everything you ever wanted and more. Thank you. I’m going to rely on your information to sew a couple things for summer and see how it goes. I have always found the instructions in printed patterns hard to follow. (I am a college graduate and with what is generally considered above average IQ, but getting a printed pattern to fit me is like trying to herd cats.) I love your giving this mathematical method. It seems so logical. Thank you.
It is comprehensive enough