
How to draft skirt patterns that suit you
Skirt – that classic garment that is at once feminine and utilitarian.
Choose your fabric and draft a favorite skirt pattern with your measurements. You can make it with just a piece of fabric or multiple pieces with various embellishments, trims, fasteners, etc.
One great thing about skirts is that it is effortless to style them – pair them with a favorite top, and you are ready for anything – a party or an office meeting, or a family dinner- There is a skirt for every occasion.
- The names of different types of skirts.
Just choose your fabric and draft a favourite skirt pattern with your own measurements. It can be made of just a piece of fabric or of multiple pieces with a variety of embellishments, trims, fasteners etc.
More like this:
Don’t forget to checkout if that skirt will suit your bodyshape or not and the different silhouettes you can design for your skirts.
To draft a pattern for skirts, the basic measurement you need are –
- Waist round (You can add 1 – 4 inches or 3 to 10 cms to waist circumference for ease)
- Hip round
- Length of the skirt ( Take differently for back and front if you have a pear-shaped body and the hips or bottom is prominent. The length of the skirt will fall differently if the same length is taken for front and back.) The length of the skirt is preferable. A 30-inch or 70-cm length is the average length for a skirt.
- The flare of the skirt – this can be calculated as an angle. A 20degree flare can give you a normal flare, a 60°can give you a flared skirt).
- Distance from the waist to the hip.
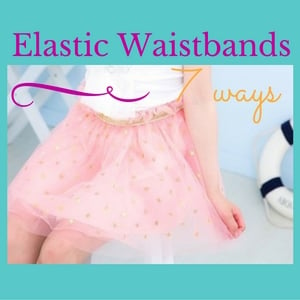
Checkout this post on the different waistbands available for you.

Learn about how to sew the straight waistband of a skirt here.
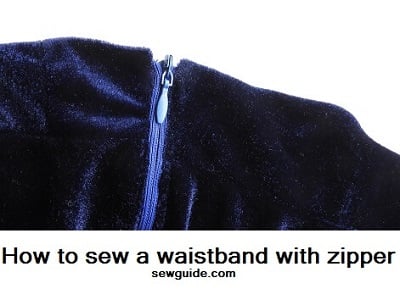
Or other ways to sew the waist – like a waist finish for skirts with zipper here.
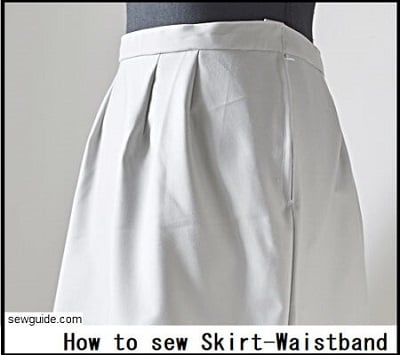
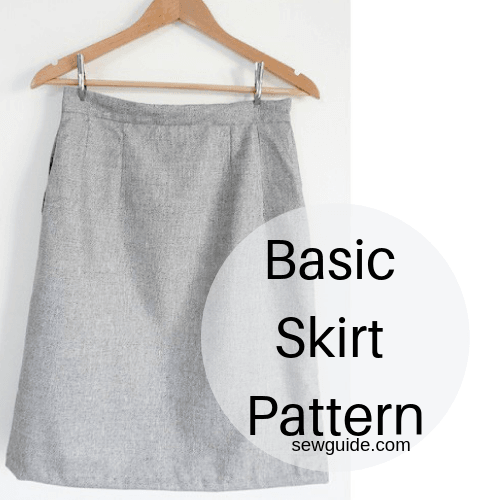
Make the most basic tailored waistband with a classic skirt.
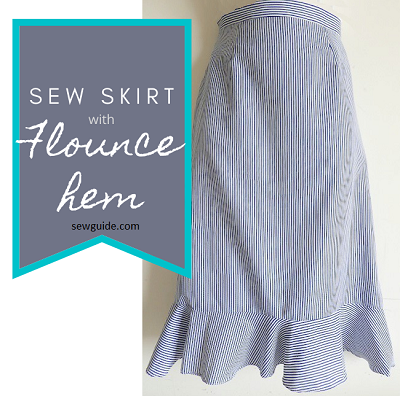
Or a plain skirt with a flounce hem.
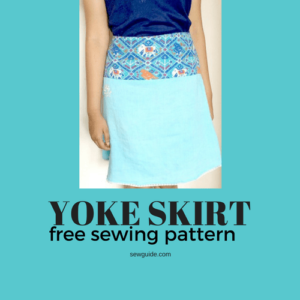
Or this detailed tutorial for a simple straight skirt with yoke and zippered opening.
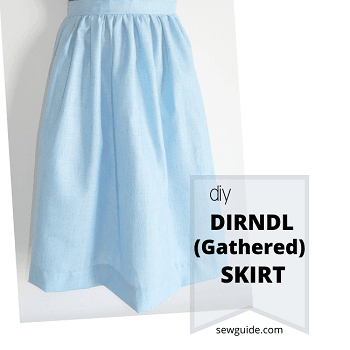
Or make this simple gathered skirt with a fitting waistband – a dirndl skirt.
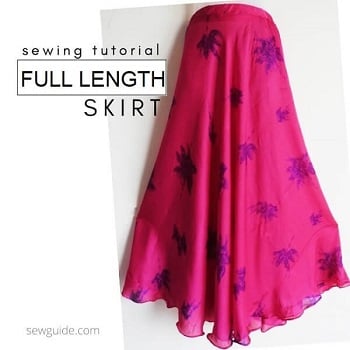
This skirt tutorial is to sew a long full skirt without much fabric.
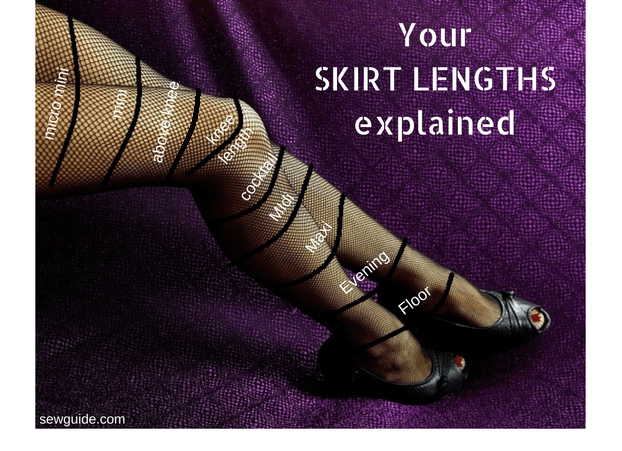
Checkout the post on hemlines and skirt lengths : 9 important names .
Related posts :
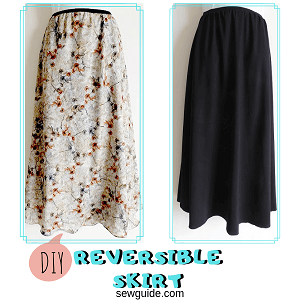
A Reversible full skirt pattern.


Opening
In a skirt, usually, the opening is kept on the side seams, though center-back openings are also common. Center-front openings are also used, though rarely.
Hems
The hem is usually a turned under edge – a 2 1/2 inch extra is added to the bottom edge for this turned under hem.
Pockets
Side seam pockets are the most commonly used pockets for skirts. Patch pockets are also used.
Waistbands
Usually, a waistband of 1 1/2 to 2 inches is given to skirts. The width will be the waist round ( measure around where you will tie the skirt without any belt) plus 1 inch extra. If there is an extension for a stud or buckle, add 1/2 inch extra.
Trims
You can add frills, lace, ribbon, etc., as trims to give an extra edge. You can add a sash and tie a bow on the front for a cute look.
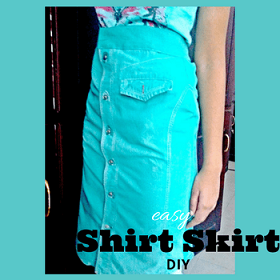
Straight skirt
Skirts are one of the easiest clothes you can make for yourself. Out of that, a straight skirt is the easiest.
Measurements you need to make a pattern for a simple straight skirt block.
- Waist round (Where you mean to tie the skirt).
- Hip round ( The widest part of hip).
- Measure distance from waist to hips ( Mostly, this is 7 inches; better measure on your own body. Check out this post on body measurements for more details).
- Length of the skirt, from the waist.
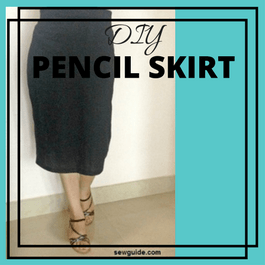
You can make a simple straight skirt with a zipper opening from these measurements. This skirt is better made below knee. If you are making it over the knee, you may need slits for walking ease as in the case of a pencil skirt.
Check out these posts on how to go about making sewing patterns and how to cut fabric for more details.
FRONT SKIRT BLOCK

A-D = 1/4 of hip round
A-C = 1/4 of waist round + 2″
A-B = 1/2″
A-H = 7″
I-J = 1 1/2″
C-N2 = 2″
N1-N2= 3/4″
M2-N2 = 1 1/2″
M1-M2 = 3/4″
N-P= 3″
M-O= 2.5″
BACK SKIRT BLOCK
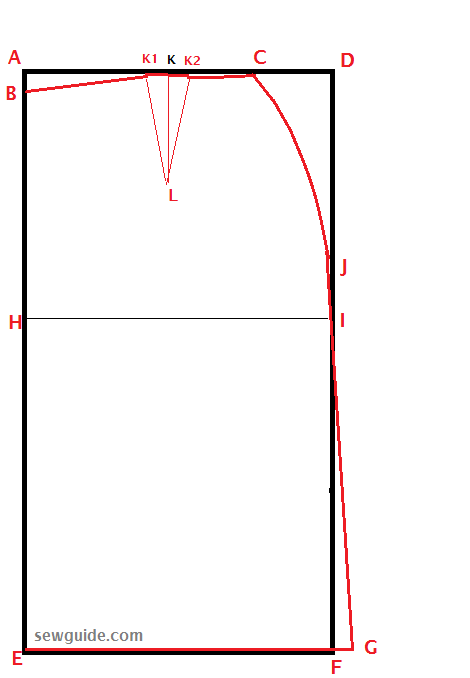
A-D = 1/4 of hip round +1/2″
A-C = 1/4 of waist round + 1.5″
A-B = 3/4″
A-H = 7″
I-J = 2″
K1-K2= 1.5″
Add your waistband. A straight waistband with a buckle or a faced one will work.
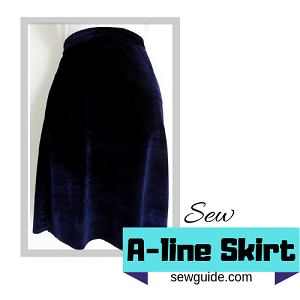
A line skirt

This skirt has the shape of alphabet A, tight at the waist and hips and flared at the hem. This classic skirt is a favorite of all those who wear skirts, as it is flattering to most body shapes.
How to make an Aline skirt pattern
Cut a Front Pattern for Aline skirt
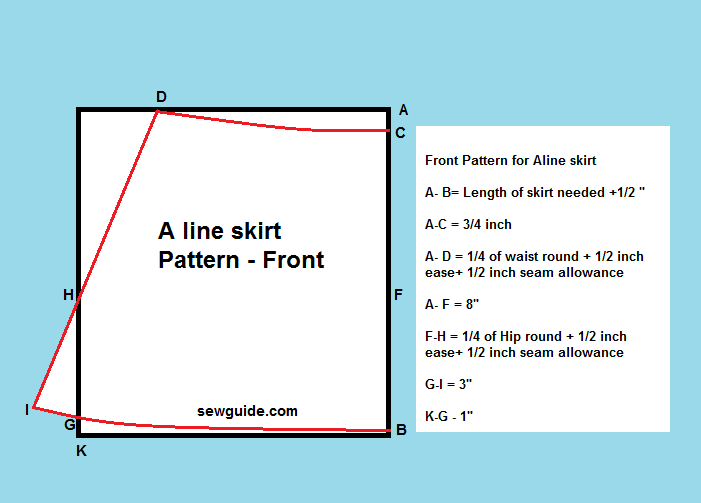
A- B= Length of skirt needed +1/2 “
A-C = 3/4 inch
A- D = 1/4 of waist round + 1/2 inch ease+ 1/2 inch seam allowance
A- F = 8″
F-H = 1/4 of Hip round + 1/2 inch ease+ 1/2 inch seam allowance
G-I = 3″
K-G – 1″
The A line skirt can have a minimum flare of 1 inch more than your hip round and maximum flare of 3-4 inches more than 1/4 of your hip round.
Cut a Back pattern for an Aline skirt
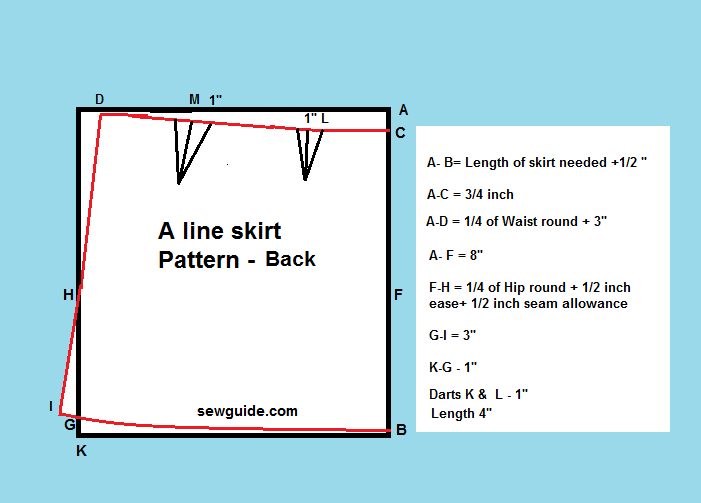
A- B= Length of skirt needed +1/2 “
A-C = 3/4 inch
A- D = 1/4 of Waist round + 3″
A- F = 8″
F-H = 1/4 of Hip round + 1/2 inch ease+ 1/2 inch seam allowance
G-I = 3″
K-G – 1″
Darts in the back pattern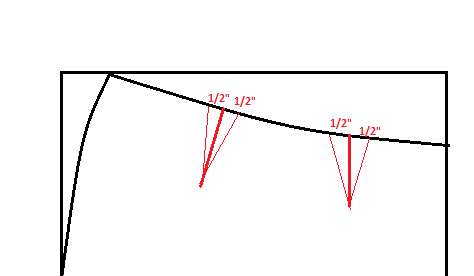
Divide C-D into 3 equal parts and mark M & L as dart points
Dart width – 1 inch for each dart; i.e., mark 1/2 inch on either side of the darts..
Dart length – 4 inches; join the dart line.
For side opening, mark 1/6th of waist from F ; For zipper opening – 7.5 inches.
Either draft a waist band, or make facings with the same pattern copying the pattern for front and back patterns to a width of 3 -4 inches.
freeimages.com/Lotus Head
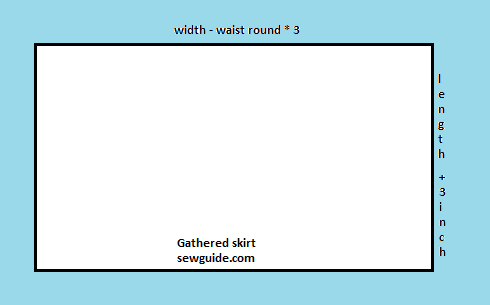
Gathered skirt
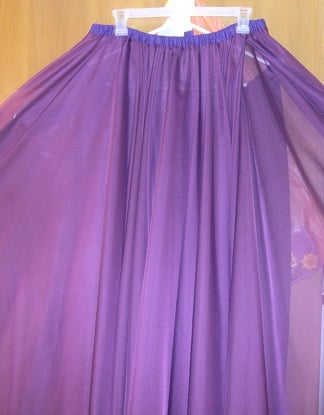
A simple construction, this skirt gathers at the waist.
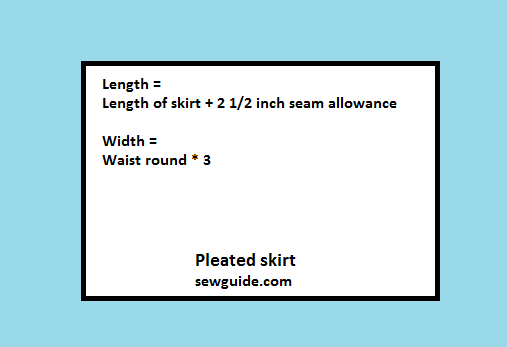
You need a rectangular fabric piece, the width of which is three times your waist round and the length, however long you want the skirt to be. You can tweak the measurement as you like it- if you wish to have lesser gathers or have only so much fabric, you can reduce the width accordingly.
Make a waistband for your skirt with elastic inserted, and you are done. You can convert the top portion of the skirt piece into an elastic waistband also.
Checkout my tutorial to stitch a very easy gathered skirt. But I cannot say anything more than Gertie does in her beautiful tutorial for a gathered skirt.
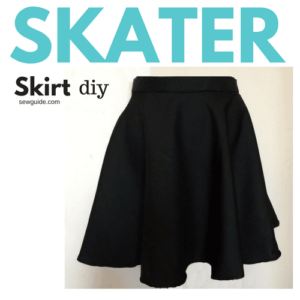
Circle skirts

Circle skirts look wonderful on all girls, big and small; the way they move around the body is beautiful and very flattering; but their construction is not as easy as it looks.
Most of the circle skirts we see are full circle skirts without a seam and they need a very wide fabric to accommodate the pattern. Variations include half and three-fourth circle skirts.
Circle skirts can be made in a variety of fabrics like satin, cotton, muslin, and organdy, with more formal skirts made with very expensive fabrics like velvet.
This skirt is cut on a bias grain of the fabric, tight at the waist, and flared at the lower edge.
Now consider the fabric you have – if you have a very wide piece of fabric, you can get a full circle, but this is very rare. (Checkout the post on fabric measurements) .
But if you have a narrow piece of fabric, you will have to make do with joining 1/4 circles. The number of 1/4 or 1/2 circles you want will also depend on your fullness.
3 1/4 circles or three half circles are the commonly used dimensions for circle skirts though six half circles are also used for a full skirt.
Let us see measurements for 1/4 circles or 1/2 circles you will need.
Measurements you need to sew the skirt
- Length of the skirt
- Hip round
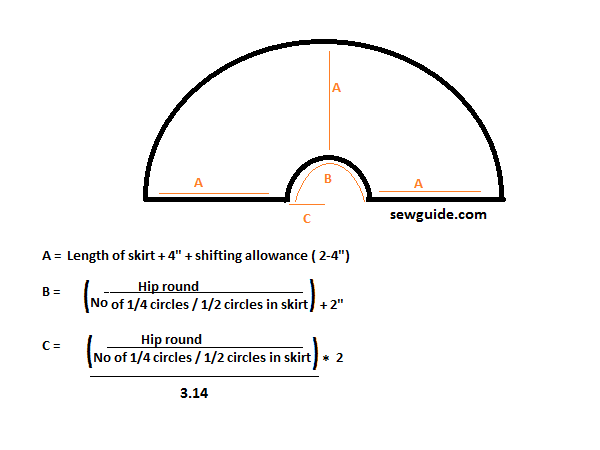
Add 4″ to the length needed for waistband seam allowance and hem seam+ some inches for shifting ( 5-6 inches if you are making a very long skirt)
Length of the skirt fabric = Length you need + 4″ + 5″
A=length you have calculated
B= Hip measurement divided by No of 1/4 or 1/2 circles in the skirt + 2″
c = hip measurement divided by no of 1/4 circles in skirt * 2″ divided by 3.14
If you are not sure about how much fabric is needed to sew the circle skirts, consider this.
For one 1/2 circle skirt piece, the width of the fabric should equal A+C, and the length of the fabric should be (A+C)* 2. The total length needed will be (A+C)* 2 * no of 1/2 circle skirt pieces you will be joining in making the skirt.
For a 1/4 circle skirt piece, the width of the fabric should be equal to A + C and the Length also should be equal to A=C.
Tips for stitching circle skirts
Hem – One tough thing for most people in making a circle skirt is a neat hem that is not twisted. The circular shape of the bottom edge of the skirt makes it very difficult to hem. Hand hemming will take a lot of time. I turn 1/4 inch inside and edge stitch once all around the hem.
Cut away extra fabric close to the stitch line (time-consuming but very well worth the time spent for a neat-looking hem). Now turn the edge inside once more and edge stitch.
Another tip is to choose a pattern with elastic in the waist rather than one with a zipper – then the sewing of a circle skirt will seem easier.
Checkout the post on 16 Ultimate circle skirt patterns from around the world.
Related posts

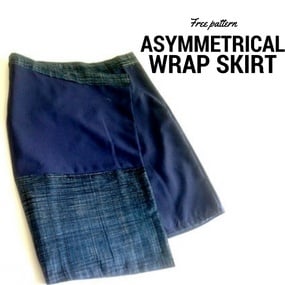
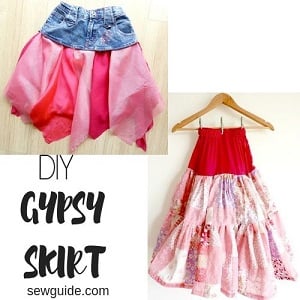
Handkerchief skirt
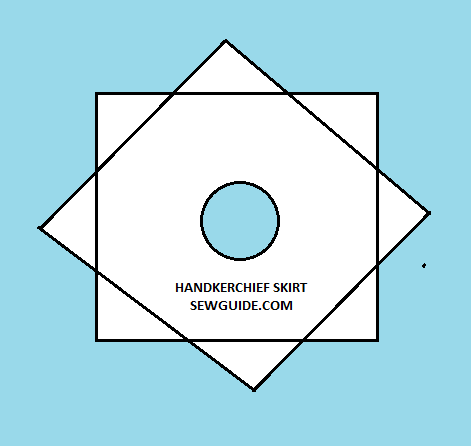
The edge of a handkerchief skirt dips down to a point and hangs down like the tip of a handkerchief.
This skirt basically is a square fabric with a waistband and its hem falls down like the corners of a handkerchief, hence the name handkerchief skirt. More and more layers of fabric can be used to increase the visual effect of the number of pointed hems.
As this skirt has an asymmetrical hemline, this skirt can be said to be flattering to all, especially short girls. The result is you can look taller if you don this skirt. Ahhh, A DIY handkerchief skirt is what I needed to look tall all this time.
You need at least 2 1/4 meters of a 45 inches wide cloth to make this skirt with two layers for an adult. The width of the cloth determines the length of your skirt, so the wider the cloth you have, the longer your skirt will be. The length of one side of this square is double the length of your skirt.
Divide the cloth you have into two squares of equal size.
Hem all four sides of the squares – you can decorate the hem with ribbons poms-poms, tassels etc.
Measure hip round loosely.
Divide the hip measurement by 6.28 – this will give you the radius of the circle you will have to cut out from the center of the squares
Fold the cloth along the middle first 1-2 ; then along 3-4 as per the diagram – you will get a square shape as the second diagram.
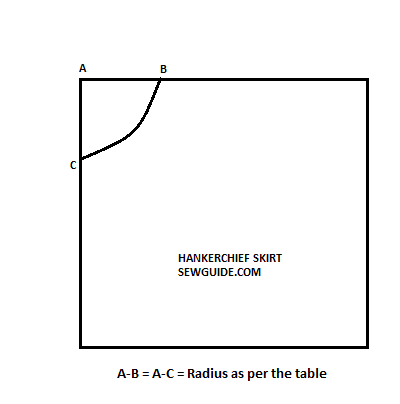
A-B = A-C = Radius of the circle you get by dividing your hip round by 6.28. Cut out the portion outside of B-C in a curved line making sure all the points are equal to the radius.
Line up the square fabric bottom layer right side up on top of the Top layer right side up. Pin along the circular hole in the middle aligning both the cloth.
Stitch around the circle edge twice with a 1/4 inch seam allowance.
Pull down the bottom layer to the back through the center hole.
Now the skirt portion is ready; you can assemble the whole handkerchief skirt by attaching a fabric waistband casing with elastic or a matching elastic waistband directly stitched to the skirt.
Make sure to take elastic 1 inch lesser than your waist measurement for a snug fit.
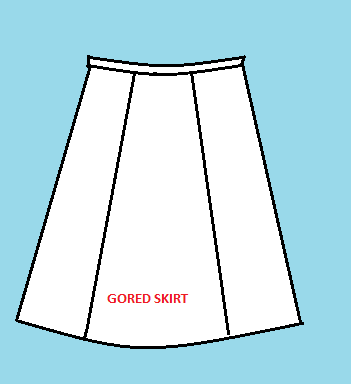
Gored skirt
How to make a 6 panel gored skirt
A gored skirt is a paneled skirt with 3 panels in the front and three panels in the back. All the panels will be of similar size.
A-B = 1 inch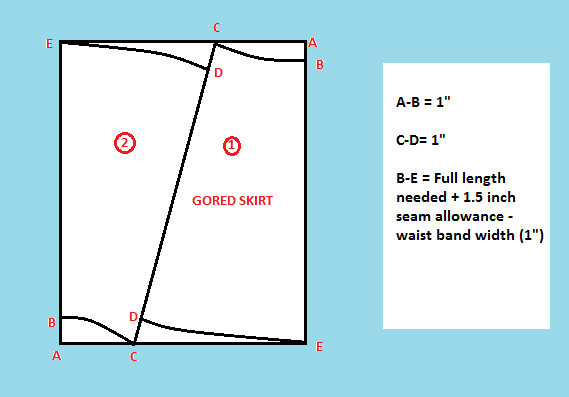
C-D = 1 inch
B-E = Full length needed +1.5 inch seam allowance minus waistband width.
Mark these on both sides of the pattern as shown in the diagram.
Join E- D and B- C in a soft curved line.
From one piece of cloth cut 2 pieces of panels.
Cut 4 more for gored skirt pattern pieces.
Novelty gathered (Tiered skirt )
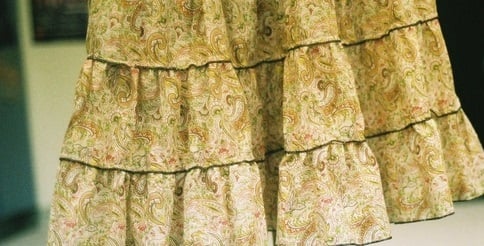
This skirt consists of three tiers of fabric attached to each other. Each tier is attached to the other one with lots of gathers.
The 3 tiered panels of the skirt should be cut as detailed in the diagram.
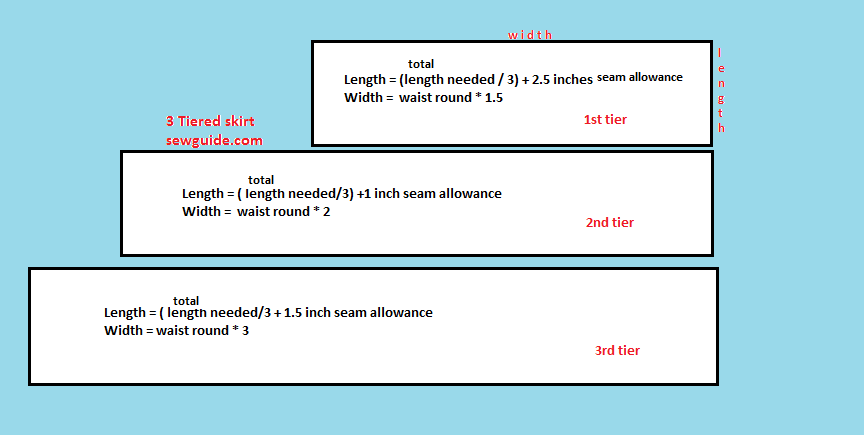
All the tiers are of the same length; the addition of 2.5 inches in the 1st tier is for the waistband 2 inches and the bottom edge seam allowance 1/2 inch.
The 2nd tier has 1/2 inch each seam allowance for upper edge and bottom edge.
The 3rd tier should have a seam allowance of 1/2 inch for the top edge and hem turning of 1 inch.
The waist band of this skirt should have elastic inserted – cut elastic 1 inch smaller than the waist round.
Join the short edges of all panels to make 3 round tiers.
Gather the top edges of 2nd and third tiers to match the top edges of 1st and 2nd tiers, respectively. Join all the tiers, and voila, the skirt is ready.
freeimages.com/ alexander redmon
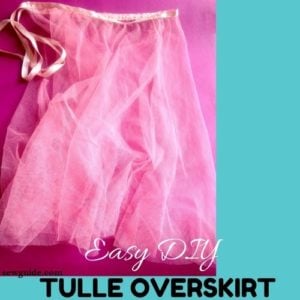
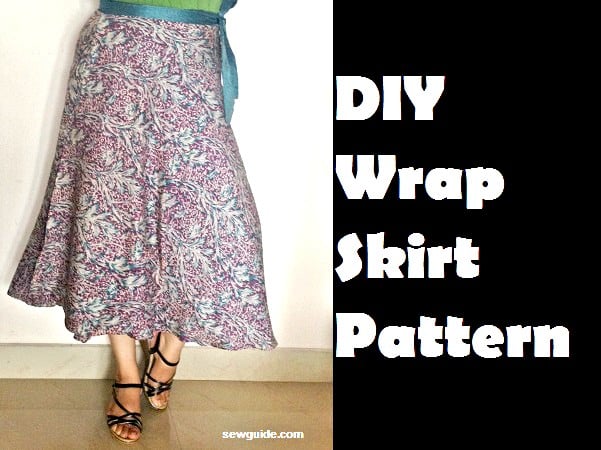
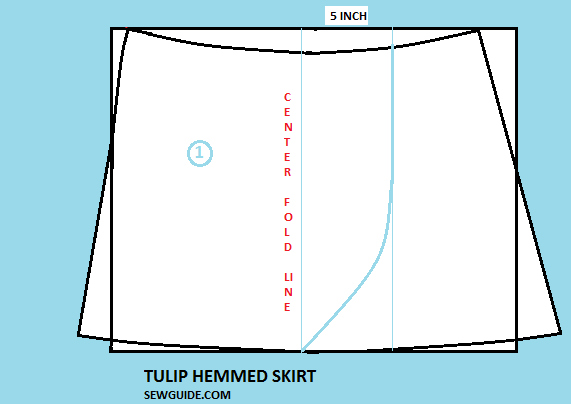
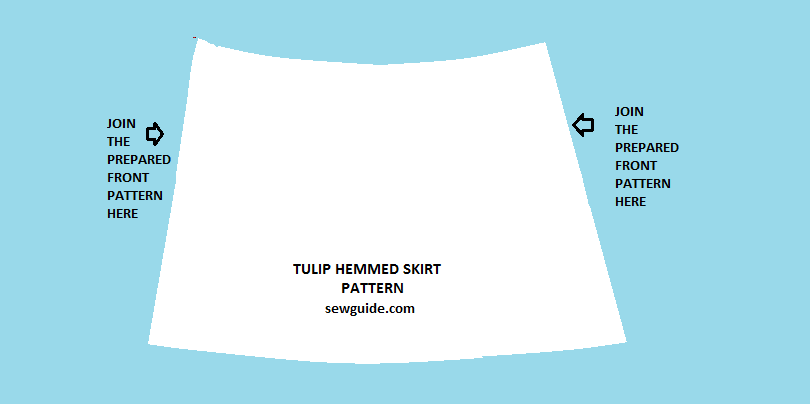
Tulip hemmed skirt
This is a skirt devoid of a side seam, and one part of it overlaps the other. It is usually worn over tights by ballet dancers.
How to make a wrap around Tulip hemmed skirt Pattern
You need an Aline skirt pattern to make this skirt; As this skirt comes without side seams, the back pattern and front patterns have to be joined after altering the front pattern.
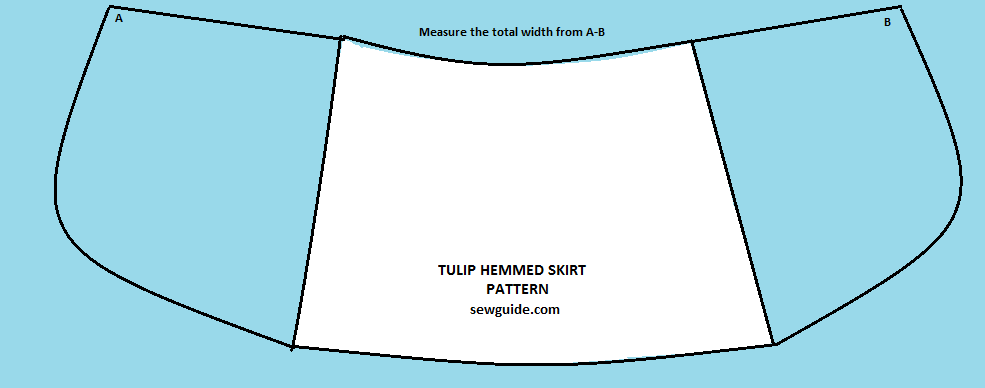
From the center line of the front pattern of Aline skirt mark 5 inches . Draw a curved line from the bottom center line to the marked point as in the diagram below- make a similar mirror pattern to the other side also.
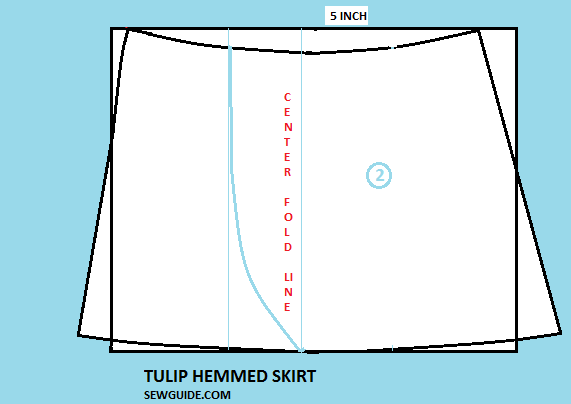
Cut out the two front panel patterns outside the curved lines; Join them to the back pattern of an A-line skirt.
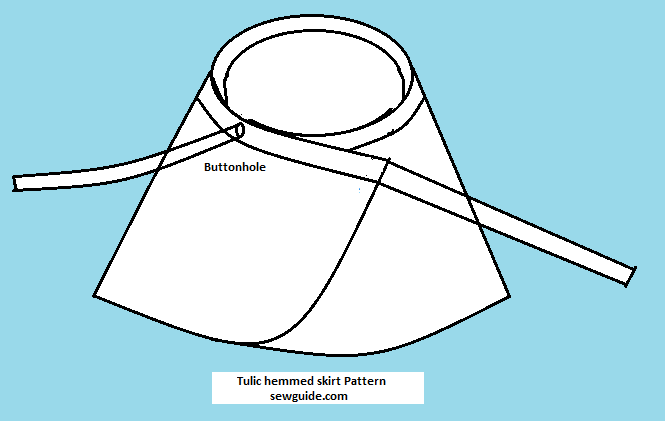
Waistband
You need a waistband which will wrap around your body – you can make this out of the same fabric or a ribbon of 1″ width.
Measure the total width of the skirt waist. Add a 1-inch seam allowance. Add 40 inch extra.
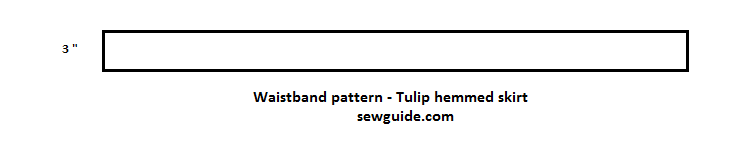
Sew a buttonhole in the waist band of the front flap to insert the tie.
Pleated skirt
A pleated skirt has pleats made by machines or by hand that adds fullness, grace, and beauty.
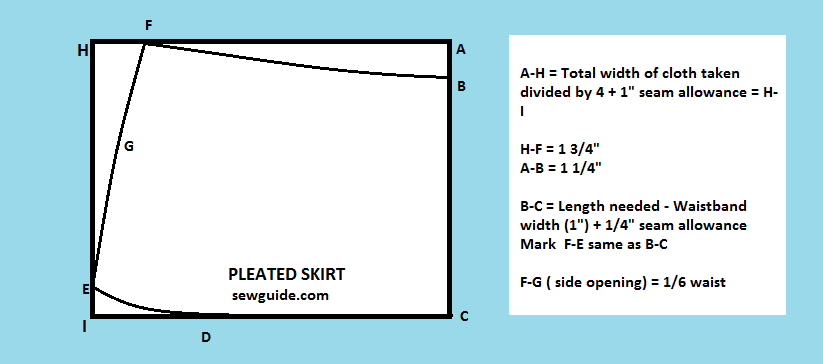
How to make a pleated skirt pattern
A-H = Total width of cloth taken divided by 4 + 1″ seam allowance = H-I.
H-F = 1 3/4″
A-B = 1 1/4″
B-C = Length needed – Waistband width (1″) + 1/4″ seam allowance
Mark F-E same as B-C.
F-G ( side opening) = 1/6 waist or 7.5 if using zipper.
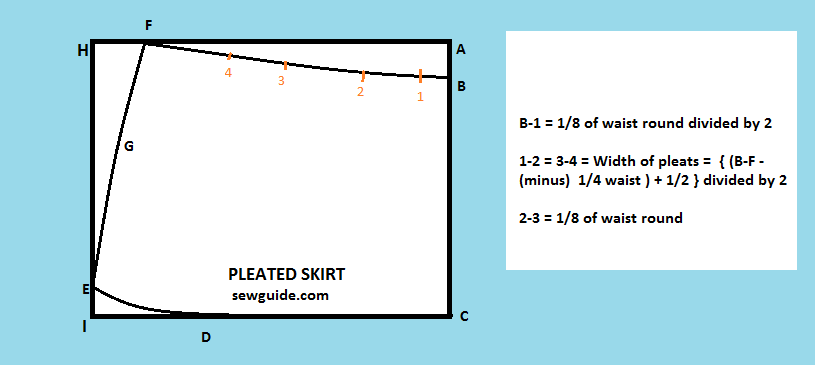
How to make pleats
Width of pleats = { (B-F – (minus) 1/4 waist ) + 1/2 } divided by 2
( Checkout the post on 5 beautiful pleats you could sew on your clothes )
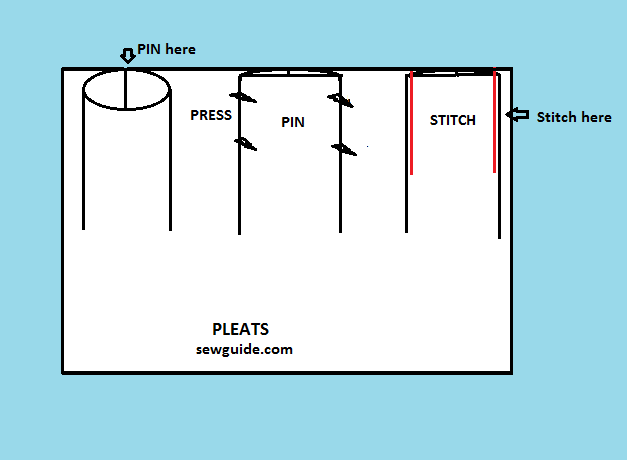
photo: free images.com/Marília Florêncio Santos
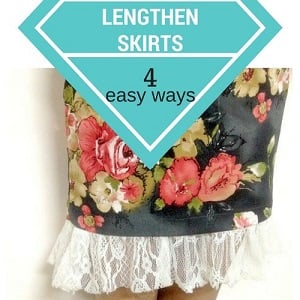
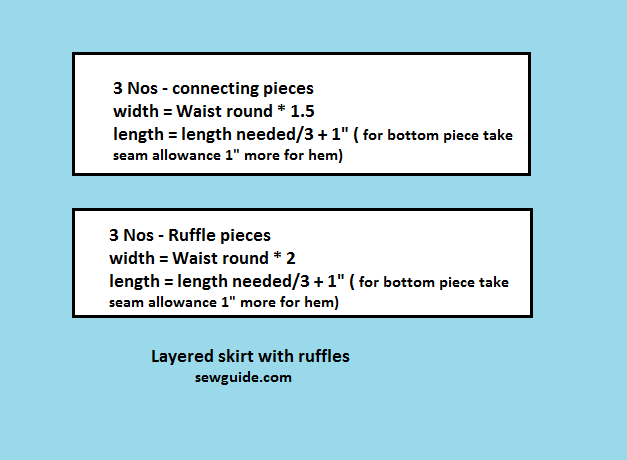
Layered skirt
This skirt may be gathered or circle skirts but consists of two or more layers.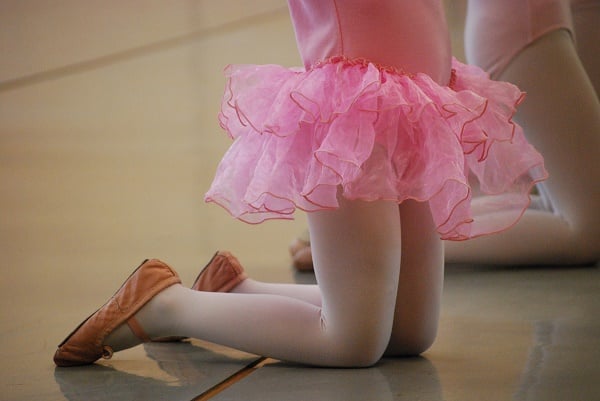
Another way of making it is to layer it with ruffles.
To make a ruffled skirt with layers, you need six pieces of fabric cut per the diagram below. The first connecting piece will be used as a waistband inserting elastic cut the same size as the waist round or slightly smaller.
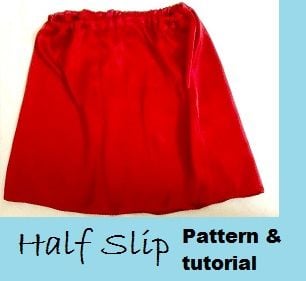
Waistband
How to draft waist band for your skirt
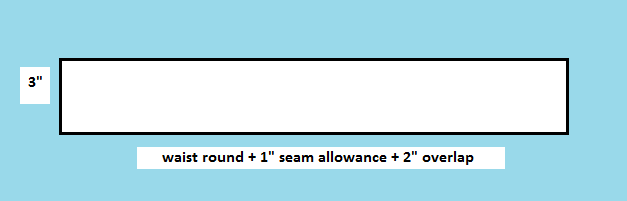
If using interfacing ( highly recommended to use ) cut it to a width of 1 inch and length of waist round + 2″ overlap (without seam allowance)
Related posts


Thanks for finally writing about > How to sew skirts – FREE DIY SKIRT PATTERNS
– Sew Guide peluche dinosaure
this is amazing, thank you.
Well, I have a problem
Hi I just found .site and I have just made my first str. aight skirt.I would like to make a flouncy skirt which is straight until the hips where it swings when you walk. Do you have any advice on this please? But the rest of your very clear instructions will certainly keep me busy in this trying time.
Thank you so much.
Keep safe and well.
I see this site as the best for any sewing topic. You suggested to measure front and back separately for big bottom and Hip people. Back will be definitely longer than front.
How do you see them together at the side?
You are really sweet to say that about the site.
The side will be the same. As you fold and cut you just make the middle part some 1 inch or so higher
Hellow hi,Its me clare.I love all the sawing patterns.really interested in sawing skirt but need to cut the pattern,
Coates had a pattern on their website in October 2018 for making a skirt from a poncho; I believe they called it a “zipper poncho skirt.” I didn’t save it a word doc (my fault!), but just bookmarked it instead. Now, of course, the link is dead.
Does anyone else have a copy of that pattern, please?
I’ve Googled everywhere, but can’t find it. Thanks.
Hi Carla
Can you join some of the popular sewing groups on facebook and ask this question. You will probably get your answer very fast.
Thanks so much this is very useful
Thanks Angel
Not so detailed for me as a beginner
Hi Olamide
Sorry if you found it confusing – You can start with simple elastic waist skirts and then go from there or a simple top like this one.
Please am I allowed to print directly from your email, in other for me to be reading gradually when am less busy or better still is there book for it so we can download it . The tutorial is helpful thanks alot
I am sewing a gathered skirt. The pattern says to cut three of same piece. The piece is cut on fold. Two of the pieces are sewn with a zip. Does this mean the side seams wont be on the sides of finshed skirt?
Hey thumbs up.I like this tutorial.
Thank you so much for gathering all this information together. You make it possible for me to actually tackle projects that otherwise I would just wish about.
Hi Willow
Thanks for the wonderful comment.
hello hi its me mary i want all the sawing patterns
You are Amazing …
I’ve applied your bodice and sleeve patterns for my teenage daughter, it was very neat and exact as I wanted your page is easy, straight to the point, clear steps and marvelous explanation with helping images.
I very much thank you ,,, right no I’m working on a skirt project..
Keep up the great work.
thanks a gain
Hi Sonam
Thanks for the comment and the kind words
Never mind, I just couldn’t get it straight in my head.
I’m confused. You say on the handkerchief skirt to layer both squares right side up. Next sew together at circle. The confusing part is where you say pull the bottom part to the back through the circle. Won’t the fabric layers then be right side to wrong side?
I was a little confused by what you were asking but have now worked it through in my head (probably as have you by now). Both right sides will be visible but the raw edges around the waist will now be concealed between the layers, ready to topstitch or finish as desired.
Hey
The tutorials look nice
Rupa