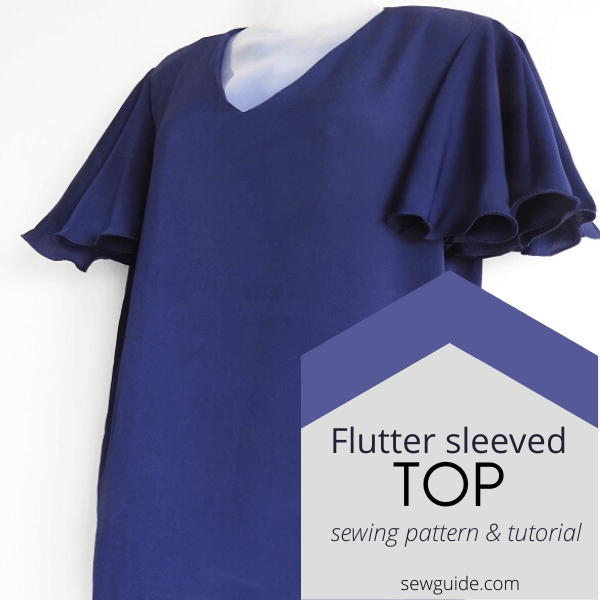
To make this top, cut out 2 fabric pieces of length 22 inches. You also need two fabric pieces (measuring double the length of the sleeves you want) to make the sleeves.
How to sew the flutter sleeve top
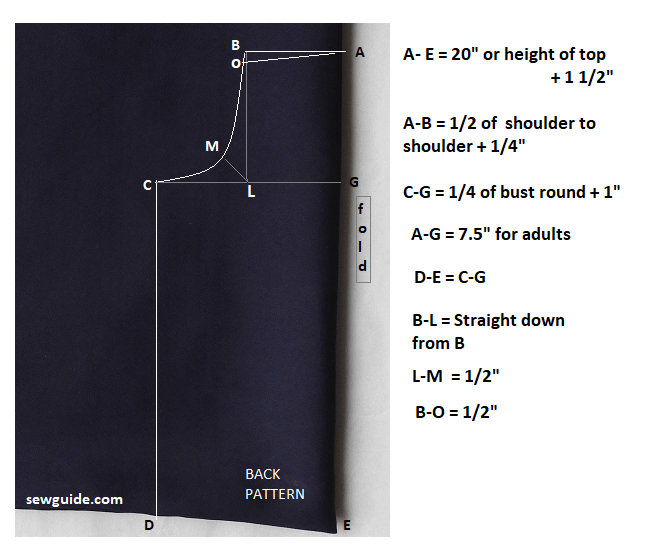
Step 1 Mark and cut the front and back bodices
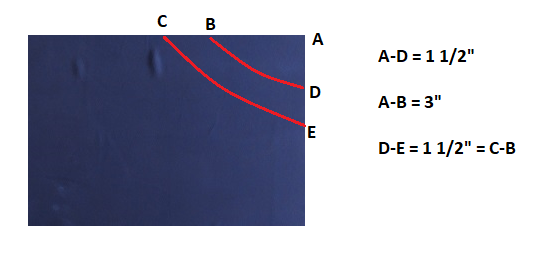
Fold the two fabric pieces by the middle and keep them together. Mark the top fabric with the following pattern – this is for the back bodice. Cut it out.(If you have wider hips, calculate D-E as 1/4 of hips plus 1″)
Step 2 Separate, Mark and cut the front bodice
Now remove the inner piece. Keep this aside as the back bodice.Mark on the remaining fabric (the outside one) for the front bodice.
The difference is only at the armhole – so mark the new armhole on your fabric as in the picture below.
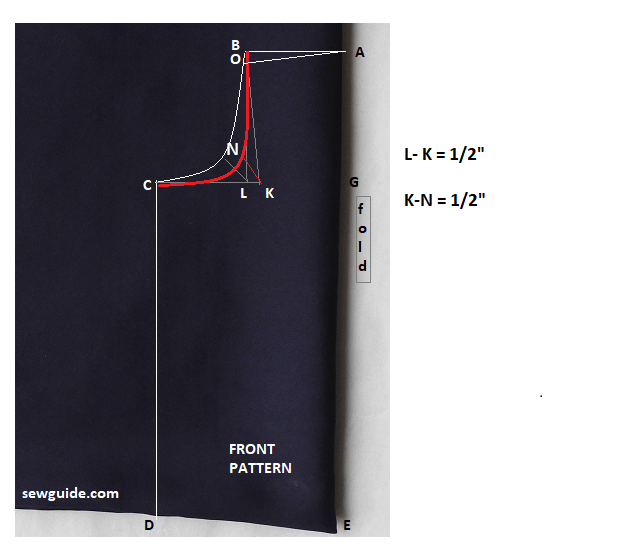
Cut out the extra.

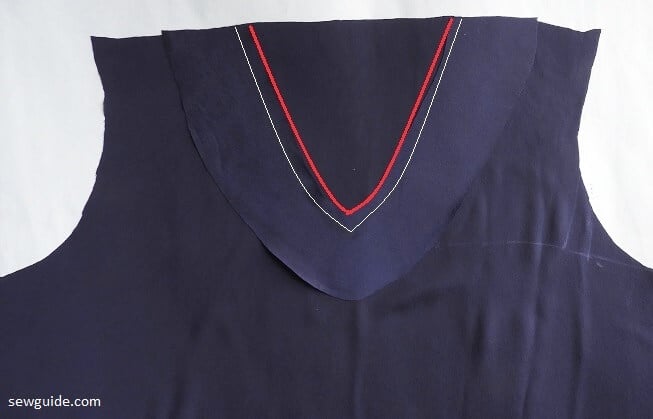
Step 3 Sew the neckline- front
For the front neckline make a facing piece. Cut inside C-B-E-D
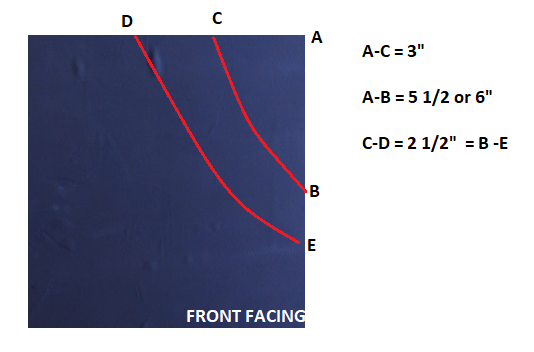
Keep it on your front bodice piece and pin in place. Sew with a 1/4 allowance on the facing piece.(Red line is the cutting line ; white the stitching line)
Check out this post on making a facing pattern.
Cut the inner portion. Clip the seam allowance at 1/2 inch interval. Clip at the v neck joint as well(this is very very important).
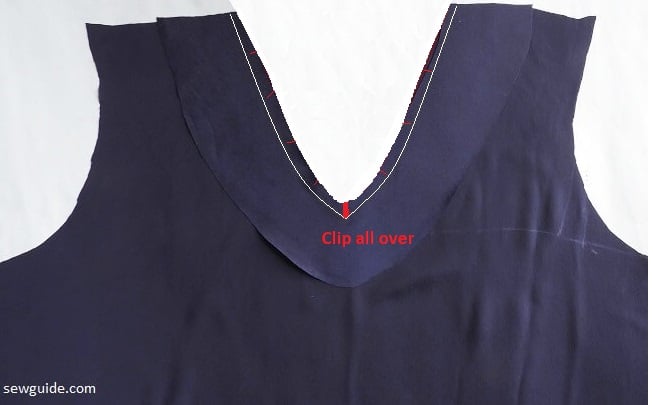
Understitch the seam allowance and the facing together so that the facing turns smoothly to the back.
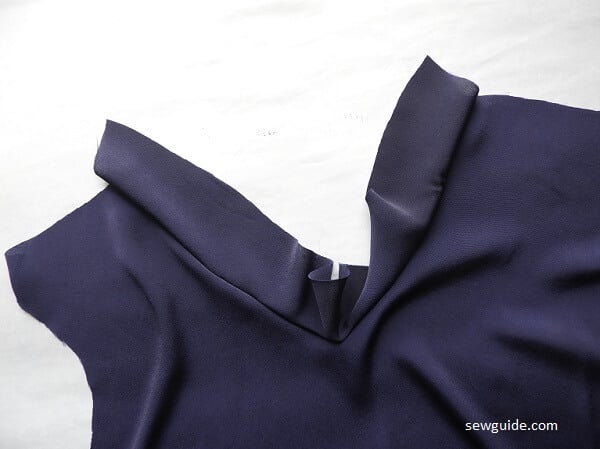
Turn the facing to the back.
Step 4 Sew the neckline of the back bodice
Use another facing piece to bind the back neckline. Cut inside C-B-E-D
Hand stitch the binding in place at the back.
Step 5 Join the bodices together at the shoulder
Keep the two fabric pieces together rightsides to the inside and sew the two bodices together at the shoulder seams.
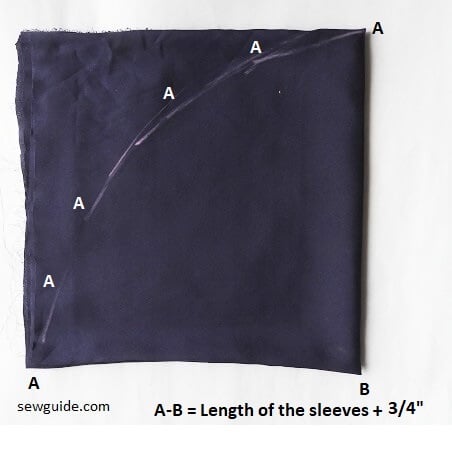
Step 6 Cut the sleeves
Decide on the length of the sleeve you want. Double this measurement. Cut out 2 square fabric pieces of this dimension.
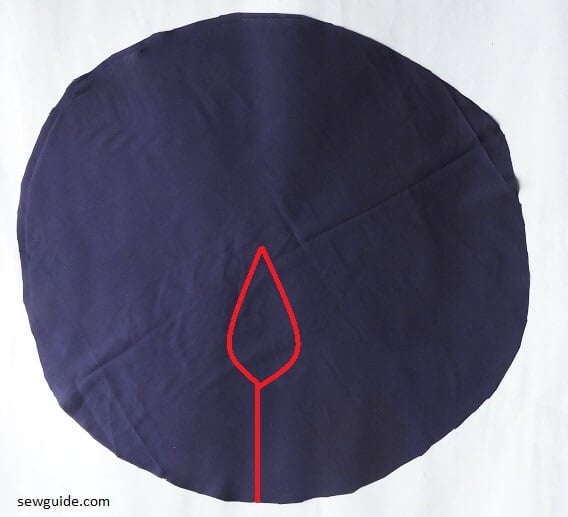
Fold this fabric twice by the middle so that you have 4 layers. Mark a curve along the fabric as in the picture below.
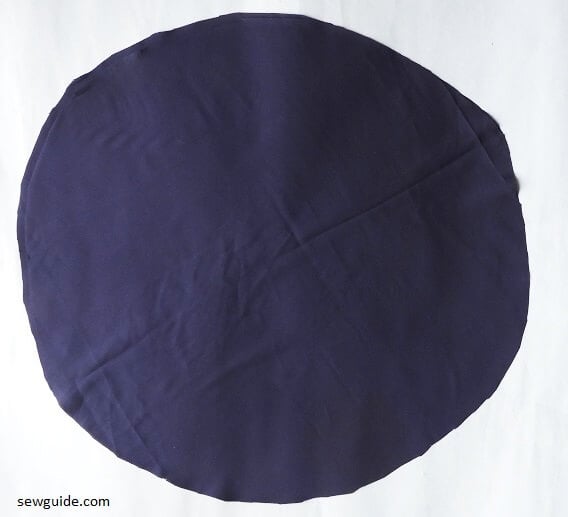
Open up the sleeve piece – you get this circle.
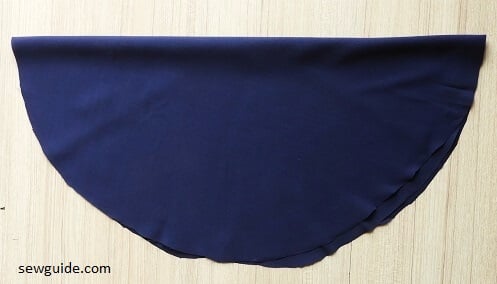
Fold the circle by the middle.
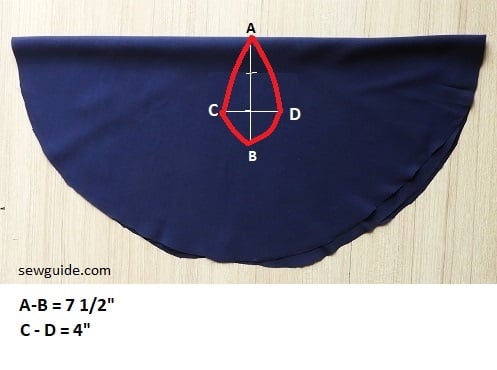
Mark as in the picture below along the middle. Mark a line of length 7.5″. Divide the line A-B by 3. On the first mark make a line perpendicular which measures 2 inches to the either side.(C-D)
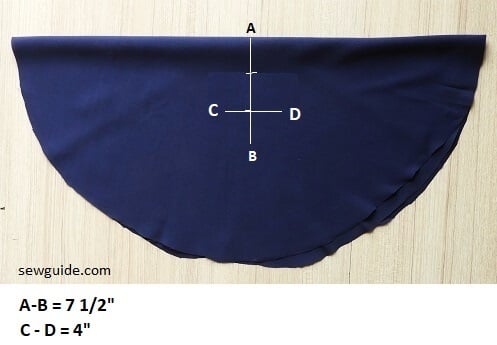
Draw along the marks you have made.
Open it out and cut out along the marking you have made.
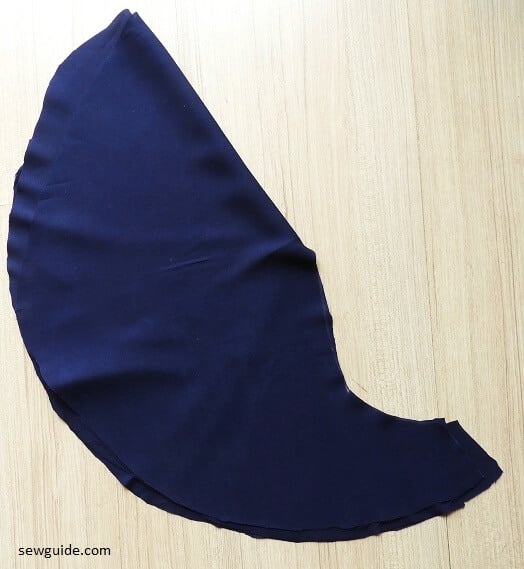
It will look like this.

This is your flutter sleeve.
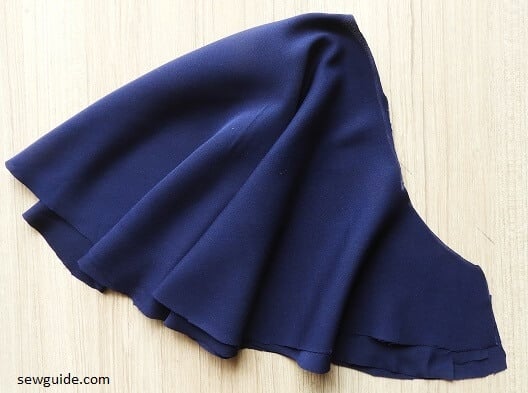
On the top, the sleeve will look like this.
Finish the edges of the sleeve with a hemmer foot – infact this is the only way you can finish the edges of this completely circular sleeve.
Check out this tutorial for sewing with the hemmer foot.
Cut two such sleeves (Do it so that they are mirror images).
Step 6 Join the sleeves to the top
Sew the sleeves to the armsyce of the top carefully. Cut off extra, if any
Step 7 Sew the hem and the side seams.
First join the sides seams of the top and then hem the bottom edge.
Related posts : 3 ways to sew flutter sleeves ; Sewng tutorial for a drop shouldered top; Sewing patterns for women
Very beautiful. Can flutter sleeve be made as long sleeve? If, please let see the post.
Lovly
बहोत मतदार है, आपके सिखाने के तरीके .
धन्यवाद
धन्यवाद 🙂
Video nhi mil sakti
easy to understand! Thanks.
How To Sew Flutter Sleeve With Dress.
Thanks. I must try this for myself.
How can you increase the bust on a bought garment?
Hi Penny
You may have to add an extra piece if the garment does not have darts or seams to let out.
Easy and straight forward
Thanks, this is well detailed and quite understanding
Good
There is no instruction for A-G or B-L. How do I know how far down that line should be?
Thanks for pointing it out; I have added now