I am thinking of buying an Embroidery Sewing Machine and cannot contain my excitement thinking about all the things I would decorate with it. People use their embroidery machines to embellish just about anything made with fabric – kids wear being the primary item, then household linen, aprons, bed sheets, pillowcases, caps, t-shirts, sportswear. I can imagine starting an embroidery business – I can embroider work wear, hotel and catering items, sportswear for businesses in my locality. Oh, there I go again – I am already building castles in the air.
Anyways, I have been reading and talking a lot about embroidery machines and how they work and have gathered some gems of wisdom from experienced people who work daily with machine embroidery.
There are 2 types of Machine Embroidery – Free motion machine embroidery and machine embroidery done with special sewing machines
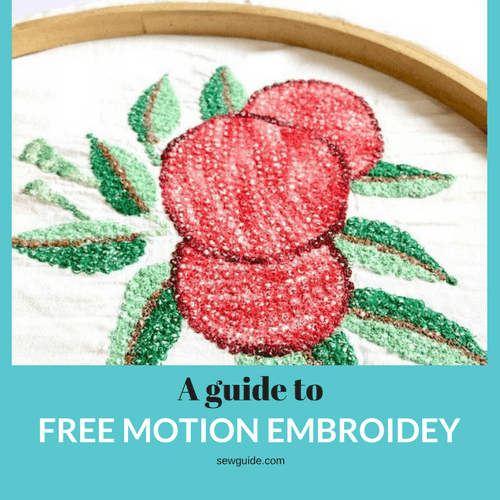
Free style Machine Embroidery
In free-Style Machine Embroidery (Free motion embroidery) you will be doing the embroidery work with your regular sewing machine with straight or zig-zag stitches. The feed dogs are lowered to prevent the fabric from moving forward as it does in ordinary sewing and the regular presser feet are removed. The fabric is kept on a hoop and we will be controlling the movement of the fabric while the freestyle stitching is done. To do this work you need a sewing machine with a drop-feed control or a plate that covers the feed dogs. You can learn more about this work in this post on Free style Machine Embroidery
Machine Embroidery with specialized Embroidery machine
There are so many different types of specialized sewing machines for embroidery today. Other than the embroidery machine, the most important things necessary for successful machine embroidery are suitable needle, correct thread tension, appropriate bobbin and top thread, a good stabilizer as backing for the fabric, hoop to keep the fabric flat
Basics of Machine Embroidery
- Free style Machine Embroidery
- Machine Embroidery with specialized Embroidery machine
- Basics of Machine Embroidery
- Embroidery designs
- Thread used for machine embroidery
- Needle
- Tension
- Stabilizer
- Hooping
- Fabric
- How to machine embroider on T-shirts
- How to embroider on lightweight fabrics
- How to embroider on denim and other heavyweight fabrics?
- How to embroider velvet and other napped fabrics and items that cannot be hooped like caps, bags, brooch etc?
- How to embroider on vinyl and Leather?
- How to embroider on towels /terrycloth ?
- Finishing
Embroidery designs
If you have a computerized embroidery machine you can choose any of the stock designs (these are digitized embroidery designs that are commercially available) or get a design customized from an artwork you have made or photograph you have taken. There are specialized shops which do this. Search for ‘Embroidery Digitizing firms’. They will do the digitizing and convert the design into the format your machine will take and in the design size (height and width) you want.
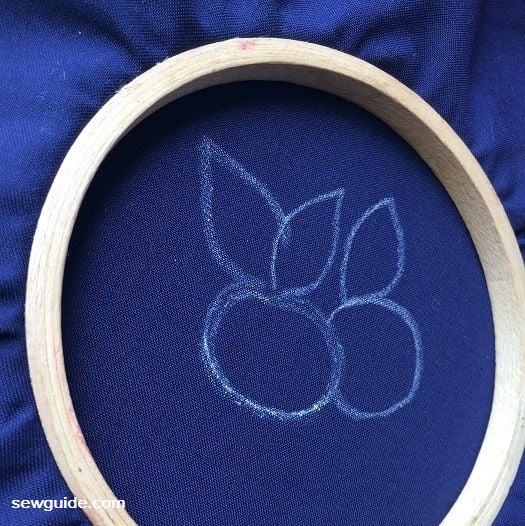
As a beginner complex designs are out of my scope. Simple designs are great for a beginner.
If you have a photograph you can change it into a line drawing suitable for machine embroidery. Scan a photo and print it full-page in grey scale. Using tracing paper, draw the significant lines that define the area for each color. Go over your pencil marks with a black marker. Scan this in black and white. Or even simply use an online program like befunky.com. Check out these related posts: Inspirations for embroidery designs ; how to convert photo to embroidery
After you have chosen the design the next thing is to decide on the position of the design on the garment / fabric, if you want to give it some special 3D effects etc.
Thread used for machine embroidery
Primarily this is about selecting the top thread depends on your sewing machine and the fabric you are embroidering on. You need a thread which will stand up to high-speed stitching without breaking or fraying, be colorfast and withstand many washings without damage to colour or stitches and give good fabric coverage.
There are three choices for top thread – Rayon embroidery thread; Polyester thread ; Cotton thread. Rayon thread is an all-time favorite of most machine embroidery enthusiasts as it has a beautiful sheen and does not break or fray. You will get a variety of solid, variegated, and twist colors (with two colors entwined together to create a shading effect). A polyester thread is also equally appealing especially because it is cheaper than rayon thread. Cotton thread is also of good performance, though the sheen is more muted.
Knowing about thread weight is also important. If you have a design which needs to be stitched densely, use a thinner thread otherwise it will be too bulky. The higher the number on the thread lighter the weight of the thread.
The bobbin thread used for sewing machine embroidery is preferably of lighter weight than the top thread.
Needle
You can use embroidery needles specified for embroidery or ball point needles for embroidering on knit fabrics. You should choose the needle depending on your fabric and thread.Light fabrics like Silk, thin knits you will need to use a needle with a lower number (#9); Thick fabrics like denim will need a thicker needle (#16). All other fabrics can use needles in between.
According to what I read, you should be changing your needle after every 8 hours of sewing. If you are using metallic thread you will need to get a special metallic thread needle.
Tension
Maintaining the proper tension while embroidering with your sewing machine means to stitch designs such that the bobbin thread does not show through the face of the embroidery. If this is the case you have a lot of adjustments to do.Consult your sewing machine manual for more details on this.
Other than the needle and thread the most important elements in machine embroidery are stabilizers and hoops. You have to get the fabric tight on the hoop. The stabilizer is needed to add strength and stability to the fabric.
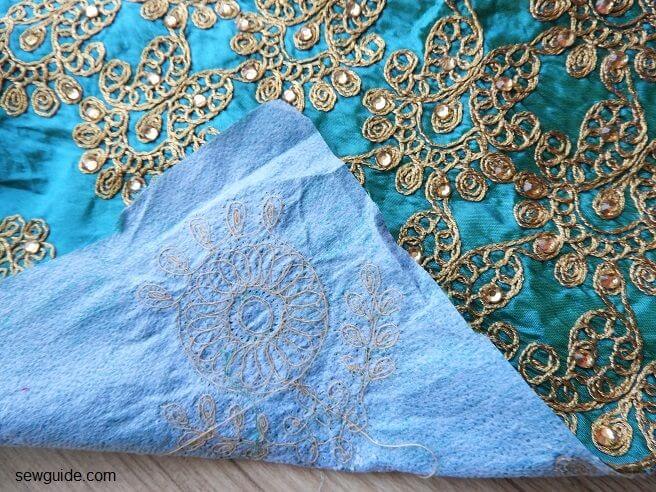
Stabilizer
You need to use a backing under your embroidery so that the fabric doesnot sag or get damaged. What stabilizers are used as backing for machine embroidery?
This depends on the weight and transparency of the fabric and if the design is supposed to be very dense in stitches or not.
As already said a stabilizer is a must when you do machine embroidery. If you have nothing else you can even use regular copy paper as a stabilizer or butter paper, but use it, you must.
The backing can be hooped with the fabric or it can be kept between the machine throat plate and the hooped garment.
The commonly used stabilizers are cut away and tear away. A cutaway stabilizer is used for fabric with even the smallest of stretch. For all others, a tear-away stabilizer can be used as well as a cutaway.
After the work is done the extra stabilizer is cut away from the back of the design. Sometimes they are left as it is, like if you have an allover design, in which case cutting away does not work.
For sheer see-through fabrics you should use a dissolving stabilizer or tear away stabilizer because the stabilizer will show through the transparent fabric and it has to be cut away completely outside the design from the back. For a design with a heavy stitch count, you need a dense stabilizer
You can shrink the stabilizer used with a steam iron – if you think your stabiliser will shrink later and cause puckering and you have preshrunk the fabric already
Related post : 10 best stabilizers used as backing for embroidery.
Hooping
Use a hoop that is the closest size of your design. Most embroiderers hoop the fabric and stabilizer together. The hooping is done in such a way that the fabric is taut and flat but without stretching the fabric out of its grain.
Do not stretch the grain of the fabric as you hoop – this is very important. The hooping for machine embroidery is different from how we hoop for the hand embroidery. Spray the top of the stabilizer with adhesive spray (temporary) and adhere them to the wrong side of the fabric to be embroidered. Hoop the two layers as one unit. Keep the fabric and stabilizer on the outer hoop and insert the inner hoop on this and tighten the screw so that it is taut. Do not push the inner hoop too much. Take the hooped fabric to the machine and start your work.
Sometimes hoops can leave permanent marks on some delicate fabrics – but hooping can make or break a machine embroidery work so what to do?
What the professionals do is to tightly hoop the stabilizer first and then adhere the fabric on top. This is done by applying fabric adhesive on the stabilizer and keeping the fabric on top – this way the fabric will float on the hoop without getting damaged by hooping.
Related post : Different types of hoops used in embroidery.
Fabric
The effect of an embroidery design will finally depend a lot on the fabric on which the embroidery is done. Some of the most commonly embroidered fabrics like t-shirt knits, wedding fabrics like organza, taffeta, crepe, metallic fabrics are all quite challenging. Some are slippery, some see through, some stretch out of shape. But there are some easy roundabouts to all these problems – must be, because people are always embroidering something or the other on these.
Nowadays the buzz is all for embroidering on Nylon mesh and then using this on whatever garment or accessory you want – just applique it, wherever you want it. The advantage of this method is that you do not have to unpick the countless stitches just in case you do not like the initial placement. No fear of puckering as well.
Related post : Fabric for embroidery.
How to machine embroider on T-shirts
T-shirts are difficult to embroider on but they are the most frequently embroidered garments. I would use the nylon mesh technique for t-shirts. Take one or two layers of the nylon mesh and do the designs on it- that is the way to go. Then machine applique this on to the t-shirt.
To embroider right on t-shirts with your sewing machine you will first have to attach a soft tear way interfacing to the back of the area you want to embroider. Ensure that there is no stretch in your stabilizer. Hoop the fabric and the stabilizer together.
Rayon thread is best to use with t-shirt material
How to embroider on lightweight fabrics
Lightweight fabrics are great when embroidered; the problem is that if the fabric is see-through interfacing/stabilizer will show through – you can use a water soluble stabilizer or use a very light paper thin stabilizer. Some people use organza cloth in the same color as stabilizer. Afterwards, the extra stabilizer is cut away close to the design
How to embroider on denim and other heavyweight fabrics?
You will need a matching tear away stabilizer on the back – use a medium or heavy weight stabilizer; if you have thin stabilizer use more than one or more layer
How to embroider velvet and other napped fabrics and items that cannot be hooped like caps, bags, brooch etc?
When you embroider on napped fabrics the problem is that the hoop may mark the nap and your fabric may be permanently damaged after the work is done. To prevent this you can hoop the stabilizer first and then attach the fabric on to the hooped stabilizer with an adhesive and then do the work
How to embroider on vinyl and Leather?
The problem with vinyl and leather are that you cannot use heat on them to adhere to the stabilizer – so you will need a self adhesive stabilizer. Then the next problem is that hooping leather or vinyl will make unwanted mark – so you can do the same thing that you do with napped fabrics ie hoop the stabilizer and adhere the fabric on to that.
How to embroider on towels /terrycloth ?
The most frequently embroidered item is towelling. Initials and monograms are regularly machine embroidered for personal as well as professional uses. The hotel towels are always embroidered with the hotel logo. The problem with embroidering on towels is that it is difficult to mark the fabric so you may need to add a topper with the design and attach another stabilizer on the back as well. Polyester thread is usually used to embroider on towels. One frequent problem in embroidering on towels is that there is a lot of lint build up – all those loops coming loose. You will have to clean up your machine a lot more frequently if you are regularly embroidering on towels
Finishing
And finally, after the design is embroidered you will have to use small sharp scissors and cut out the extra stabilizer.
My embroidery machine will be one of the most expensive things I would have bought – if and when I buy it. And I hope to use it as much as I can. I think the sewing machine manual I get will be my reading companion for a long time to come.
For Reference and altogether daily delectation: www.emblibrary.com.