You have your dream dress on – but something is not quite right. And that one thing is ruining it for you. Time for Alterations.
Alterations sometimes become a necessity, like a scenario where your favorite dress is too tight that you absolutely cannot get into it, OR sometimes it is just for the aesthetics like the bootleg jeans which you want to transform into a tapering one.
Whether as an option or a necessity, alterations are something I do not enjoy as much as sewing a new garment. I have this pile of clothes ready for alterations at any point in my wardrobe – hems which have come loose, dresses which need a bit of seam stitching, hooks that have come loose etc – all of those clothes sitting it out in the wardrobe for months. Timeout is over, clothing.
If you know just what to do and you have your seam ripper, there is nothing you cannot do to that dress to make it wearable and turn it, maybe, even gorgeous.
What do you need to do clothing alterations
For simple alterations, you can do with your seam ripper and sewing machine. Sometimes you may have to retake body measurements and need to stitch with a hand sewing needle and thread. Then replacements have to be bought – like new zipper, buttons etc.
You also need some sewing knowhow for alterations – knowing the 9 easy hand sewing stitches, the best 5 invisible stitches with which you can sew seams and hems without a sewing machine, the basic 20 stitches on your sewing machine and the basic knowledge of how your sewing machine works and how to take your body measurement, the darning stitches and other methods for mending clothes if there are tears – all come handy.
Clothing Alterations – and simple solutions
1. The dress is too tight
This is a sad situation to be in. Either you have put on weight, which is sad or you bought a size smaller hoping you will lose weight, which is sadder. Or you may have shrunk the clothing in the wash
( Check out the tips in the post “How not to shrink clothes” to prevent this from happening again)
You may have to let out seams or darts. Loosening the side seam and restitching is the most often solution – you will need extra seam allowance in this case.
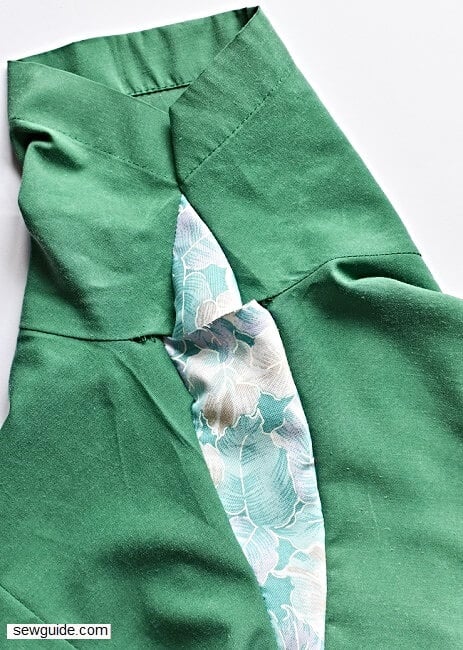
Or You may have to add an extra fabric piece if there is no seam allowance to let out – for this you will need to find matching fabric to the fabric of the dress, with the same care instructions. This extra piece is to be inserted into the seam to add some more width. If it is near joints it is called a gusset – a rectangular piece is added to give ease.
You can add lace trims and use insertion stitches to stitch this piece – check out this post on insertion stitches for more details
You can find the best ways to deal with the situation in this post – Best tricks to alter clothes that are TOO TIGHT.
2. Pant is too tight
Check out this post on the how to alter tight pants
3. Dress/pant/skirt is too short
You will need to lengthen hemlines. You can do this in many ways like adding ruffles to the hems, or even making a slip extender to wear under the clothing, to give it length. Check out this post on How to lengthen skirts for more details on this.
4. Pant is too long
For this check out these posts – How to hem jeans with the original hem; How to shorten the length and hem dress pants ; How to make a blind hem stitch ; Best stitches for invisible hem.
5. The dress is too loose at the waist
This involves Tapering of Dresses & Shirts or skirts. You will have to retake body measurements and add enough ease and then make a new stitching line to the inside. You can also take out excess fabric by adding a dart or two
If you got this dress which is much too big, you can add a waistband like the one in this post on sewing a beach cover up to gather the fullness
Know more about what to do if your dress is too loose here.
6. The Bodice is loose
Here the problem is that the bodice of the dress seems to be too long and bulges/folds
This is a similar problem as the above, but here the bodice alone is loose, not the skirt. It happens if the person stands straight while taking the body measurements but afterward return to her true posture of slumping.
See if the problem can be solved by a tuck straight across the chest area or in the area below the bust if it seems to bulge with extra length there.
Check out the post on sewing darts correctly here.
7. Pant is too loose
This can be read more in detail in this post – How to alter too loose pants ; How to alter loose jeans

8. Dress is too long
This involves Shortening the length of dress, skirt, top, Pants or Jeans- cutting out the extra portion and sewing the hemline again.
A hem stitch should ideally be not seen on the outside – hand stitching is the best. Use easy stitches for hand sewing to sew the hem back. Make them small – 1/4 inches apart.
Check out the post on 20 different ways to sew a machine made hem; you can also hand sew hems – Check out this post on the 17 ways to handmade hems . If you are looking for invisibility in the hem, check out this 4 methods to create an invisible hem.
For jeans you can check out this post on shortening and hemming jeans – 3 different ways – all of them work.
This post outlines the best way to shorten and hem the length of dress pants.
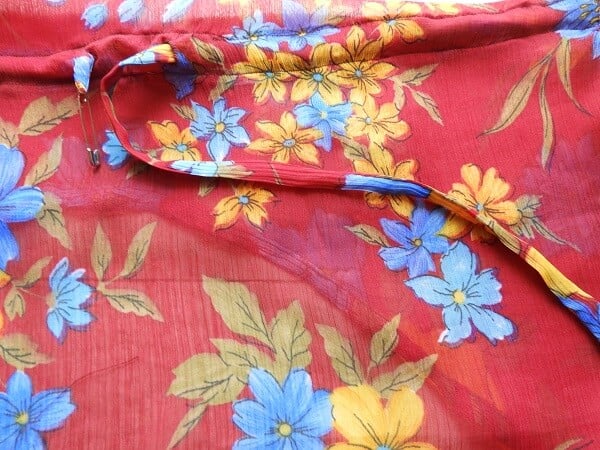
9. Straps are too long or short
Adjust the length of straps on shirts & dresses; You may have to remake the straps or add adjusting sliders.
Check out this post on making thin fabric tubes that can be used for making these straps.
10. Add/replace lining in jackets and dresses
This is too much trouble if you ask me but sometimes it has to be done. Prewash the lining fabric. You will have to let out the seams and restitch or add it as an underlining and hand stitch it to the garment.
You can use slip stitches to very unobstrusively sew a lining to your garment.
11. Altering a neckline that is too big
A neckline which is too wide will gape and expose too much of what you do not want to be shown. There are many solutions to this problem. Check out the post on How to fix a neckline that gapes for these.
12. Wrinkles at the back of the waist
There is extra ease at the back between the base of the neck and waist. You can see this if the hip area is too tight.
You can try to shape this by taking in some ( 1 cm ) at the side seam or the center seam at the waistline and by loosening the seams at the hip.
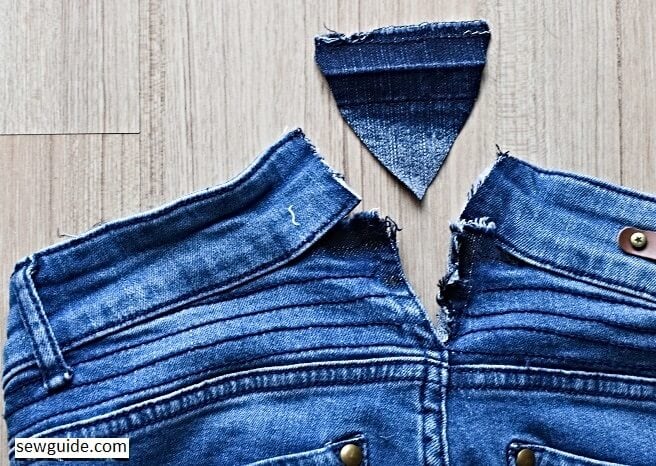
13. The collar needs replacement or repair
If you cannot sew, or you do not have a lot of spare time for repair, this is unrepairable. Usually the fabric has frayed with wear. You can patch it or replace the collar.
If the collar is looking odd, ask yourself – Did you cut the collar correctly. The outer piece should be cut lengthwise on the fabric and the inner collar piece should be cut crosswise for better stretch. Most of the time problem happens when the collar is too small
You will have to replace the whole collar. Check out this list of different types of collars. Here is a tutorial to sew a polo collar and Tutorial to sew a band collar.
14. Sleeves not fitting
Tightness in the sleeve
This is evident especially when you lift up the arm.
You should always measure a long sleeve with the arm slightly bent.
One reason for this is because the crown height is lesser. You will have to mark the crown height a little higher next time. If the dress has shoulder pads, you can take it off to increase the crown height a little bit.
Sometimes it becomes tight because you have developed more muscles in the forearm
Wrinkles in the crown of the sleeve
This is because crown height of the sleeve is more. Add a shoulder pad to immediately solve the problem. Otherwise, let out the seam , decrease the crown height and sew.
Wrinkles in the arm of a long sleeve
This may be because the sleeve is not fitting for the measurement of the arm of the person.
Cut out armscye slightly. Shapes of armscyes must vary with muscular development around armpits of individuals.
15. Replace pockets and trims
Pockets can get worn or tear at the pressure points. If simple tear repair would not do it, you can replace the pocket. Check out the post on sewing patch pockets
Trims also may need replacement – learn how you can add trim to edges here
16. Faulty fasteners
Zippers break, buttonholes get wider, buttons pop out, thread bars get threadbare, snaps come loose, velcro looses its grip and lacing eyelets pop out. A garment is virtually useless without its fastener. So you will need to repair these pronto.
Check out posts like ” How to fix zippers” for all your zipper problems; How to sew a button with a sewing machine or by hand or how to sew button loops for solutions to some of these problems. Other fastener solutions are there in these posts : How to sew a zipper ; How to make cloth buttons; How to do the lacing right.
17. Pant side pockets get open without you doing anything
This is because the pants are not fitting around the hips – it is too tight for you. You will have to find a solution to this problem first. Check out this post on what to do if the pants or jeans are too tight.
18. Armscye Gapes
Droopiness in the armscye under the arm.
Make a dart in the back pattern. This may solve this problem
If the armscye gapes near the bust you will have to make a diagonal dart to the point of the bust. Do not over pinch or it will be too tight.
First Let out the seam at the armscye. You may have to add a small diagonal dart from the armscye line near the bust to the bust point on the main bodice.
If the armscye gapes near the shoulder make a corrective dart at the shoulder. A basic shoulder dart will take out the too much ease.
19. Shoulder droops
If you like a slightly tailored look to the shoulder rather than a droopy look, a shoulderpad can be used. If only one shoulder droops use on one side alone.
20. The skirt of a dress looks limp
If you want a puffy look to your clothing (party dresses, kids frocks, long skirts etc), you will have to add extra reinforcement. A simple solution to this problem is to wear a pouffy pettiskirt underneath. There are many ways to make this – check out this post for more info on making a petticoat. You can use a horsehair braid at the hem for the hem to look stiff.
Related post : Clothing repairs and solutions
I bought a dress , waist is fine but it’s too big across the hips and thighs. I have taken in the side seams equally on both sides of the dress but now it looks like the back of the dress is almost bigger than the front ! It’s hard to explain but when I try it on it looks like I should be taking more from the back ( at the side seam ) than the front ? It’s almost like the seam is working it’s way round to the front and the back is now further round ???
Can you help please as I can’t take the dress in all the way up the side because it would then be too tight across my tummy and chest .
Cant you make darts in the back near the hips starting from the waist.
“1. The dress is too tight. This is a sad situation to be in. Either you have put on weight, which is sad or you bought a size smaller hoping you will lose weight, which is sadder.”
This is a horrible way to begin this article. People are looking for help, not be shamed for putting on weight. Poorly written and ignorant.
Sorry If it is offensive. It was just a way of starting an article – not meant to shame anyone. Everyone is beautiful in their own way, whatever their weight.
I bought a ready made dress that has darts in the front. It is pointy at the apex. Does not look good to say the least. I took out one dart hoping I could just re-do the dart. After taking the dart out, I find whoever made it, cut a hole and then sewed the dart. How can I fix this?!!
They must have first sewn the dart and then cut the dart seam allowance to open it out smoothly. I guess you will have to sew it back the same way or cut the bodice with a princess seam – but then it will tighten the bodice.
Nice Blogs!
Thanks for sharing this informative blog.
Having a team of highly qualified, skilled, and professional alteration experts at each of our stores in Randwick, Northbridge, Narellan, and Nice Look Narellan, we can assure you that you will walk away with great pleasure. We know every client has different needs and requirements; hence, we customise our services according to the preferences of our customers. If you ever have a dress or a suit or any other clothes that do not fit you, come over to our shops in Narellan, Northbridge, and Randwick. We can also provide you with the same day service on your demand.
Hi maam , can i ask who is the author and when it is published? Because i like your topic. Your response is much appreciated.Thank you
cant pull down top fast enoiugh to go to bathroom what can i do
I have a prom dress that rides up from the waist to the bust when I walk. How do I fix that?
Look at adding a waist stay. Google that phrase, usually a simple grosgrain ribbon will do the trick
I have a dressy rain coat that has elastic on the outside of the cuffs. It goes about halfway around the cuffs. One end is sewn into the sleeve (on the seam) and the other end is fastened with a button. These pieces of elastic are large and loose and they don’t like to stay in place. Also, they seem to serve no purpose, since they’re not adjustable at all. Is there an easy way for fix this for someone with novice sewing skills? Thank you.
sign me up
my jumpsuit is to tight around the waist how can i fix it
Hi Palmer
Does it have extra seam allowance to let out?