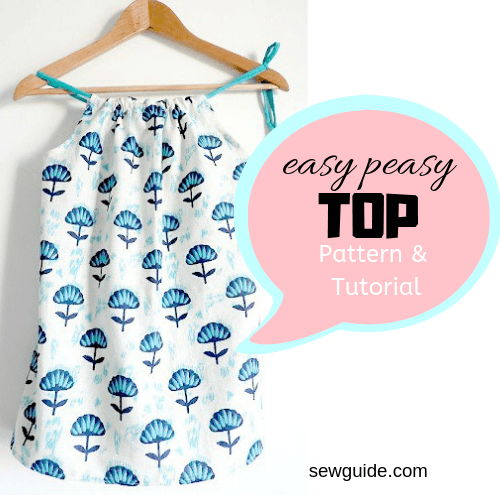
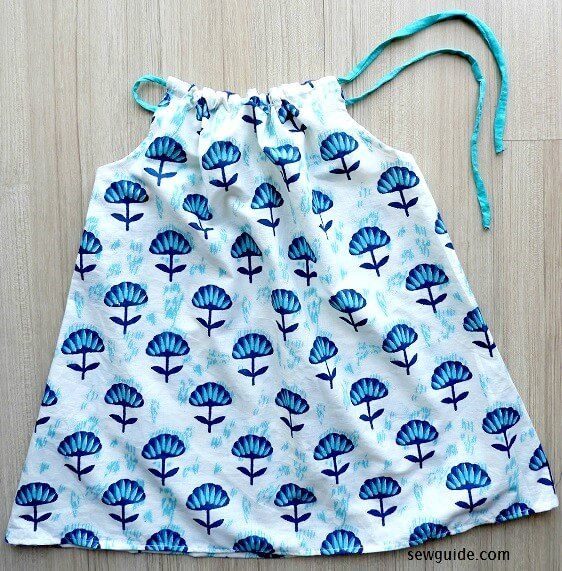
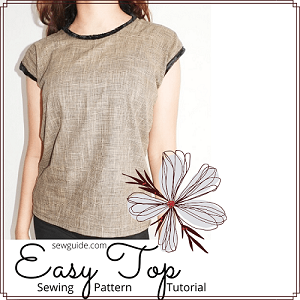
At times you cannot bother to sew complicated collars, button stands or zippers. But you want to wear something you have sewn. This top is the exact thing you need. If you mind exposed shoulders you can wear it over plain t-shirts or wear it as it is for a quick and simple summer top.
How to sew easy Summer top
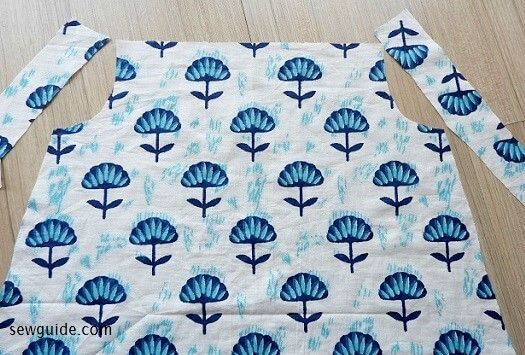
Step 1
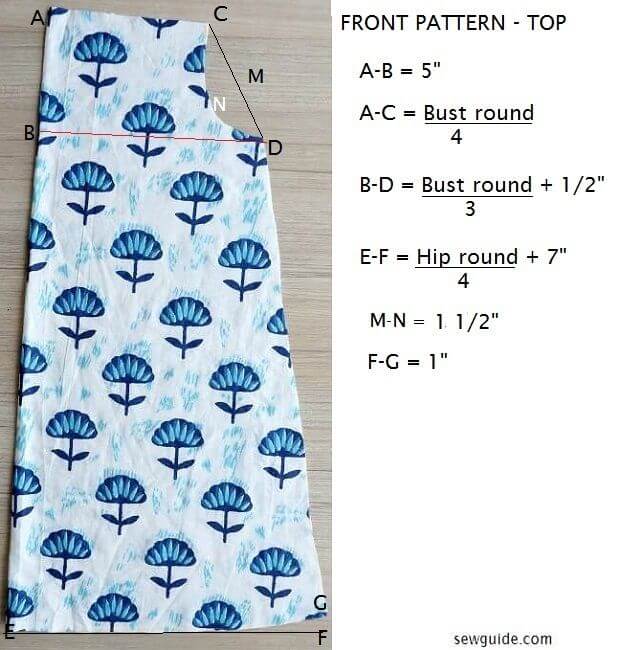
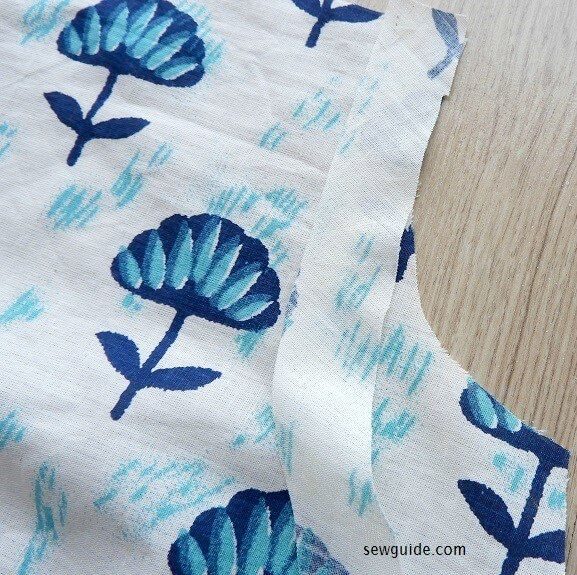
Cut out the pattern pieces for the front and back bodices as per the pattern given below. Learn more about cutting fabric for sewing clothes here.
Cut on folded fabric – length A-E depends on what you want for the top- add 1 inch for hem allowance and top edge.
Front bodice for the top
Back bodice pattern
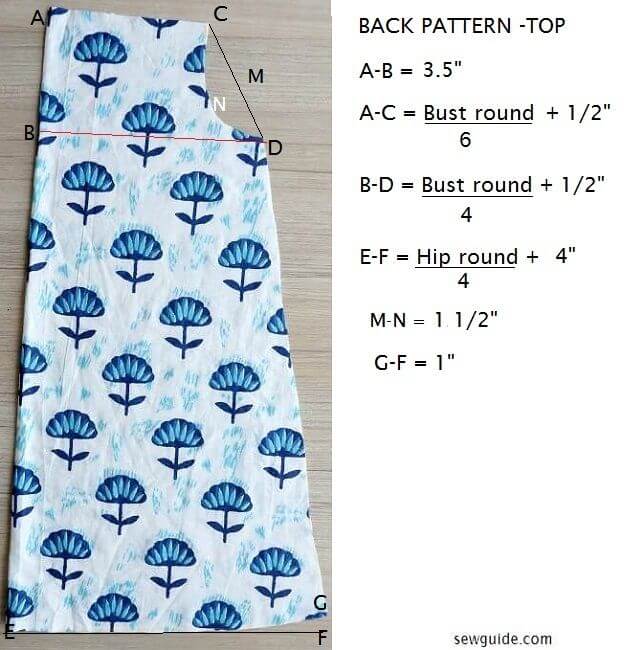
Important note : the length of D-G should be same for both the pieces.
Step 2
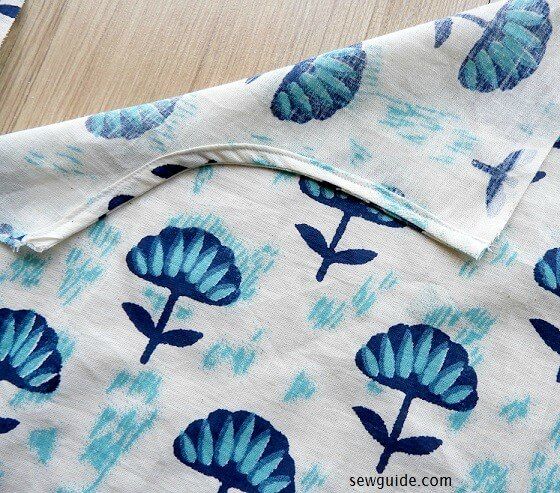
Cut out 4 pieces of bias strips ( bias cut fabric pieces) of width 3/4 inches and length equalling the armhole of the bodices.
Read more about cutting fabric on the bias here or on different types of bias tapes.
Step 3
Bind the armholes with the bias strips
Step 4
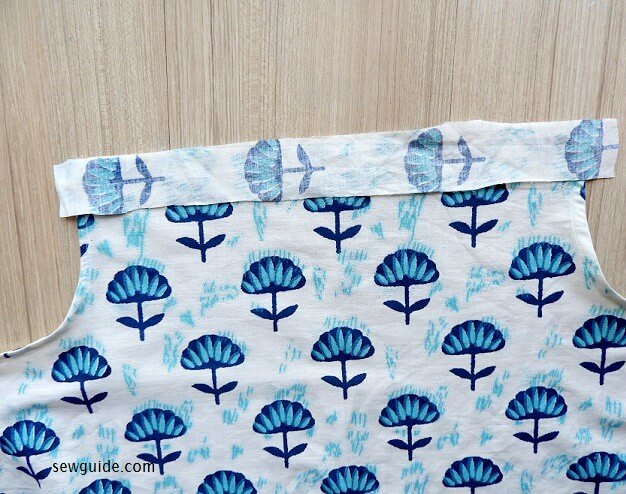
Cut 2 inch fabric strips equalling the top edge of both bodices + 1 inch extra for folding in.
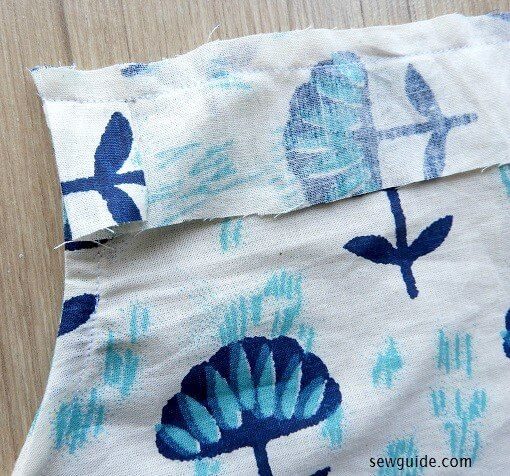
Step 5
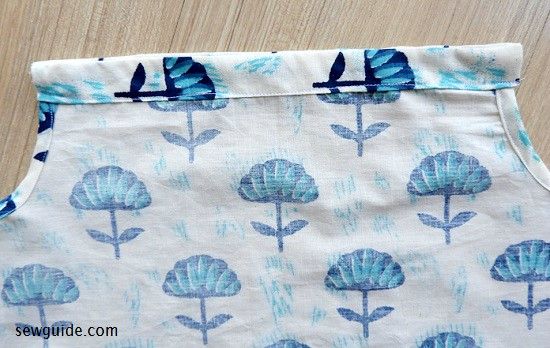
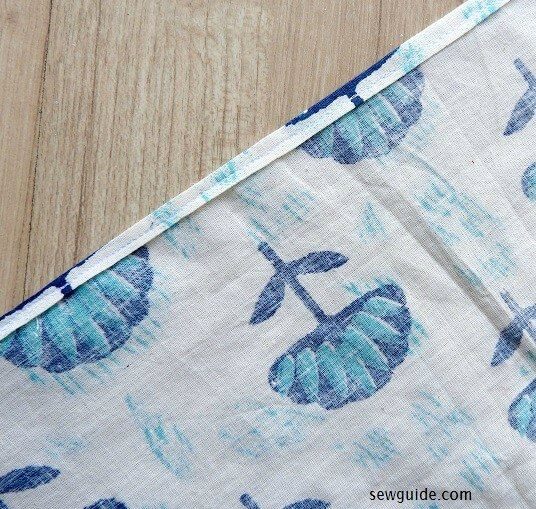
Keep the piece right side down on the top of edge of the bodice. Keep the edges folded in. Stitch the top edge in place.
Turn the piece to the back and stitch in place. Do not stitch the sides closed – you need it open on all 4 edges to insert the drawstrings. Here you are making a casing for the drawstring. Do this for both bodices
Step 6
Sew the hem of both the bodices. Because the hem is cut slightly curved you will have to make a narrow hem
Step 7
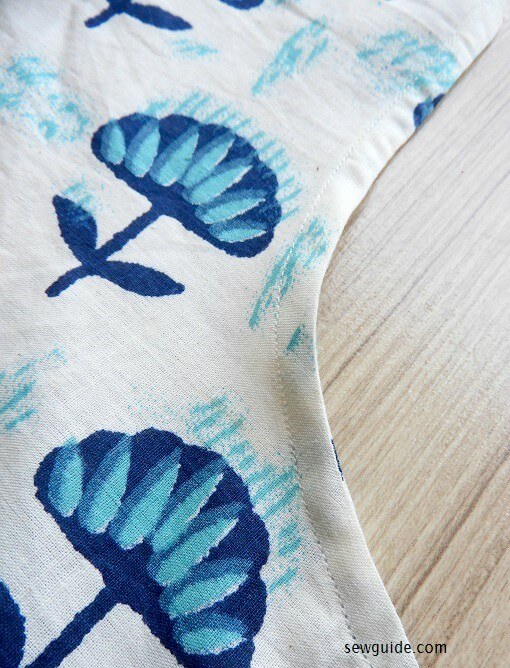
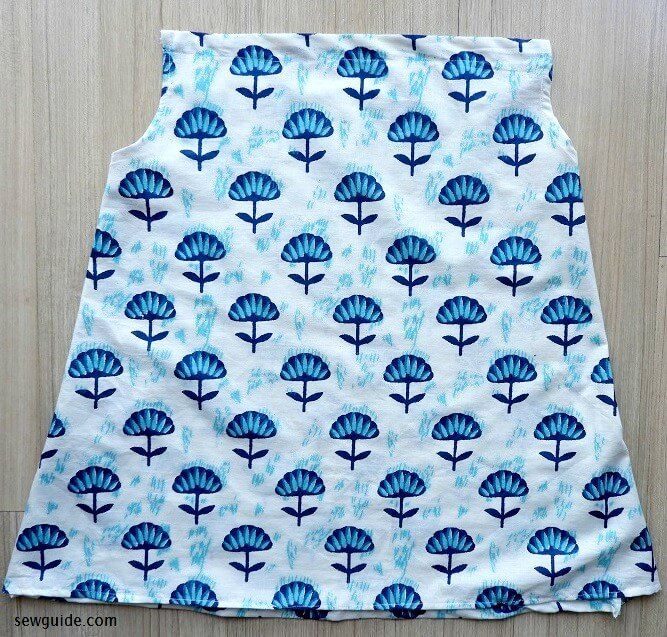
Join the side seams of both the bodices
Step 8
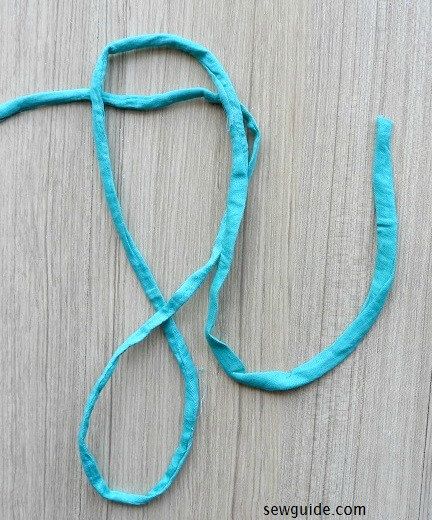
Make a piece of thin fabric tube of length 1.50 meters or cut out ribbon of the same length. If you want instructions for making the thin fabric tube check out this post on making fabric tubes
Basically, you cut out 1.5 meters of fabric strip pieces of 1-inch width and keep it folded by the middle right sides together. Stitch through the middle. Turn the tube right side out with the help of needle and thread. (Wrong side of the needle passing through the tube turning it right side out as effectively as any fabric tube turner)
Step 9
Insert the drawstring through the front bodice right side with the help of a pin
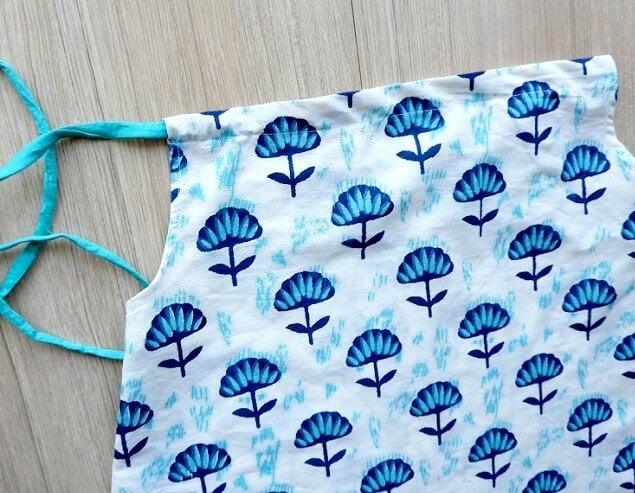
Insert the other end of the fabric tube through the back bodice casing, through the right side.
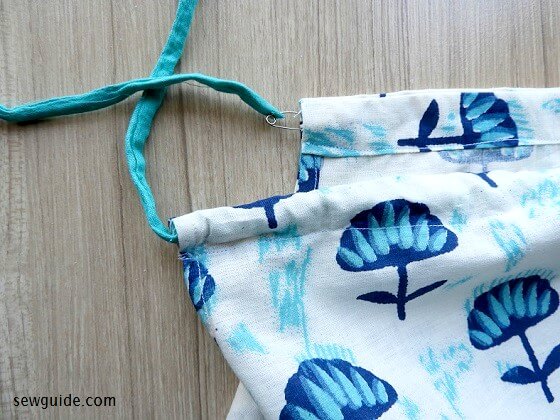
The ends of the drawstrings will be tied after wearing the top
Is there a more easier top to sew than this.
Related posts : Free womens sewing patterns ; An easy every day top sewing tutorial.
This was really helpful. I’m not really a designer, I haven’t gone to any fashion school but I have interest in sewing. So when I saw this I picked up a fabric and followed all the steps. I made some small mistakes but I really love the result. Ps: It’s the very first top I’ll make.
Just recently found this site. Many excellent tips. I have been sewing for many years, but only recently making my own patterns. I have looked about a bit and likely missed it, but I cannot find the seam allowance used for the patterns. Are we using 1/2” for all clothing? Are you using 1/4” for things like bias strips? Thanks again.
I really like this blouse. I can’t understand how you got the angle from d to f. Please explain. Thank you.
Should be just connect from D to F with a straight edge like a yard stick.
Yes i tried it…and now itz ready to wear…but I’m a designer by myself. So i made small changes in it…in tips of kurti
I am half way through this project which I chose as my first as was ‘easy peasy’ ? however the calculations have really confused me. And now I think I have messed it up. In the measurement calculations should the extra inches be added to the hip/bust measurements before dividing by the 3,4 or 6” stated or after?
Hi Yvonne
The calculations are as written on the pics. Hip is divided by 4 first and then added extra allowance ( for the fullness, seam etc)
Ah great, thanks Sarina that’s how I calculated it. It does look a bit strange though (but may be due to doing for a child), so may need to adjust a little.
I like very nice, but I try my self,some qutiion if l have so I ask you .
Thankyou so much.
Why not sew side seams together before applying binding.? What are the seam allowances? Confusing about adding 1 inch at top & bottom…is that included in A-B or extra???
I’m a beginner and I want to try it as it seems easy but is there any video tutorial available for how to do it? because I’m more of a visual learner. thank you.
Sorry Christine, No video.
Hello, I sew this pattern today and it was awesome… very well explained!
P.s. I’m a beginner
Thanks for leaving the comment, Mahesha
Very well explained.
Please is the method same for stitching dress for a girl of 5-8 yrs old.
Specially measurement from A to B.
Thanks
Has anybody already tried this pattern? If so are there any *keep in mind* details? Im a beginner but a fast learner 🙂
Hi Yviee Barboza
I have : )
Lovely ideas.look forward to more patterns etc.
Thanks. Well done forcthe directions
Thanks for illustration ma.
So beautiful yet easy to make. I will try it
Thanks Bony
I love this very much so easy n beautiful
Thanks Mili
I am going to try this pattern. Thank you
Hi Mariet
Thanks for reading and commenting
I am mala i like very ese top mam
Thank you Mala