A petticoat is an underskirt worn under skirts to give it a definite shape and structure. It is usually worn under long skirts and gowns and serves as a sort of lining for them.
Different types of petticoats
Petticoats are categorized according to their shape – They can have a pouffy look or a simple A-line silhouette. The Pouffy petticoat can have either a bell shape or a cupcake, depending on the silhouette you want for your skirt. Then there are two types of petticoats – a petticoat with boning and a petticoat without boning. The petticoat without boning uses stiff fabric to look full.
How to choose the Petticoat
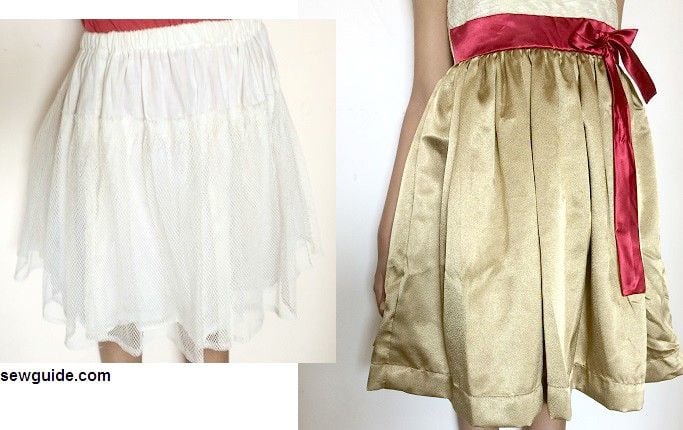
Ideally, for the basic petticoat you should be using the same pattern of the skirt. It should be appropriate for the skirt or dress you are wearing it under. The basic silhouette of the dress and the petticoat should be the same.
For a fitted skirt, a gathered petticoat will bring unwanted bulk.
How to make a Petticoat
Layered Petticoats
The petticoats of the earlier days worn under the long gowns were one with several flounces and layers. They were some 1-2 inches shorter than the main skirt. The circumference of the lower edge of these petticoat skirts were as large as 100 inches.
Layers of flounces were attached to the lower edge to give great fullness to the outer skirt. If one petticoat did not give the full effect, more than one was worn.
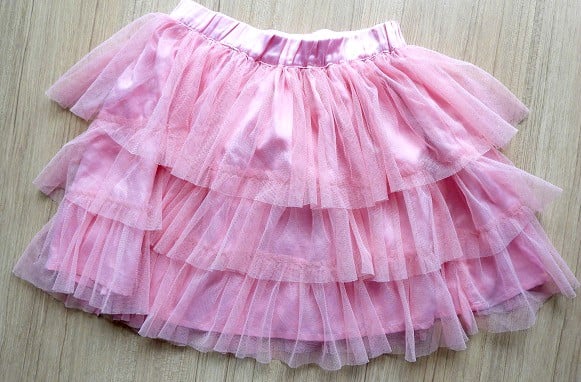
These petticoat skirts were made of cotton batiste, satin, linen, etc. You can make them in Voile and Organza. 2 to 8 layers can be used for a petticoat skirt. When you add more layers, you get that much extra fullness.
You can see the pattern to make this ruffled tiered skirt in the post on DIY Gypsy skirt here. It gives you all the bounce you want under the skirt.

You can add extra ruffles to these layers for more fullness – made with netting or voile. 1-inch wide Extra ruffles can be attached to the hem of each layer of your petticoat. Usually, these frilly ruffles are added from the top layer for puffiness. If you want more fullness at the bottom, you can use a horsehair braid at the hem – it will give you that suspended pouffy look.
The Basic gathered petticoat
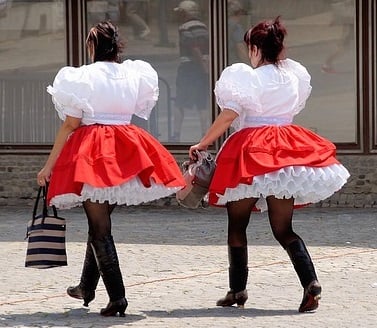
This dress is photographed with the petticoat skirt under, and it has made a difference in the way it looks.
You can make the basic gathered petticoat very easily. You need cotton fabric which is not too lightweight, and some tulle fabric/netting to make this gathered petticoat skirt.
Gathered petticoat skirt Pattern
Cutting the petticoat pieces : Just take a rectangular piece of fabric of width measuring your hip round + 5 inch ease (add more ease if you want) + 1″ seam allowance.
The length should be lesser than the skirt/dress you are planning to wear. Ankle or even lower calf length is good enough for wearing under-floor skirts or gowns. Otherwise, you will trip over all those layers.
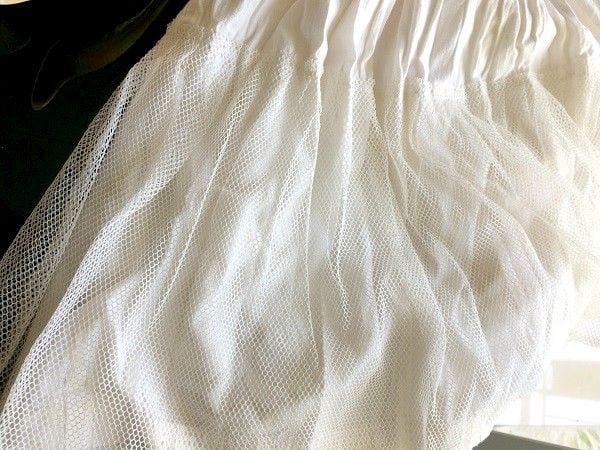
Join the two short edges, and you will get the skirt tube. Hem the bottom edge and turn under the top edge to make an elastic waistband. Now you have to attach the tulle/netting/crinoline on top of the skirt.
For the crinoline part attached over the petticoat skirt for that pouffy look – Measure the skirt round. Multiply this by 1.5 or if you want more fullness 2. This should be the length of the tulle for each layer.
Cut tulle/netting/crinoline into long strips of at least 6-inch width. Now you have to gather the top edge of this piece and attach the long strip of tulle fabric on top of the petticoat skirt.
Gather the tulle/ netting top edge ( use a thick thread and use wide zig zag stitches over this to gather the tulle). Join the ends of the tulle strip/netting to make it a tube. Stitch the gathered tube on top of the skirt. You can keep the tulle/netting layer upside down ( right sides together on the skirt and then flip it down) and stitch instead of topstitching.
If you want fullness from the waist, you will have to attach many layers of tulle. I have given here two layers of tulle strips. More and more layers of tulle will give you greater fullness. Instead of tulle, you can use crinoline.
(Crinoline is the stiff fabric used to make petticoats. Crinoline is a stiff net that is used to give the petticoat a nice volume and flounce. It is usually attached to the hem of the petticoat, but you can also attach the crinoline to the whole skirt in a tired fashion for a full look. Nowadays, many use the term crinoline as a substitute word for petticoat, which is wrong.
In fact, if you use a crinoline to make petticoats, you will be scratching all over the body. The material is stiff and scratchy. Hence the crinoline is attached to the face (outside) of the petticoat. You can totally skip this layer if you do not want the fullness or flounce).
If you want more fullness than what you see here, one trick is to soak the petticoat in a liquid starch solution and then dry it to appropriate stiffness. You will have to ensure that the stiffness is not overwhelming. Checkout the different types of liquid starches and stiffeners you can make yourself for this purpose.
You can attach the crinoline in layers as it is done in tulle skirts for more overall fullness.
Make a slip like this one and attach the crinoline gathered (take 2.5 times the circumference of the skirt for each layer).
In the costumes of old Bands of contrasting fabric at the bottom of petticoats were added – this will be visible under the gown and hence were made of more expensive fabric than used for the petticoat skirt.
Taffeta, satin and velvet bands were used.
You can either gather the top edge or pleat the fullness so that it does not bulk up on the waist. Either make an elastic casing and insert a 1/2 inch wide elastic to gather the waistline, or make a regular waistband and join the skirt after gathering it.
Make two lines of basting stitches 1/4 inches apart to gather the waist. Gather these two rows of stitching together until the top of the skirt is the same as your waist measurement, plus 1/2 to 1 inch.
If you are making a petticoat for a gathered skirt with many layers or for a fitted gown, you may not need this fullness.
A Fitted petticoat skirt – petticoat pattern
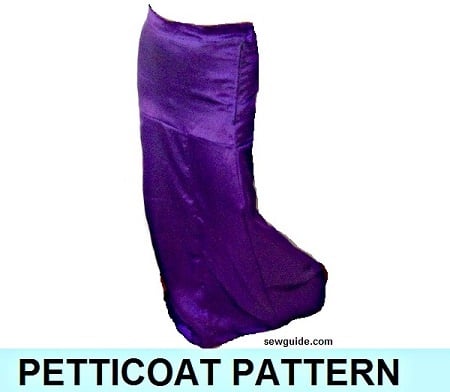
The petticoat pattern given here is a simple petticoat skirt that I usually wear under lots of clothes – long maxi skirts, lehengas, saris, and long gowns. It is a fitting skirt from the waist to the hip and then panels flaring slightly to the hem. Being fitted near the waist makes it a lifesaver in that there is no added unwanted bulk of the usually gathered underskirts.
This pattern is a ‘suits-all’ underskirt with a fitted waist band with button, and zipper opening.
PETTICOAT/ PETTISKIRT -Materials needed
Cotton Fabric ( muslin) or silk taffeta or Satin – Double the skirt length needed. I am using a thin satin cloth here. Always choose a lightweight or medium-weight fabric which is comfortable next to your skin.
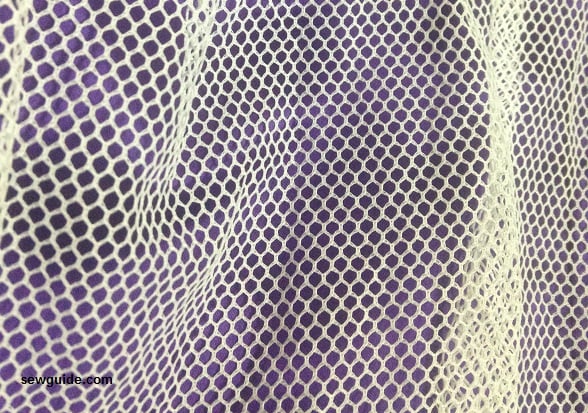
Crinoline or stiff nylon netting ( optional only if you want fullness at the hem) – How much crinoline you need will depend on the ruffles you are going to sew on the crinoline, and this depends on the fullness you need. An average petticoat will require a minimum of 2 yards of netting. A very full petticoat will require about 4 – 6 yards. If you do not have crinoline, you can make a flounce with the same fabric as the petticoat.
Pattern
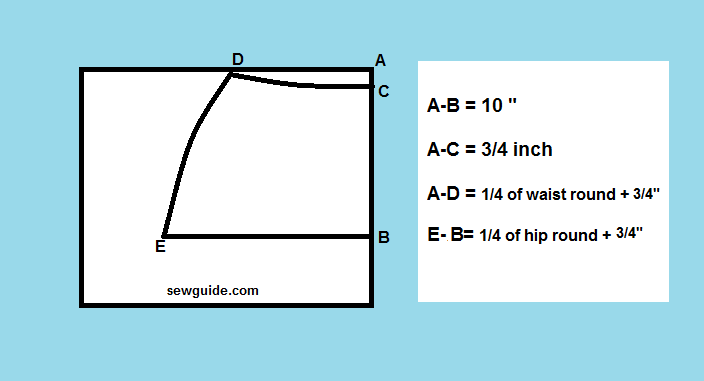
Panels – For the bottom panels, you need to cut 6 of the below pattern on fold – 3 for the front and 3 for the back.
How to sew a Petticoat
Step 1
Cut out the pattern pieces – The skirt pieces and bias strip for the waistband and the crinoline pieces.
Step 2
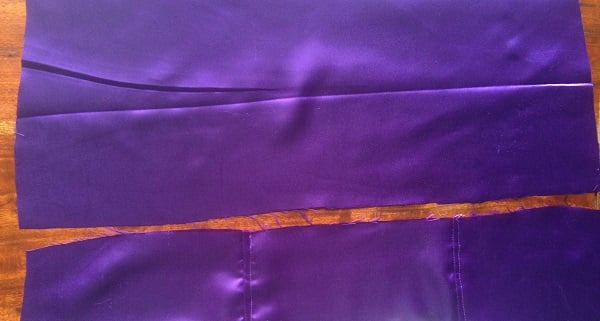
Join the seams of the three panels together – each for the front and back; I have made a flat felled seam along the panel seams. This seam finish with a parallel line gives strength to the seam line and looks good from the outside.
Join the front top portion to the panel portion. Do the same for the back portion as well.
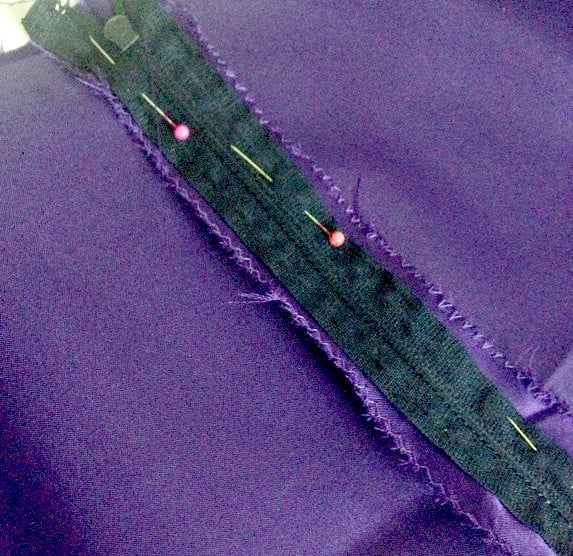
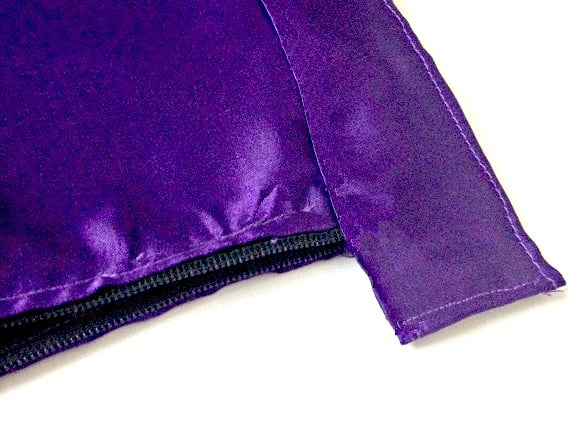
Join the front and back pieces at the sides to make the skirt. Ensure that the side seams are aligned when joining the front and back pieces together. Leave 7 inches at the top of the left side seams open. Join that area with a basting stitch (long-length stitches). This is for attaching the zipper.
Step 3
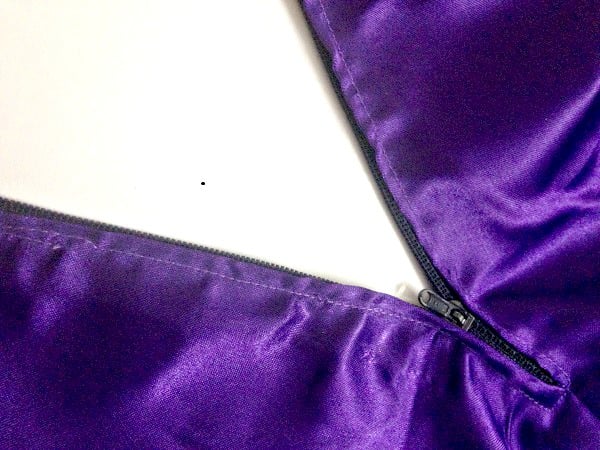
Attach the zipper on the side seam.
Keep the zipper face down on the seam allowance where the basting stitches are made. Pin in place. Sew the sides.
For better explanation, check the tutorial on sewing zippers.
Remove the basting stitches.
Step 4
Make the waistband.
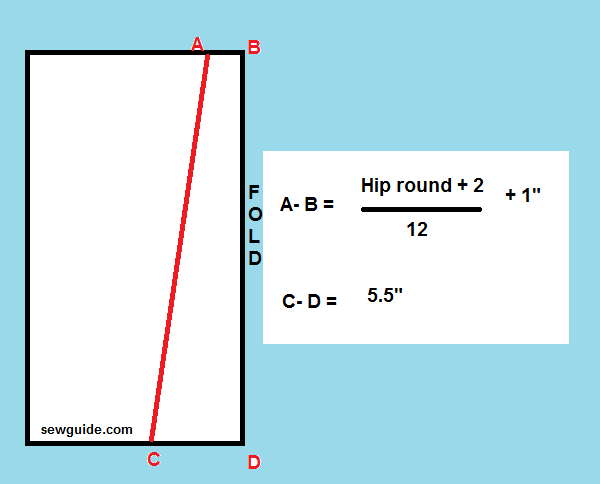
- Measure the top of the skirt edge. The waistband should be this length + 2 inch. width 4″
Fold the bias strip half lengthwise. - Press.
- Stitch the edges right sides together with a 1/2 inch allowance.
- Keep the bias strip along the outside of the waist with the fabric edges together. Stitch with a 1/ 4 inch seam allowance.
- Turn under the other side and pin it in place.
- Stitch in the ditch from the front or top stitch, making sure that the turned under edge is caught in your stitch.
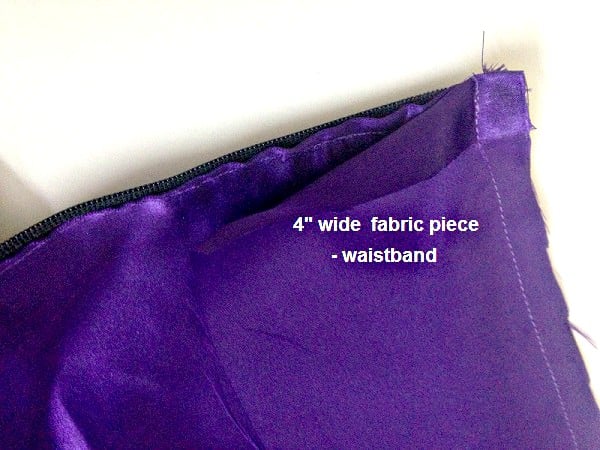
You need an extension of 1 inch on the front piece for fastening – you can sew buttons or hooks and eye to fasten the skirt.
Step 5
Hem the skirt by turning under the edge twice 1/4 inch first and then 1/2 inch.
Step 6
Sew the netting to the skirt
Hem the net first – turn under the fabric’s long edge once and stitch.
Join the net pieces on the short edge to form one long piece. Mark 4 equal divisions of the net. Gather the frill using two basting stitches along the edge. Distribute the gathers among these four divisions
Press the gather..
Stitch the frill into a tube. Adjust the width

Keep the frill upside down around the outside of the hem with right sides together, the gathered frill on top of the skirt. Pin the frill in place, and ensure that the gathers are distributed evenly. Stitch the frill to the petticoat equal distance from the bottom edge of the frill. If you want more frills, add upper layers of crinoline netting.
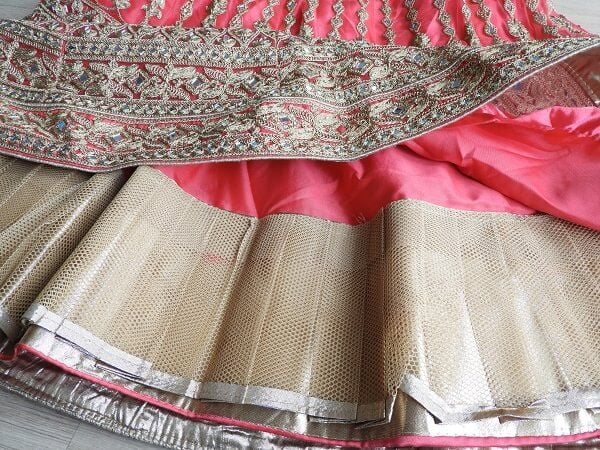
This would make an ideal petticoat skirt under the Lehenga skirt pattern.
Related posts


helpful article, but more pictures would be great, as sometimes I don’t know if I’m interpreting your description correctly
Very helpful article detailing types of petticoats! Answered my questions about the slim form with bottom ruffle. Thanks!