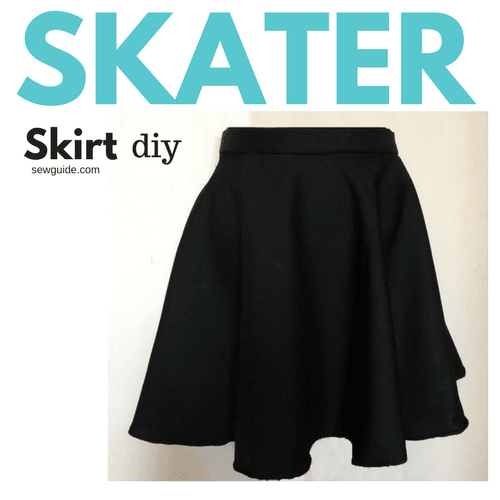
A skater skirt is a flared short skirt which is worn high waist. Basically it is a circle skirt which is cut short like those worn by the skaters. The skirt mostly finishes below the knee.
This skirt can look very glamourous on its own ( if you have the guts and the legs to go with it) or worn layered with tights.A thin leather skater skirt looks wonderful.
I made this skirt out of 1 1/2(1.5) meters ( 1.7 yards) of medium weight fabric with a width of 54 inch ; this will give you a skirt of length 21 inches. You also need a short zipper and a pair of snap buttons / hooks and eye
How to sew a skater skirt.
Step 1
Measurements
Measure the waist . Take measurement around where you will be tying your skirt.
Measure the length from the waist to the hem ( where you want the skirt to end)
Step 2
Cut the pattern
Basically this skirt is a circle with a hole – the standard circle skirt. Check out the post on circle skirt calculator for more details.
You take the waist measurement you had earlier taken . Add 2 inch to this as seam allowance. Divide this by 6.28. You get a number. Minus 1/2 inch from this ; This is A-B ; Length you need for the skirt + 1 inch is B-C
Example
- For my waist round of 30 inch . Add 2 inch = 32.
- 32 Divided by 6.28 and I got 5 inch.
- Now minus 1/2 inch from this.
- So I have 4 1/2 inches (A-B); This is how much I will have to take it out of the fabric I have ( my A-B).
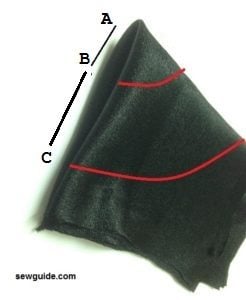
Fold the fabric you have by half lengthwise and then fold this by half widthwise. You will get 4 layers of cloth with a center point . Pin in place
Step 3
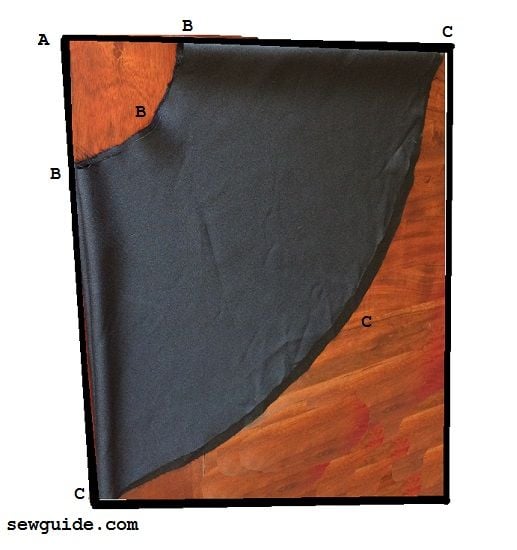
From the top point measure 4 1/2 inch down ( A-B). Mark every 2 inches points with this measure. Connect these points with a chalk. This is your waistline.
Mark the length of the skirt from this waistline(B-C) . Mark points every 2 inch. Join the dots to make a hemline ( Line C).
If you have a big hip, you had better measure the back length as well with the help of a friend. According to this, You will have to add 1 inch or 2 nch so that the hem doesn’t look raised in the back.
Step 4
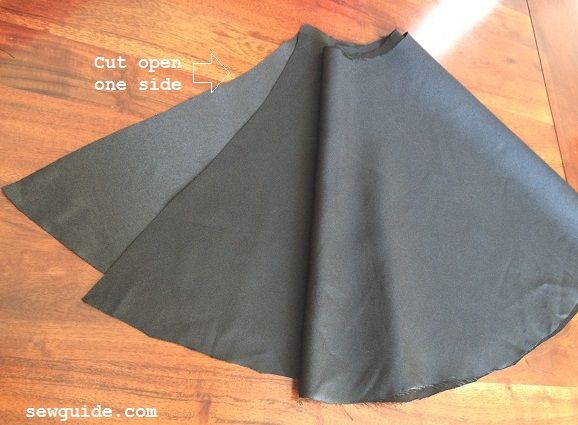
Cut along the lines. Now you have a big circle with a small hole in the middle. This is your main skirt.
Step 5
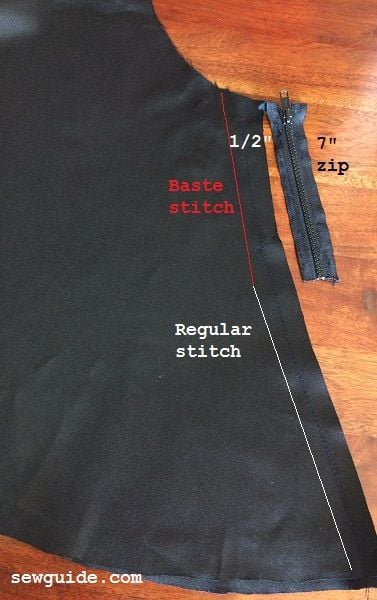
Cut one side of this circle ( any where down the length of the skirt) so that you have a seam to add the zipper
Step 6
Insert zipper
Sew the open seam with basting stitch where you will be attaching the zipper right sides of the fabric together) ; rest you stitch a regular seam.
Keep the zipper face down on the seam allowances, zipper teeth aligned on the seam line. Stitch the seam allowance and the zipper sides together. (Checkout this post on attaching zippers for more details)
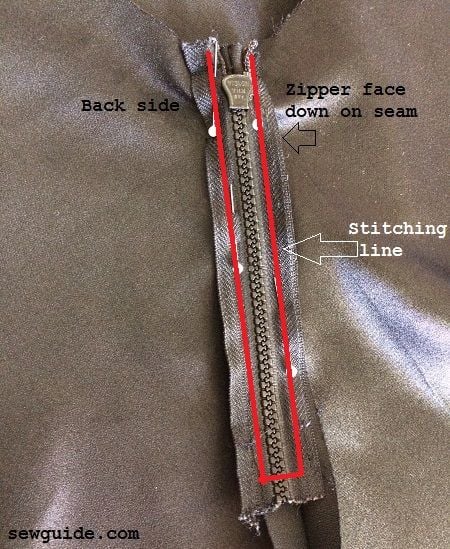
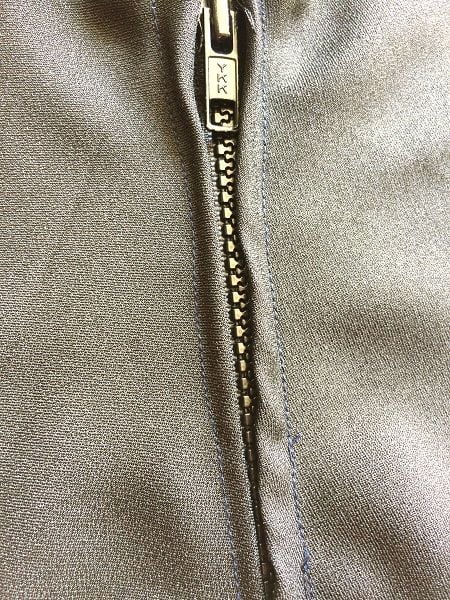
Open the basting stitches, after the zipper is attached.
Step 7
Add the waistband
Cut out the waistband piece; Measure the top of the skirt edge +1 1/2 inch – this is the length ; width = 1 3/4″ ( if you are sewing with a 1/4 inch seam allowance). I have added interfacing to the back of the fabric.
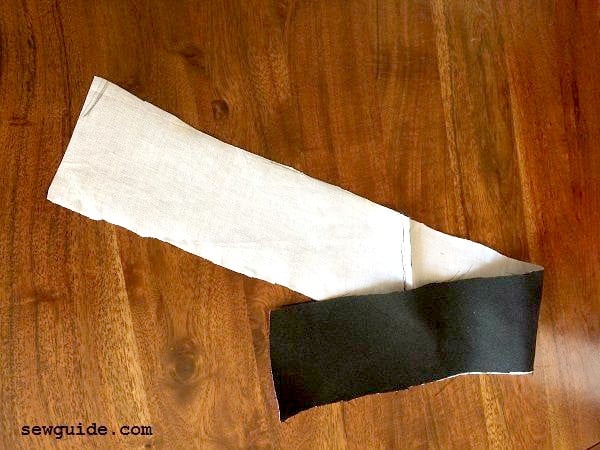
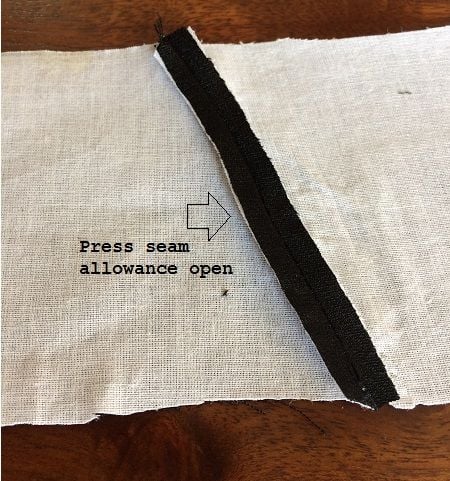
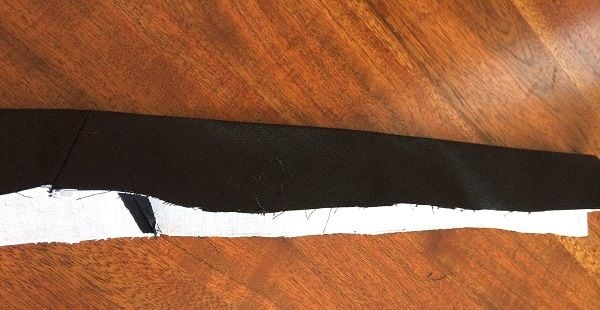
Because the fabric I had was not long enough I have joined two pieces together for the waistband. Then pressed the seam open with iron, so that there is no bulk.
Press the waistband by the center so that one side is slightly ( 1/4 inch) bigger than the other side. Just like you do for a bias binding. This is done so that you can stitch the waistband from the top and catch the back edge at the same time.
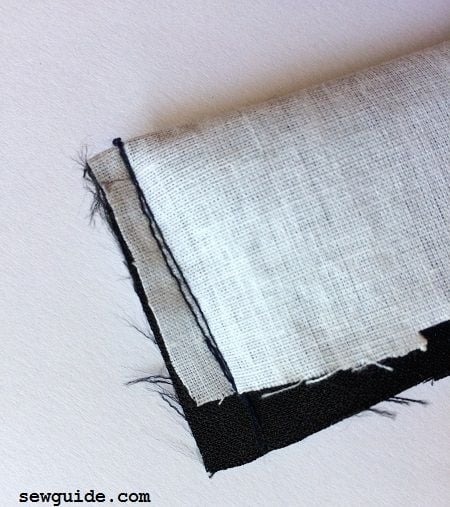
Turn the waistband piece wrong side out and stitch the short edges together like the picture below ; do this for both ends.
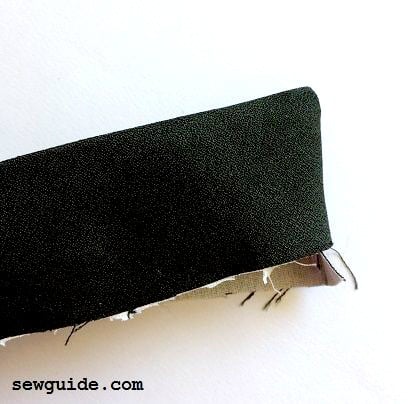
Turn the waistband rightside out
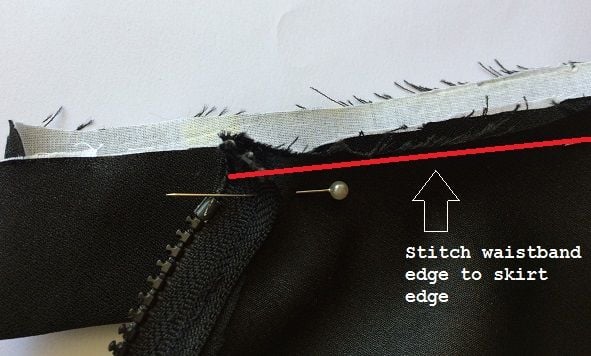
Stitch the waistband to the skirt top edge. Start from the extended edge. Keep the waistband piece ( shorter edge) and skirt edge together with a 1/4 inch allowance all along.
Now sew the extended portion. For this turn it wrong side out. Stitch the bottom portion closed – till the stitching line of the edge.

Turn this extended potion inside out. Use tweezer ends or pencil to turn the corners pointy. You can do a better job than me.
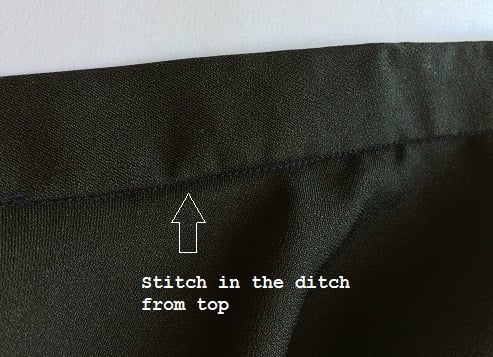
Now we have to top stitch ( stitch in the ditch) the waist band so that the back waistband edge is caught. First turn under the back edge ; use pins to hold in place all along the waistband.
Stitch in the ditch from the top ; the back edge will be caught automatically because you have a longer side there.
Step 8
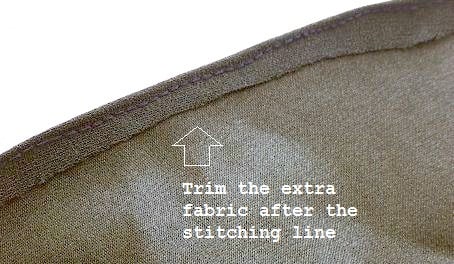
Hem the skirt – I used a narrow edge which is the best hem for these kind of skirts. To make this hem fold the hem a little to the inside and stitch along the fold. Trim the extra allowance close to the stitching line. Now stitch again along the fold – you will get the teeniest hem.
Step 9
Add the hook and the bar for the waistband. Check out this tutorial for adding hooks and eyes.
Related posts: Patterns for sewing