
This pattern is to sew a sleeveless Tank top with side tails and an embroidered yoke. I have done the simplest embroidery – Holbein embroidery stitch ( Kasuti stitch), double running stitches on the yoke. The pattern is very flowing and suitable for any body type.
Step 1. Cut out the pattern pieces
Fold a piece of fabric 60 inch wide and 1.5 meters long by half crosswise first and then by lengthwise. Checkout this post on cutting fabric for more details
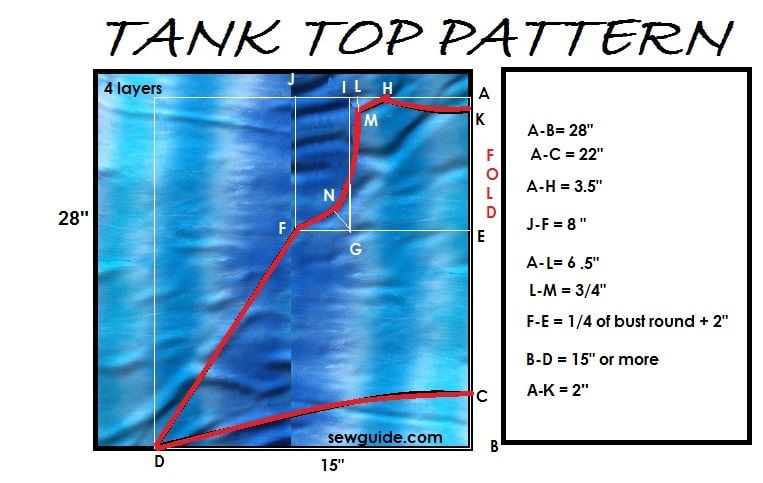
A-B= 28″ – This is the length of the top including the tails.More if you are a tall person
A-H = 3.5″ This is the neck width. You can take this as 4″ if you want a more loose neck.
J-F = 8 ” This is the armhole depth
A-L= 6″ This is the shoulder width
F-E = 1/4 of bust round + 2″
B-D = 15″ or more
A-C = 22″ Join C- D in a soft curve
L-M = 3/4″. This is marked from line A-L so that you get a small shoulder slope.
A-K = 2″. This is the back neck depth.
To mark the armhole. Please mark the armhole with a chalk or something removable as the marks maynot be cut out.
Mark A-I = 7″ Go down straight to G from I on line A-I. From G Mark 1″ up diagonally to N. Join F- M in a soft curved line touching N. This is your armhole.
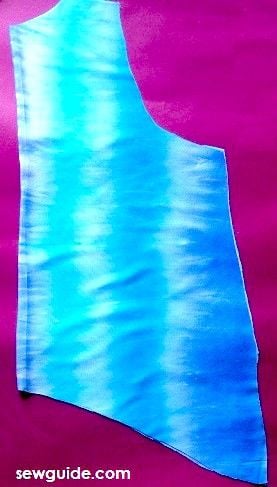
Cut out the two pieces. Separate the front bodice and back bodice. Remember that the front and back pattern pieces look the same . But in the next step we will be making the front bodice neckline.
Step 2 Finish the neck of Front bodice
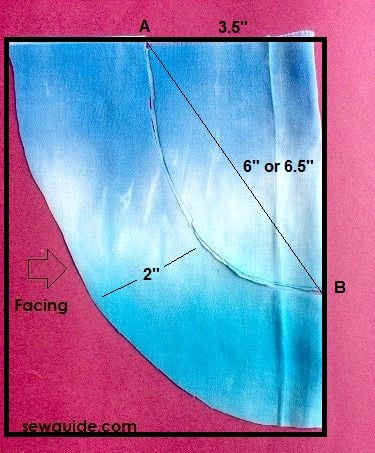
Take a 12 inch square fabric . You can use the same colour as your top or a contrast colour. Just remember that this facing is the yoke which will be visible from the outside.
Iron a piece of interfacing to this piece of cloth. Fold by the center.
Neck width is taken as 3.5 ” from the fold same as for the back ( you can take this as 4″ if you want a loose neck – just make the same change in the back pattern also). To mark neck depth mark from A to the fold – 6″ . Make a curved neckline as you like.Cut out the piece . Ensure that the facing is 2″ throughout.
Step 3 Do embroidery work
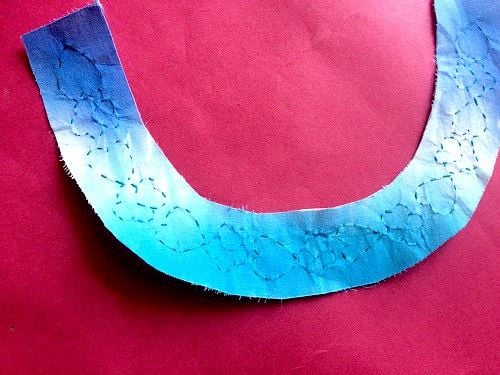
I have drawn the embroidery pattern on the back of the facing piece. Because Holbein stitch or Kasuti stitch can be stitched from front as well as back, I have taken the easy way out and free drew the design on the back so that I can work from the back. ( Doesn’t it look wonky – please copy pattern if you want perfection. My drawing is not perfect )
I folded the piece twice to mark the intersections where I should draw the flowers and drew with a ball pen.
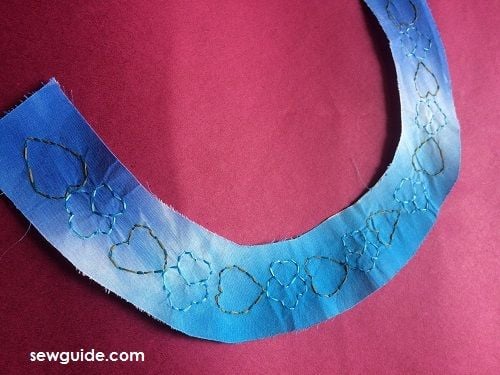
I did one way embroidery first. The Holbein stitch involves running stitches made twice.
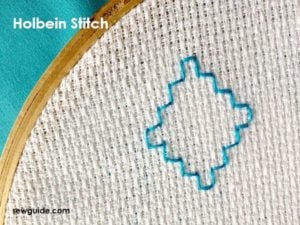
I have done the stitches using two colours of thread. If you donot have hand embroidery thread just use machine embroidery thread. I am easy like that. Just increase the number of strands on the needle.
Completed the embroidery stitches in no time . You can take your time and do it more perfectly than I did. Used a different coloured thread for the second journey with running stitches; I think this gives a depth .
Step 4 . Stitch facing to neck
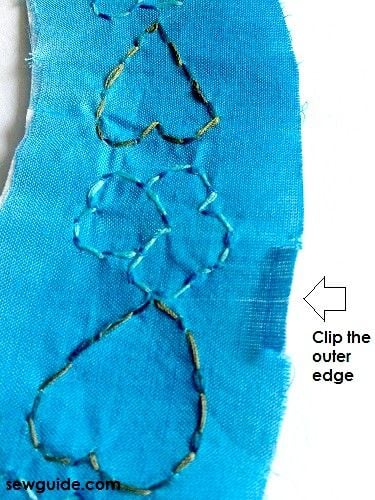
Clip the outer edge a little bit. Fold this part to the inside and press with a hot iron
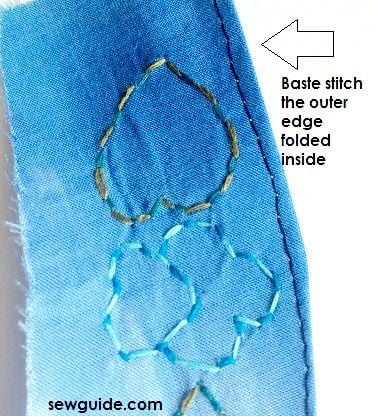
Make a machine basting stitch ( long stitches) along the outer edge. We will be removing this thread later. So use a different coloured thread so that it will be easier for you to pick the thread. This is done to fix the seam allowance to the inside and make the job easier when you sew this to the bodice
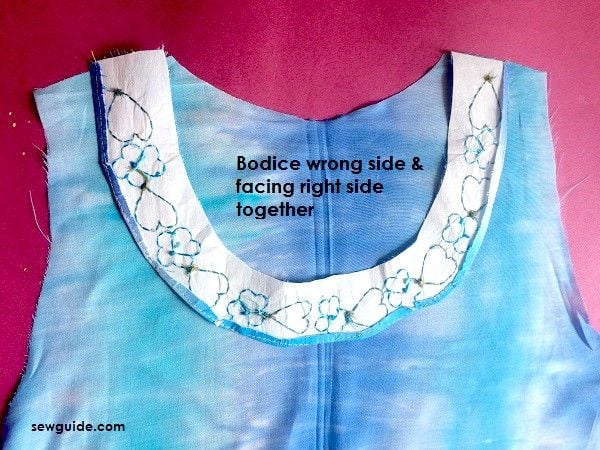
Keep the front bodice ( either of the two bodice pieces you have will do – remember they are the same) wrong side up. Keep the facing piece right side down on to the bodice, matching the neck edges. Pin in place .
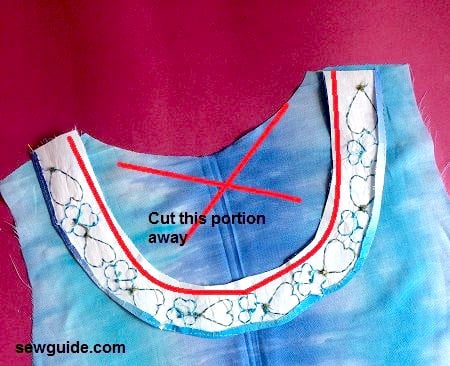
Sew along the inner edge with a very small seam allowance. Cut away the inner portion.
Clip the seam allowance every 2 inches.
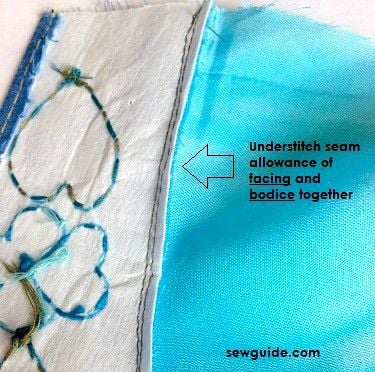
Now to make sure that the facing will go easily inside you can understitch the seam allowance of facing and bodice together. This is an optional step.Press.
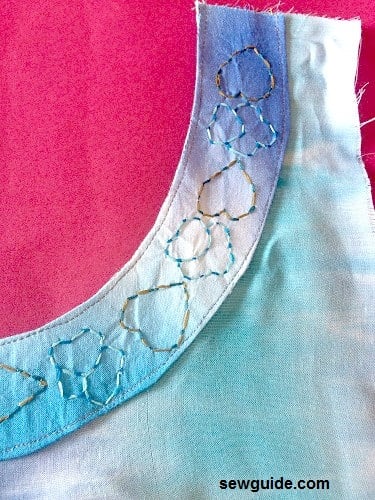
Flip the facing to the right side of the bodice. Press with hot iron so that everything looks good.
Stitch the outer edge of the facing and the bodice together. Start from the center of the facing and go to the sides so that there is no puckering of fabric
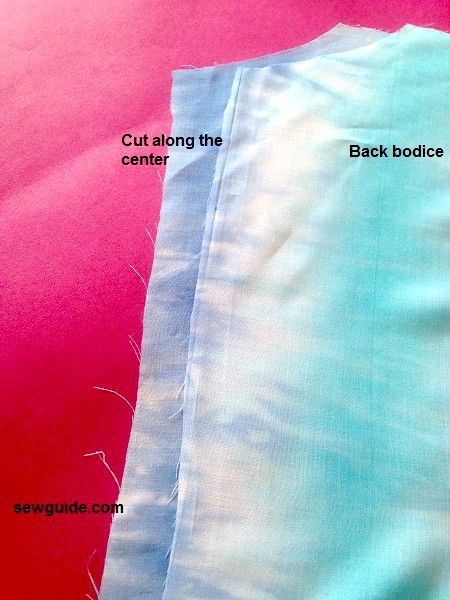
Step 5 Back opening of the back bodice
Cut the back bodice by the center.
Sew the back bodice, right sides together. Leave 5″ at the top unstitched . This is the opening at the top for hook and eye.
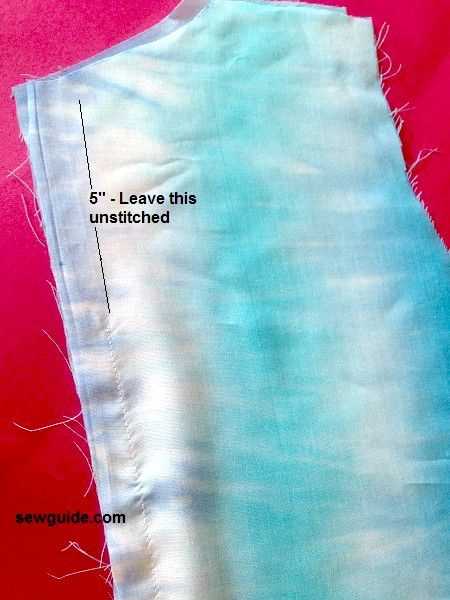
Press the seam allowance open from the inside of the bodice
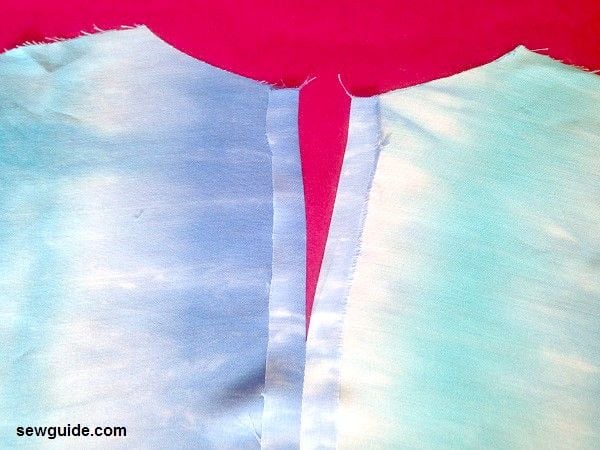
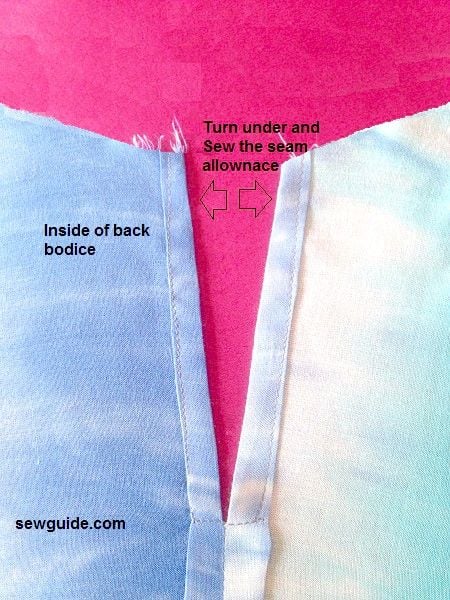
Fold the seam allowance at the top inside and stitch like you would do when making slits
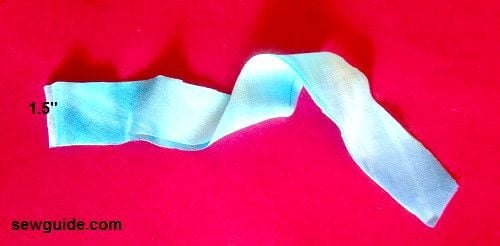
Cut out a bias strip 5 inch long which is 1.5 inch wide.
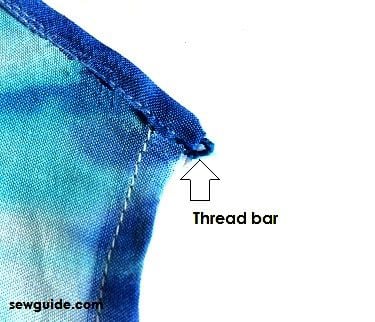
Bind the top neck edge of the back bodice
Sew the hook and thread bar for the opening. Checkout this post if you donot know how to sew the hooks and thread bar.
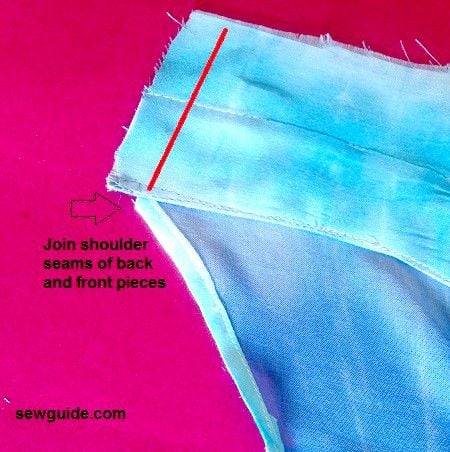
Step 6 Join the front and back bodice
Stitch the shoulder seams of the front and back bodice right sides together.
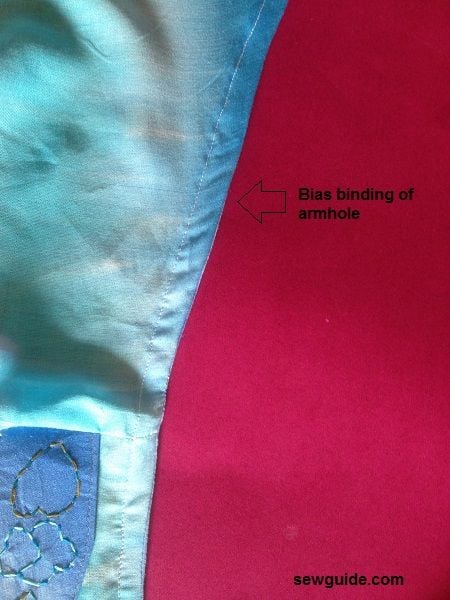
Step 7 Finish armholes
Cut a long bias strip from the same cloth. Bind the armholes with this bias strip.
Step 8. Finish the side seams and hem
Finally sew the side seams and the hem. I did a narrow hem ( baby hem). Done.

Thank you this is awesome.
Hi Sarina
I tried your shorts matters both the fitted and the elastic waist. They were easy to follow and with a small adjustment they fitted well. Thank you for making it easy to follow. I would like to know what is your standard seam allowance?
1/2 inch
Great
Your tutorials are amazing. Teaching myself to pattern draft… lol… I mean, YOU are teaching me how to pattern draft.
Thanks for everything!
Hi,
Thank for the tutorial!
What if you don’t want to make a slit in the back, can we leave it like that, or should we cut the back side smaller?
Thanks
Hi
I think the neckline is a little close to the neck and you may need the opening. You can draft it lower and then avoid the slit
Ok,let me try makiing this one – love tank tops
🙂
Thank you for the effort, keep up the great work Great work.
Thanks 🙂