Free very simple DIY TUNIC pattern for women.
This is a very easy to sew tunic top/dress DIY pattern which you can make with minimal pattern making experience. Stitching it up is also very easy and possible to start and finish in less than an hour.
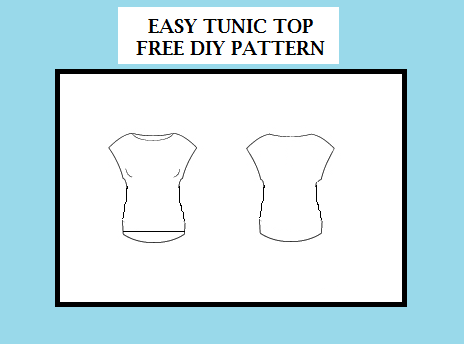
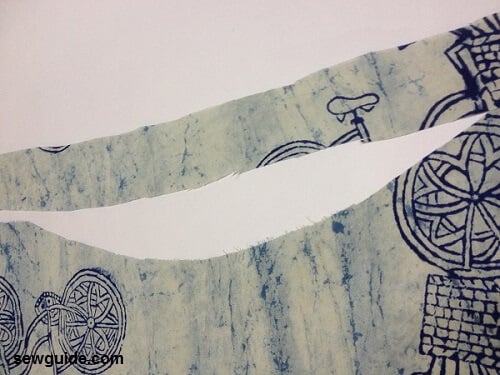
This top has a very modern irregular hem and short kimono sleeves ; It is very modest in that it lies below hip in the back and well below waist in the front. The length given in the pattern is for a top but it can be adopted as a delightful tunic dress also.
This stylish but comfortably fitting tunic will look best paired with thin pants . Loose bottoms will create an undesirable baggy look. You can add a belt to this tunic along with a long chain to look ultra fabulous.Checkout the tutorial to make an easy leggings pattern and sewing instructions.
If you are making this is as a nightwear checkout the tutorial to make a pajama pants to go with it for a comfortable combination.
How to make a sewing pattern for a simple tunic
Two important things to consider before making the pattern – if you want a loose fitting tunic choose the next size ie if the bust round is 32 inch choose the measurement for a 34 inch. Always prewash the fabric before sewing it up. I have had tops shrink a size smaller after the first wash.
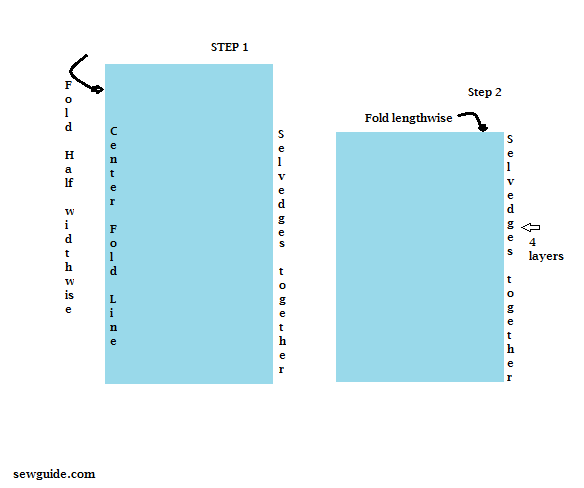
You need about 1.60 meters of cloth for this top. Fold the fabric as per the diagram below . For more details Check out this article on how to cut fabric properly
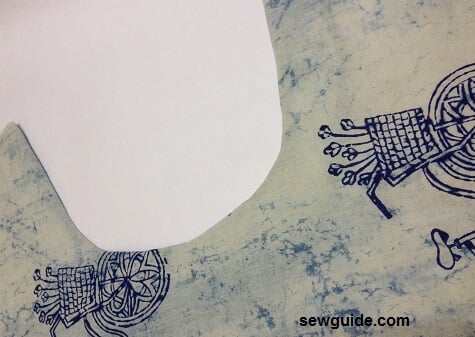
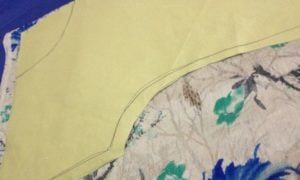 I have made a paper pattern first. Then kept it on top of the cloth folded as above and marked with a chalk all around it.
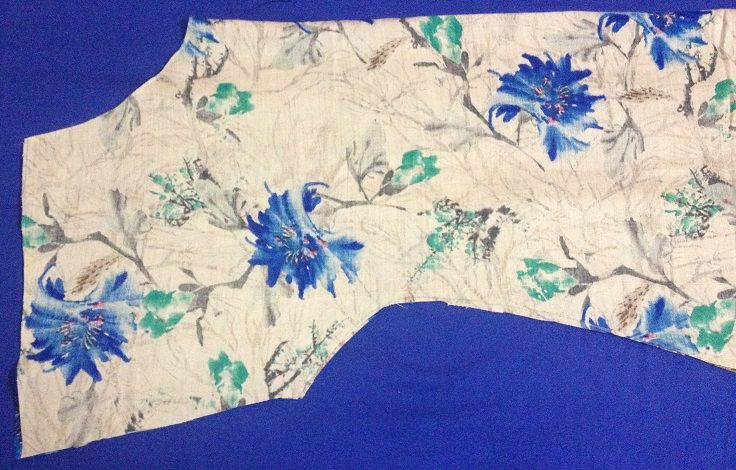
Mark the Back pattern on the top piece first. Cut the 4 layers as per this back pattern measurements. Remove the fabric piece inside – you have the back pattern.
Now start marking the remaining cloth. This is the front pattern now.
Make sure that you have cut out all the chalk lines. They just add up.
You just need to mark front neck and bottom hem different in the front pattern.
Mark Back pattern for a tunic top/dress
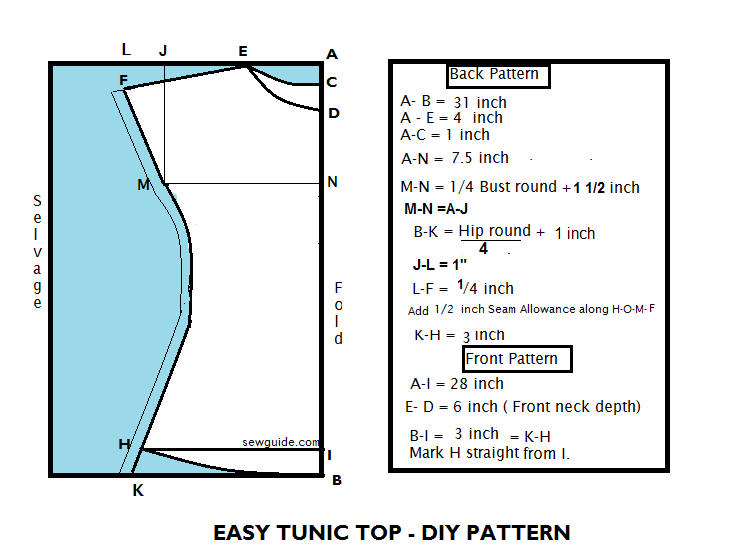
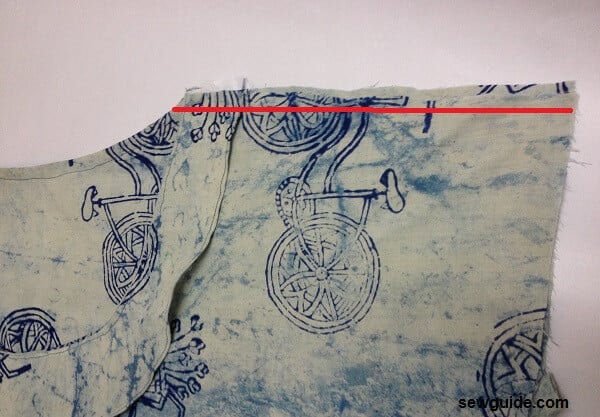
Mark A-B which is the total length of the top. You can increase this if you want to make it as a dress = 31 inch
Mark the length from top to Armhole ( armhole depth) 7.5 inch
Mark the length from top to waist as A-J
Mark N-M as 1/4 of the Bust round + 1 1/2 inch ease
Mark B -K as 1/4 of hip round + 1 inch ease ( increase this if you want more flair).
Add 1/2 inch seam allowance along F-M-O-H
Mark the Neck width A-E as 4 inch.
A-C as 1 inch
From E mark 10 inch to L for shoulder
Go down to F 3/4 inch
Join F- M
Add 1/2 inch seam allowance along F-M
For the bottom hem curve go up 3 inch from K to H
Draw a soft curve from B
Cut out this portion including the neck hole for all the 4 layers.
Remove the inside piece – this is the back pattern.
Mark Front Bodice pattern
Mark the rest of the pattern for front bodice on the remaining piece.
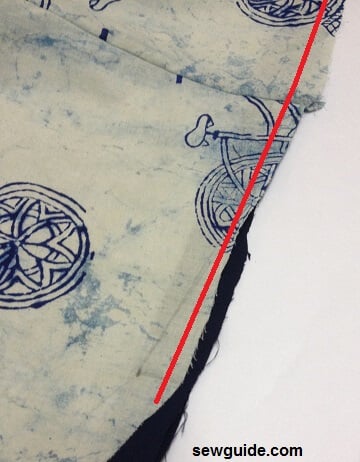
Mark up 3 inch from B to I
From I join in straight line to H
You just need these two pattern pieces and strips of bias tape to sew this simple and easy tunic and a facing piece for the front neckline
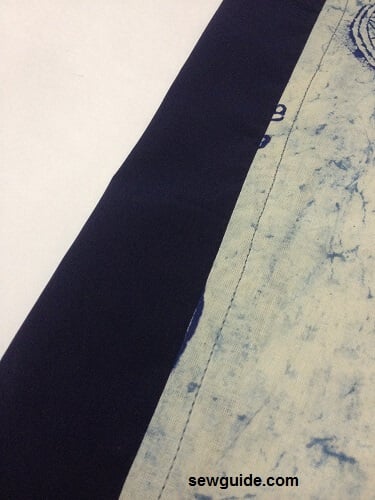
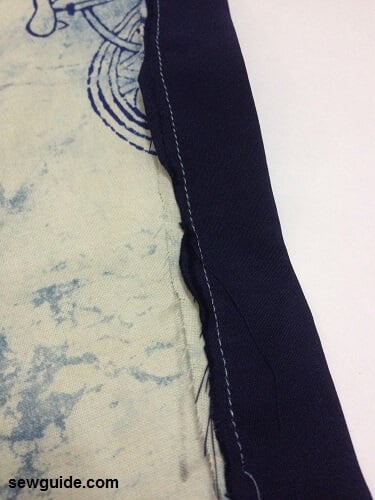
I wanted to add a piece of contrast coloured fabric to the front bodice bottom edge so cut off some of the main fabric and added the extra strip of fabric by fold.
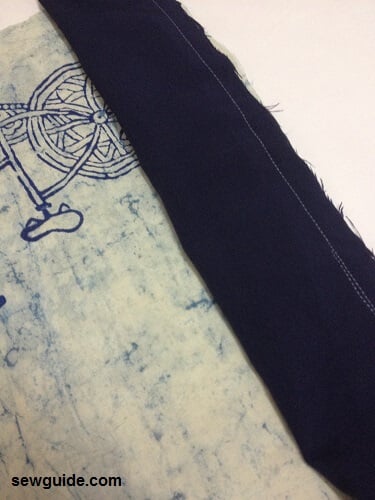
Top stitched this in place.
How to make the tunic top or dress
Sewing this up is as easy as making this pattern. The fact that this pattern doesnot have sleeves makes it all the more quick. Just 6 quick steps and your Beautiful tunic is ready.
Step 1. Finish the necklines
Back neckline – Cut out a strip of bias binding strip of 2 inch for the back neckline. Checkout the article on bias binding for more details .
Keep the bias tape on top of your back neckline right sides together.Pin in place. Sew them together along one edge with a 1/4 inch seam allowance
Snip along the seam allowance every one or two inches.
Turn the bias binding to the inside and stitch in place.
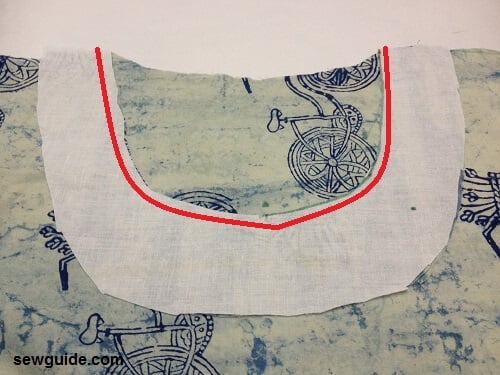
Finish the front neckline with a facing
Actually you can finish the front neckline with a bias strip as well but the facing gives a neater look. So skip this and bias bind if you are in a hurry.
Make a facing as per the pattern given on a piece of fabric with interfacing attached.
Change the neck length to your choice. I have taken 7″.
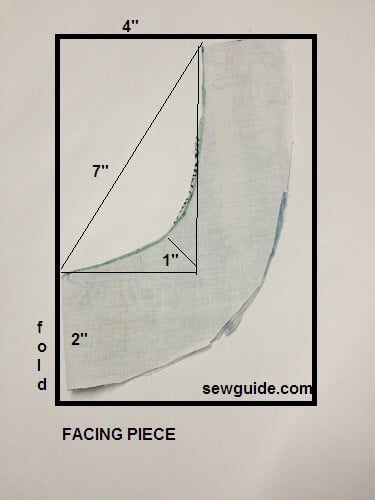
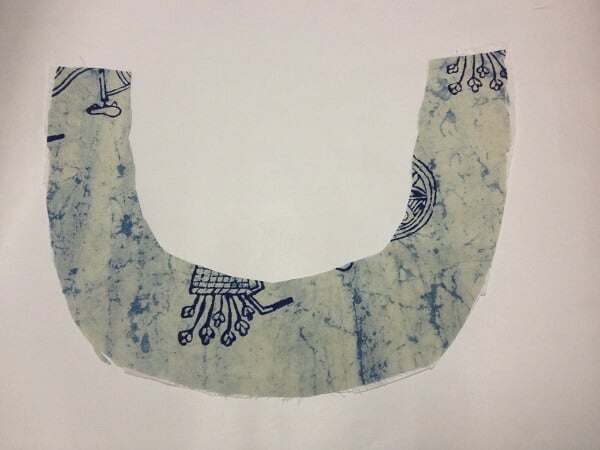
Cut out the pattern piece and you will get the piece as given below.
Keep the facing on top of the bodice matching the neck width markings. Pin in place.
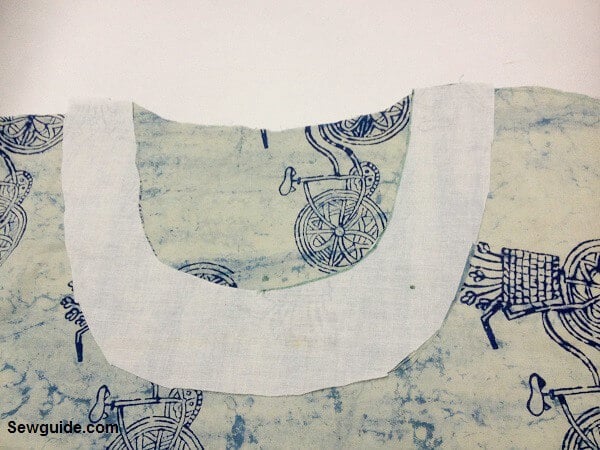
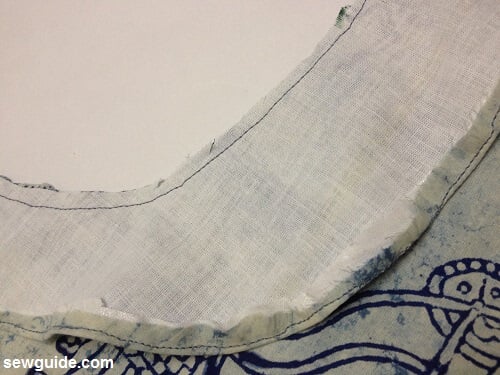
Stitch the facing in place with a very small seam allowance
Cut the inside piece. Clip the seam allowance. Finish the edges of the facing as well
Understitch- this will make the facing roll to the inside easily
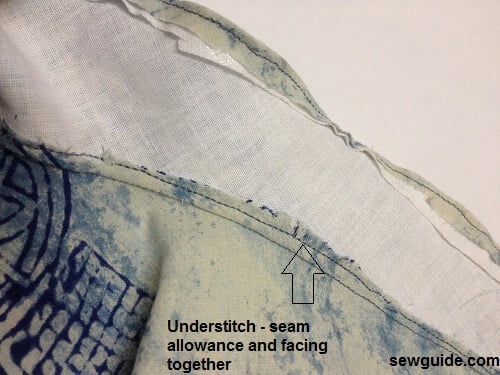
Turn the facing to the inside and it will look neat
Step 2. Join the shoulders
Keep the shoulder seam together of the front and bodice patterns Right side together.
Pin in place and stitch the shoulder seams
Step 3.
I have decided to make a small cuff at the sleeve edge.This can be skipped altogether and the sleeve hem finished by turned under edge finish
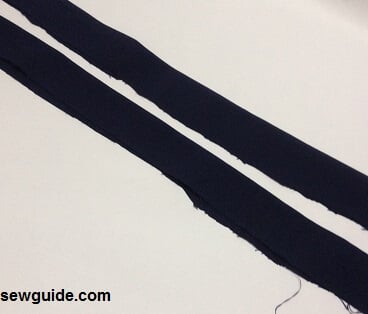
Take 2 pieces of fabric strips 2.5 inches wide and 16 inches long. Fold by the middle (length wise) and press ( you have the fold to one side and two edges together).
Keep this piece under the sleeve edge ( cut edges together) and stitch the edges together
Turn the folded strip to the front bodice
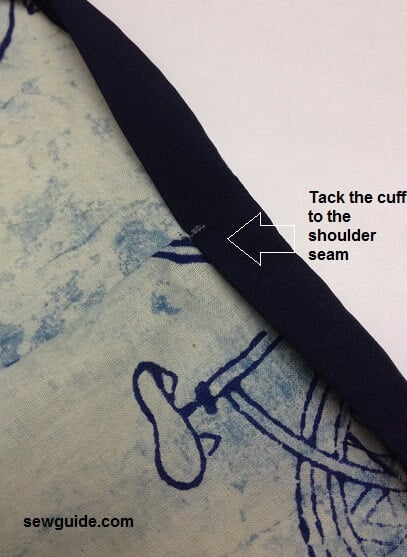
Turn the cuff to the front of the tunic. Tack stitch the cuff in place
Step 4. Finish the bottom hem of the back bodice. A narrow hem or bias facing should be used especially for the back bodice hem because it is curved. I have used bias binding
As I have the extra fabric folded bottom edge at the front bodice no need for finishing this edge
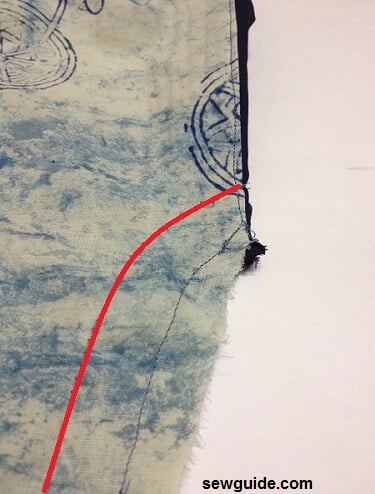
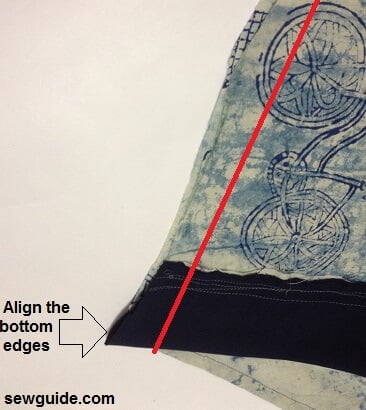
Step 6. Join the side seams of the front and back bodices with a 1/2 inch seam allowance.
Ensure that the sides match and the sleeve cuff is turned to the inside.
Finish the fabric edges for a neat finish at the inside as well

Reference
Related posts