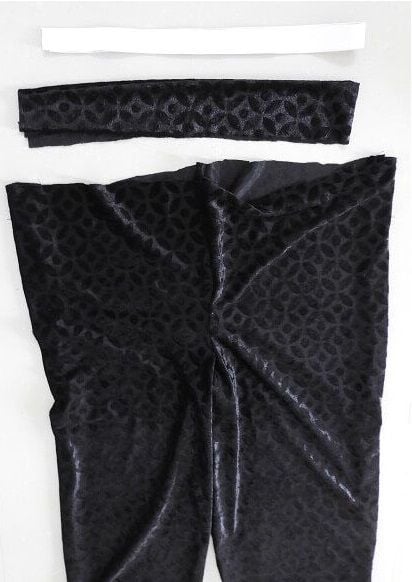
A Capri pant is a long fabric shorts. Also known as Capris, the hem of capri pants ends somewhere around a woman’s mid-calf. The casual look of the capris pants makes it very attractive on kids as well as adults. This is a sewing pattern to make this cool and casual capri pants.
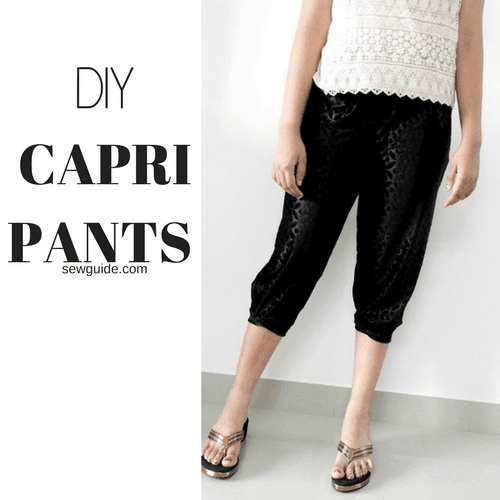
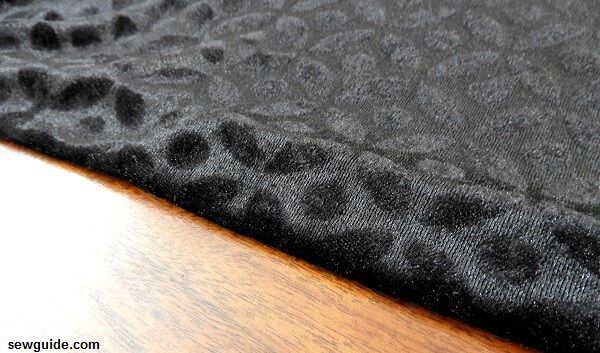
You should choose a stretchy fabric for making this pants ( especially for the waistband and the ankle bands). I have selected a slightly stretchy embossed velvet fabric. It is not as garish as it looks in the photographs, believe me.
Check out the post on the different types of stretchy fabrics
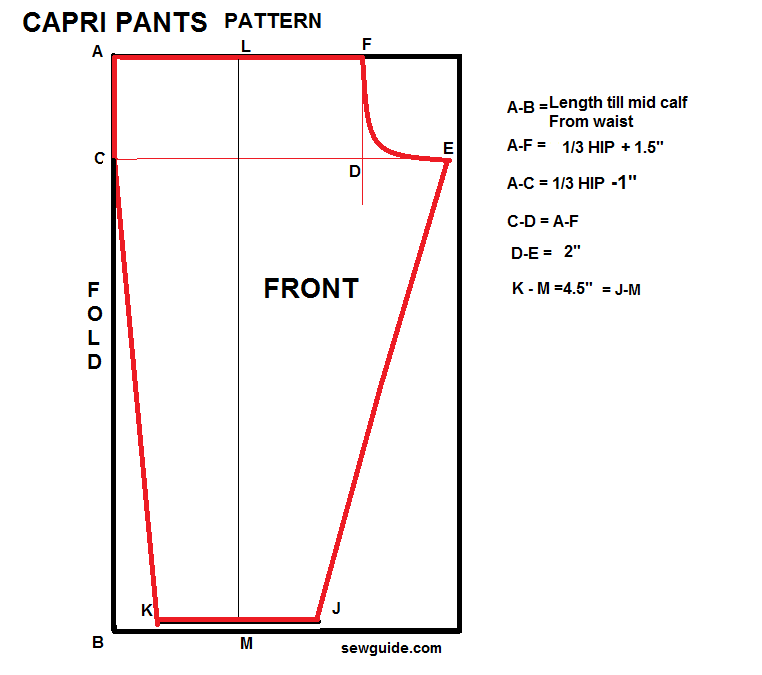
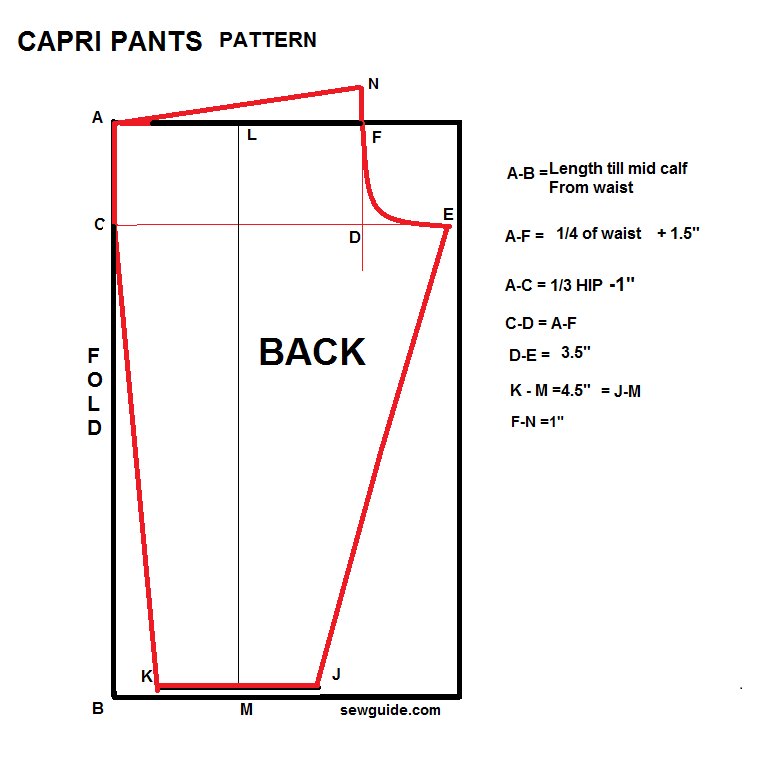
Sewing Pattern for the Capri Pant
Measurements: Take the waist round – ie where you will tie the waist of the pants; take hip round; take calf round where you want the pants to end.
You have to cut 2 pieces of the front leg pattern and 2 pieces of the back leg pattern
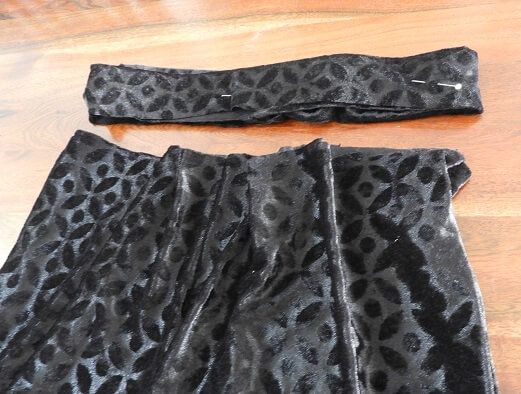
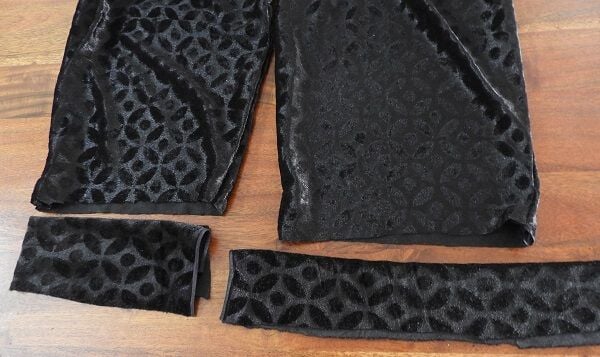
You also need 3 pieces of fabric strips ( cut with stretch – ensure that the fabric will stretch when you pull it lengthwise or else you will not get into your capri pants). 3 inches wide
Sewing the capri pants
Step 1
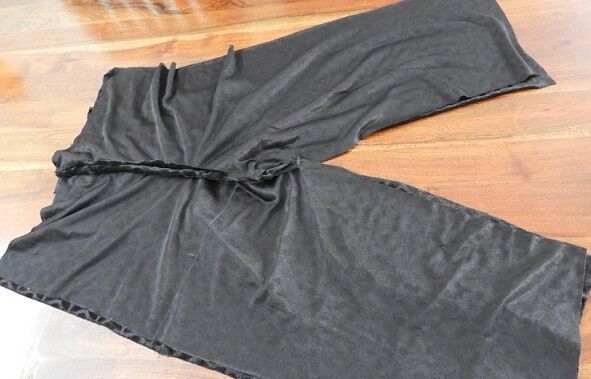
Keep the front leg pieces right sides together; sew along the crotch line
Keep the back leg pieces right sides together; sew along the crotch line
Your four leg pieces have become two now – the front and back pieces
Step 2
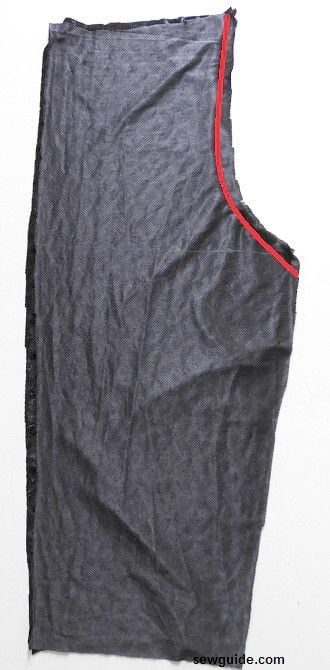
Keep the front and back pieces rightsides together
Align the sides and pin in place ; stitch the sides and the inside of the legs (red line in the picture below)
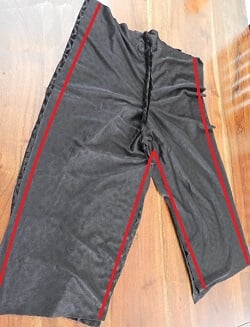
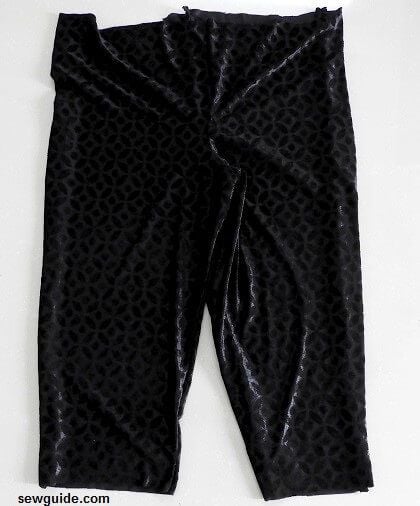
Turn the pants right side out
Step 4
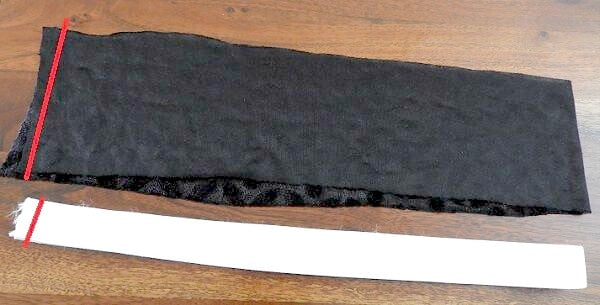
Prepare the waistband
Cut out 3 inches wide fabric piece (with stretch) length equalling your waist round plus 2 inches. ( This band should go over your hips)
Cut out 1/2 inch or 3/4 inch elastic the length of the measure around the waist.
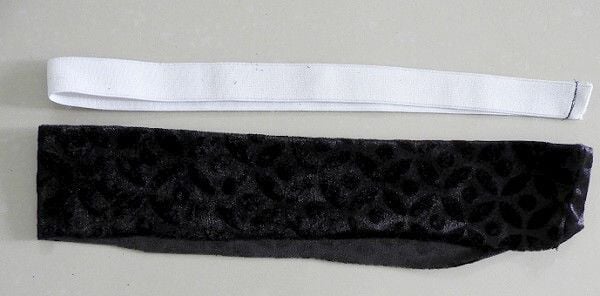
Sew the end edges of the fabric pieces together, kept right sides together.
Sew the edges of the elastic also together
Turn the fabric piece inside out folding by the middle.
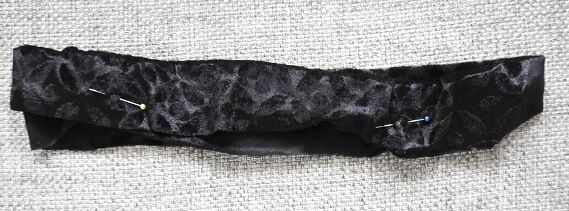
Insert the elastic ring you have made inside and Pin the fabric edges. You should ideally baste stitch along the raw edges – this will make it easier when you sew the pant waist
Step 5
Pleat the pants. The front portion of the pants should be given some small pleats – enough to fit the waistband you have made.
Step 7
Keep the fabric edges of the pant piece and the waistband piece together. Stitch the waistband and the pant piece top edge together.

Step 8
Stitch the leg bands. This is stitched the same way as the waistband, but without the elastic. The fabric piece is cut 3 inches wide and length equalling your calf round + 1/2 inch sewing allowance. ( Absolutely necessary that this piece has stretch)
what is the seam allowance for the pants crotch area and legs and waist when joing front to back? is that accounted for in your diagram measurements or do I need to add those on?
Included
what is the seam allowance? 1/2″? 1/4″?
Thanks much for excellent work you organised
What does 1/3 HIP mean, I’m sorry, I’m just starting out and have never used a pattern before, and I can’t find a definition anywhere
Measure around your hips. Take a third of this measure
I’ve decided to take apart an old pair of my carpris and copy that pattern, knowing they will already fit me. I just need to figure out what type of material to use that stretches so well. And how much I will need. Great idea to sew me up some colors that I can’t find in the stores.
Hi Paula
You can buy double the length of the pants plus 1/4 meters extra.
What size are these can you make them bigger for plus women thank u vicky
I can’t find any pattern
I can only find the back pattern
Hi Debora
Can you refresh and see because I can see it
there is only a front leg pattern…no back leg pattern
Hey there! How many yards of fabric do I need for this?
Hey Emma
Double the length + 1/4 meters is the conservative guestimate I use for pants