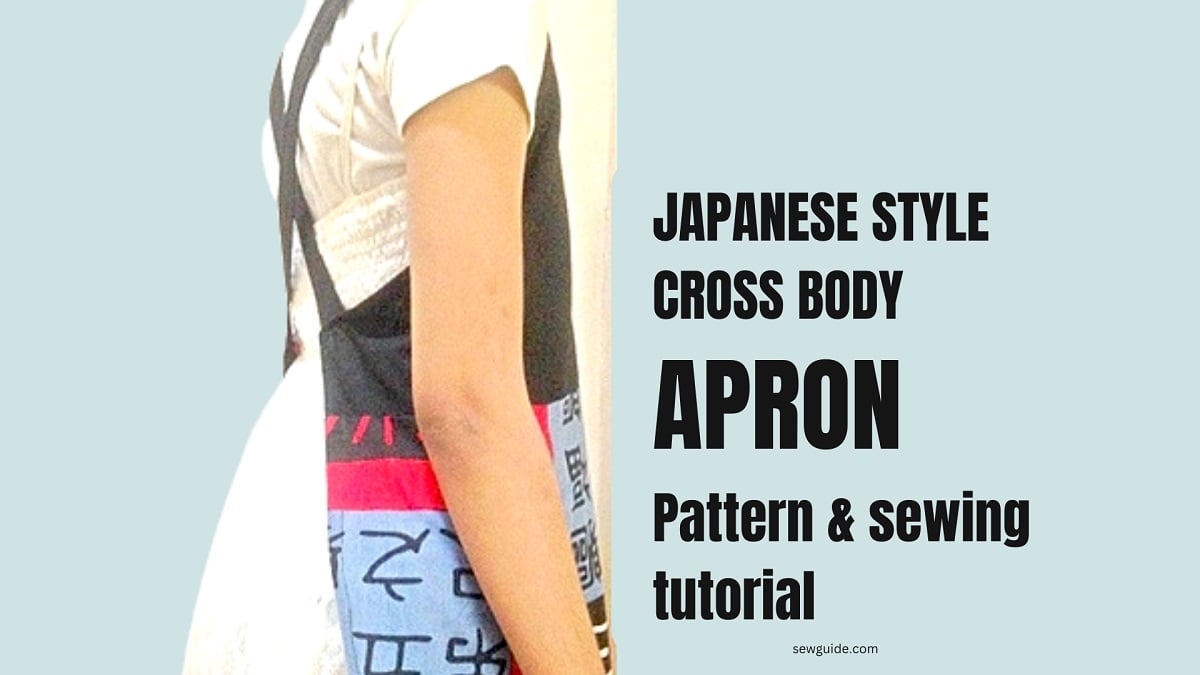
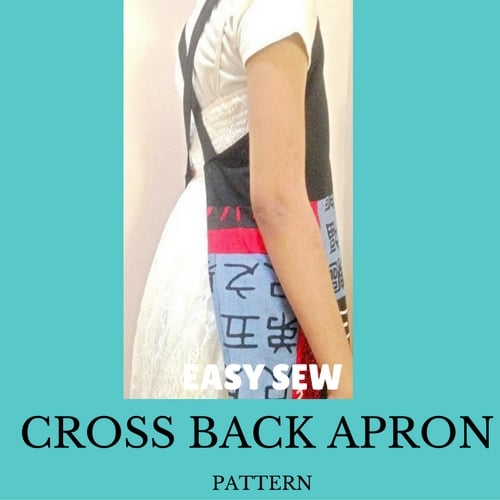
This is a customizable pattern to make a Pinafore apron, most popularly known as the Japanese style apron with cross straps in the back. This is a great apron for cooking, gardening, or general tinkering. Makes a great gift for the tinker you know who desperately needs it (me?).
What puts me off the normal aprons are the ties – they refuse to untie when I absolutely want to. The advantage of this apron is that you do not have to bother about ties. You just have to put it on (slip it on over your head), and it will protect you and the favourite dress you have on from all the mess you may have to deal with.
Cotton is the most suitable fabric for making this apron. You can make this in linen for a very sophisticated and rich look.
“No ties” Japanese style Pinafore Apron
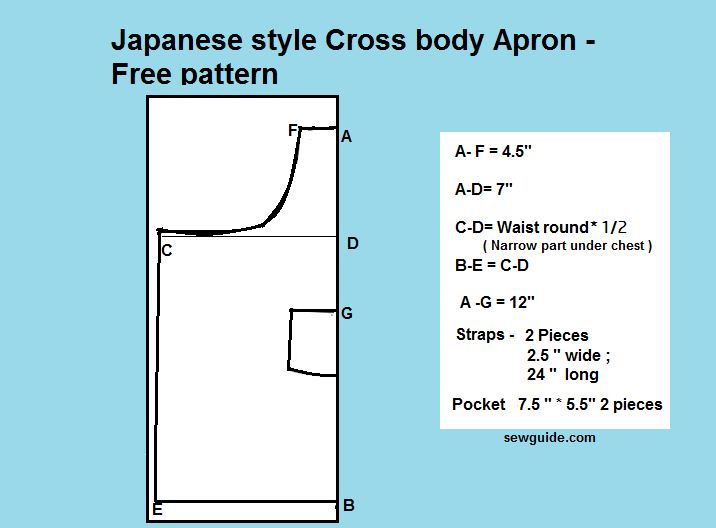
The measurements you need to make for this apron are the waist round and the height you want. You need about 1 meter (1.09 yd) cloth to make a knee height apron.
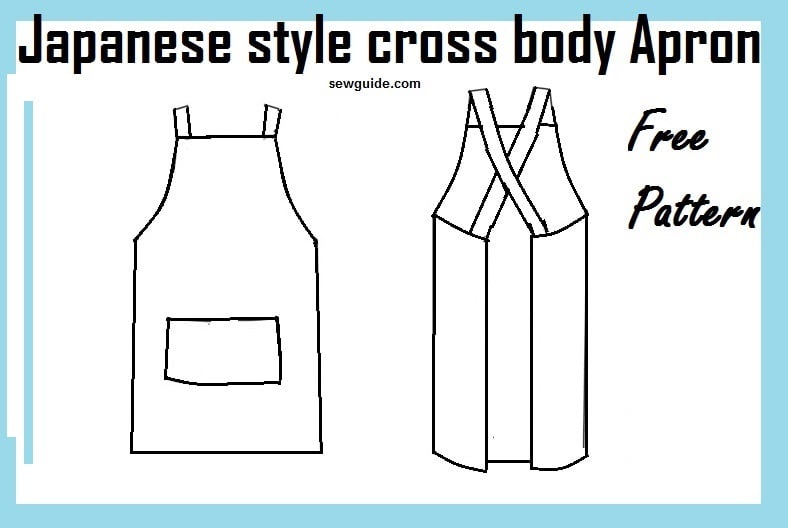
How to sew the Cross Back Apron
Step 1
Fold the fabric piece by half. Mark the pattern on the fold. Cut it out.
Cut out strap pieces and the facing patterns for the top edge and armholes (optional; you can also turn under the arm line to make it simpler).
Straps for the japanese apron
For a height of 4 feet to 5 feet, a 20-inch strap ( final strap 18 inches) would work for a comfortable fit. For above 5 feet, you need 24 inches ( final strap 22 inches ).
Basically, it is 2-inch seam allowances Plus a measure of shoulder to waist plus 7 inches. If you are sewing for yourself, Cut more than you want and then trim to the length you want.
Step 2
Sew the armholes by making a facing as I have done or by turning under the edges 1/4 inch twice. Cut a bias strip of 1 inch for this.
Sew the side edges by turning under the edges 1/4 inch twice.
Step 3
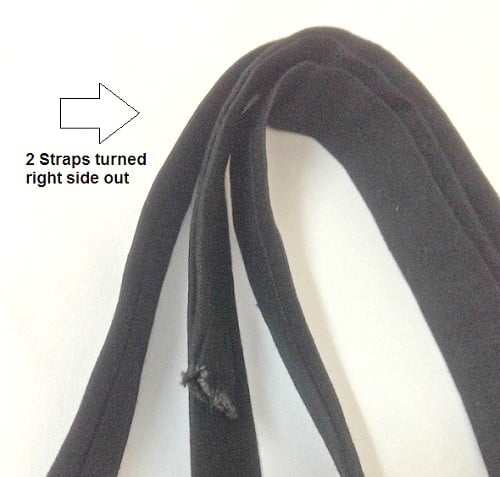
Make 2 straps by folding the fabric pieces by the center lengthwise and stitching the edges together, right sides together. Turn the fabric tube you have got, right side out, by using a safety pin.
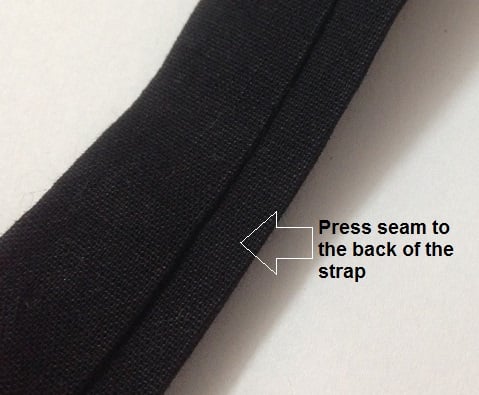
Step 4
Iron the seams of the two straps to the back.
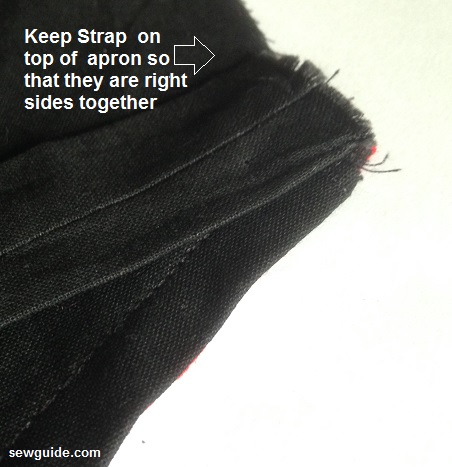
Step 5
Keep the strap edges seam side up on top of the apron, near the edge.
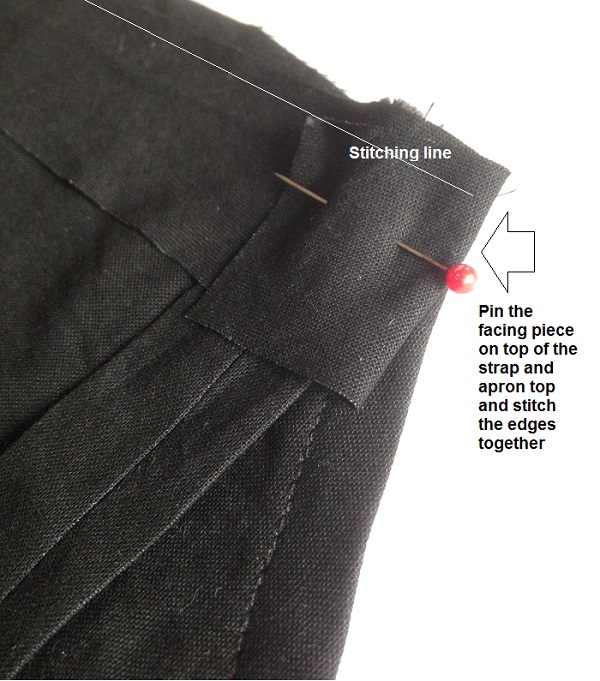
Keep the facing piece on top of these and fold in the edges. Pin.
Stitch all of these together at the top edge with a 1/4 inch seam allowance.
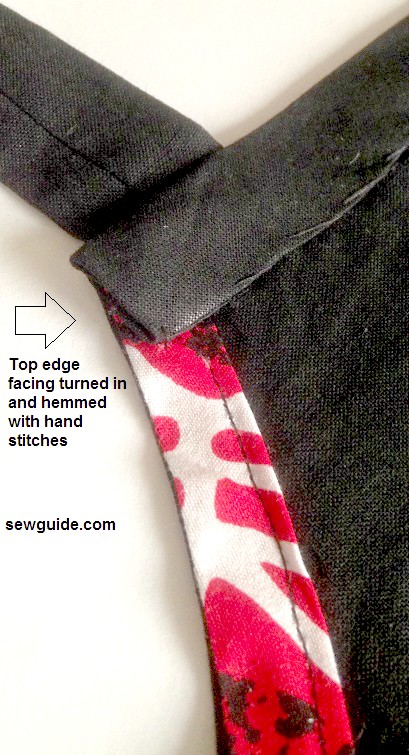
When you turn the facing piece to the back, you will get the strap right where you want it.
Turn to the wrong side of the apron, and turn under the facing piece edge 1/4 inch and hand stitch the edge.
Attach the other ends of the straps crosswise to the back edges of the apron. Left strap to right back and right strap to left back.
If you want, you can add a patch pocket in the front, or the sides. If you would like to know further about sewing patch pockets checkout the tutorial.
Just slip the straps over your head and you are wearing an apron which is almost like a fitting frock and which also protects your dress. Additionally it gives you an aura of a serious ‘worker’, which my daughters seem to relish.
Disclaimer : I hope I didn’t sew the Japanese letters upside down in the apron. If I have, it is completely out of ignorance of Japanese fonts and nothing else.
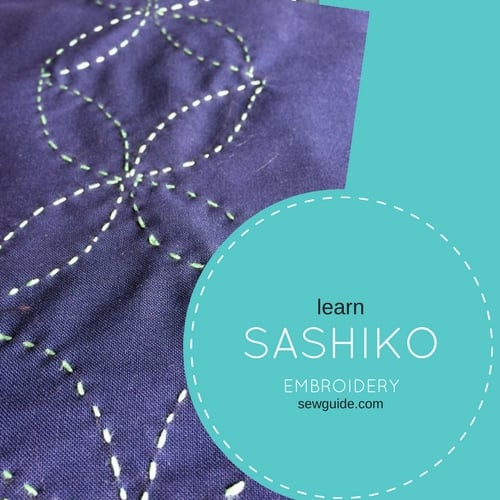
If you would like to, make it completely Japanese by stitching the beautiful sashiko embroidery. You can find the tutorial to do the sashiko embroidery here.
Related posts
More like this:
hi, I am looking for cross body apron pattern. Where is the cross-body apron pattern? I clicked Free Pattern, and I cannot find the cross-body pattern.
Thanks,
TracyBeth
Where is the pattern?
I made your apron today for my sister’s Christmas present. I doubled the width of the straps and made larger pockets. I found your instructions and drawings very clear and easy to follow. Thank you.
I can’t see what are the mesurement of : A to B and C to E.
Also, I am not sure, for C to D: if it take the waist round * 1/2, it is like dividing it by 2. So, is it half of the waist round or the waist round * 1,5 ?
These seem so easy, however, I always have trouble getting the curve from point F to point C. Why does nobody give a measurement from the fold to the center of that curved cut to tell how deep the curve should be???
My suggestion would be to make some slits in the sides of this apron to allow you to easily access pants pockets underneath the apron. I would still put pockets in the apron itself but I believe a couple of slits would be useful too
Hi Cathy
Good suggestion. Thanks
Thank you for this pattern. I found the $100 price tag for quality work aprons prohibitive. I made mine for under $20.
I have seen these $100 dollar + aprons. I can’t believe someone would pay a $100 for an apron…that’s a dress.
I made mine from fabric had laying around. Even sold some.
In regards to the Japanese style cross body apron pattern….should the distance from D to C be the full “waist round” or half of it?
For example if a waist round equals 30 inches, then does the un-folded fabric width equal 60 inches?
I am very, very new to pattern interpretation.
Hi Jane
Your pattern interpretation is not at fault – my diagram is – sorry for the mistake. please take 15 not 30
corrected . Don’t know what I was thinking
Thank you!
So, the unfolded piece would measure 30?