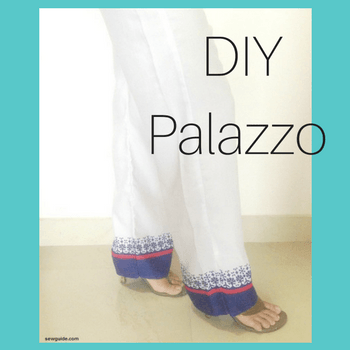
My palazzo pants are among the most worn of all my garments. They are super comfortable and contradictorily trendy as well.
As a summer favorite Palazzo is there among the top. Flowing, breezy, relaxing, loose, and stylish all describe Palazzo pants very well.
They team up well with tunics, blouses, t-shirts, skirts, kurtas, and Kaftans.
I think they look the best with fitted tops and blouses because the silhouette of Palazzo pants (like Harem pants) can get a little baggy if the flare of the pants is too wide. These pants go very well with crop tops with a slight show of well-toned midriff.
Check out How to wear Palazzo Pants
When sewing pants, the most important thing is fit. Style comes close behind.’ Being comfortable does not mean that you should sacrifice fit. Most parallel pants come with extra bulk at the waist and hip. But not this one. This will hug your hips lovingly and flare beneath to good shape. Choose the flare you want, sew Palazzo pants for yourself, and join the tribe.
How much cloth do you need to sew a Palazzo?
Double the measure from your waist ( where you will tie the palazzo) and add .25 meters. That is how much fabric you need for palazzo pants.
Basic colors like Black, White, and navy blue work well with most upper wear. You can also choose to sew these pants in printed fabrics. I especially like the Elephant prints on Palazzo pants. They look ethnic and modern at the same time.s
The basic colours like Black, White and navy blue work well with most upper wear. You can also choose to sew these pants in printed fabrics. I especially like the Elephant prints on Palazzo pants. They look ethnic and modern at the same time.
How to make a pattern for Palazzo pants ?
There are two methods for making Palazzo pants; the first one is the easiest, but it is slightly baggy; the second one is more fitted around the hips and waist.
Method 1. Easy Palazzo pants pattern
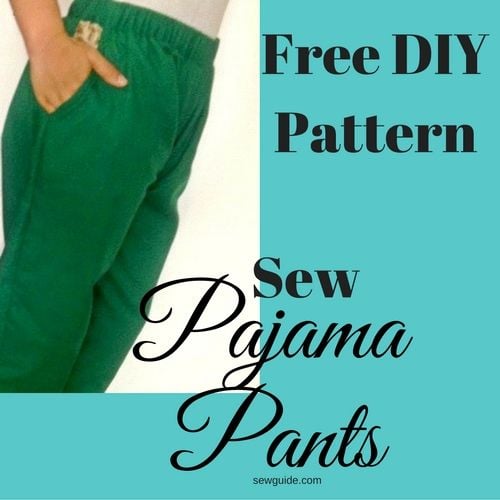
How to sew Palazzo pants
Very easy – finished – Just insert 1/2″ wide elastic with a pin and you have a palazzo.
Checkout the tutorial to sew a drawstring lounge pants which is very similar, but with a different band for the waistband
Method 2 – Palazzo pants
This pattern makes Palazzo pants with a flat front and elastic waistband back.
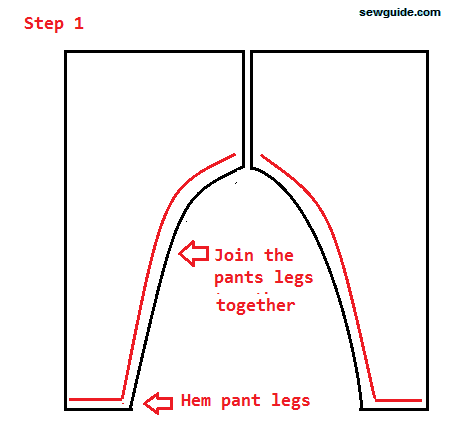
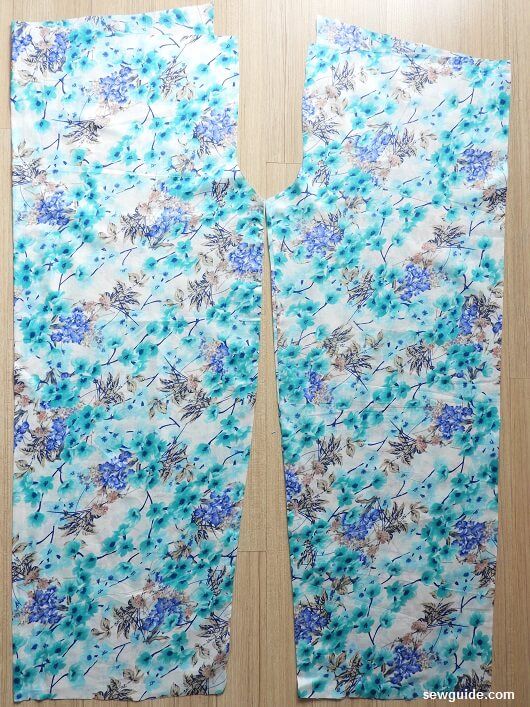
Step 1 Cut out the pattern pieces for the legs
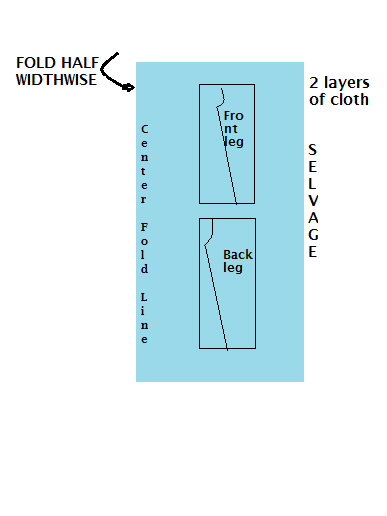
You will have to take two pieces of fabric with a length equalling your final pant length plus 4 inches. Keep the two fabrics right sides together. You can mark the pattern given below.
( I have a shortcut for marking this – Fold the two pieces by the center. Mark the pattern given below for the back alone. Then open the fold and then on one side, mark the front and cut it out)
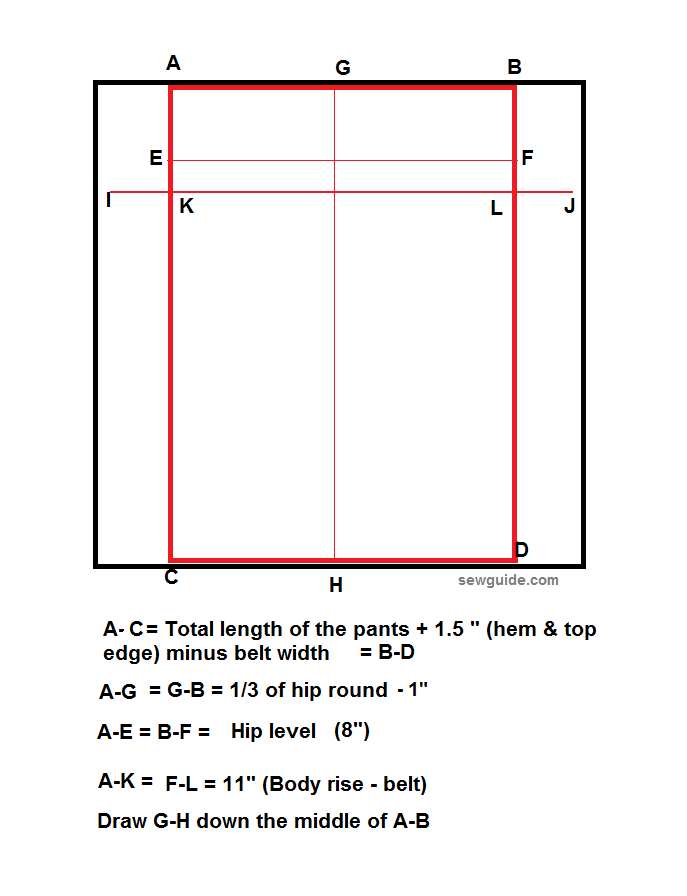
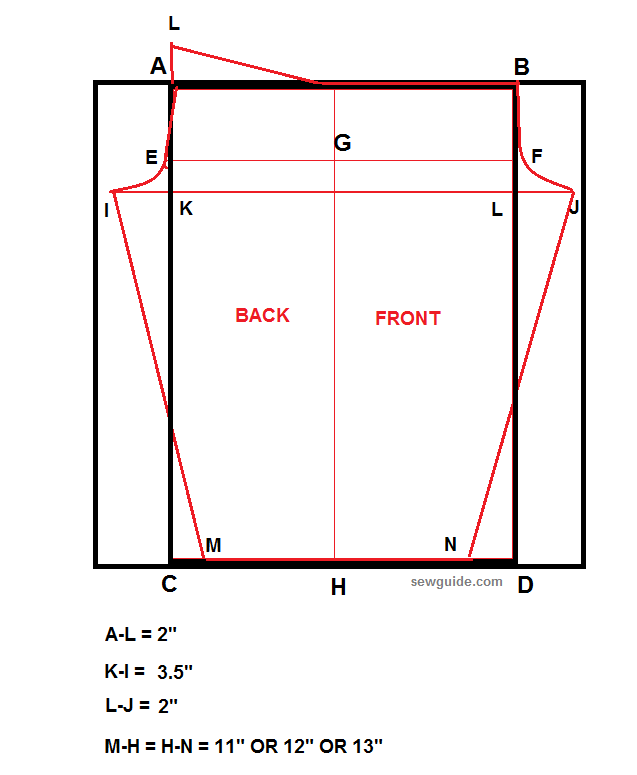
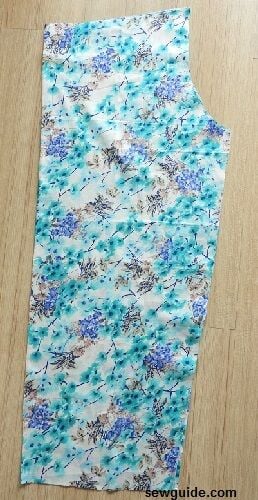
Fold the fabric pieces by the center; mark the back piece and cut it out.
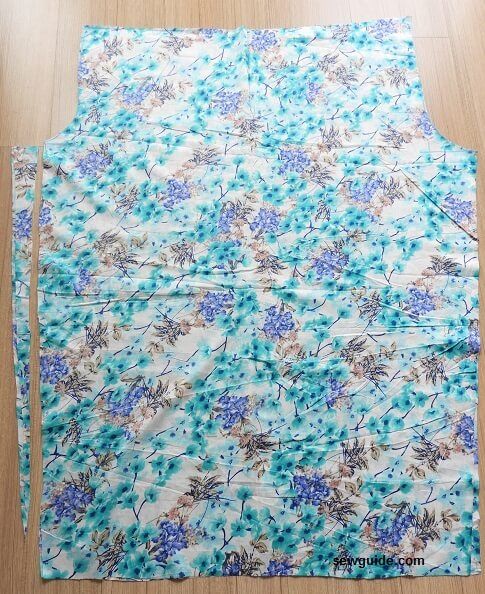
Open and cut out the front pattern on one side
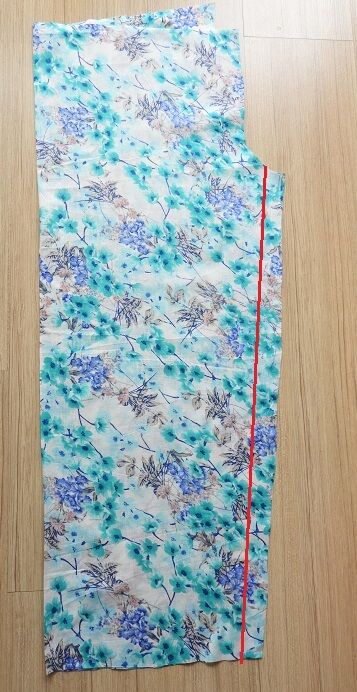
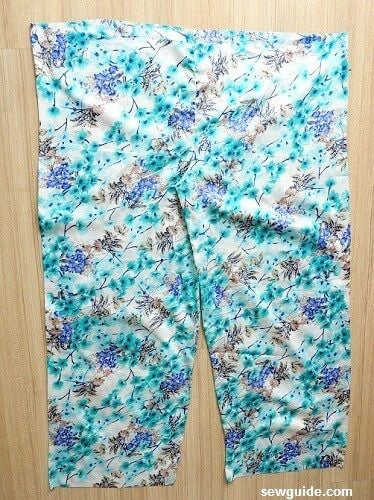
Step 2 Sew the leg inseams
Keep the edges of one leg piece together( right sides inside) and sew the inseam together. Do this for both the legs
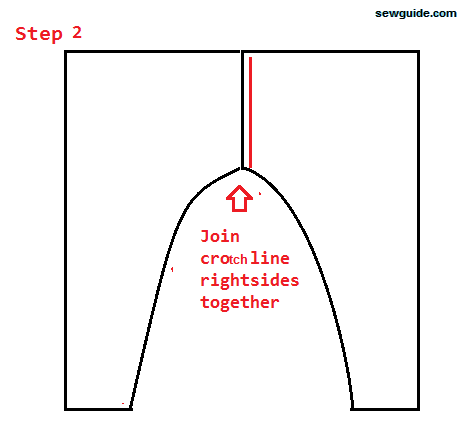
Step 3 Sew the crotch seam
You have the two leg pieces; now they have to be joined together at the crotch seam. Keep them together and stitch.
Make two stitching lines for extra safety
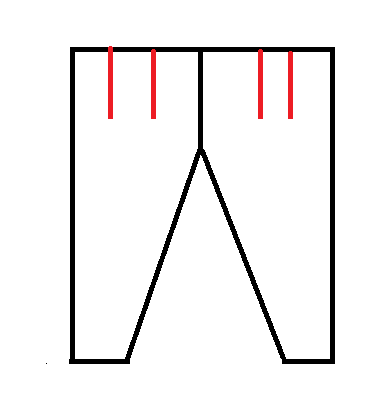
Step 4 Sew darts
Now on the front part, I have made two darts on each side – 8 inches long. This is to make it more fitting on the front. Know more about darts here.
The dart width is calculated like this. Take the measure of the top edge of the pant piece you have made; the circumference of the top edge – say it is 50 inches. Take half of this 25 inches (take this as A)
Take your waist round. Say it is 30 inches; take half of this – ie 15 inches (take this as B). Subtract B from A ; so 25 -15 is 10″ in my case.
I have to contain this 10 inch inside the 4 darts. Divide this (10″) by 4 (which is the number of darts I will make). I get 2.5 inch for each dart. This is the width of each dart.
Mark 4 such darts (2 on each side) which are 2.5 inch wide and 8 inches long
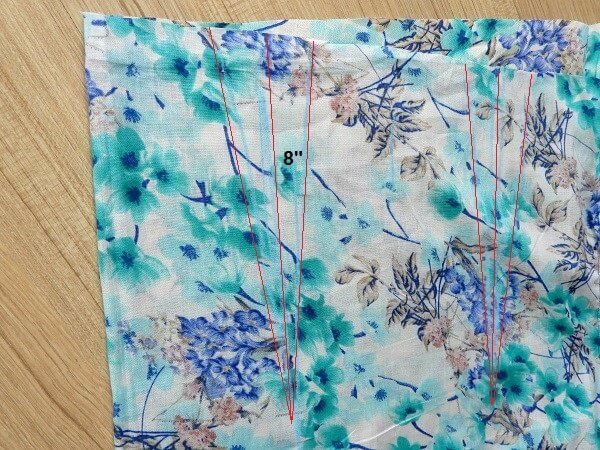
Sew the darts from the inside.
Remember to taper the darts to a point and tie the thread tails together (no backstitching at the end of the dart unless you are an expert)
Press from the darts on the back and the right-hand side.
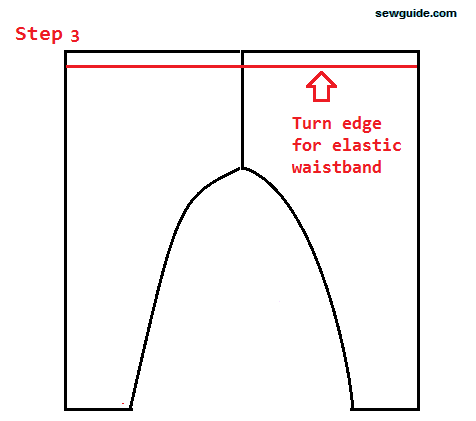
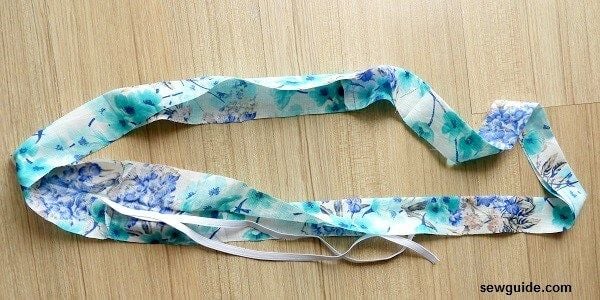
Step 5 Make Waistband
Now on to making waist bands
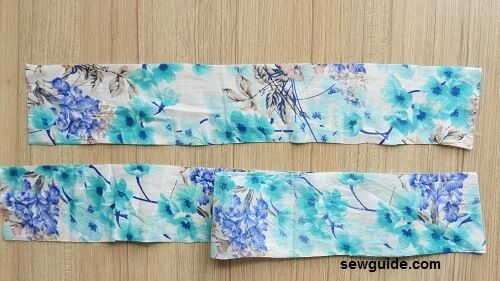
Cut out two pieces of fabric 3 inches wide
One fabric piece should be of length equalling half of your waist plus 1 ” extra.
The other fabric piece should be of length equalling measurement of the top edge minus half of your waist round plus 1″ extra for seam allowance.
Join the two pieces to form a tube.
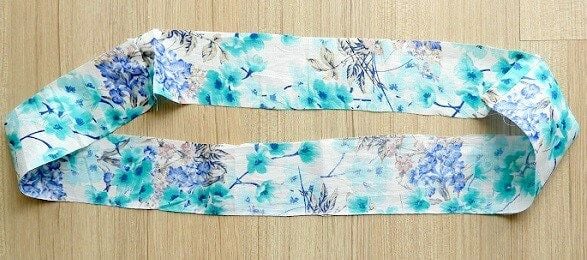
Fold this piece by the center and press
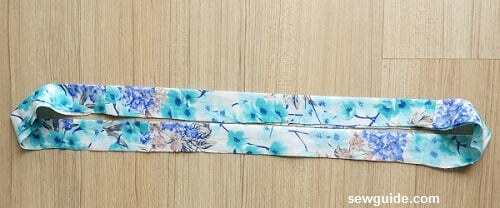
Cut a piece of elastic measuring half of your waist minus 1″
Keep it to the inside of the waistband you have made. Stitch the ends on either sides on the seam joining line
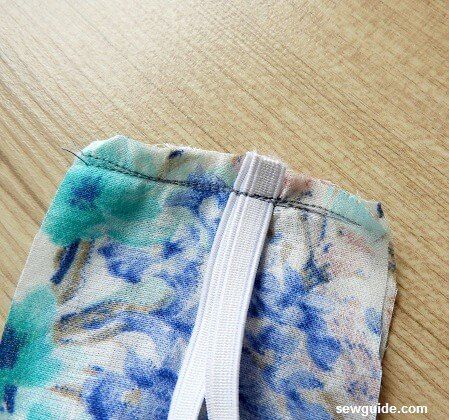
This will gather the back of the waistband. Baste stitch the waistband edges together so that it is easy for you when you sew it together.
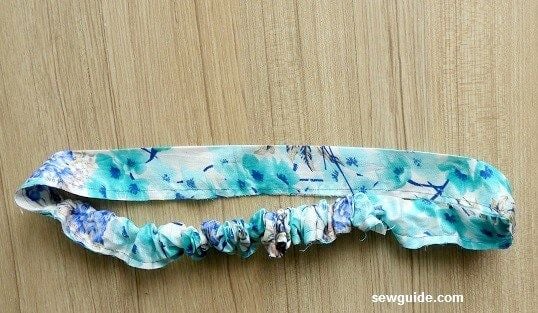
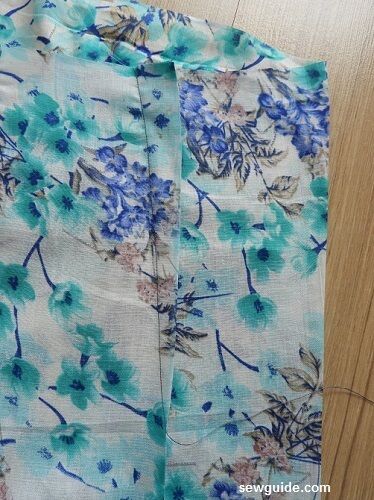
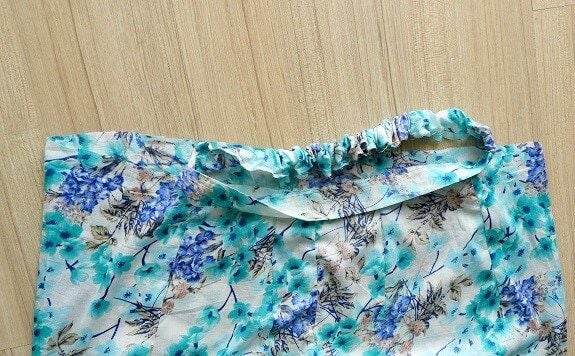
Stitch the waistband to the pant piece. Aligning the center of the front waistband and the leg piece and start stitching there.
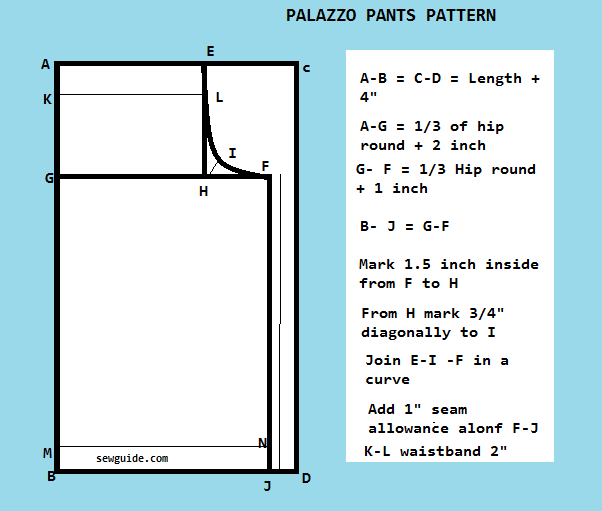
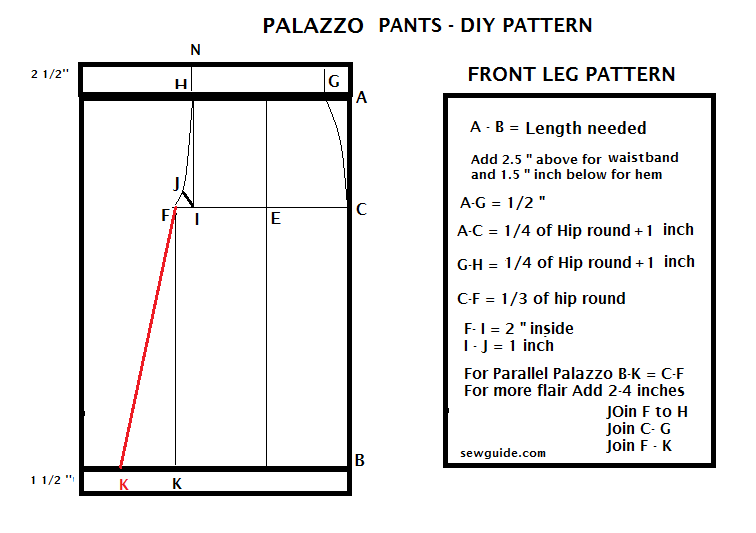
Method 3. A more fitted pants pattern
This is a more fitted pants compared to the more parallel fitting of the above pattern. This is easy to make as well.
You can make a paper pattern or mark directly on the cloth for this pattern. You need to cut four pieces of the pattern – 2 pattern pieces for the front leg and two for the back leg. This is sewn like a regular pant – 4 pieces of patterns. The back pattern is slightly wider than the front pattern.
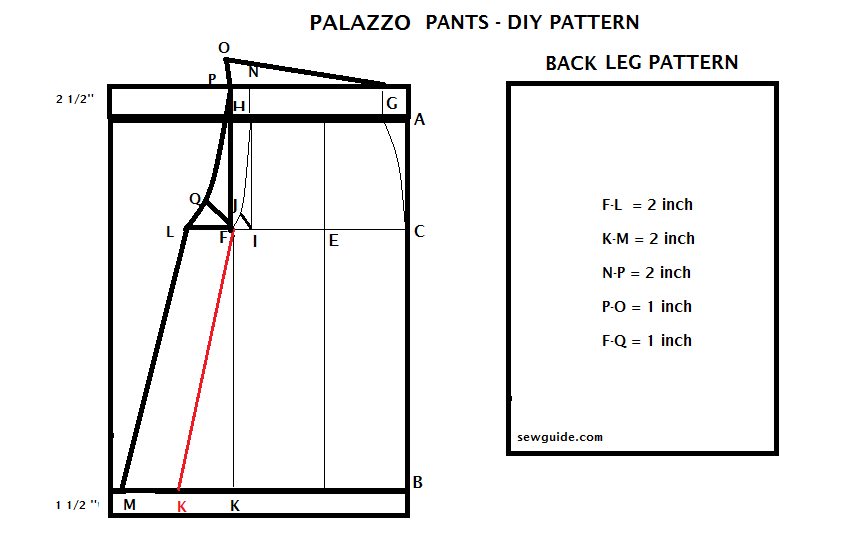
To make the back leg pattern, You need to base it on the front leg pattern. So After you have made the pattern for the front leg, keep the front leg pattern on top of the fabric / paper and mark the back pattern as a continuation.
Keep the above pattern on a bigger paper or fabric and mark the extra as in the diagram below.
You need to increase the width from the crotch line and waist line by about 2 inches and increase the height in the back by about 1 inch.
Back pattern for Palazzo
Stitching instructions for a Palazzo pants
How to sew Palazzo Pants
A step by step instructions to sew a similar pants is given in the post – Draft and sew a Pajama Pants – Check it out for detailed tutorial with photos.
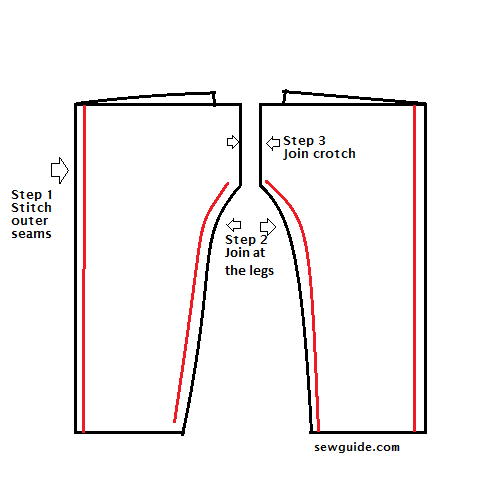
Step 1. After you have cut the 4 pieces of patterns, Align one front leg and one back leg right sides together. Stitch along the Outer seam first.
Step 2. Stitch the inseam. It is better to do 2 lines of stitching to make the seams strong. You can finish the fabric edges as well now.Check out the different types of seam finishes. You now have two leg pieces
Step 3. Join the crotch lines of the two legs. Turn one leg of the pants inside out.
The other leg should be left right side out. Slip one of the leg inside the other, right sides together so that crotch seams are aligned. Pin along. Stitch the seam.
Sew atleast double line of stitches through the seam line. You want the crotch seam line super strong for obvious reasons. Finish the seam edges with a serger, zigzag stitch. I sometimes like to do a french seam or a turned under finish to the seams here.
Step 4. Finish the hem.
Step 5. Make the elastic casing for the waistband. Cut elastic 1 inch less than your waist measure. You can also try the elastic on your waist ( where you will tie the pants ) for a snug fit and add 1/2 inch seam allowance and cut it out.
An alternative to elastic casing is to add a waist band with buckle in the front and elastic casing at the back. You will be having a zipper on the side seam as opening here. For this the pattern has to be cut differently from the above pattern.
Related Post


Hello Sarina, hope you doing good…I made an A line gown with a straight skirt using your method, having a friend’s wedding this weekend and am going to wear it, i already got so many complements about it which makes me really happy…thank you so much