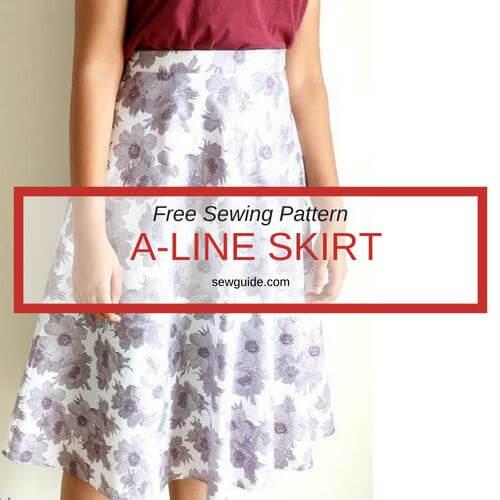
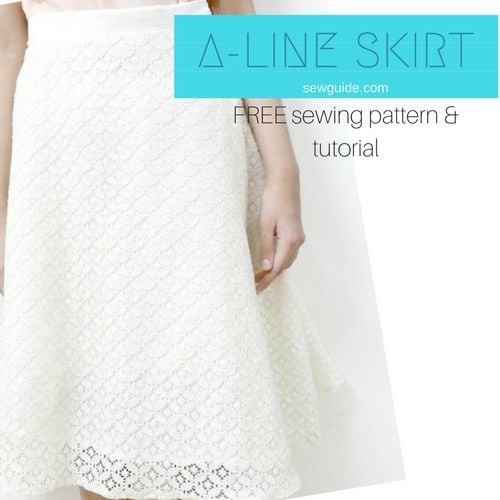
 What is an A-line skirt ?
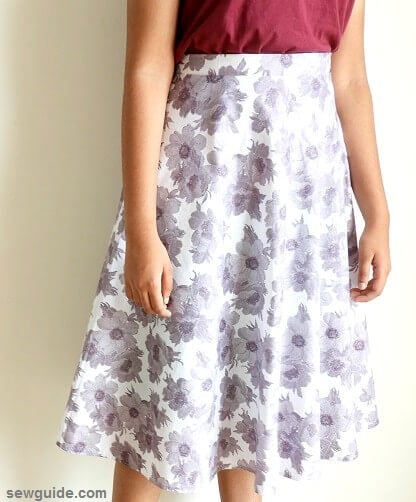
Basically, a skirt which slides over the hip from a fitting waist and flares to the hem. A line skirt is that versatile skirt which will look good on you whatever your body shape is. It flatters an Apple body shape – Contradictorily it suits the big hips of a pear shape too
Actually, most of the skirts fall into the A line shape – Checkout this post on the 17 different types of skirts you can have – most of them have flared shape. The true A line skirt comes without any pleats or tucks – it fits the waist and hips and gently widens to the hem.
You can make the A line skirt in any length you want. Decide on a length which suits you and look out for the fabric. Make a flattering wardrobe staple which you can wear for a long long time
Here I have outlined two ways to make an Aline skirt – one is a very flared circle skirt construction and the next one more close to the body, but still a flattering A line silhouette
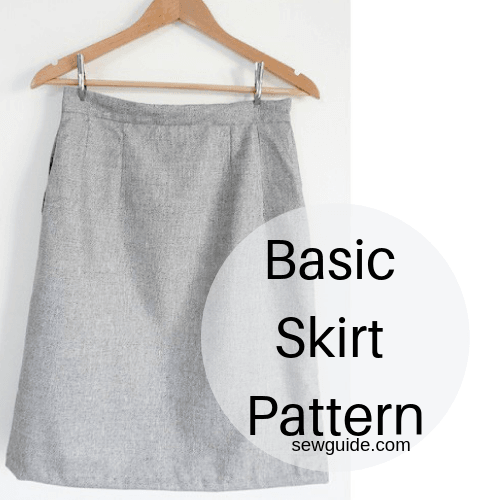
If you are looking for more fitting skirt check out this tutorial for a basic skirt pattern and sewing instructions
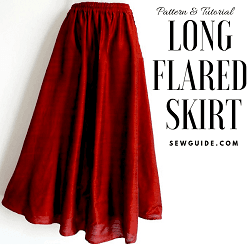
If you want a long flared skirt pattern check out this one.
Or go ahead to the tutorials below
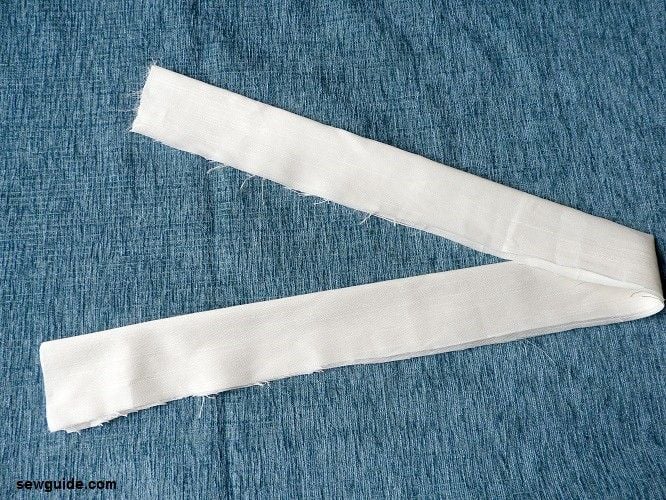
Method 1 Simple A line skirt
Step 1 Cut out the pattern for the skirt body
You will need two pieces – a front and back piece. Decide on the flare you want and the length you want. Cut out two fabric pieces a little bigger than this dimension and then mark the pattern on them.
Fold your fabric pieces for the skirt- front and back by the middle for marking the pattern.
Step 2 Join the skirt pieces (front and back) together.

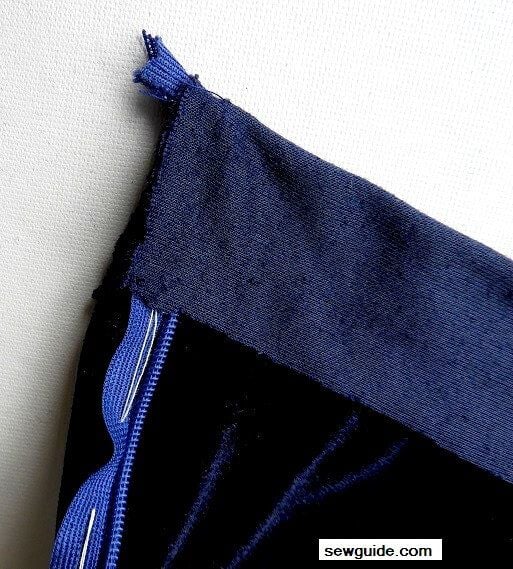
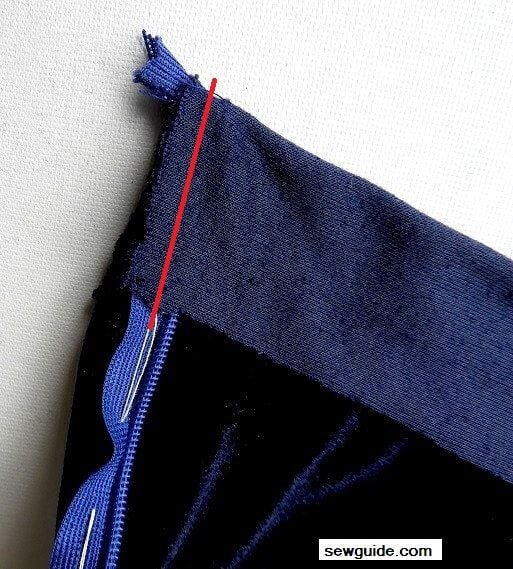
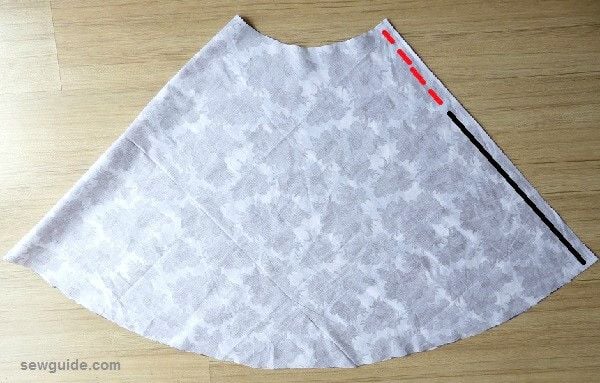
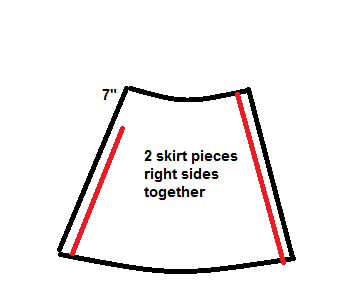
Keep the front and back pieces of the skirt right sides together and stitch the side seams. The red lines in the picture is the stitching line. 7 inch is left un-stitched on the top edge of one side seam to insert invisible zipper
Turn it right side out.
Step 3 Cut out the waistband
Measure the top edge of your skirt and cut out the waist band piece in this measure. The width of the piece should be 3 3/4 inch- the final waistband width will be 1 1/2 inch. You can interface the waistband at this point for more stiffness.
Step 4 Attach the waistband piece to skirt

Keep the waistband piece on top of the top of the skirt, right side down on the right side up skirt. The top edge is joined together with a 1/4 inch seam allowance.
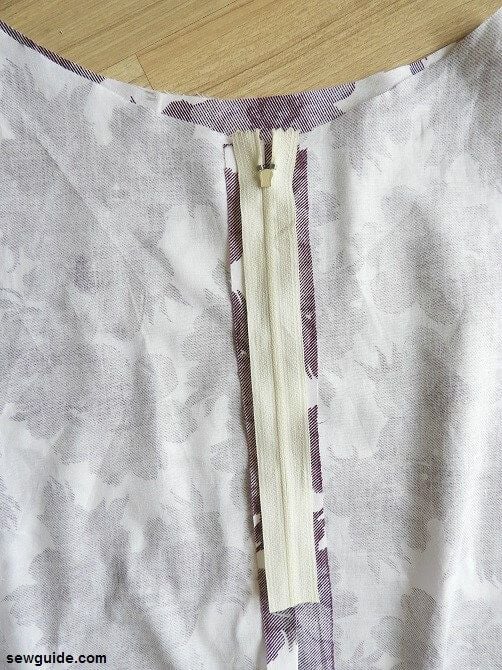
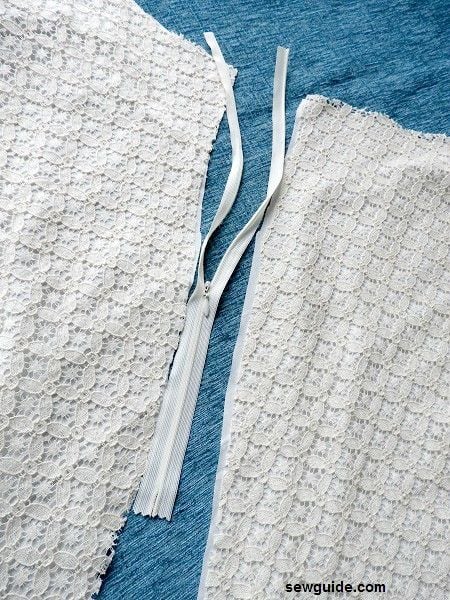
Step 5 Attach the Invisible zipper
You need to cut the invisible zipper to measure 11 inches long. Make straight stitches across the zipper teeth at the bottom edge to prevent the zipper opening up completely.
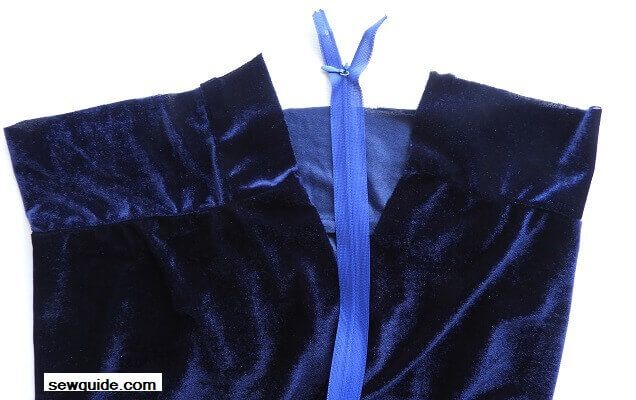
Step 6 Attach invisible zipper
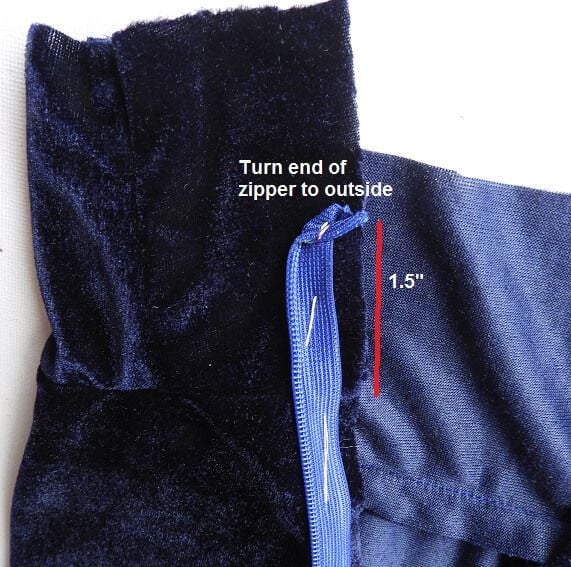
Keep the zipper open. Align the zipper face down on one open edge. The zipper should be kept 1/2 inch up from the waistband seam.As you keep the zipper remember to fold the short edge to the outside as in the picture .Baste stitch in place .
Do so for the other side as well
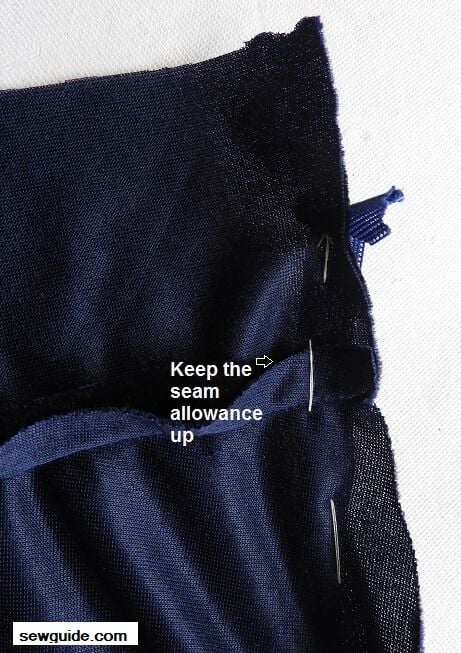
The seam allowance inside should be turned up as you baste stitch.
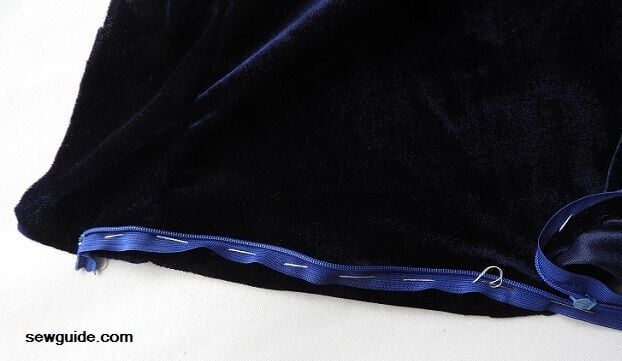
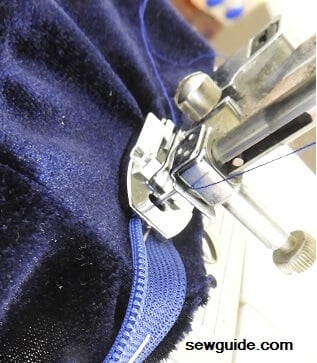
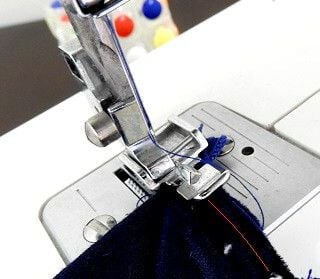
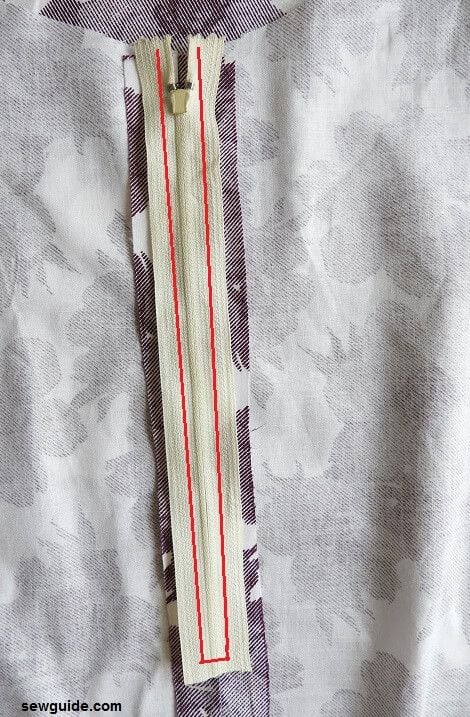
On the first edge, just use an invisible zipper foot to stitch the invisible zipper very close to the teeth.
Step 7 Fold the top of the waistband down. Still the skirt is face up, allright?
Stitch along the seam allowance joining the waistband
Use a zipper foot for this.
Now just flip the waistband inside out and your waist band is almost ready
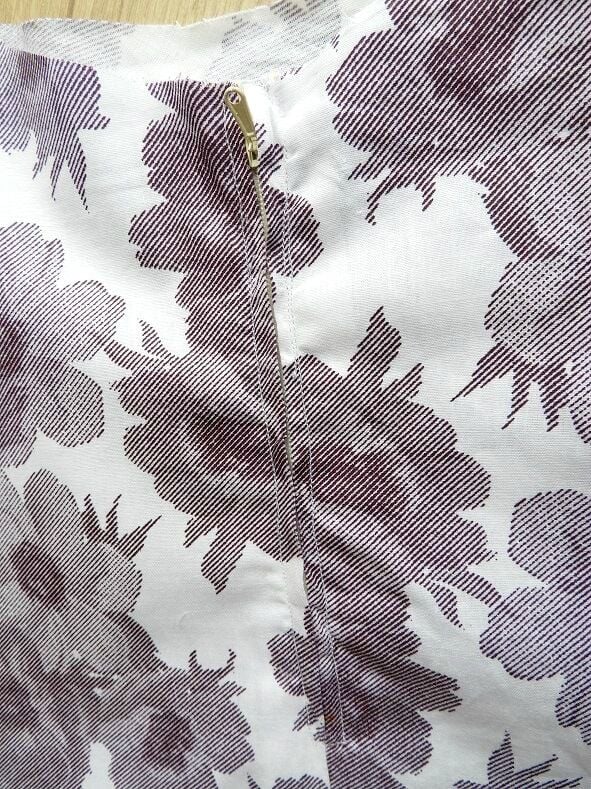
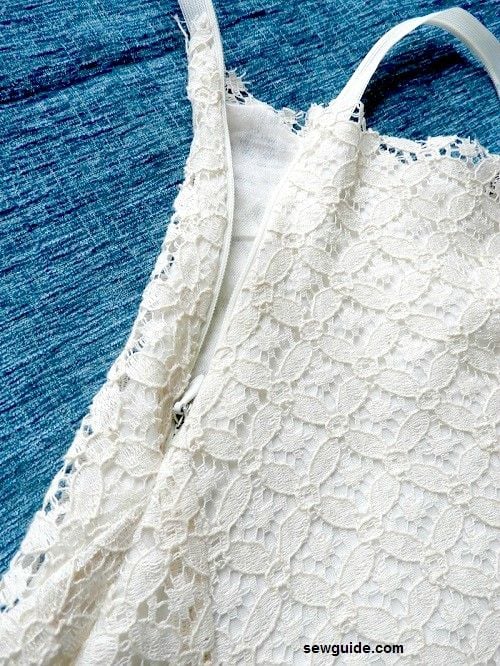
Step 8 Top stitch the zipper edge
You have to stitch the zipper from the top along the zipper teeth so that everything is finished well. You can hand stitch as well.
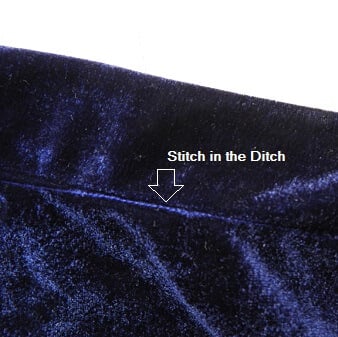
Step 9 Now finish the waistband
The back side of the waistband is not finished. You will have to fold the back edge to the inside and pin in place. Stitch in the ditch from the front or hand sew in place from the back.
Step 10 Hem the skirt
You can hand hem or use your sewing machine to hem your skirt. Here are the hand hemming stitches ; and sewing the hem by sewing machine – 20 ways.
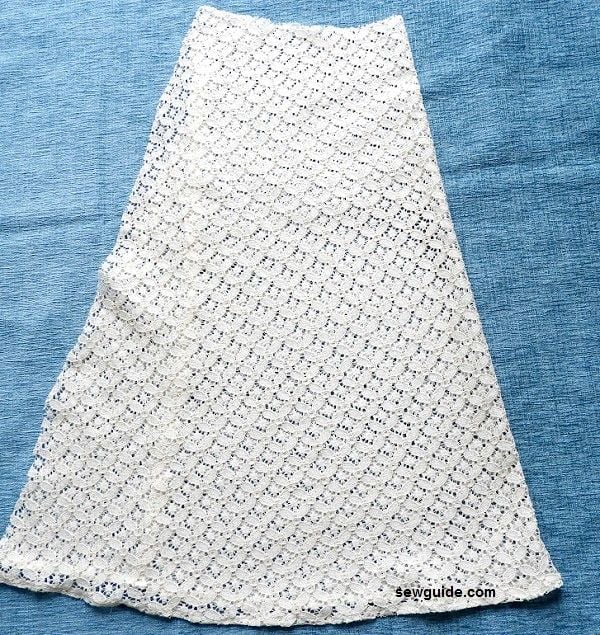
Method 2 Very flared A-line skirt pattern
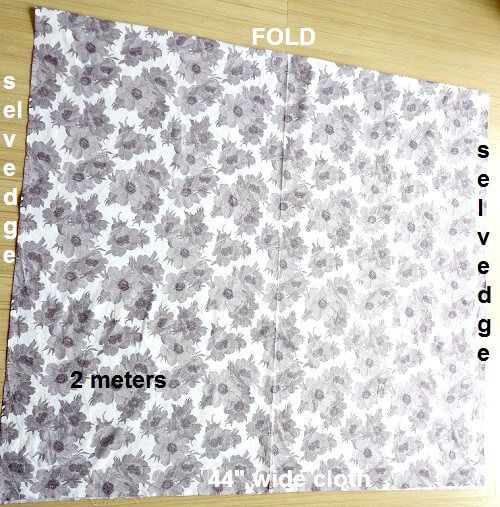
This is a fitting skirt with a nice flare and you need fabric which has a width of 44 inches to make this
Step 1
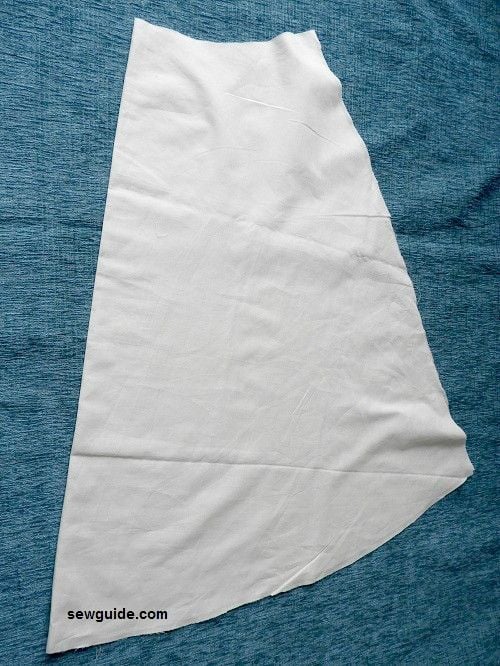
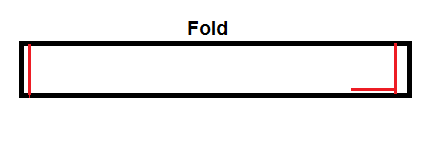
Take 2 meters of cloth which has a width of 44 inches. Fold it by half as in the picture below.
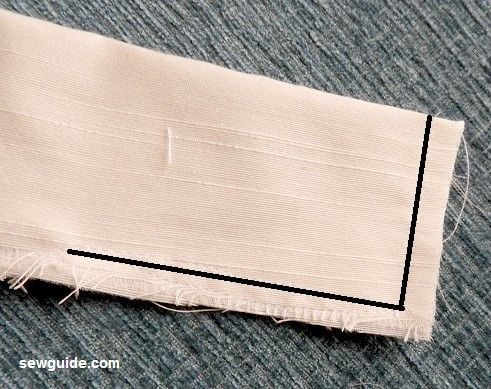
Measure your waist where you intend to tie the skirt.This is your waist measure
Calculate the measure of cutting the waist area with the formula –
A-B = waist measure divided by 3.14.
Mark this from the top corner near the fold such that A-B is equal all along. You will get the arc B in the picture below.
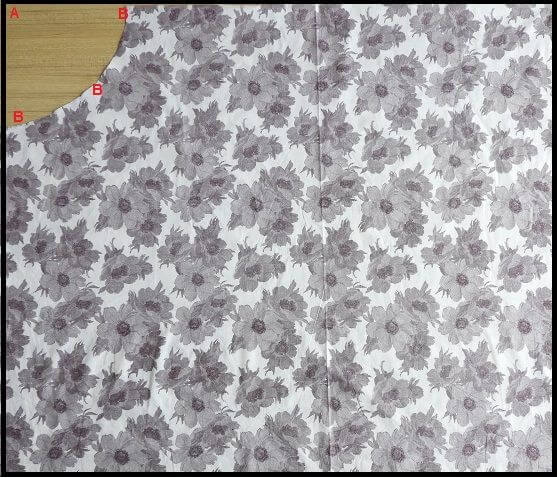
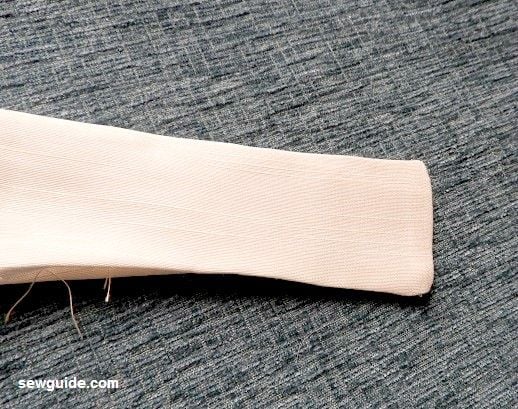
Cut it out
Step 2 Cut out the skirt length
Decide on the length of the skirt you want. Minus the width of the waistband, you will be adding. I am giving a waistband of 1.25″. Add 1″ as the hem.
Mark this from the waistline, in an arc. Mark every 3-4 inches for accuracy and then join the dots to get the exact measure. I have taken a 28 inch length. Check out this post on skirt lengths to know the names of various lengths of skirts that you can cut.
Cut it out.
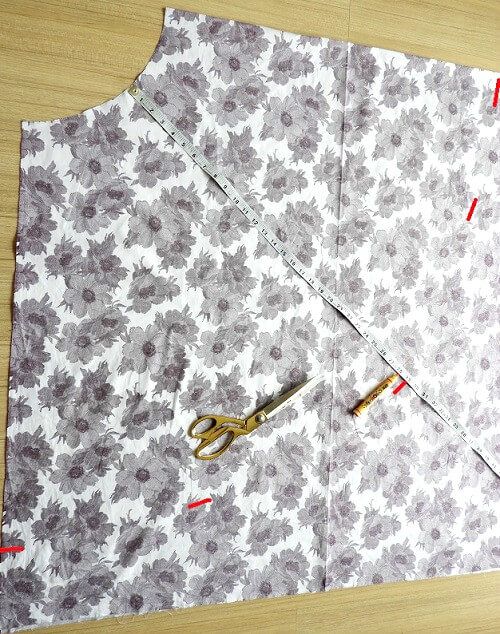
Step 3 Side seam and zipper
Keep the skirt piece right sides to the inside. Mark 7 inches from the top edge. This is for inserting a zipper. You will have to make basting stitches here. Basting stitches are long running stitches you can make with your sewing machine also by making the stitches long. This is for easy removal after the zipper is attached.
So make the basting stitches till 7 inches only ( red line in the picture below); after this make regular strong stitches you make for sewing seams
Turn the seam towards you. Open up the seam allowance. Keep the zipper face down on the seam line. Make sure that the zipper teeth is directly above the seam line. Pin in place
With the zipper presser foot on your sewing machine stitch the zipper on the seam as in the picture below- red line is the stitching line. ( the zipper is face down, right?)
Now turn the skirt right side out and carefully with the seam ripper open up the basting stitches. They should come out soon enough. Especially if you made it with a weak basting thread like professionals do. Do not worry if you did not. You can easily remove the thread with the trusty seam ripper. It removes even the teeniest stitches for me regularly.
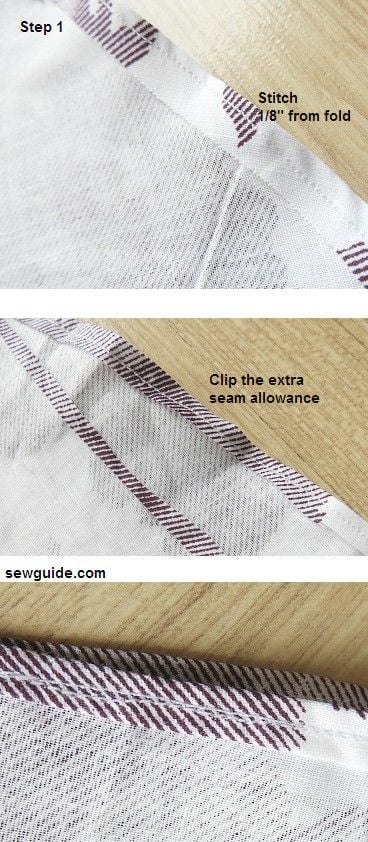
Step 4 Make a baby hem
Only baby hems would do for this kind of circular skirts with flare. It is but the simple turned under edge, made very narrow.
You turn the hem edge once 1/4 inch and stitch in place very close to the edge (1/8 inch from the edge) Cut away the extra seam allowance carefully with a small sharp scissors. Now turn under 1/4 inch or lesser again and stitch. This is your baby hem
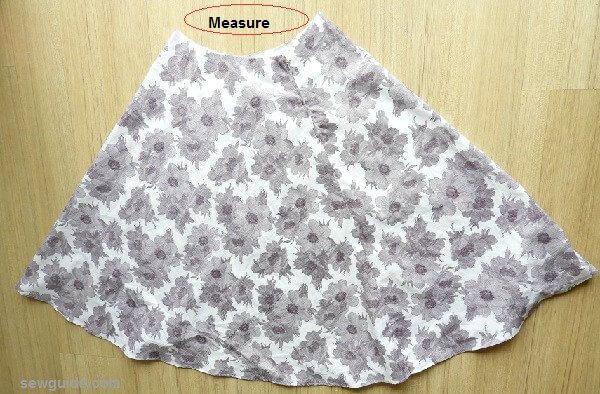
Step 5 Make and Attach waistband
Measure the top edge of your skirt.
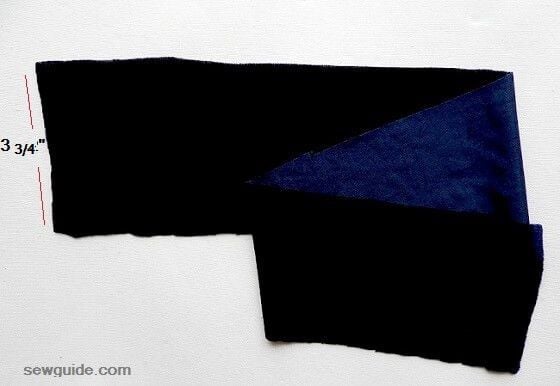
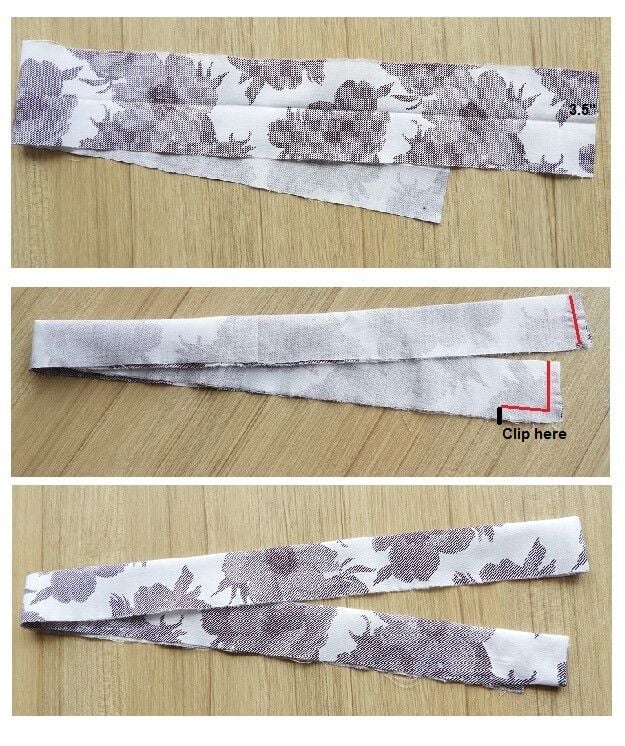
Say that measure is A. Add 1 inch extra for the hook projection, 1 inch extra for seam allowance to this.Cut this length fabric piece of width 3.5 inches for the waistband. This is your waistband fabric.
To prepare the waistband, fold the waistband fabric by the middle lengthwise and stitch the short edge of both sides with 1/2 inch seam allowance.
On one edge stitch the underside also 1 inch as in the picture below ( red lines are all stitching line and the black is a clip/cut). Make a small clip ( of length between 1/4 inch – 1/2 inch )with your sharp scissors just near you ended the stitch as in the picture.
Clip the seam allowance near the short edge , at the corner as well so that when you turn the waistband it will look neat. Turn it right side out. Use a sharp tool to straighten the corner.
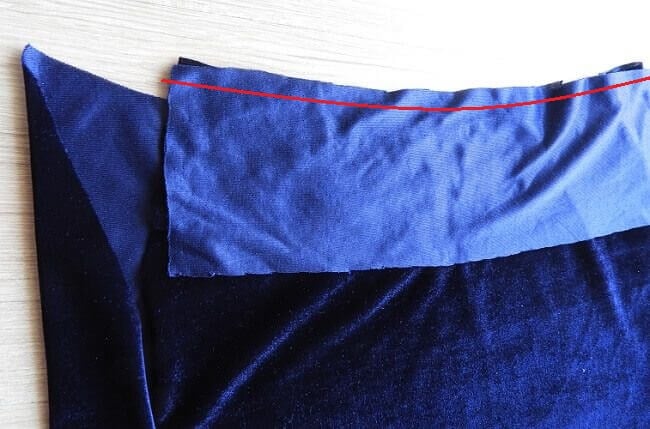
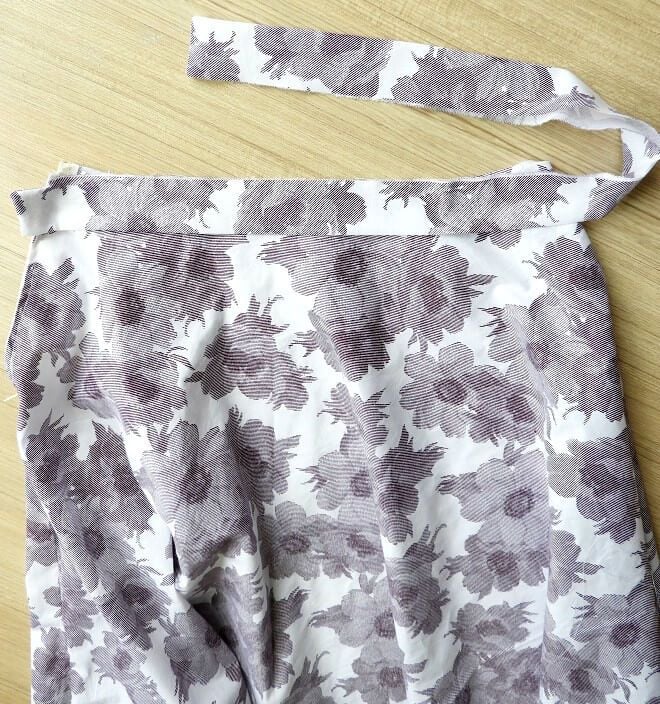
Step 6 Attach the waistband to the skirt.
Simply keep the waistband on top of the skirt and stitch together, keeping the projecting part for the hook outside the edge. Because of the clip, you made earlier the waistband will have the seam allowance extending outside making it easy for you to attach it.
Step 7 Attach the hook
Hand stitch a hook to the back of the projecting side of the waistband. Make a thread loop or attach a steel bar for the hook on the other side. Wear it
Method 3 Another simple A-line skirt pattern
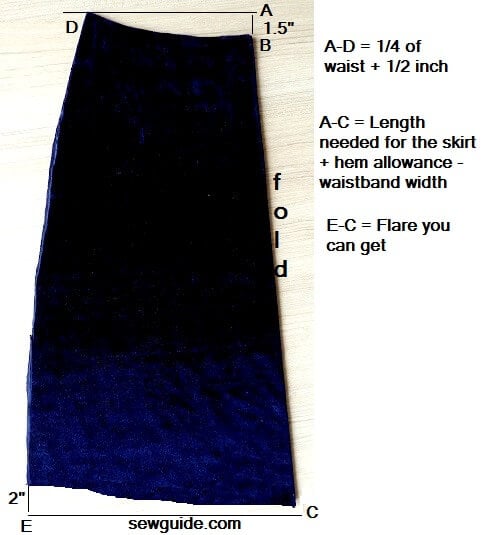
This is a super easy to sew Aline skirt pattern, made when you donot have a very wide fabric ; say you have a 33 inch wide fabric – it can be done.
Take two pieces of fabric, each of width atleast 34 inches. The height should be the height you need for the skirt plus some 3/4 inch extra for hem
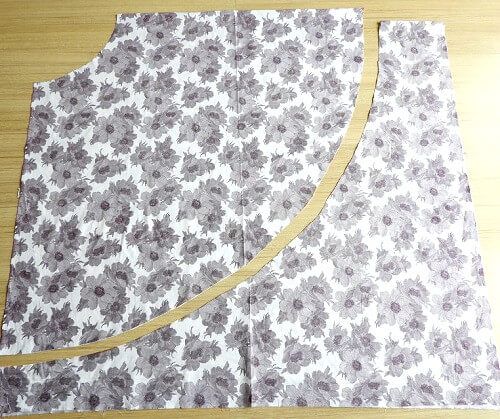
Fold the two pieces by half and cut the pieces as per the measurement given below. A-B is the height of the skirt plus 1/2 inch extra for hem allowance minus 1 inch waistband.
The red line is the cutting line. A-G is a slight done curve and C-E is marked so that skirt donot hang from the sides as it would if it was cut straight across. You can choose to cut this anywhere between 2 1/2 to 3 inches.
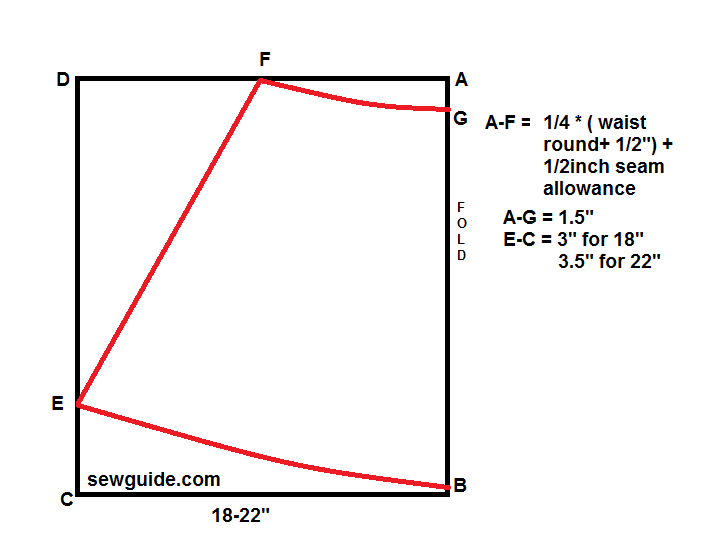
I have cut two pieces of the lining as well. These lining pieces are treated as one with the top fabric pieces. The height of the lining pieces should be about 1 inch or so lesser or otherwise it will show (peep) outside.
Hem all the fabric pieces for the skirt – lining as well as top fabric. A baby hem is the best as the curve would not take wider hems. To make the baby hem, turn under 1/4 inch of the bottom edge; stitch very near to the fold. Trim the seam allowance close to the stitching line. Again turn under 1/4 inch and stitch
You need to attach a zipper to the skirt
For this, first sew the side seams of the skirt.
Keep the back and front skirt pieces right sides together, stitch along the side seams with a 1/2 inch seam allowance. On one side from top edge leave a 7 inch unstitched. This is for inserting the zipper
You can either insert an ordinary zipper or an invisible zipper. I am attaching an invisible zipper. Checkout the posts explaining how to insert invisible zipper as well as How to insert ordinary zippers
Put on the skirt and see if the skirt is fitting. If it is loose, and not snug fit, stitch the other side seam a little to the inside to make the skirt tighter.
Make a waist band.Measure top edge , add 1/2 inch for seam allowance, and 1 1/2 inch extra for attaching buckle or hook
Cut out a fabric which is 2 1/2 inch – 3 inch wide and length equalling what you calculated earlier
Stitch on short edge by folding the waistband fabric by the center, right sides together and stitch the seam. Do the seam for the other short edge – here you will have to stitch 1 1/2 inches on the bottom edge as well
Turn the waistband right sides out.
Keep the unstitched edge of the waistband on top of the skirt top edge, right sides together. Stitch the edge. Another way to stitch (better looking) is to stitch one edge of the waistband to the skirt edge and then turn under and top stitch the other edge. But I pormised easy. This IS easy.

Attach hook to the inside of the projected waistband part and a hook to the other end of the skirt waistband and the skirt is ready
If you want the convenience of a gathered skirt along with an Aline silhouette you can checkout this simple gathered elastic waist skirt pattern

Checkout other options to sew hem by machine and more hemming stitches by hand .
Do Finish the fabric edges inside the garment as you sew with a zig zag finish or serger. Makes for a better garment inside as well as outside.
Related posts : How to sew the waistband of skirts ; Skirt lengths ; Which skirt suits you?

Love these. Thank you
Hi,
On Method 2, what kind of fabric did you use?
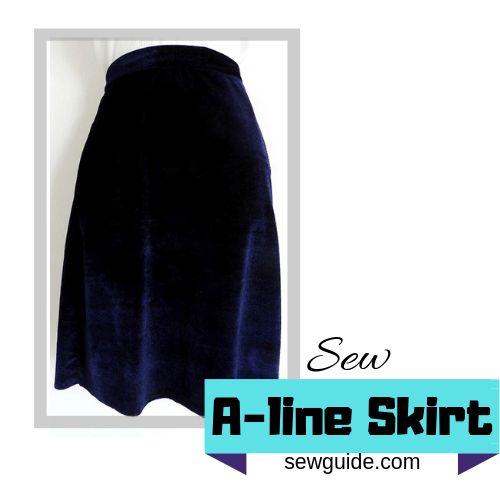
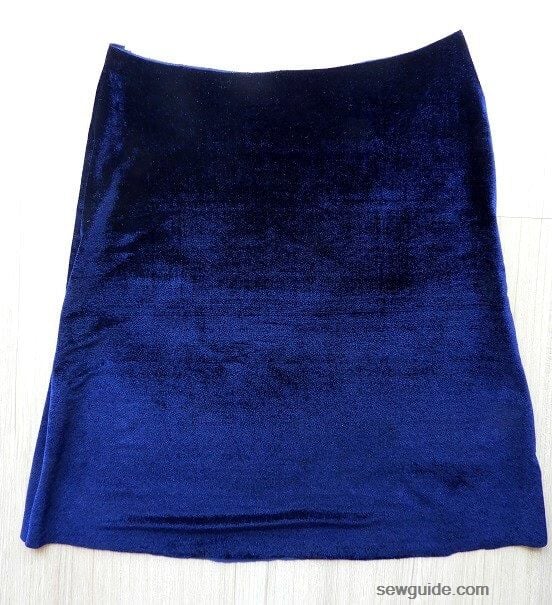
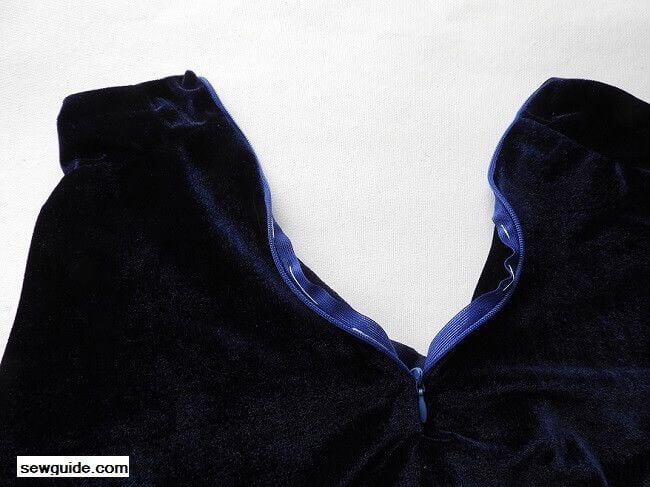
What kind of fabric did you use for the first skirt (the blue one)?
That is a velvet
Hi Which Method Can I Follow To Make Six Pieces Skirt With Its Illustration.
Hi Hamisu
Lehenga skirt – this is a panelled skirt pattern
Hi good day I would like to sew like a pro but frighten to cut fabric, I see you have a lot to teach me to sew will be taking some interest in your sewing let you no more by keeping in touch with you.
Hi, I’m new to sewing and would like to know what the A and B stands for in the formula A-B = waist measure?
Hi Sandra
It is not A-B = waist measure ; it is waist measure divided by 3.14 ; waist measure is the measure taken around where you want the waist of the skirt to rest. Hope this is clear
Hii. When you say 2meters how much is that in yard .. please tell us where do you buy fabric and what material .. which brand thread is good. Please make a youtube channel so that us more visual with video and talking..
Hi Kauser
2 meters is 2.18 yrd
Thanks
This so easy to I understand. Thanks so much
This is so cool…… Wow real good
Thanks Damope