Shorts are nothing short of a necessity during warm weather. You have sunny weather and the shorts are not far behind. What can be more cooling than wearing comfy shorts in the heat? Some girls even get away with wearing them to the office. The cool and trendy look that shorts give you is what you are looking for this summer.
Checkout the names of different types of shorts in this post here.
I have 3 patterns here – One has a fitted band in the front and an elastic band in the back. The next one is the easiest – a simple, comfy pajama shorts with an elastic waistband and then a more fitted one with an elastic waistband.
How much cloth is needed to sew shorts ?
It depends on the hip measurement and the length of the shorts. Till about 40 inches ( Hip round – the widest part ) you can make a shorts in about 1 meter fabric (.91 yards). Add some .25 meters above this.
1. A fitted shorts pattern
The pattern given below will give you a defined waist as it is fitted on the front draping comfortably around your hips with a fitted waistband fastened with pant hooks and zipper on the side seams and in the back you have an elastic waistband which will give you room for movement and ease.
Fitting shorts sewing pattern with Elastic waist band in the back.
Body Measurements needed
- Waist round
- Hip round
- Thigh circumference or flair of the leg
- Length of shorts.
For sewing this shorts you need 4 pieces of fabric – 2 for back pieces and 2 for front pieces. You also need fabric strips for making a belt and a 7 inch zipper.
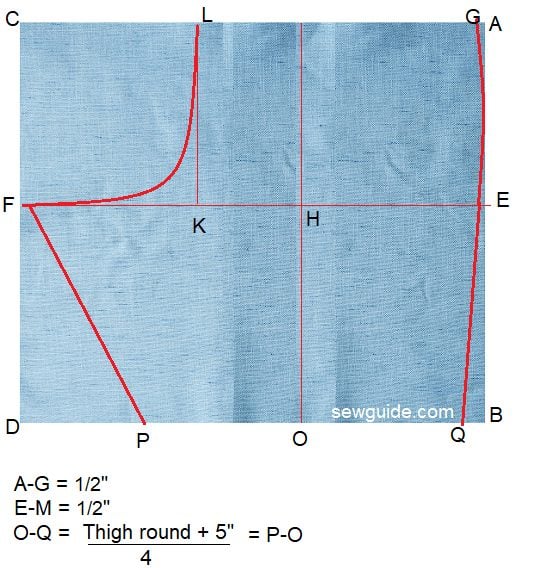
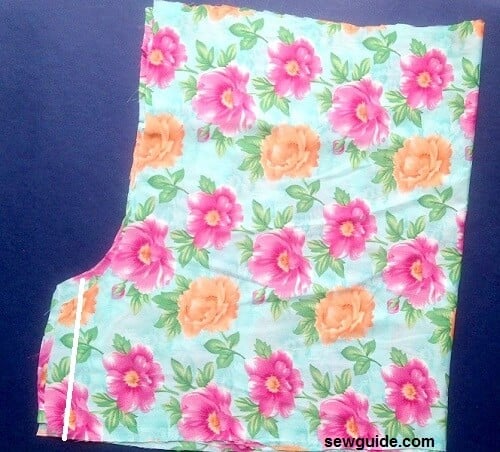
Step 1. Draft the front piece of your shorts
Keep two fabric pieces and mark the following dimensions.

Step 2. Draft the back piece of your shorts
Do the same for back pieces.
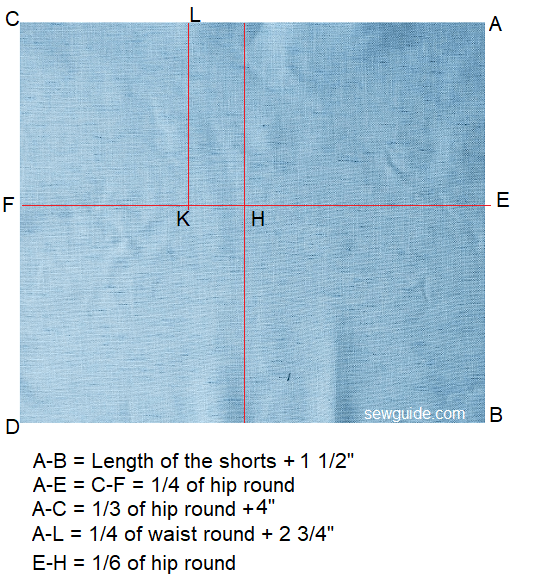

( If you have a heavier hip area (back), you may want to raise the back pattern a little bit (at L) )
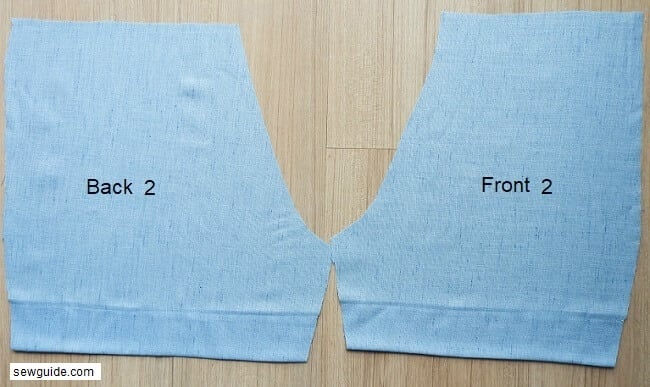
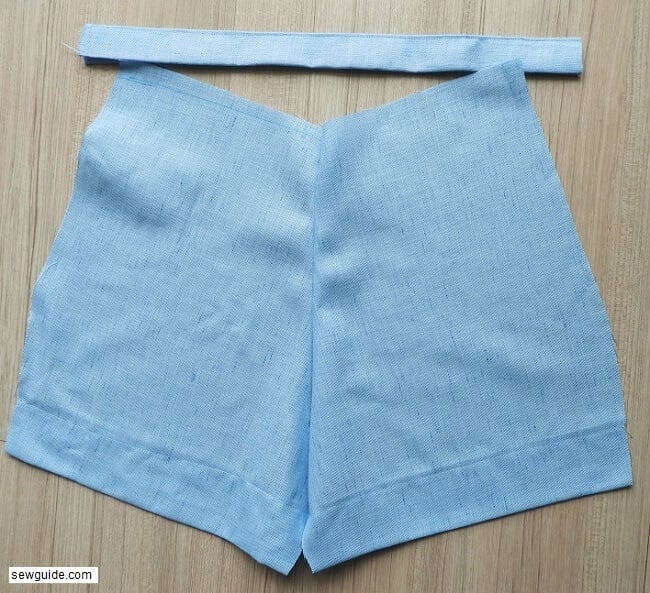
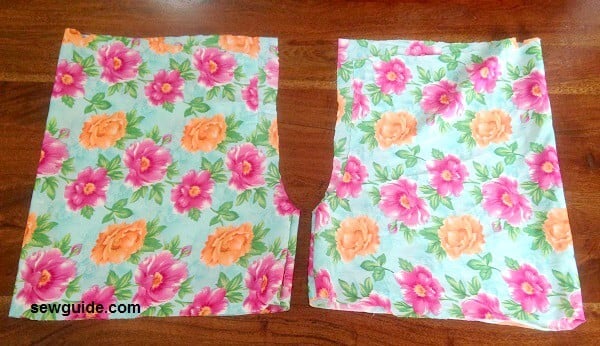
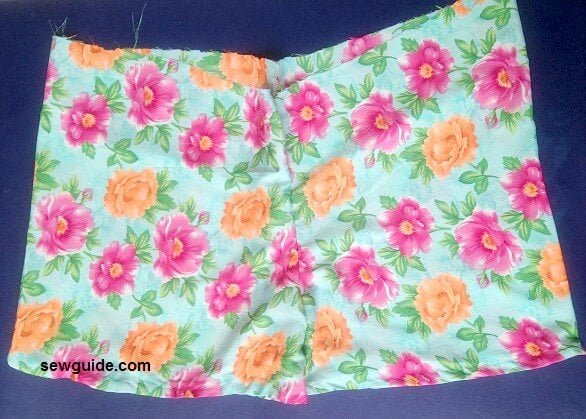
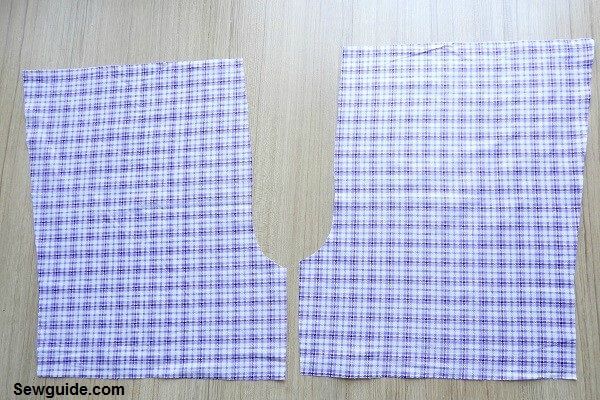
Step 3. Sew the hem of your pieces
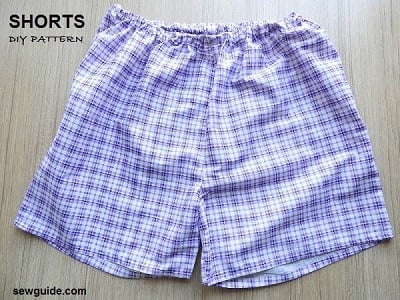
You get 4 pieces like the picture below.
Step 4. Sew the crotch seams
Keep the two front pieces right sides together and sew the crotch seam together.
Press the seam open.
Do the same with the back pieces.
Step 5. Sew waistband
Measure the top edge of your two pieces.
Cut out two fabric strips of dimension 5 inch wide and length equalling the top edge.
You may want to interface the strap you are making for the front. Do not interface the one for the back.
Fold the edges to the inside and press and keep.
Sew the strap to the top edge.
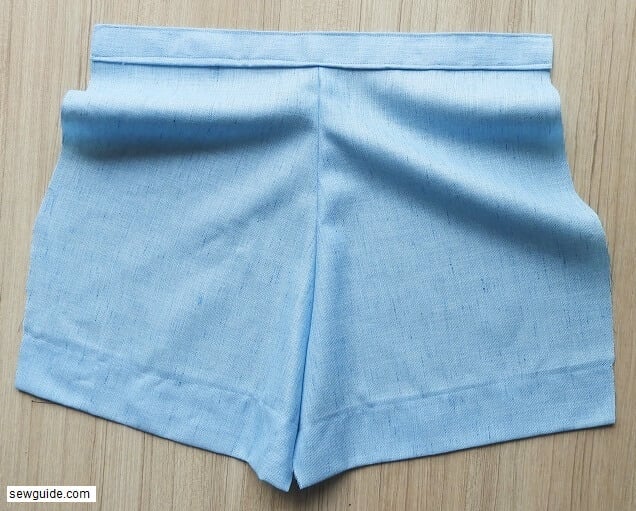
Step 6. Sew waistband with elastic
Do the same for the back piece as well.
Insert elastic into the back strap. Cut out elastic measuring (1/2 of your waist round minus 2 inches). Insert with a pin and then sew the elastic edges to both edges with a stitch across.
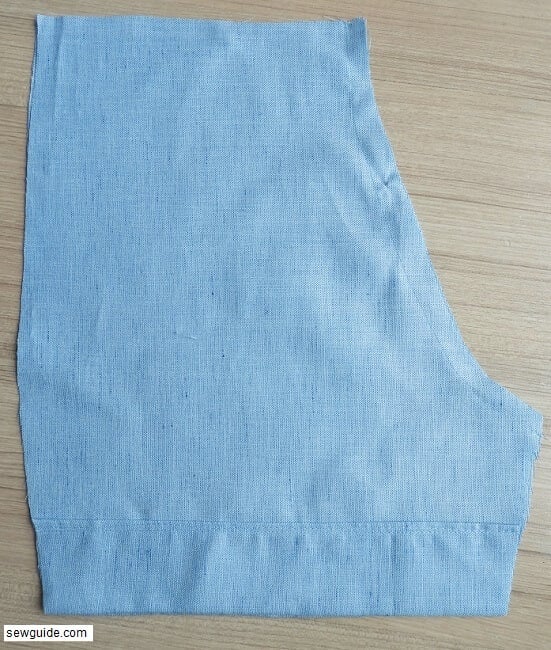
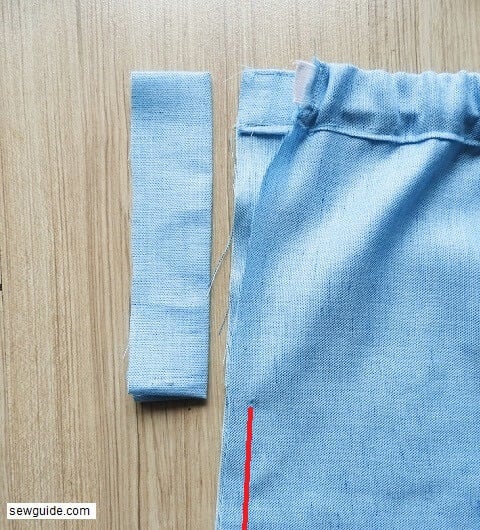
Step 7. Sew the back and front together
Keep the two pieces you have – back and front, right sides to the inside and sew one of the edges and the inner leg seam.
Step 8. Sew the zipper seam
Now you have to insert a zipper into the other seam.
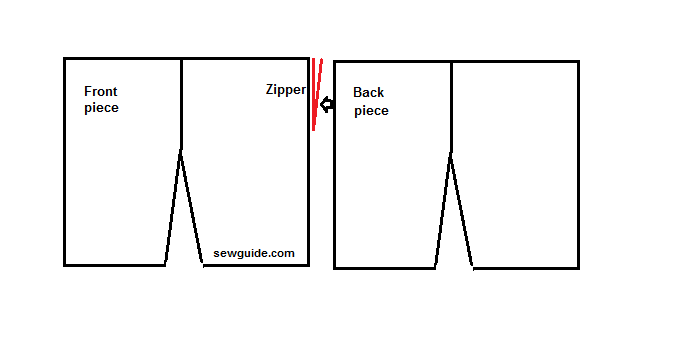
Sew the seam up from the hem leaving a gap to insert a zipper.
Make basting stitches along the top edge. ( if you are confused by the instructions here may be this post on attaching zipper will explain better)
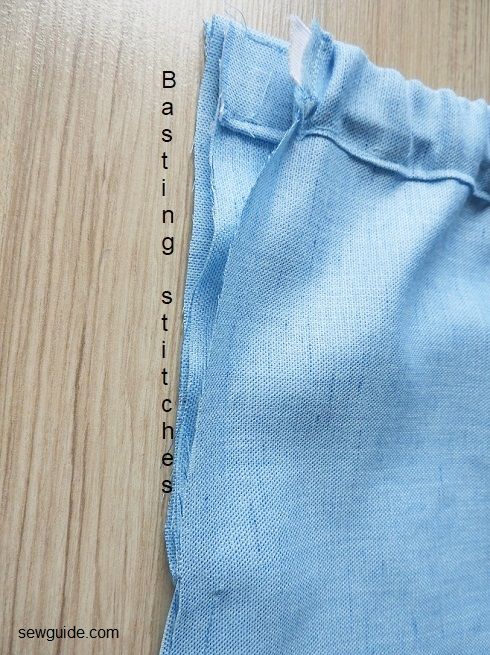
Press the basting stitched seam open. Keep the zipper face down on this seam line. Remember to fold the top zipper edges to the inside as you sew. Use a zipper foot to sew this. Sew close to the zipper teeth.
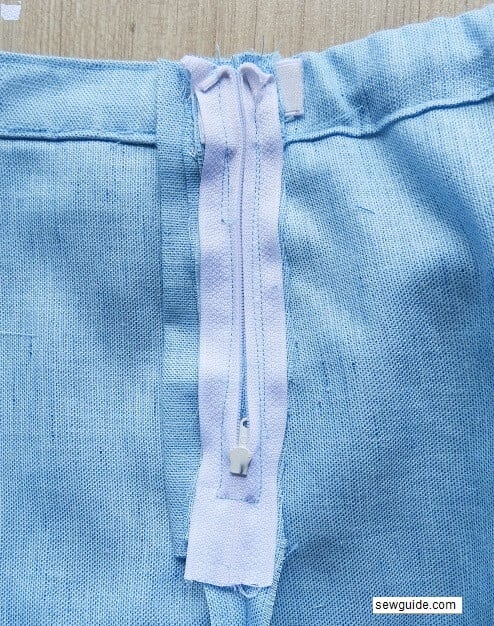
After you have sewn the zipper, open the basting stitches with a seam ripper. You can add a hook and eye at the top of the zipper for extra closure.
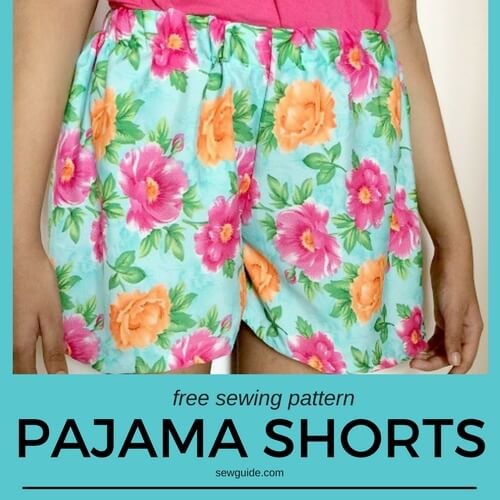
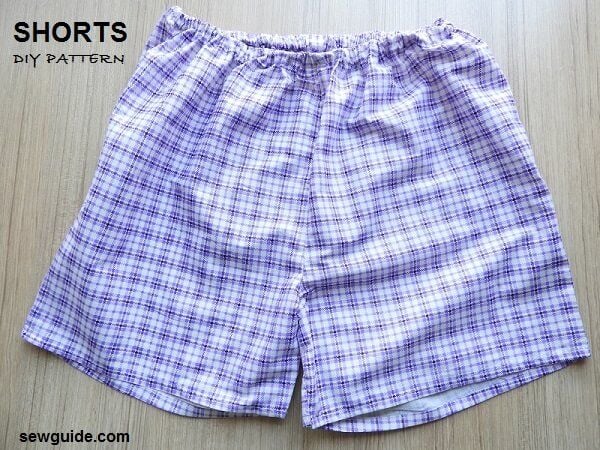
2. Pajama shorts pattern
Take two fabric pieces of length = equalling the length you need for the shorts + 4 inches. Fold by the center.
Keep them stacked so that you have 4 layers of cloth. Mark on the top cloth and cut.
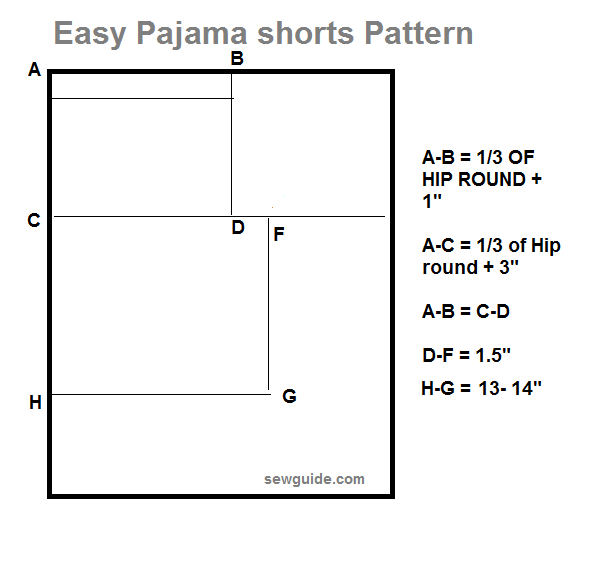
You need to Take the hip round measurement and mark the pattern as below.
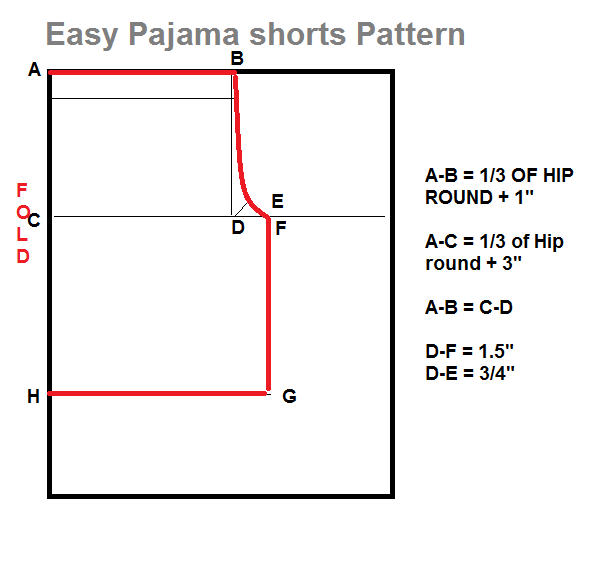
A-H is the folded side of the fabric. Mark A-B as 1/3 of the hip round measurement plus 1 inch.From A mark down on the folded side C – 1/3 of the hip round measure plus 3 inch. Mark D on this line so that it is the same measure as A-B. Add 1.5 inches outside to F. Now mark from C to down – this is the length of the shorts. I would mark this 6 inches or so ( This is short shorts, not Bermudas. If you want longer, add more length)
Mark 3/4 inch diagonally to E from D. Join B -E-F in a soft curve. This is the crotch line.
Cut through A-B-E-F-G-H.
You have two pieces cut now – for both the legs of the pajama shorts.
Take one of the leg pieces. Keep the piece rightsides in and sew the leg inseam together. Do this for both the legs.
You will have two leg pieces like this.
Now join the crotch line of the two leg pieces together, ensuring that the front is joined to front and back to back (front has a dip in the front).
Keep the edge together and sew the whole stretch. Make two stitching lines and finish the edges as well – this is a very taxing seam :).
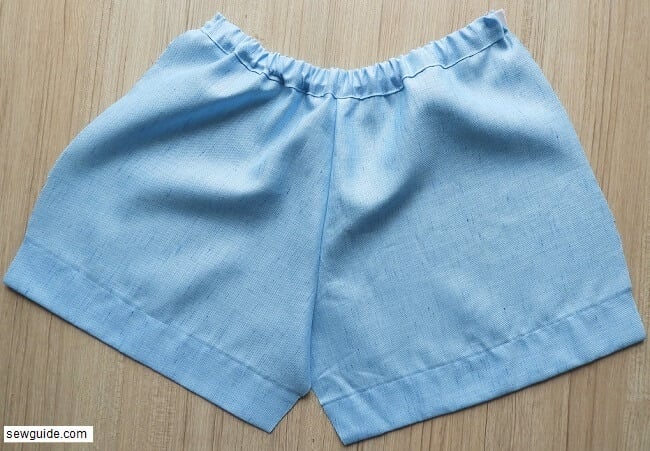
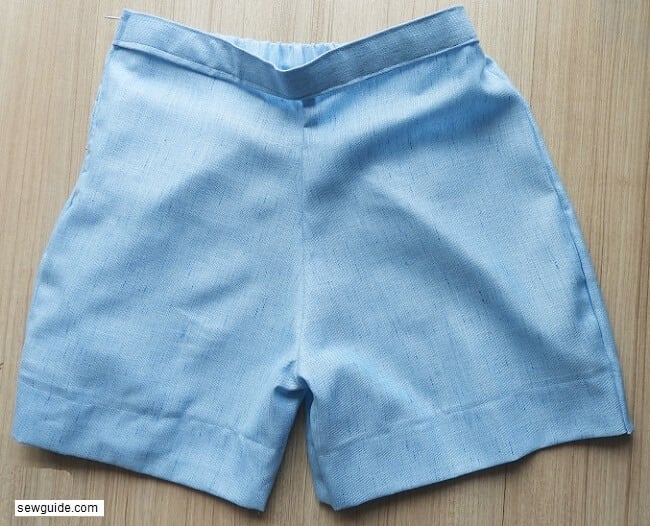
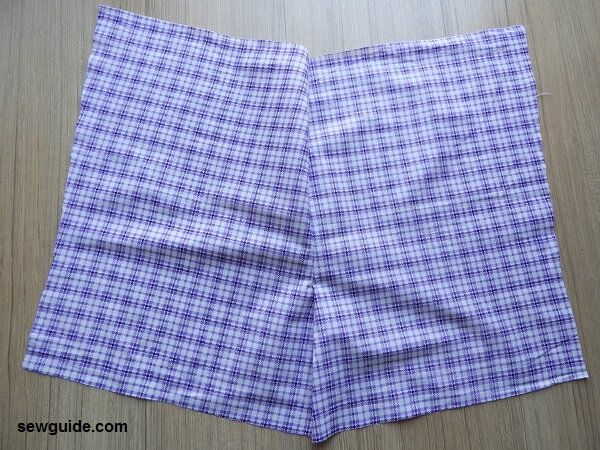
You have your piece like this now.
Hem the leg bottom edges. I hand sew the hem as the polyester fabric was behaving badly when sewn.
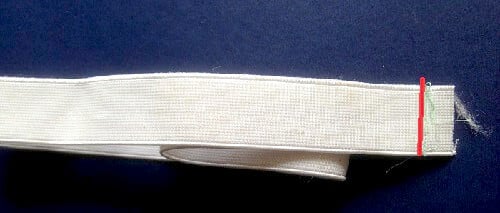
Take a 1/2 inch or 3/4 inch elastic (length equalling your waist round). Sew the edges together to make a ring. I have decided to add the elastic like this instead of threading with a safety pin as I usually do.
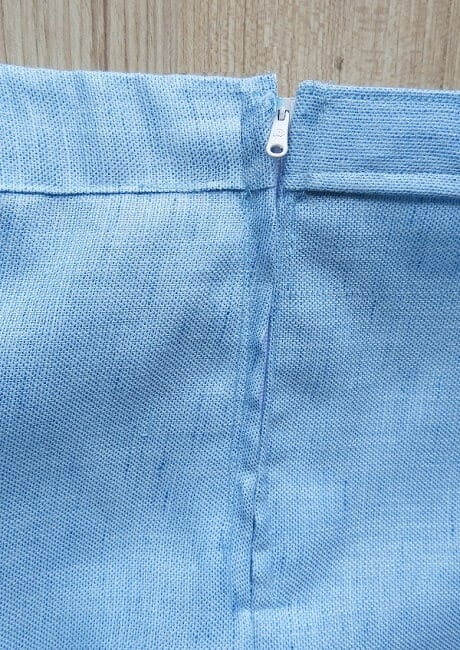
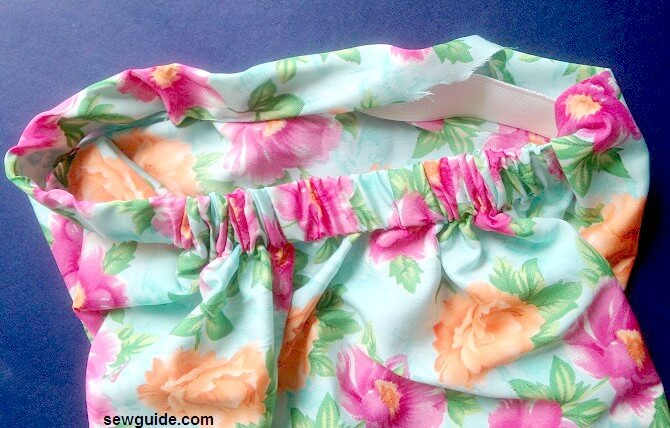
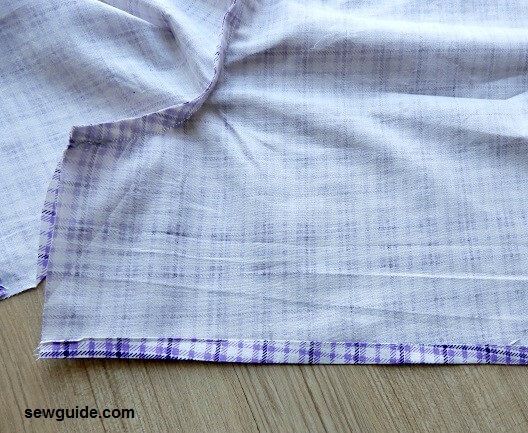
Keep it inside the shorts’ top edge. Turn under the edge and stitch in place from the inside.
As you sew, move the fabric so that you can sew the waistband without creases, as shown in the picture below.
You can make any addition to this pattern like pretty patchpockets in a contrast colour or add a lace trim to the leg edge ; You can also make cuffs at the hem.
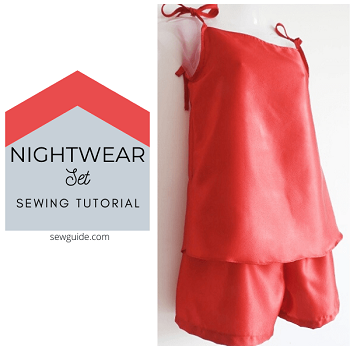
Find a similar tutorial to make a nightwear set of pajama shorts and cami top here.
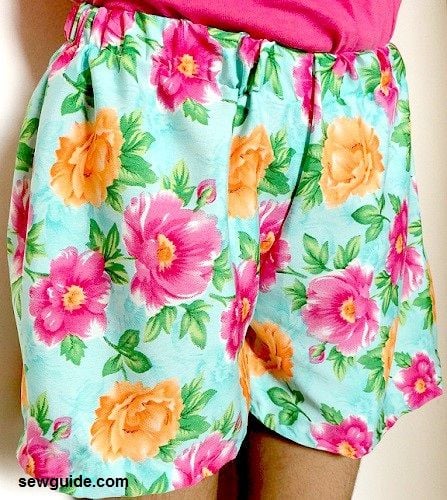
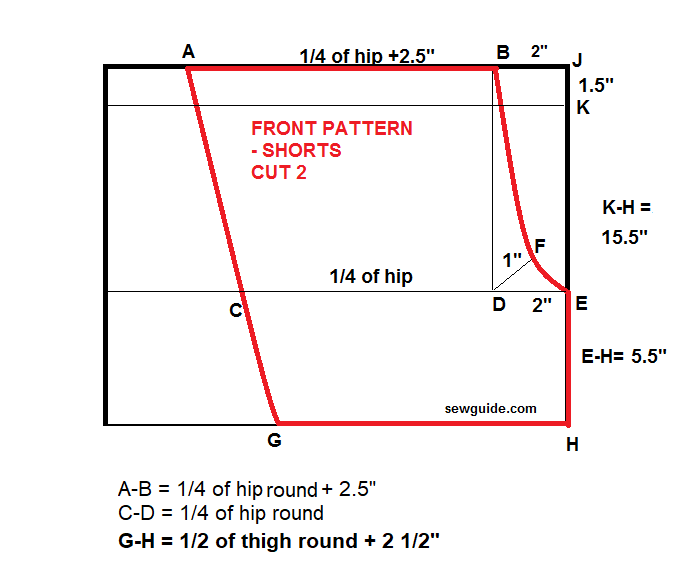
3. My favourite shorts pattern
This is another easy shorts pattern – this is now my favorite pattern. This one has two more seams than the above pattern. You need to cut two pieces of the back and two pieces of the front ( This way, you get a slightly raised curve in the back waist top edge as well as a better fit in the crotch area).
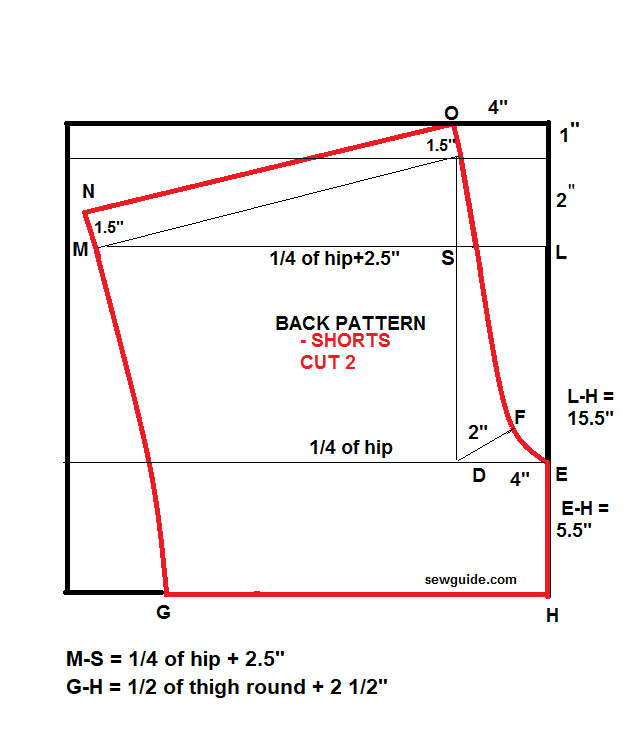
Back pattern – cut 2 pattern pieces.
Keep two fabric pieces together rightsides to the inside for cutting your back pieces. Mark the pattern given below on the top piece and cut them together.You will get your 2 back pieces.
Front Pattern – cut 2 pattern pieces
Now keep two fabric pieces together rightsides to the inside for cutting your front pieces. Mark the pattern given below on the top piece and cut them together.You will get your 2 front pieces.
How to sew this shorts
Cut out the two back pieces.
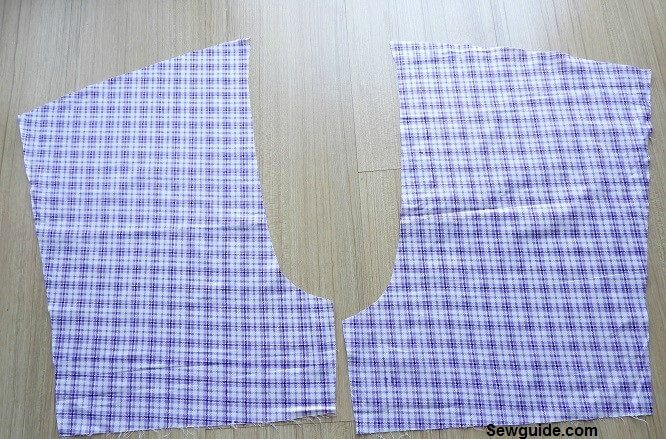
Keep them together (right sides inside) and sew the crotch area together with a 1/4 inch seam allowance. Finish the edges with a zigzag or serge finish
This is what you get. Press seams
Cut the front pieces.
Keep them together (right sides inside) and sew the crotch area together with a 1/4 inch seam allowances. Finish the edges with a zigzag or serge finish.
You have the front piece of the shorts ready
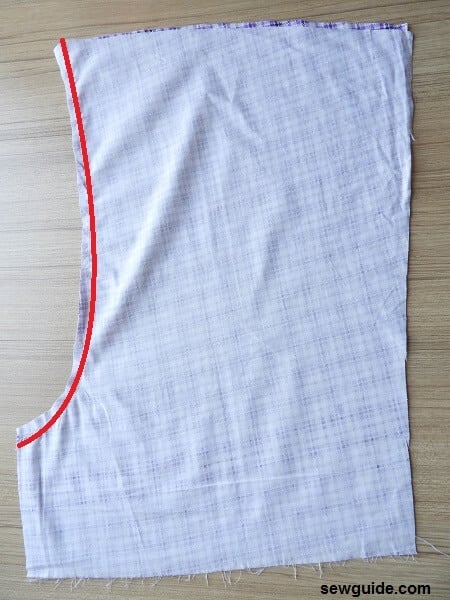
Now finish the bottom edge of the legs – I turned under 1/4 inch twice and stitched. If you want a wider hem, you should leave more edge at the cutting stage.
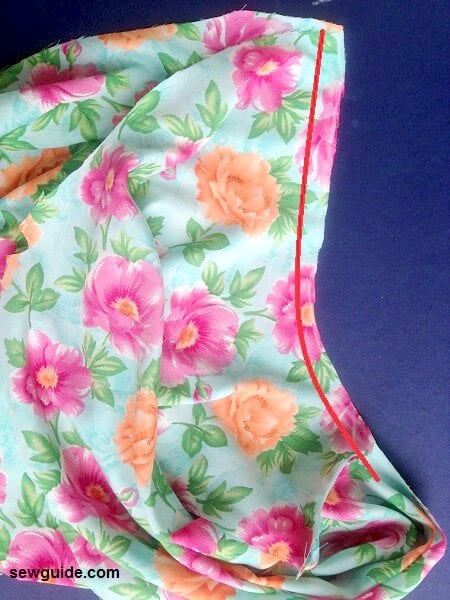
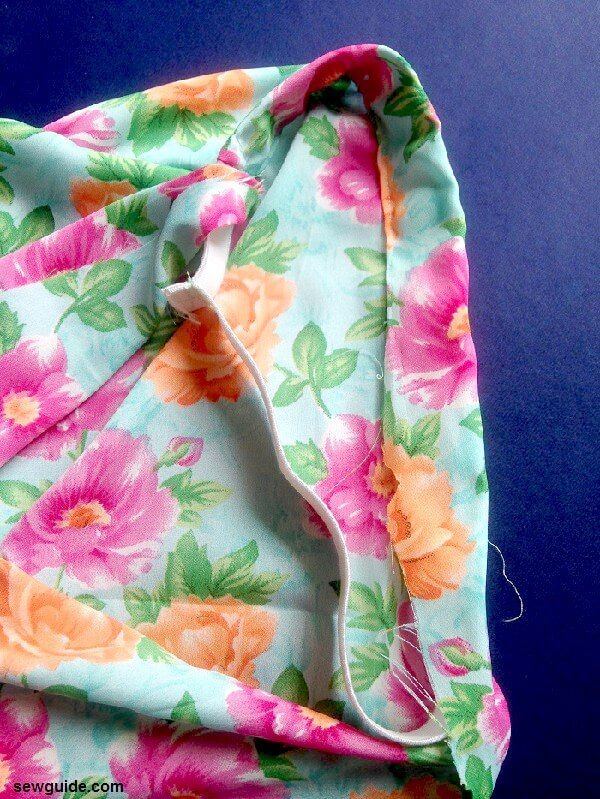
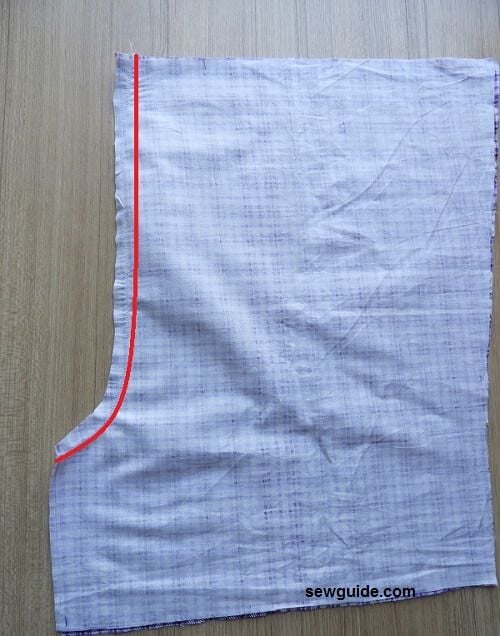
Keep the back and front pieces rightsides together and stitch the side seams and the inner leg seam ( as in the picture below – the red line)
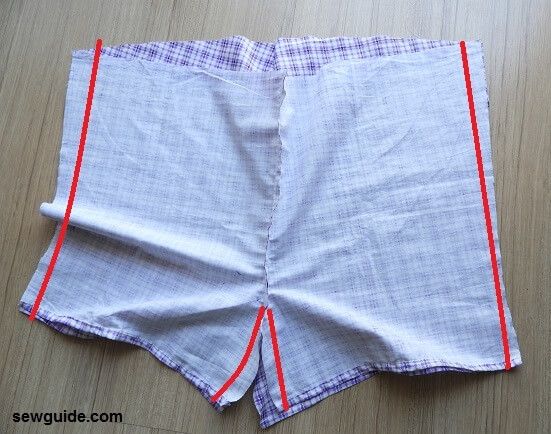
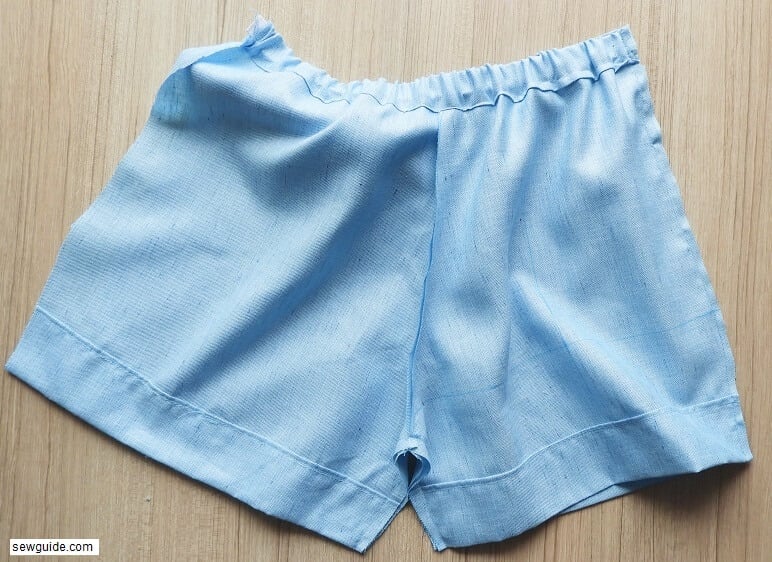
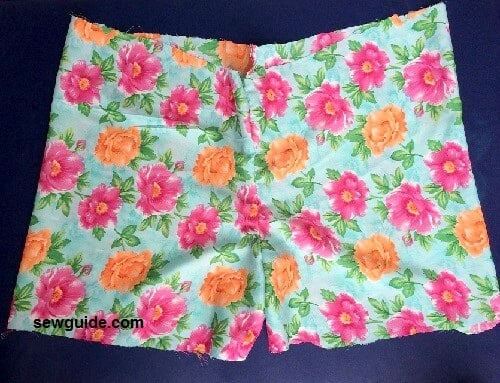
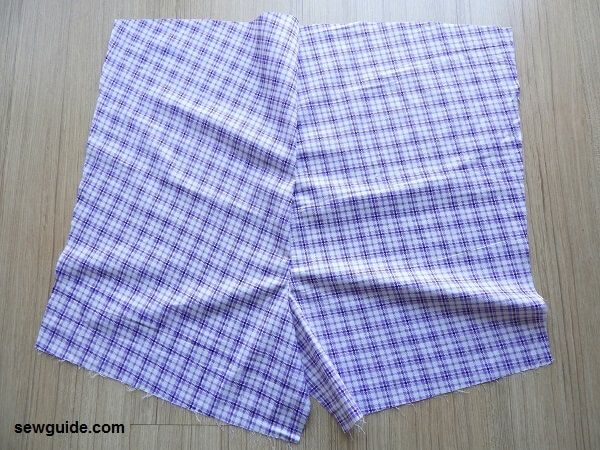
The top edge will look a little awkwardly pointed. Turn under the top edge for a 1″ inch of the casing for the elastic. You may have to slightly gather the casing as you turn under. When you insert the elastic, it will all come all right. Leave about 2 inches unstitched. Insert the elastic through this opening, and you are good.
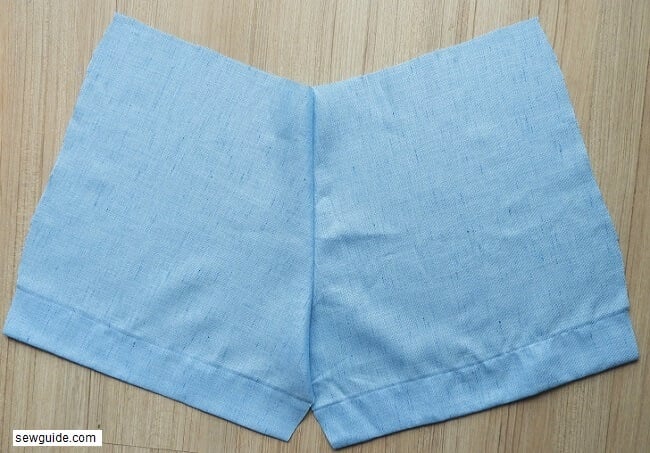
Sew this easy summer shorts pattern and discover a piece of garment you find you cannot do without.
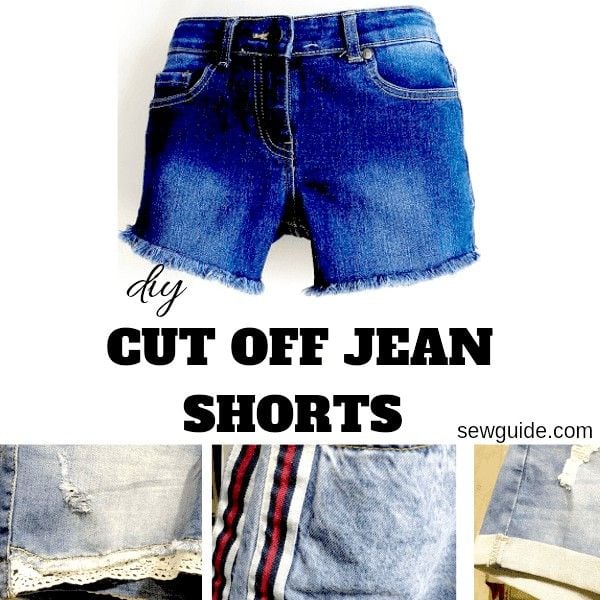
Sew cut off shorts from jeans by following this tutorial
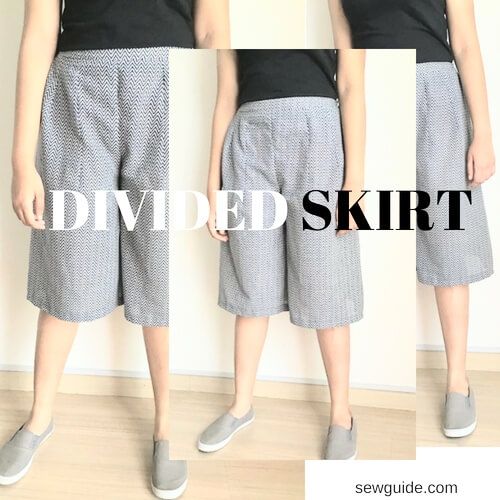
If you are looking for shorts which look more like a skirt, check out the tutorial and pattern to sew culottes (divided skirt)
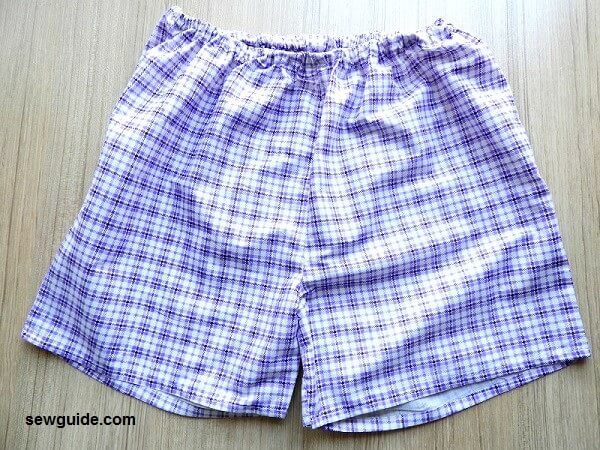
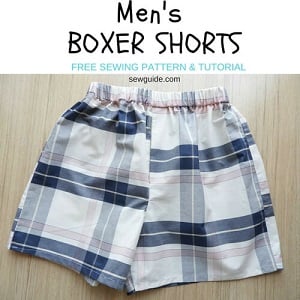
or to make and sew men’s Boxer shorts pattern, checkout the tutorial here
I have one policy when wearing shorts. Solid-colored tops with printed shorts and printed or patterned tops with solid-colored shorts. But this rule is not followed by many fashionistas. They combine patterns and prints with their tops and shorts and look fantastic.
The shorts can be made in any material you want, but a natural woven fabric like cotton and linen works best, especially when sewing summer shorts. Bold patterns, stripes, eyelet fabric, lovely prints, and small embroidery – all can add interest to this simple pattern.
You can pair your shorts with any style of top ranging from basic tees, fitted tops, Kaftans, crop tops, denim jackets, camisole tops, button-down shirts, and tank tops. Halterneck tops and shorts are the best combos to beat the heat. A day frolicking on the beach in cotton shorts and an off-shoulder top is the idea of fun for many. Flat sandals suit shorts the best, but many may disagree.
Checkout other fashion sewing patterns in this site here.


Beautiful
Hi
What an exciting post. Can’t wait to see my final result!
I’m working on the fitted shorts. However it seems like there is no M on the pattern and also, maybe it’s just me, but it seems that you have skipped the description of the first picture where you have sewn the waistline. How wide is that?
You are right ; there is no M on the pattern. Sorry about that. You can take M as 1/2 inch inside from E. The waistband is taken 5 inches wide. When it is folded you will get a 2 inch wide waistband.
Thanks for the step to step drafts of different shorts. I am progressing in my sewing work and I am receiving more customers because my work is smart and excellent. May Allah richly bless you.
Thanks for this awesome post! I never thought i could draft my own pattern as a beginner but this tutorial was perfect! Feeling inspired and excited with my new shorts! I wish there was a way to upload a photo of what i made in this comment.
Thanks for the “draft your own pattern” tutorial. Do the pattern measurements include seam allowances? I’ve got my pattern pieces drawn so I’m ready to cut my muslin so if no reply soon I’ll just forge ahead and make adjustments as needful.
Thanks again!
Sorry; yes, they are included
Thanks so much for doing this perfect little tutorial on this most common of sewing projects. Having the sequenced options was great. My daughter and I liked “Favorite Shorts 3”.
The favorite pajama shorts pattern instructions are most confusing. The measurements given are not lining up with the number of points on the pattern. For example, on the pattern the top part from L is 2″ and 1″. But the distance between M-N says 1.5″, which is correct? What should be the length of N-O? From which point is 1/4 hip measured? I am new to sewing and this has me stumped. Can you clarify this please. I was good with the first two but this one seem incomplete.
Thanks
wow niece
The pajama shorts are WAY too big! Yes, I realise they’re for sleep and supposed to be loose and comfortable but this is beyond loose. I think the measurements should be “1/4 of hip round + X inches” not 1/3.
Did you draw these illustrations? They look exactly like a pattern I have bought which was not made by you… and there are clear copyright laws on doing something like that!
Which one?
hi love I can’t wait to make it
How to avoid camel toes in making shorts or pants? What part of the pattern affects it?
Hi Ajet
This happens when the crotch is shorter and tighter. You can add width at the hips and make crotch length longer for this. You can add a gusset, if you are asking for an alteration as in this post on sewing leggings.
Do these have ease included?
Ummm. I have a question about where the 1/4 hip measurement goes in the favorite shorts pattern too?? Which points or lines does it specify?
Hi Penny
I have tried to mark the pattern in a better way ; please have a look
Thank you! How amazing that you were able to change the entire page within one day in answer to a question!! You’re awesome. 🙂 I’ll let you know how the shorts turn out!
I have the same question/problem as Hanna. I am also trying to make the favorite shorts pattern and it isn’t clear where the “1/4 hip” and “1/4 of hip + 2.5” lines end. Do they meet up with the red pattern line on the right? Or do they stop once they intersect the vertical line that defines the crotch area? (This would be point D for the 1/4 hip line.) Thank you.
Trying to do the favourite shorts pattern. Confused about where the 1/4 of hip and 1/4 of hip +2.5” goes on the pattern? TIA!
to make ladies short
Many thanks..gor sharing..your knowkedge..looking forward to more..all the very best stay safe..
What do you use for seam allowance?
The pyjamas pattern did not say which pattern is front an which Is back. Front was never mentioned until now. Pls help
Ref.. “………ensuring that the front is joined to front and back to back (front has a dip in the front) “
Hi Sade
The pyjama shorts has back and front the same. The left and right legs are cut as two pieces and the legs are joined at the crotch and then legs are joined and then waistband turned under and stitched – simple process.
Brilliant! FINALLY one comprehensive tutorial that starts with showing how to take measurements.THANK YOU