How to make a wedding veil
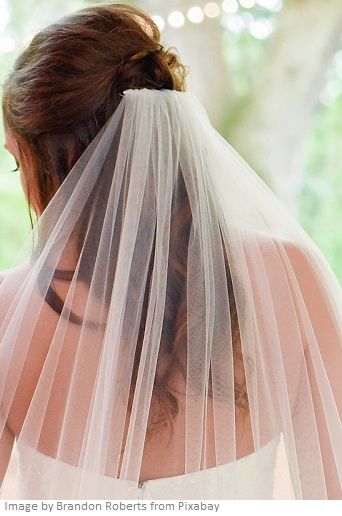
A veil completes the wedding gown. Many brides will not even think beyond a veil, when they consider their wedding ensemble. Brides may also wear veils for religious reasons, for the sake of modesty, but noone can deny that a veil brings a completely ethereal beauty to the bridal gown. Sewing a wedding gown may be a little difficult and even nerve-wracking but there are many simple ways to make wedding veils, even for a new sewist. Here are the steps to follow to sew your own veils.
Sewing tips for wedding veils
Step 1. Consider the wedding dress
The wedding veil should never overpower the dress – it should compliment it. Dress should be the focal point of the wedding. A veil will add to the beauty of your dress. The veil should flow seamlessly with the dress rather than jarr the look.
Very long veils are dramatic and make quite an impression but may be difficult to manage. A finger tip length is the most popular length suitable for most wedding dresses especially the longer length gowns. If you will be wearing a shorter dress choose an elbow length veil.
Step 2. Decide on the length, style & fullness
The main questions you have to ask are whether you want a long veil or a short veil and If it is a long veil you want, then would you want a train or no train. For a Shoulder length or blusher length veil you need tulle fabric of length 18 -24″, for Waist length veil 30 inches, Fingertip veil is cut about 35-40-48 inches, Ankle length is 60″, Floor length veil about 60-72 inches, Chapel length is 80″ and Cathedral veil about 108 inches or longer.
The veils differ according to the way they are cut too.
You can have a look at this post on the different types of wedding veils according to their style, length etc.

Fullness of the veil and width of tulle you need – If you want a simple short veil you can use a 54 inch wide tulle fabric to get enough fullness. But if you want a veil with medium fullness or lots of volume, look for fabric with 72 inch width or 108 inch width. 72 inch wide fabric is used in commercial veils.
For short veil less fullness is alright but for finger tip and longer veils more fullness is preferred so use tulle of bigger width like 108 inches.
A formal wedding veil can be made in about 5.5 meters (6 yards) of net fabric. A finger tip length veil can be made in about 3 meters of net fabric – this can be taken by buying one width of 108 inch wide tulle/net fabric in the required fullness.
Step 3. Decide on the color you want
A veil usually matches the color of the dress.
Do you know that if you ask for white tulle you can get pure white with a blue undertone, a white without the blue undertone, cream with a blue undertone and a cream with grey undertone and cream with brown undertone? And you only asked for white! So better to get the gown and the fabric of the veil at the same time – to get that perfect match.
And do not order the fabric for veil by naming the color online, you can never be sure that what will arrive will be the color you wanted.
Step 4. Select the fabric
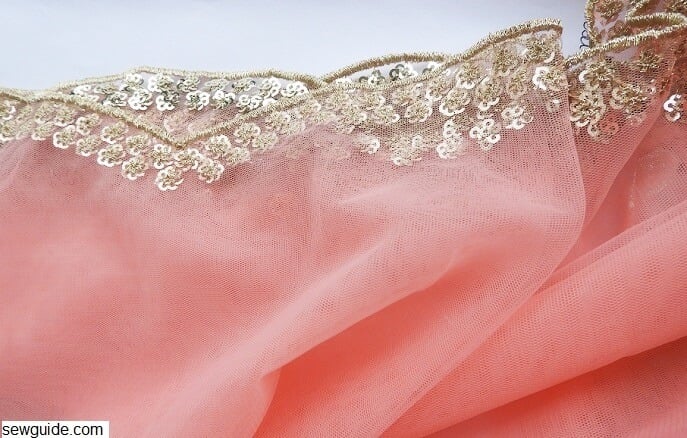
In the case of wedding veils, fabric is the beauty. You need a beautifully flowy drapey fabric that will fall graciously around you.
Bridal illusion net, Silk chiffon, Organza, English net, Silk tulle, Polyester chiffon, Glimmer illusion are the most favorite fabrics to make wedding veils. China silk is a beautifully flowy but inexpensive silk fabric with which you can make soft and supple veils, if you want the opaque and silk veil. Silk and polyester chiffon are options if you want more opaque veils. Organza is almost like chiffon but it is more transparent and a little crisp. If you want a heavily embroidered veil organza is a good choice as the base fabric.
Bridal Illusion is the most preferred fabric for veils – it is a nylon net that is very soft and drapey. It comes in width as much as 108 inches which give you a lot of fullness. Silk Tulle veil is a more expensive option. English silk tulle as well as French silk tulle are softer than a bridal illusion but then more expensive. Among these French tulle is the most luxurious and flowy. Another disadvantage of silk tulle is that it is delicate and fragile. English net is another favorite netting fabric because it is made of cotton and is soft and flowy. And it is slightly more opaque and heavier and stiffer than other tulles and not quite as expensive. It is not available in wide widths beyond 54 inches.
You can also use a Glimmer tulle which is quite shiny.
The fullness of the veil will depend on the width of the tulle – Usually tulle is available in 54 inches width. But you can even get tulle at a width of 108 inches. For short veils, this is alright but for long veils, you might want to get tulle with more width, if you want a nice fullness.
Step 5. Gather your supplies and prepare
You need to get the matching thread, a roller foot for your sewing machine to finish the edges of the veil, small weights to keep the tulle flat in a clear space. You need really sharp scissors to cut the fabric with neat edges. You may also need trims to finish the edges and crystals, pearls, etc for embellishing the veil.
First and foremost, you have to press all the wrinkles out of your tulle fabric. You have to be very careful when you press – a high temperature will melt the delicate fibers of your tulle. Test the temperature before pressing. A steam press with your steam iron which uses just the right temperature and steam is the best to remove wrinkles from tulle.
Step 5. Mark and make the veil
Circular Veil
A circular veil is nothing but a circle of tulle/veil fabric. Cut your fabric as a circle. The height of the veil can be the width of the fabric if you cut it as half circles and join or half the width if you decide to cut the whole circle in one piece.
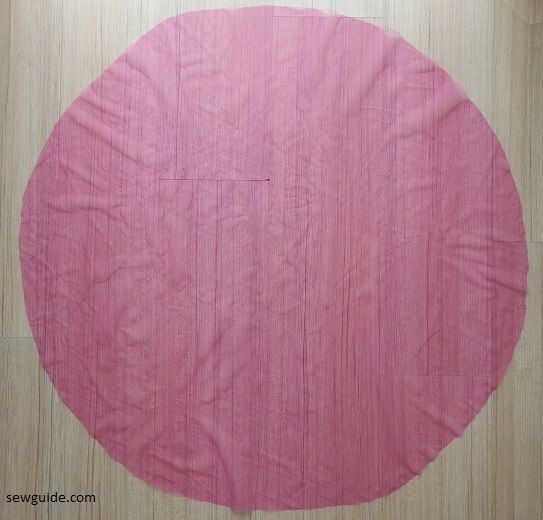
Remember that with a circular veil the radius of your circle is the height you get as the length of the veil. You will be folding the circular veil cut as a circle by the middle.

Cut the circle by the middle as in the picture above.
Now just gather by the middle and you get your veil.
If you have a fabric with a lesser width, you can still make your circular veil.
Circular veil -tutorial
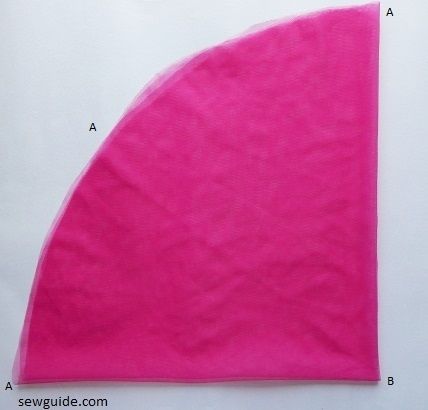
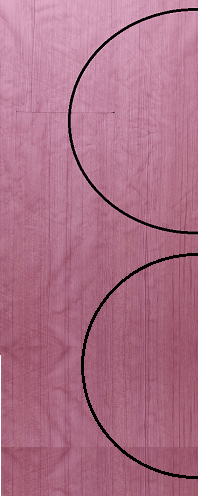
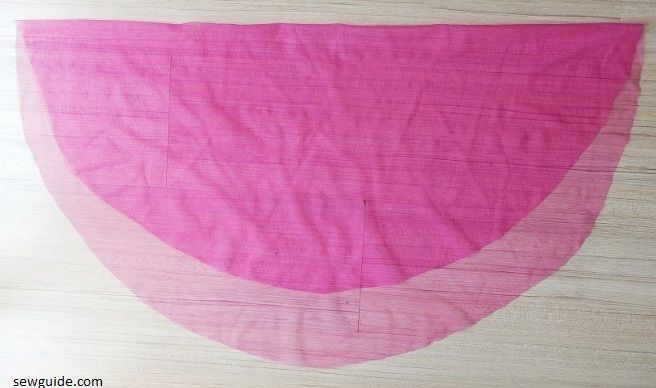
To make a circular veil, mark half circles on the fabric as in the picture below. Cut them out.
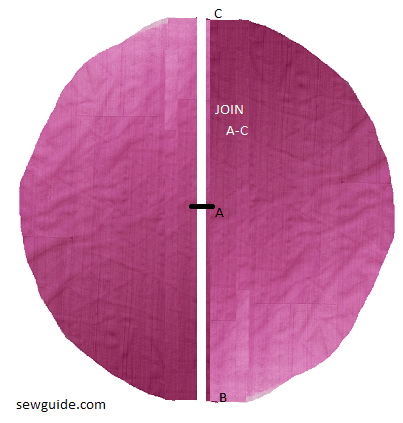
Join the fabric pieces as in the picture below.
You will have to sew the tulle with a french seam – because tulle is a transparent fabric and the seam edges will be visible otherwise. French seam is a very neat and least visible seam for thin transparent fabrics. To sew a french seam on tulle joints, sew the two fabric pieces keeping them wrong sides together; now trim the seam close to the seam line, and then keep the fabric pieces right sides together and sew with a 1/4 inch seam allowance – here the raw edge is enclosed inside.
Learn how to sew french seams here.
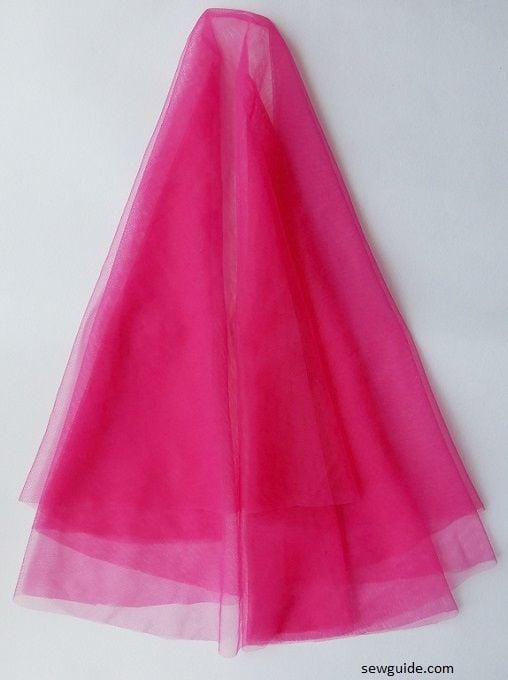
Now gather by the middle and attach to your comb.
Drop veil
You can also wear a circular veil as a Drop veil. A drop veil is worn flat on top of the head falling over the face – without any gathering.

Simple Traditional Veil
This is a simple and very easy to make veil. You can make it as a single Layer or as a double layered Veil. It is a simple rectangular shape with rounded bottom edge. Other than the single layer, 2 or 3 tier veils are all very popular.
How to make this veil
Cut the tulle fabric into a rectangular shape of the length you want and then cut the bottom edge in a circular shape and finish the edges to make this veil. You can also cut the fabric as a tear drop shape.
Gather the top edge and attach to your comb. You can attach the top edge of the veil to a headpiece without gathering as well – it will lie flat on your head which is another look
You can cut this veil in a tear drop shape if you do not want too many gathers at the top edge.
Here is an excellent tutorial to sew a long veil.
Two layered veil
You can make this veil with many layers. Cut the second layer shorter than the bottom layer. Combine a Shoulder length and Chapel length layers by cutting the tulle in 25″ and 88″ lengths. Combine a Elbow length and Chapel length layers by cutting the tulle in 30″ and 88″ lengths. Combine a Finger tip length and Chapel length layers by cutting the tulle in 40″ and 88″ lengths
After you have cut the fabric into shape, finish the bottom edges. Gather the top edge with running stitches using a hand sewing needle and thread. Attach to the comb or head piece you are using.
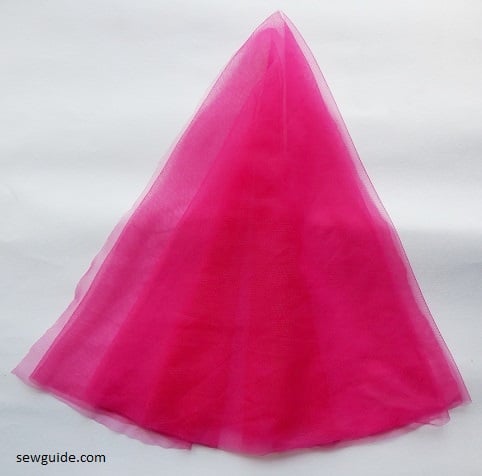
Waterfall veil / Angel cut veil
This is a veil that falls with a lot of fullness and tapers to an almost narrow bottom edge, falling in gentle cascade/waves around the body. (also called a cascade veil). It is cut in a triangular shape so that the fabric forms gentle waves. This type of shape is most suitable for elbow, fingertip and waltz length veils.
You can achieve this cascading look with a circular veil.
You can cut a circle or an oval from your tulle fabric (veil fabric) and then fold it by half so that one edge lies up. This makes a good layered veil.
Gather the top and attach to the comb.
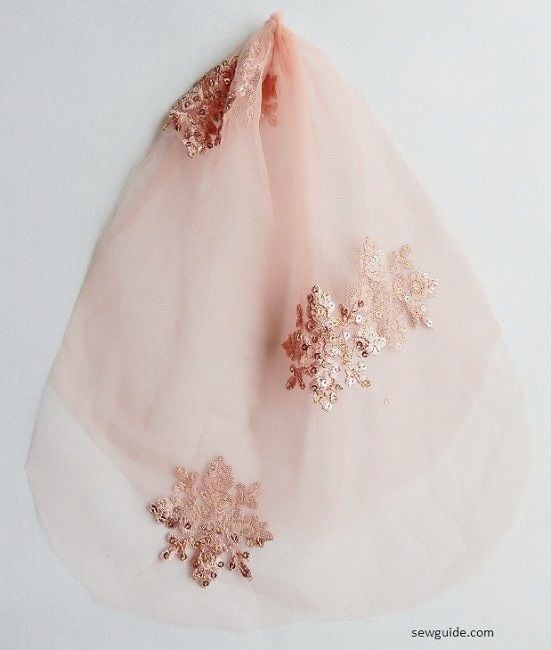
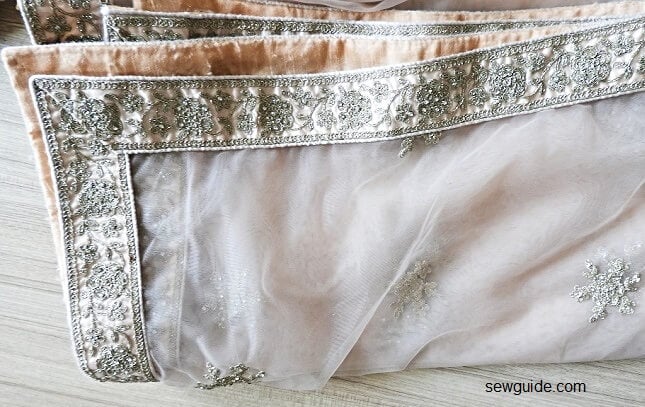
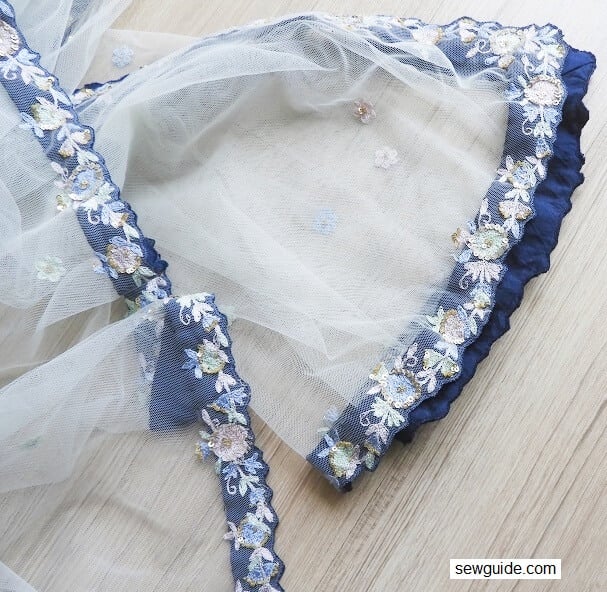
Mantilla veil
A mantilla veil is a circular veil ( or oval shaped veil) with pretty lace edges, worn over the head flat. This is draped flat over the head in a simple way. The edges make the mantilla veil very pretty, framing the face in a beautiful way.

To make this veil, cut the tulle in an oval shape or circular shape and attach lace along the edge. You can also embroider the edges.
Asian Wedding Veil
For Indian weddings, the bride wears a veil (Ghungat in Hindi) over the head, with Indian wedding dresses like sarees and lehengas. The veil is a rectangular fabric, either a net fabric or organza or same fabric as that of the wedding dress. The size can be 90 – 94 inches long by 40 inches wide. You can sew them in many ways – check out this post on making scarves for some easy ways to finish them.
For knowing more about Middle eastern wedding head coverings you can check out these posts Arabian clothing & How to make Hijab
Step 6. Finish the edge
Tulle fabric does not fray so the edges maybe left as it is. A raw edge veil is sometimes preferred with heavily ornate gowns because of its simple look.
But a rolled edge is the most popular edge stitching when making veils. It creates a hard pencil edge which is nice. Check out How to sew rolled edge with a roller foot.
If you are making veils with silk chiffon or organza you will definitely have to finish the edges. Rolled hem is good for these fabrics too. Lettuce edge creates a wavy look – it is a rolled hem with a ruffled look. You can also bind the edges of these fabrics.
You can also add 1/8″ and 1/4″ wide ribbons along the edge. You just have to sew the ribbon flat on the front of the veil at the edge of the veil. Scalloped embroidered lace can be added to the edge.
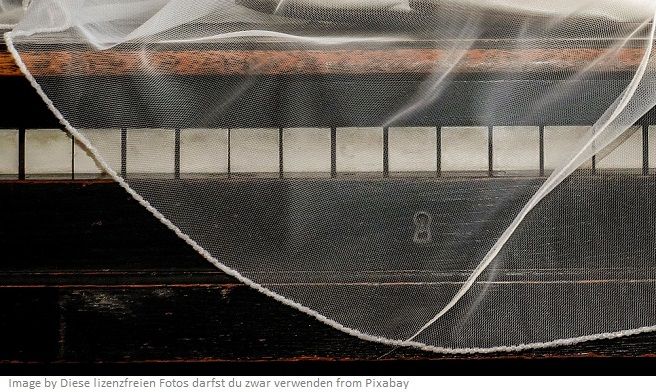
Satin rattail cord or soutache can also be added along the edges. This round cord edge gives a real definition to the veil edges.
Silk chiffon veils can be trimmed with French Lace.
Another option is to make a facing for your veil edge as in the picture below.
Related post :How to sew trims
Step 7. Embellish the veil
Embellishing a veil is done after the veil is cut and finished but before the top edge is gathered and attached to the comb.The comb will be hidden under the veil
You can choose to leave the veil as it is, undecorated so that the fabric of the veil is shown to advantage. The fabric that your veil is made of is a beauty in itself and may not need any embellishments.
You can decorate your veil with crystals, sequins, pearls, rhinestones, plastic/fabric flower petals, pretty lace applique. Swarovski crystal beads create a very shimmering glittery effect. All these are very easy to attach with suitable glue.
Just ensure that whatever decorations you choose it is not too much for the fabric and its flow
And DO NOT USE GLUE. If you want to decorate your precious veil use hand sewing. Unless, you are making it for your enemy. Glues that promise life long adherence may prove themselves wrong on the most important day of the person who will be wearing the veil
Use monofilament thread to sew on the beads, rhinestones etc unless they are the glue-on only kind. You can string beads on a long thread (or buy strings of beads as such) and couch stitch it to the veil
If you have no option but to glue (Flat back beads, rhinestones), just search for jewel glue on online stores.
Related post :How to attach sequins ; How to attach rhinestones; How to sew trims
Step 8. Decide on the way to attach the veil
You can attach the veil to a clear plastic comb, tiara, headband, barrette or a decorative comb. 3 – 4.5 inch clear plastic comb is usually used. But if you have thick hair metal combs are preferred.
You can sew the veil directly to the headpiece/ comb or attach with velcro.
To attach the veil to a tiara you will have to fit the edge of the veil to the frame of the tiara. You can gather the edge and then Pin it to the back of the tiara frame. Pull the gathered thread to fit the frame. Sew the veil to the tiara to keep everything in place.
If attaching with velcro – On the hook side of the velcro attach (sew or glue) the veil and the tape side is attached to the comb. Then you can remove the veil as and when you want. Another option is to use elastic loops available in shops – this is attached to hairdos with the help of hair pins.
Related posts : What is Tulle fabric ; Design and sew wedding gowns ; Different types of gowns; How to sew scarves.; Scarf dimensions
thank you very much for the drawing pattern. I really appreciate and it is helping a lot
please email me drawing, patterns for kids( girls)
Can you look at this post Free sewing patterns for kids
nice
Good