A kurta tunic top is my favourite – it somehow makes me look long and lean than any other top I own – I think the fitting and the long line of this short top helps. And it can be as glamorous as you want it to be – depending on the fabric you choose (do not go by my plain-as-anything top – this is what happens when you start cutting bedsheets to sew)
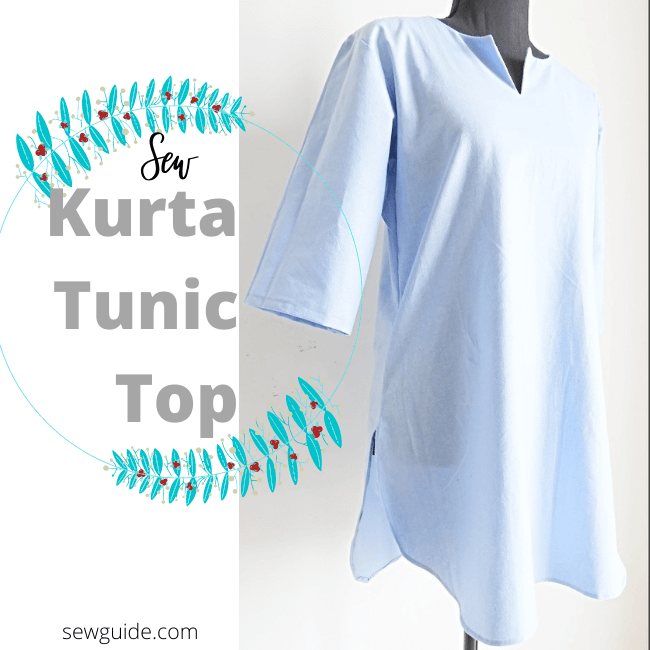
Sewing tutorial for a Kurta Tunic Top
Step 1
Take all the necessary measurements on your body like waist round, bust round, hip round, Sleeve hem round. Learn more about measuring your body here.
Step 2
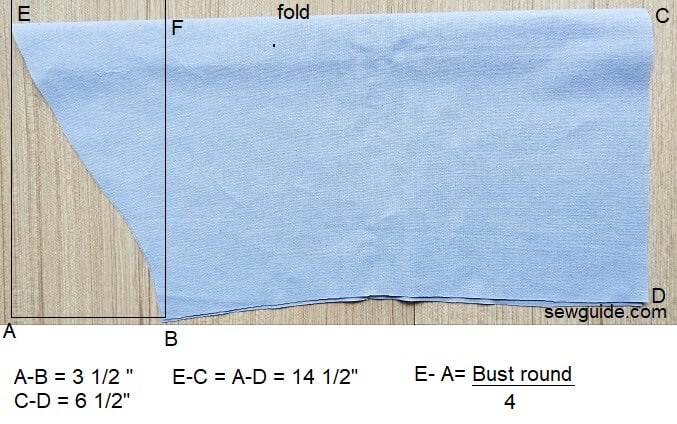
Fold 2 lengths of fabric pieces which are 35 inches long.(Length depends on the final length you need for your kurta tunic top)
These are for your front and back bodices.
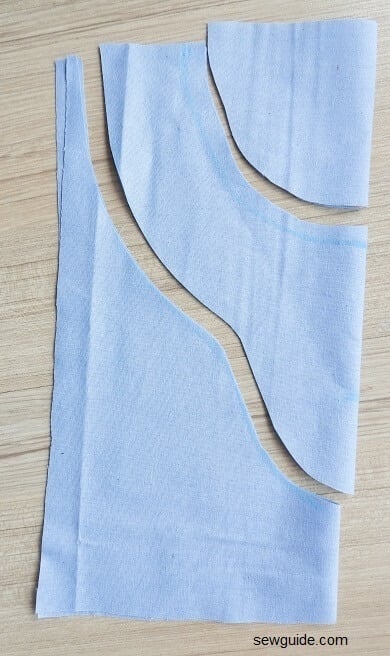
Mark the top fabric with the following pattern measurements. Cut the 2 bodices.
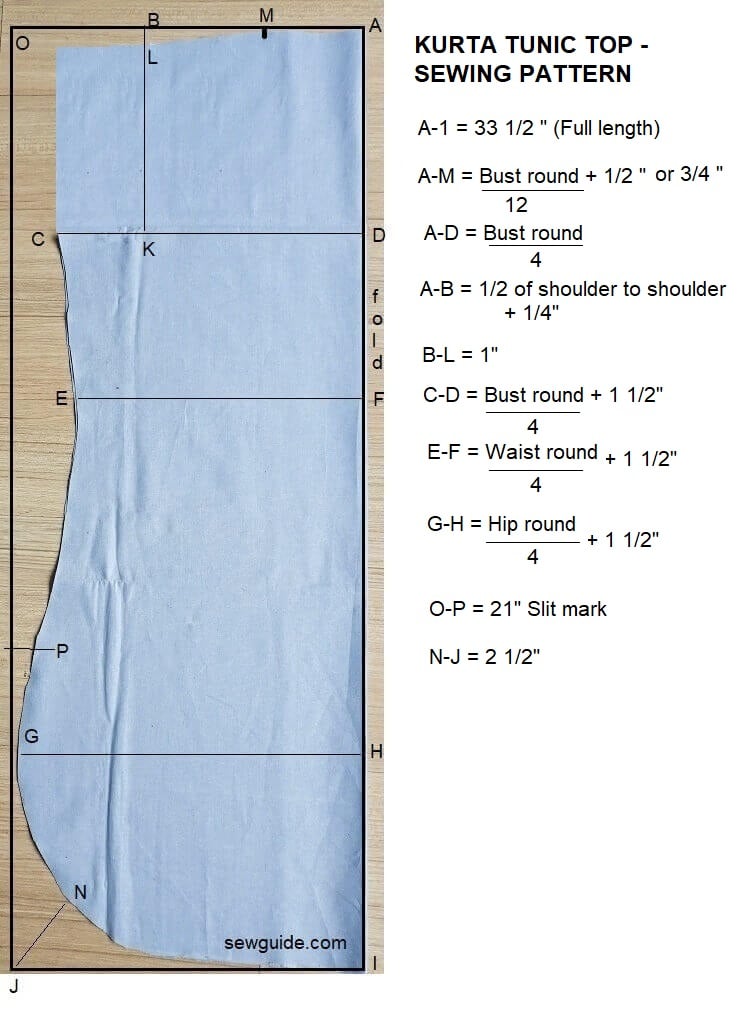
As necklines and armholes of the front and back bodice pieces are different they are marked seperately.
Step 3
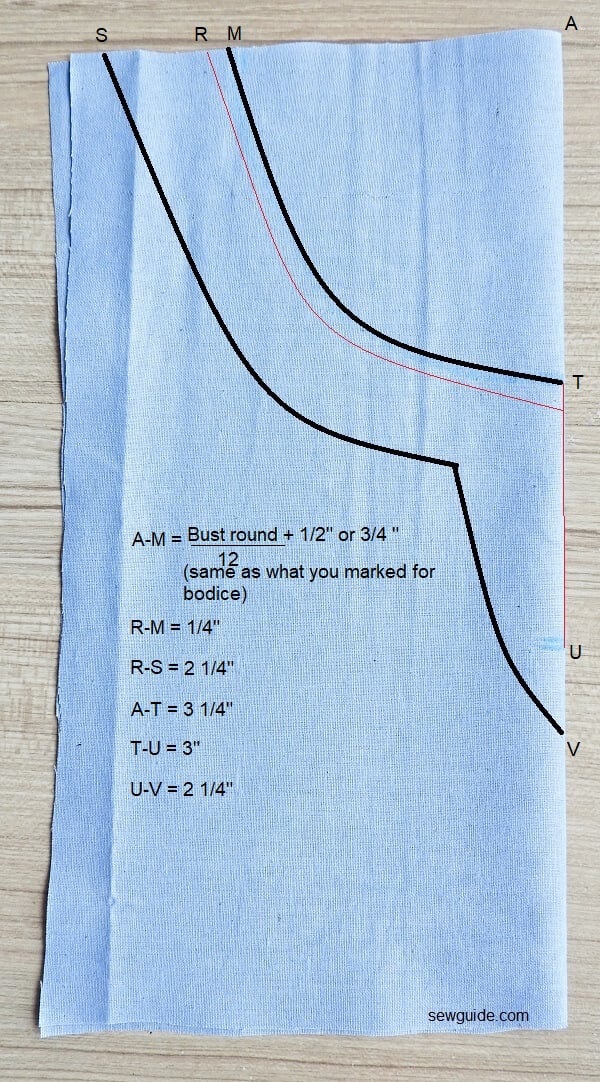
Take one of the pieces out and on it Mark the front bodice pattern markings.
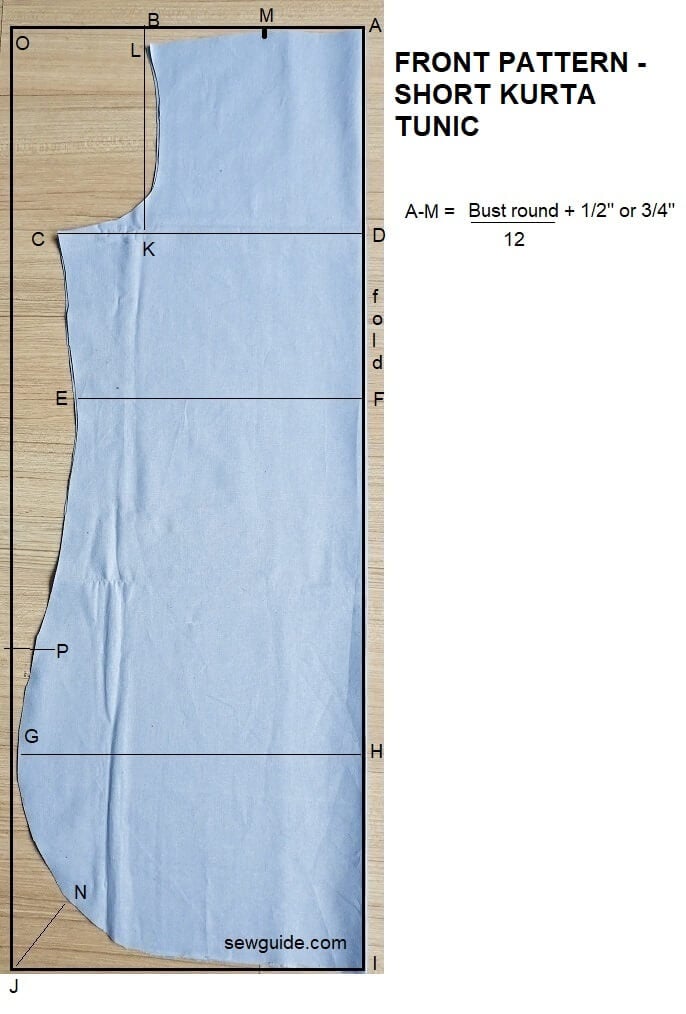
Step 4
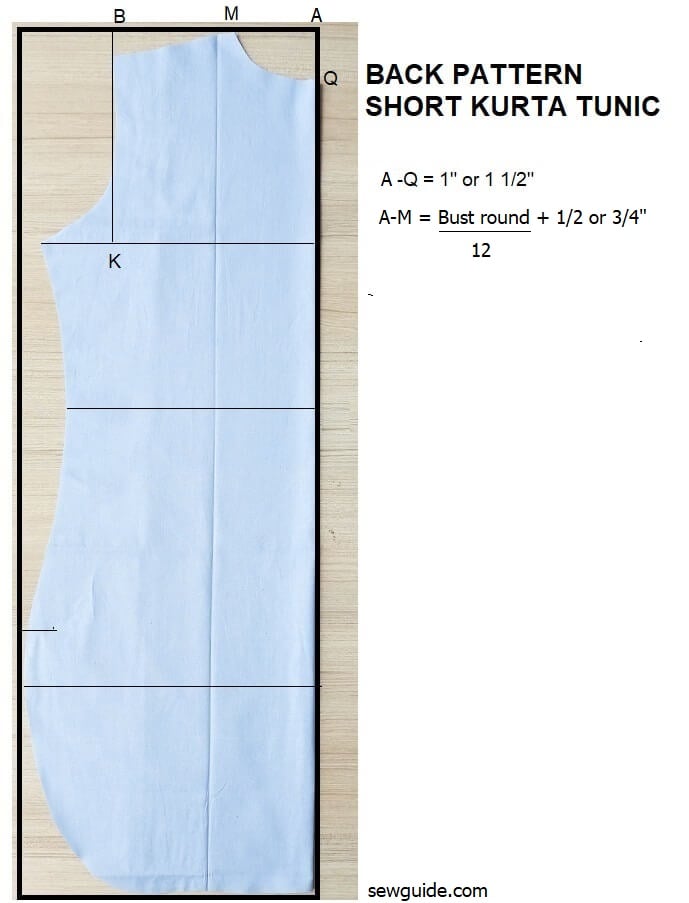
Take the other bodice piece and mark the back bodice pattern markings. The armhole of the back piece can be marked along the line from the shoulder. Check out this post on drafting a bodice for more details.
Step 5
Cut Sleeves – take two fabric pieces which are 14 1/4 inches long and 20 inches wide. Fold by half. Mark the sleeves on this.
If you want a different sleeve check out this post on drafting different types of sleeves.
Step 6
Prepare the neckline of the front bodice.
For this take a 11 -12 inch square fabric piece; fold it by half and mark the neckline facing
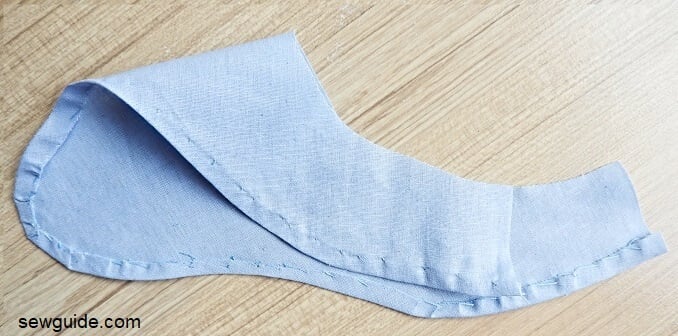
Fold the outer edges of the facing to the inside and Hand stitch the fold in place.
Step 7
Sew the front neckline
Keep the front bodice piece right side up in front of you. Keep the facing piece right side down on the neckline – aligning the center mark of both the pieces. Pin or baste stitch in place.
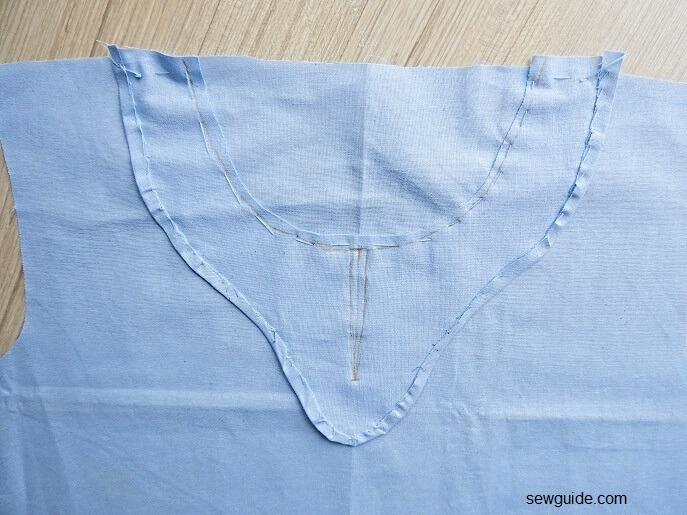
Sew along the neckline mark. Use a small stitch length when you stitch along the sides of the slit. When you stitch along the slit, as you reach the tip of the slit, pivot, make one single horizontal stitch across the point and then pivot again to the other side. This is better than ending the stitching line straight and then pivoting – as you turn you will have a neater look
Cut out the extra fabric above the facing. Cut stright down along the line you have marked – cut till the tip (without cutting the stitches you have made.

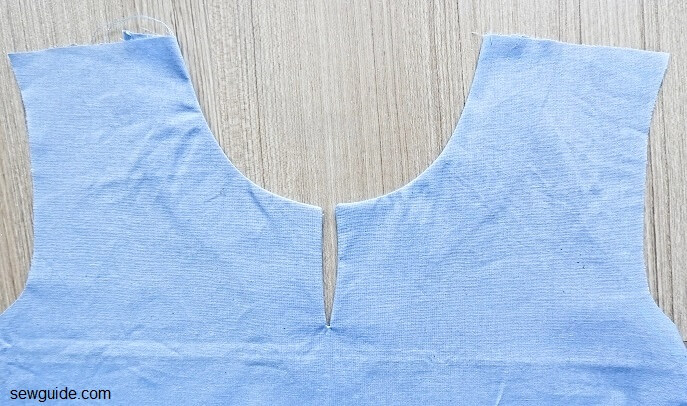
Turn the facing to the back. Use some long thin tool (my favorite for this is a knitting needle) to turn the corners neatly pointed. Press.
Step 8
Sew the back neckline. You will be binding the back neckline with a bias cut fabric piece. Cut it 1 1/2 inches longer than the neckline edge.
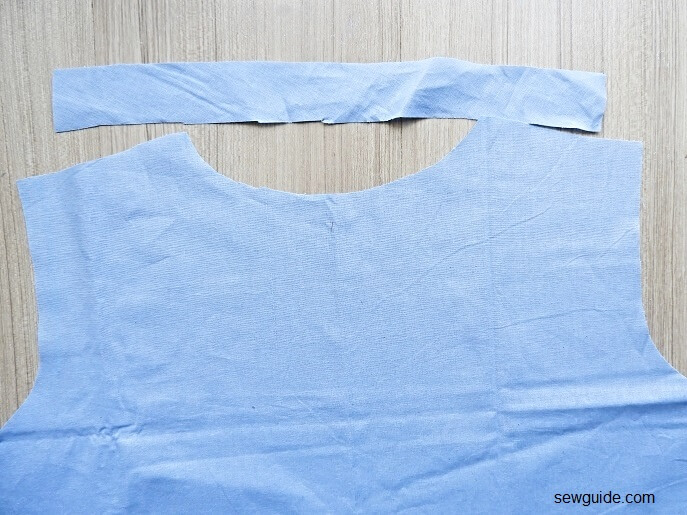
Start joining the bias tape on the neckline from the center to both sides. Stop 1/2 inch away from the edges.
(If you find all the above and following steps complicated just bias tape the full back neckline edge and join the shoulder joints – this is simple but I like the complicated version because the inside looks somewhat neater).
Step 9
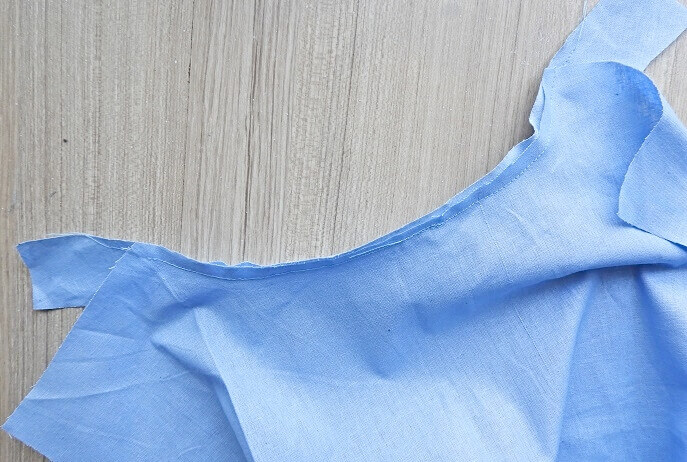
Sew shoulder joints.
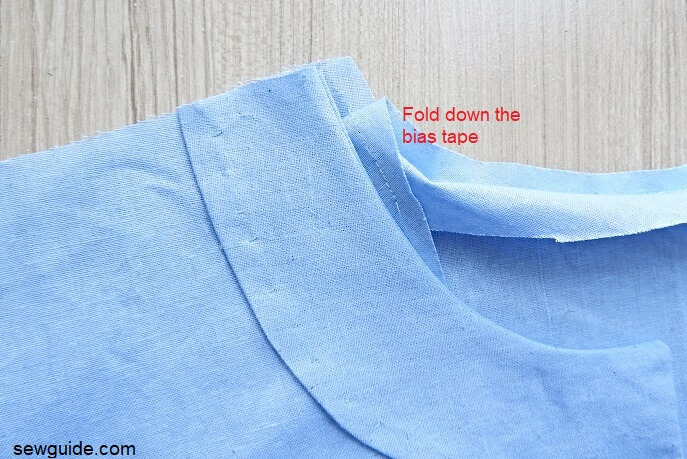
When you sew the joints you will be keeping the front neckline 1/4 inch to the inside.(This seam allowance of the bias tape edge will be enclosed to the inside later) and fold the bias tape down – exactly as the below picture.
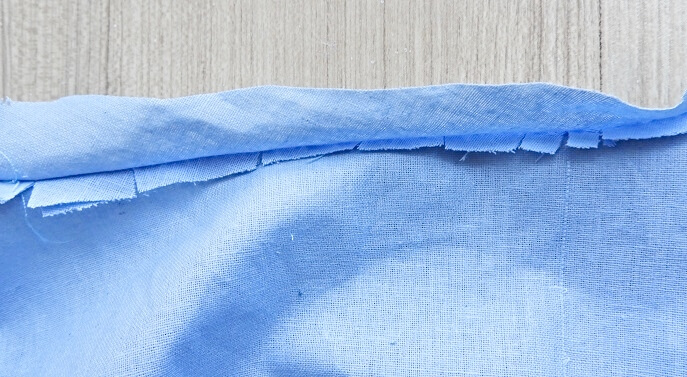
Clip the inside seam allowance quite frequently – every 1/2 inch or 1 inch
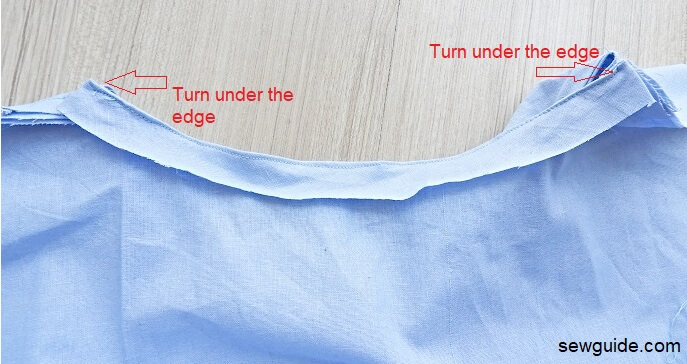
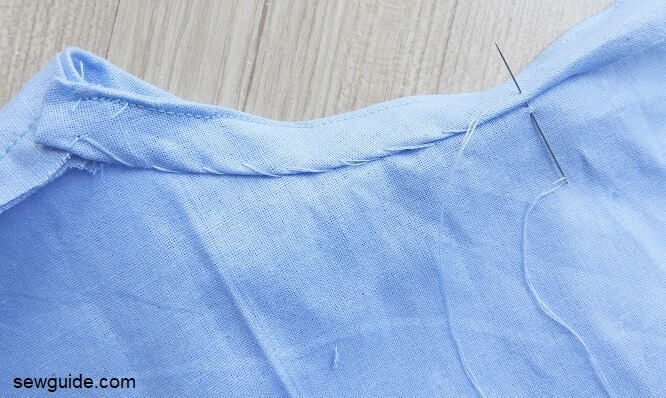
After the shoulder is joined finish the bias tape binding. First turn under the short edges 1/2 inch to the inside. Pin in place
Now hand stitch the bias binding on the back.
Step 10
Sew the sleeves. Learn more about joining the sleeves here.
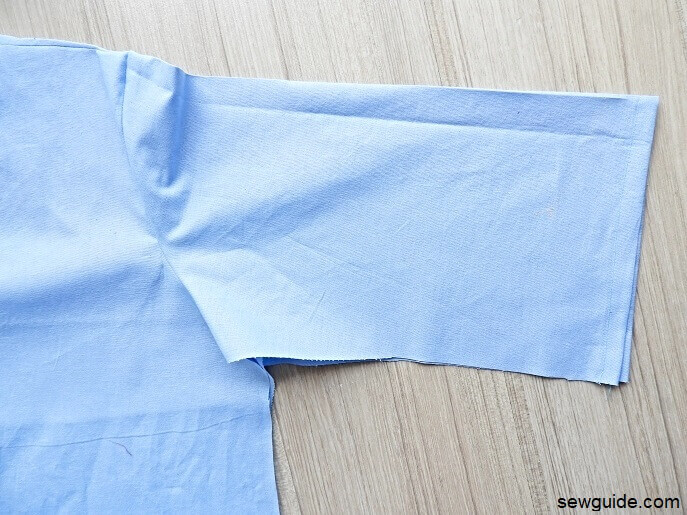
Step 9
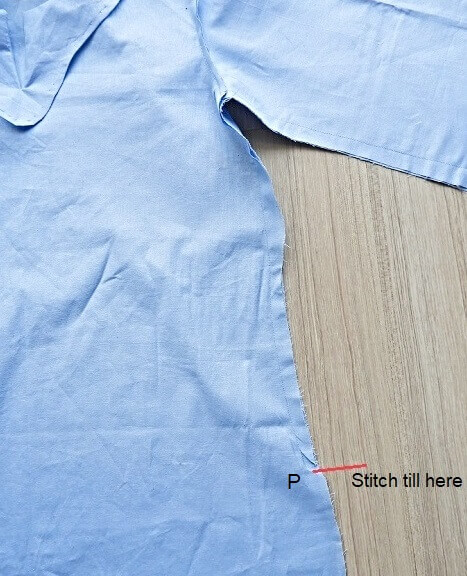
Sew the side seams with a 3/4 inch seam allowance. Join the sides till the slit mark – from the sleeve hem to the slit mark one continous seam.
Step 10
Sew the hem. This has a curved edge and you have to be careful when sewing the hem – otherwise it can look pretty bad. Trim the seam allowance above the hem edge to 1/2 inches.
Turn the cut edge to touch the seam line (picture shows clearly – I hope) – this will be 1/4 inches. Ensure that the cut edge do not exceed the seam line.
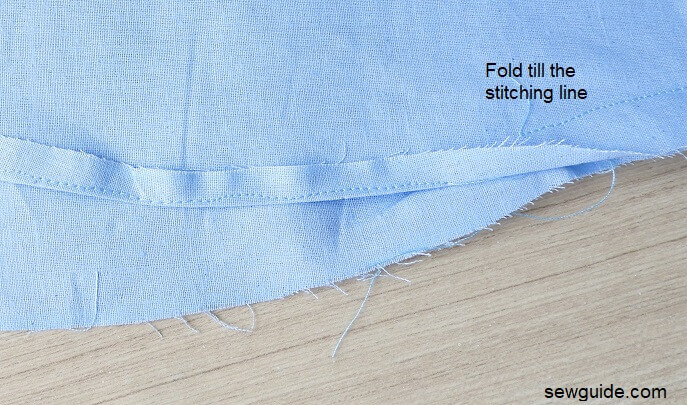
Sew the folded edge – sew close to the fold as much as possible.
Trim away the extra fabric outside of the stitching line .
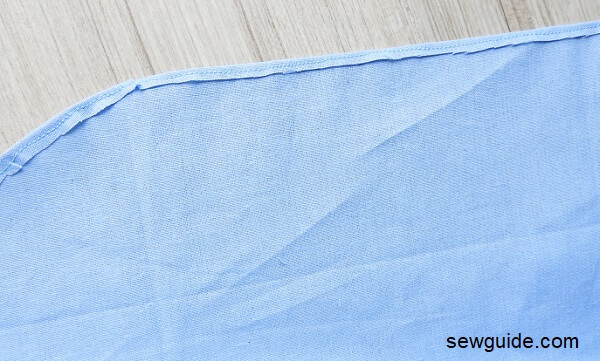
Now fold again 1/4 inches and sew in place.
Finish all the cut edges of the seam allowances inside with zig zag stitch
Related posts :How to sew neckline slit; How to sew neckline binding; How to sew facing; How to sew a salwar kameez ; Sewing patterns for salwar pants
Thank You.
hi
it is nice explaintion for tunic dress masurement. i love this. let me know please do you learn to online classes? or your youtube channel. or how i contact you via whatsup or instagram or facebook. i m waiting for reply. thank you.
How do you know where to put points e-f and g-h? Do you just measure down from shoulder? And how much ease should I add if I wanted this a tad bit looser?
I would love to watch you make this on YouTube
This is great! I’ve been looking for something like this. I have the perfect fabric for this. Thank you!
I also wonder about Step 7: ;
Step 7
Sew the front neckline
Keep the front bodice piece right side up in front of you. Keep the facing piece right side down on the neckline – aligning the center mark of both the pieces. Pin or baste stitch in place.
When sewing the .
What comes after the and before the . ?
I have clumpsily deleted the portion somehow – thanks for pointing it out. Corrected
Thanks Sarina. I’m sorry to be a pain but there’s a problem with Step 3 too 🙁 The photograph and instructions for the back bodice are the same as for the front bodice.
I am the pain 🙂 Added.
In Step #7, I think there’s some instructions missing on sewing the “keyhole”/lapel opening. I’m not sure how one gets the lovely point and not a squared off end.
Thanks for pointing it out – I have corrected
Great job. Like your no nonsense approach.
Why not post pattern with darts?
AM just learning to sew. The method applied here is simple to follow. I feel can make kurta tunic top with these guidelines.
Is it possible to make this sleeveless?
Yes, I did it. Just leave off the sleeves and stitch up the sides according to the directions. You will have to make your own bias tape, interfacing or something for the armholes though.
When you make it sleeveless you may want to lessen the armhole and bring the shoulder a little (1/2″) to the inside – as per choice.
I will try this, it looks pretty easy and beautiful
Like the pattern it looks super easy and comfortable